SKOOL

Concert Photography: What You Need to Know Before You Shoot Your First Gig

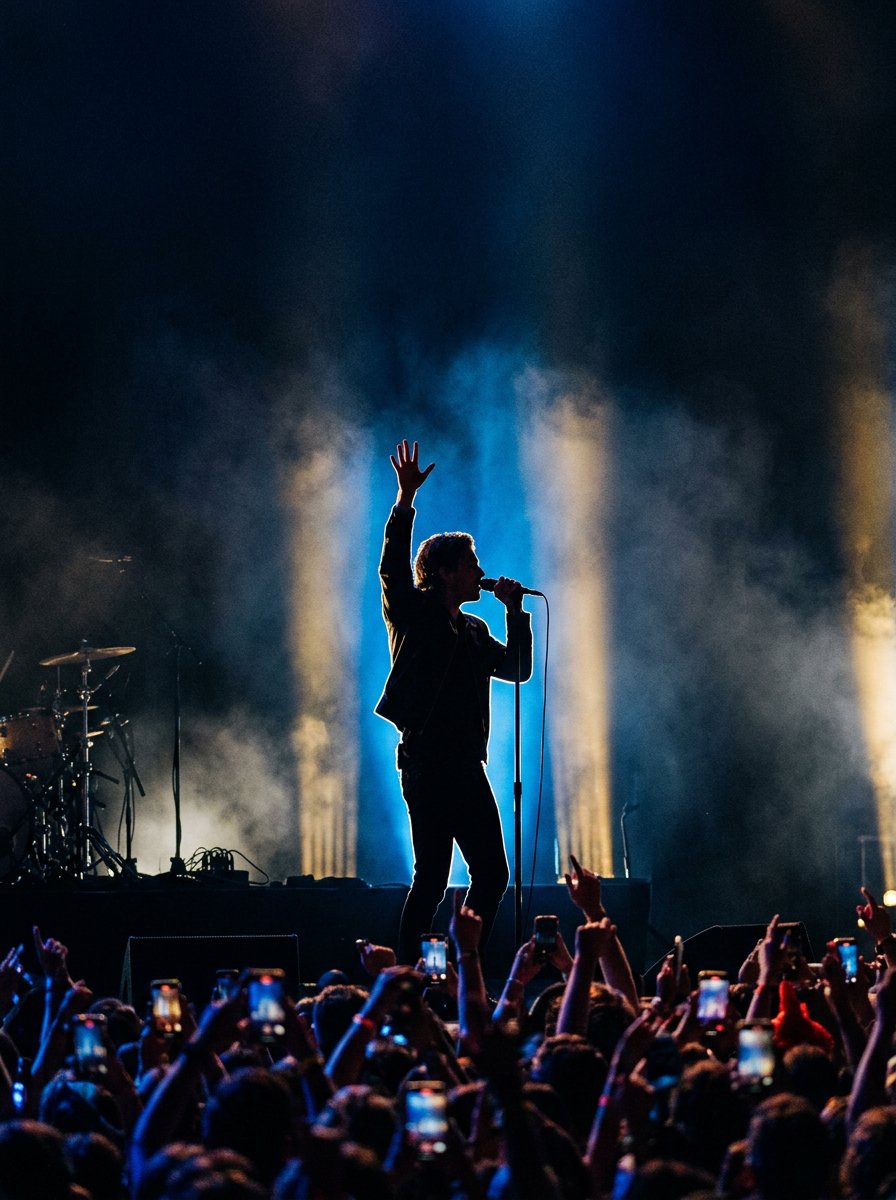
Concert photography is one of the most challenging and rewarding genres you can get into. Fast light, loud rooms, no second chances. But if you're willing to put in the work, it's also one of the most exciting. This guide, put together by community member Scott Diussa, covers the essentials to get you started.

Gear

You don't need a massive kit to begin. A DSLR or mirrorless body with a decent zoom will get you a long way. A 24-70mm or 24-105mm is your workhorse. Add a 70-200mm when you need reach (drummers, especially), and a wide option for tight spaces or dramatic environmental shots. In terms of aperture, f/2.8 or f/4 as a maximum gives you the best chance in low light, but don't let gear anxiety hold you back. Start with what you have.

Camera Settings

Stage lighting shifts constantly, and if you leave the camera in any kind of auto exposure mode it'll fight the light show rather than work with it. Manual mode is the way to go. Shoot RAW, always. The colour temperature at a gig is rarely flattering by default, and RAW gives you the latitude to fix it properly in post.

A solid starting point: 1/500s shutter speed, widest aperture available, and push the ISO until the exposure looks right. Don't underexpose to keep ISO low. Lifting shadows in Lightroom also lifts noise, and it's far messier than noise from a correctly exposed high-ISO file.

Getting Access

The most common question people ask is how to get into shows with a camera. The answer is straightforward: start small. Local venues, local bands. In most cases you don't need formal permission to photograph a smaller act, and small venues are actually harder to shoot than big ones. Bad light, cramped spaces, limited movement. Master those conditions and the bigger shows feel straightforward by comparison.

For larger shows you'll need a media pass, which means having a publication or media outlet to shoot for. That's a longer game, built on portfolio and relationships. Get the shots right at the small shows first and those conversations open up naturally.

Shooting Each Instrument

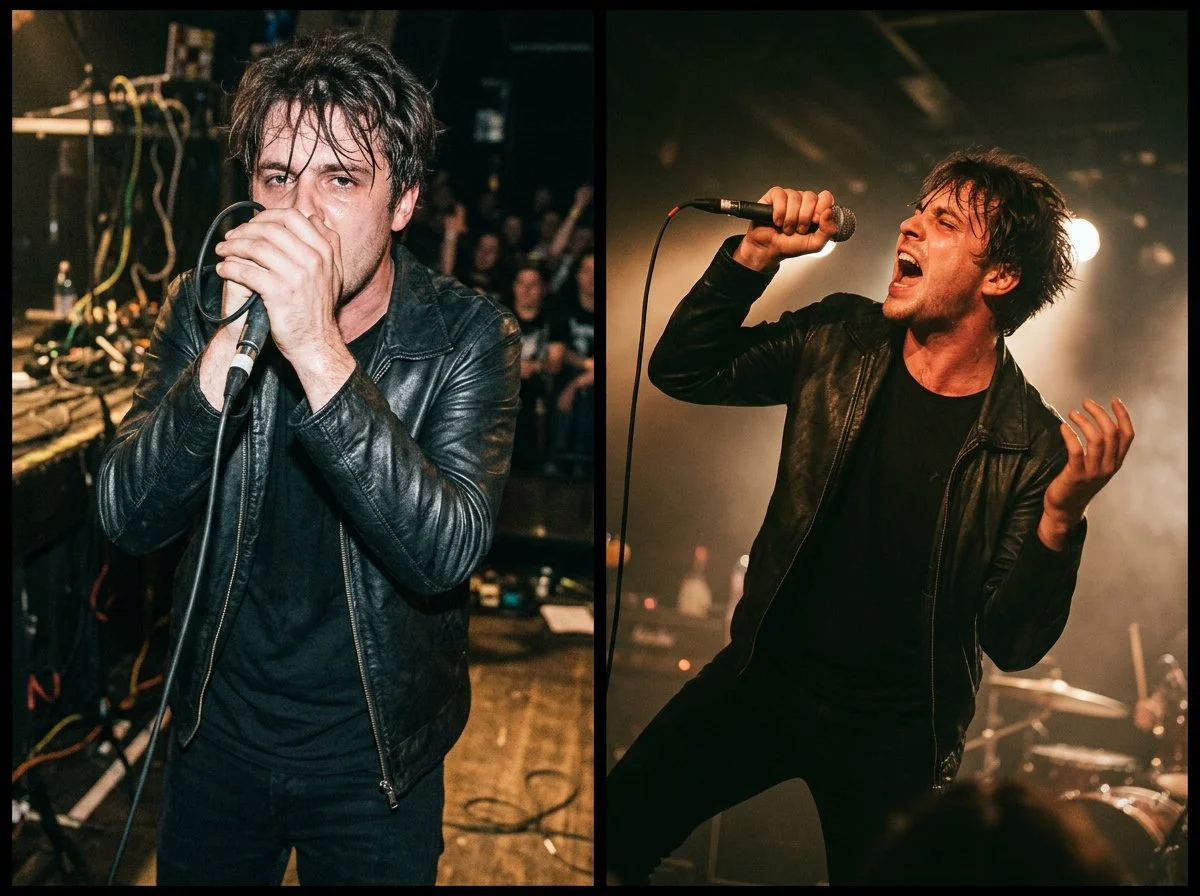
Every member of the band presents a different challenge. With singers, timing is everything. The best moments tend to come when they step back slightly from the microphone on a held note, which also naturally avoids the microphone shadow falling across their face. If you can learn the setlist beforehand, do it.

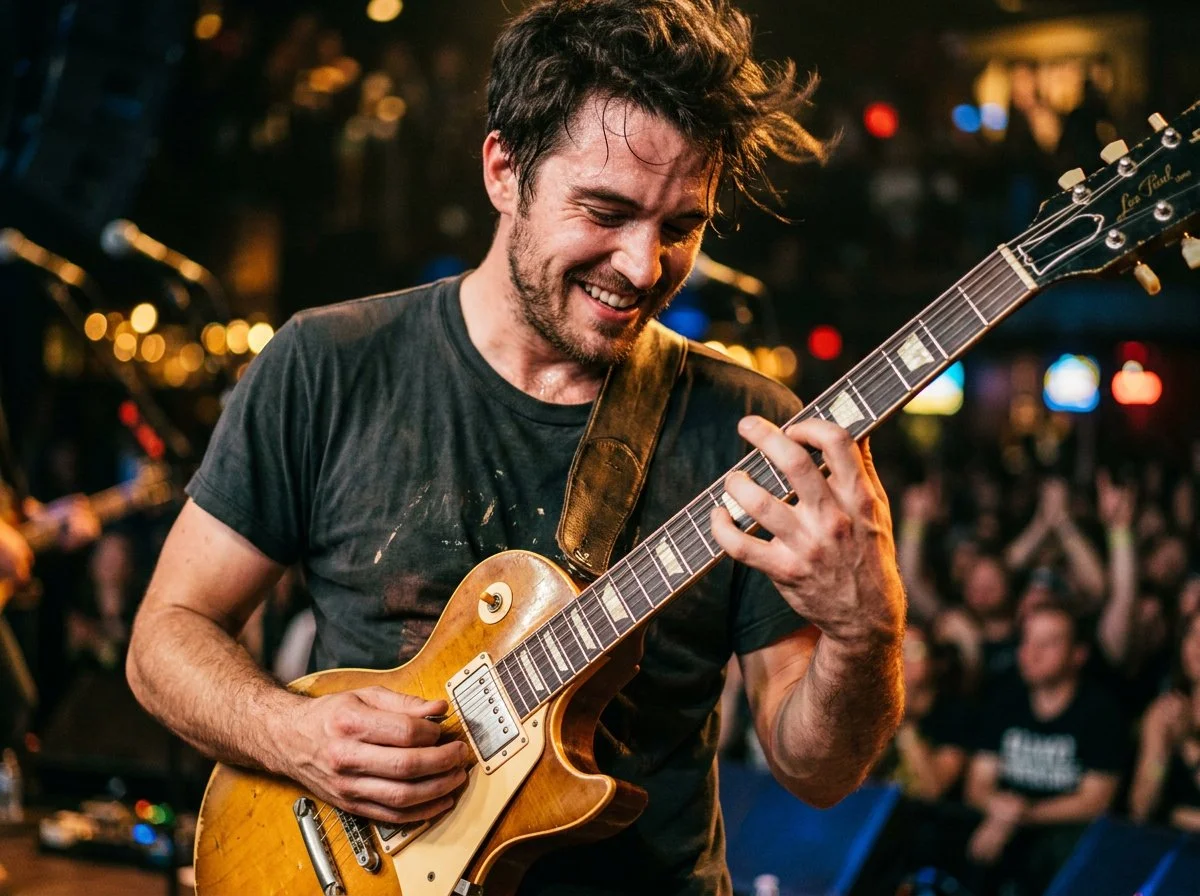
For guitar and bass, try not to cut off the headstock of the instrument. Think of it like cropping a wrist out of a portrait. Angles help a lot here. A lower shooting position or a slight tilt adds energy to what would otherwise be a flat frame.

Drummers are the hardest subject in the genre, full stop. You're usually shooting through cymbals, hardware, and kit stands. A 70-200mm helps you reach through the gaps. Use Eye Detection AF if your camera has it, shoot continuously, and keep that 1/500s shutter speed to freeze stick movement.

Editing and Sharing

You'll come back from a gig with a lot of files. Cull before you edit; go through everything and mark your picks before you touch a single slider. Be ruthless. The instinct is always to keep too many.

In post, focus on two things: face colour and exposure balance. Export full-resolution files for your archive, and 2000px watermarked versions for social.

When you share with the band or a PR contact, send your best 20 images. Not everything you shot. Twenty strong images that make the band look great. Tag the artist when you share on social media too; it builds the relationship and extends the reach of your work at the same time.

Enjoyed this? The full version of Scott's concert photography guide is available inside The Photography Creative Circle on Skool, where community members share knowledge, tips, and guides like this one across every area of photography. It's free to join.

Join The Photography Creative Circle

Getting Started with Street Photography: What You Actually Need to Know

Street photography is one of the most rewarding types of photography you can do, and also one of the most misunderstood. A lot of people assume it requires a big city, a specific camera, or nerves of steel. It doesn't. It mostly requires the right mindset, and that's something you can develop from day one.

Here are the key things that will make a real difference when you head out.

Get your head right first

Before you even think about camera settings, think about how you're going to carry yourself. You have every right to be in a public space with a camera. Move at a normal pace, act like you belong, and don't hover. Most awkward moments in street photography come from how you behave before and after the shot, not from pressing the shutter.

If someone questions you, have a simple honest answer ready. "I loved the contrast of colours," or "I'm working on a project about everyday life" goes a long way. Some photographers carry a small business card. It can turn a wary stranger into a willing subject.

Three ways to work the street

There are really three approaches, and knowing which one you're using keeps you focused:

Hunting means walking and actively looking for moments. Keep your head up and your eyes moving. Start small; a funny sign or someone's reaction to something is often more interesting than a dramatic scene.

Fishing means finding a spot with great light or an interesting background and waiting for life to walk into it. Strong shadows, reflections, colourful walls. Set yourself up and be patient. It's also brilliant if you're shy, because you're not chasing anyone.

Street portraits are a different thing entirely. You approach someone, have a brief chat, then ask. Keep the conversation going while you shoot. People are usually more than happy to help if they can see you're genuinely trying to make a good image.

Light and composition

Find the light before you find the subject. Shafts of sunlight, deep shadows, silhouettes; light shapes everything. Once you've found good light, think about the whole frame: what's in the background, what's at the edges, what's pulling the eye away from where you want it to go.

One tip worth remembering: give yourself a theme for the day. Hats. Dogs. Reflections. The colour red. It sharpens your eye dramatically.

Gear and settings

Any camera works, including your phone. What matters is being ready. Most experienced street photographers use aperture priority or manual with auto ISO so they're not constantly adjusting. A starting point that works well: 1/500s shutter speed, f/5.6 to f/8, auto ISO. Push the shutter to 1/1000s if there's faster movement. Don't be afraid of grain; it often suits street photography well.

Keep your camera out and ready, not buried in a bag. By the time you've got it out, the moment's gone. A silent shutter, if your camera has one, makes a big difference too.

You don't need a big city

This one catches a lot of people out. Street photography isn't only for London or New York. Market squares, bus stops, seafronts, quiet high streets; interesting moments happen everywhere. If you're nervous about photographing faces, start with people from behind, silhouettes, or detail shots: hands, shadows, dogs, bags. You're still telling a story.

The best thing you can do is head out and start. Everything else comes with time.

This post is drawn from The Community Guide to Street Photography, a full beginner's resource put together by members of The Photography Creative Circle on Skool. It covers everything in much more depth, including camera setups, focusing techniques, how to handle conversations on the street, and practical exercises to push your skills forward.

If you want to read the full guide and be part of the conversations that created it, come and join us over at the community …

Join The FREE Photography Creative Circle