
Over the past couple of weeks I’ve been putting a lot of time into not just revamping my website, but moving it to a completely new hosting platform (thank you SquareSpace). I’m going to be writing a post about why I’ve done this, but needless to say I am VERY happy I finally made the (much needed) move.
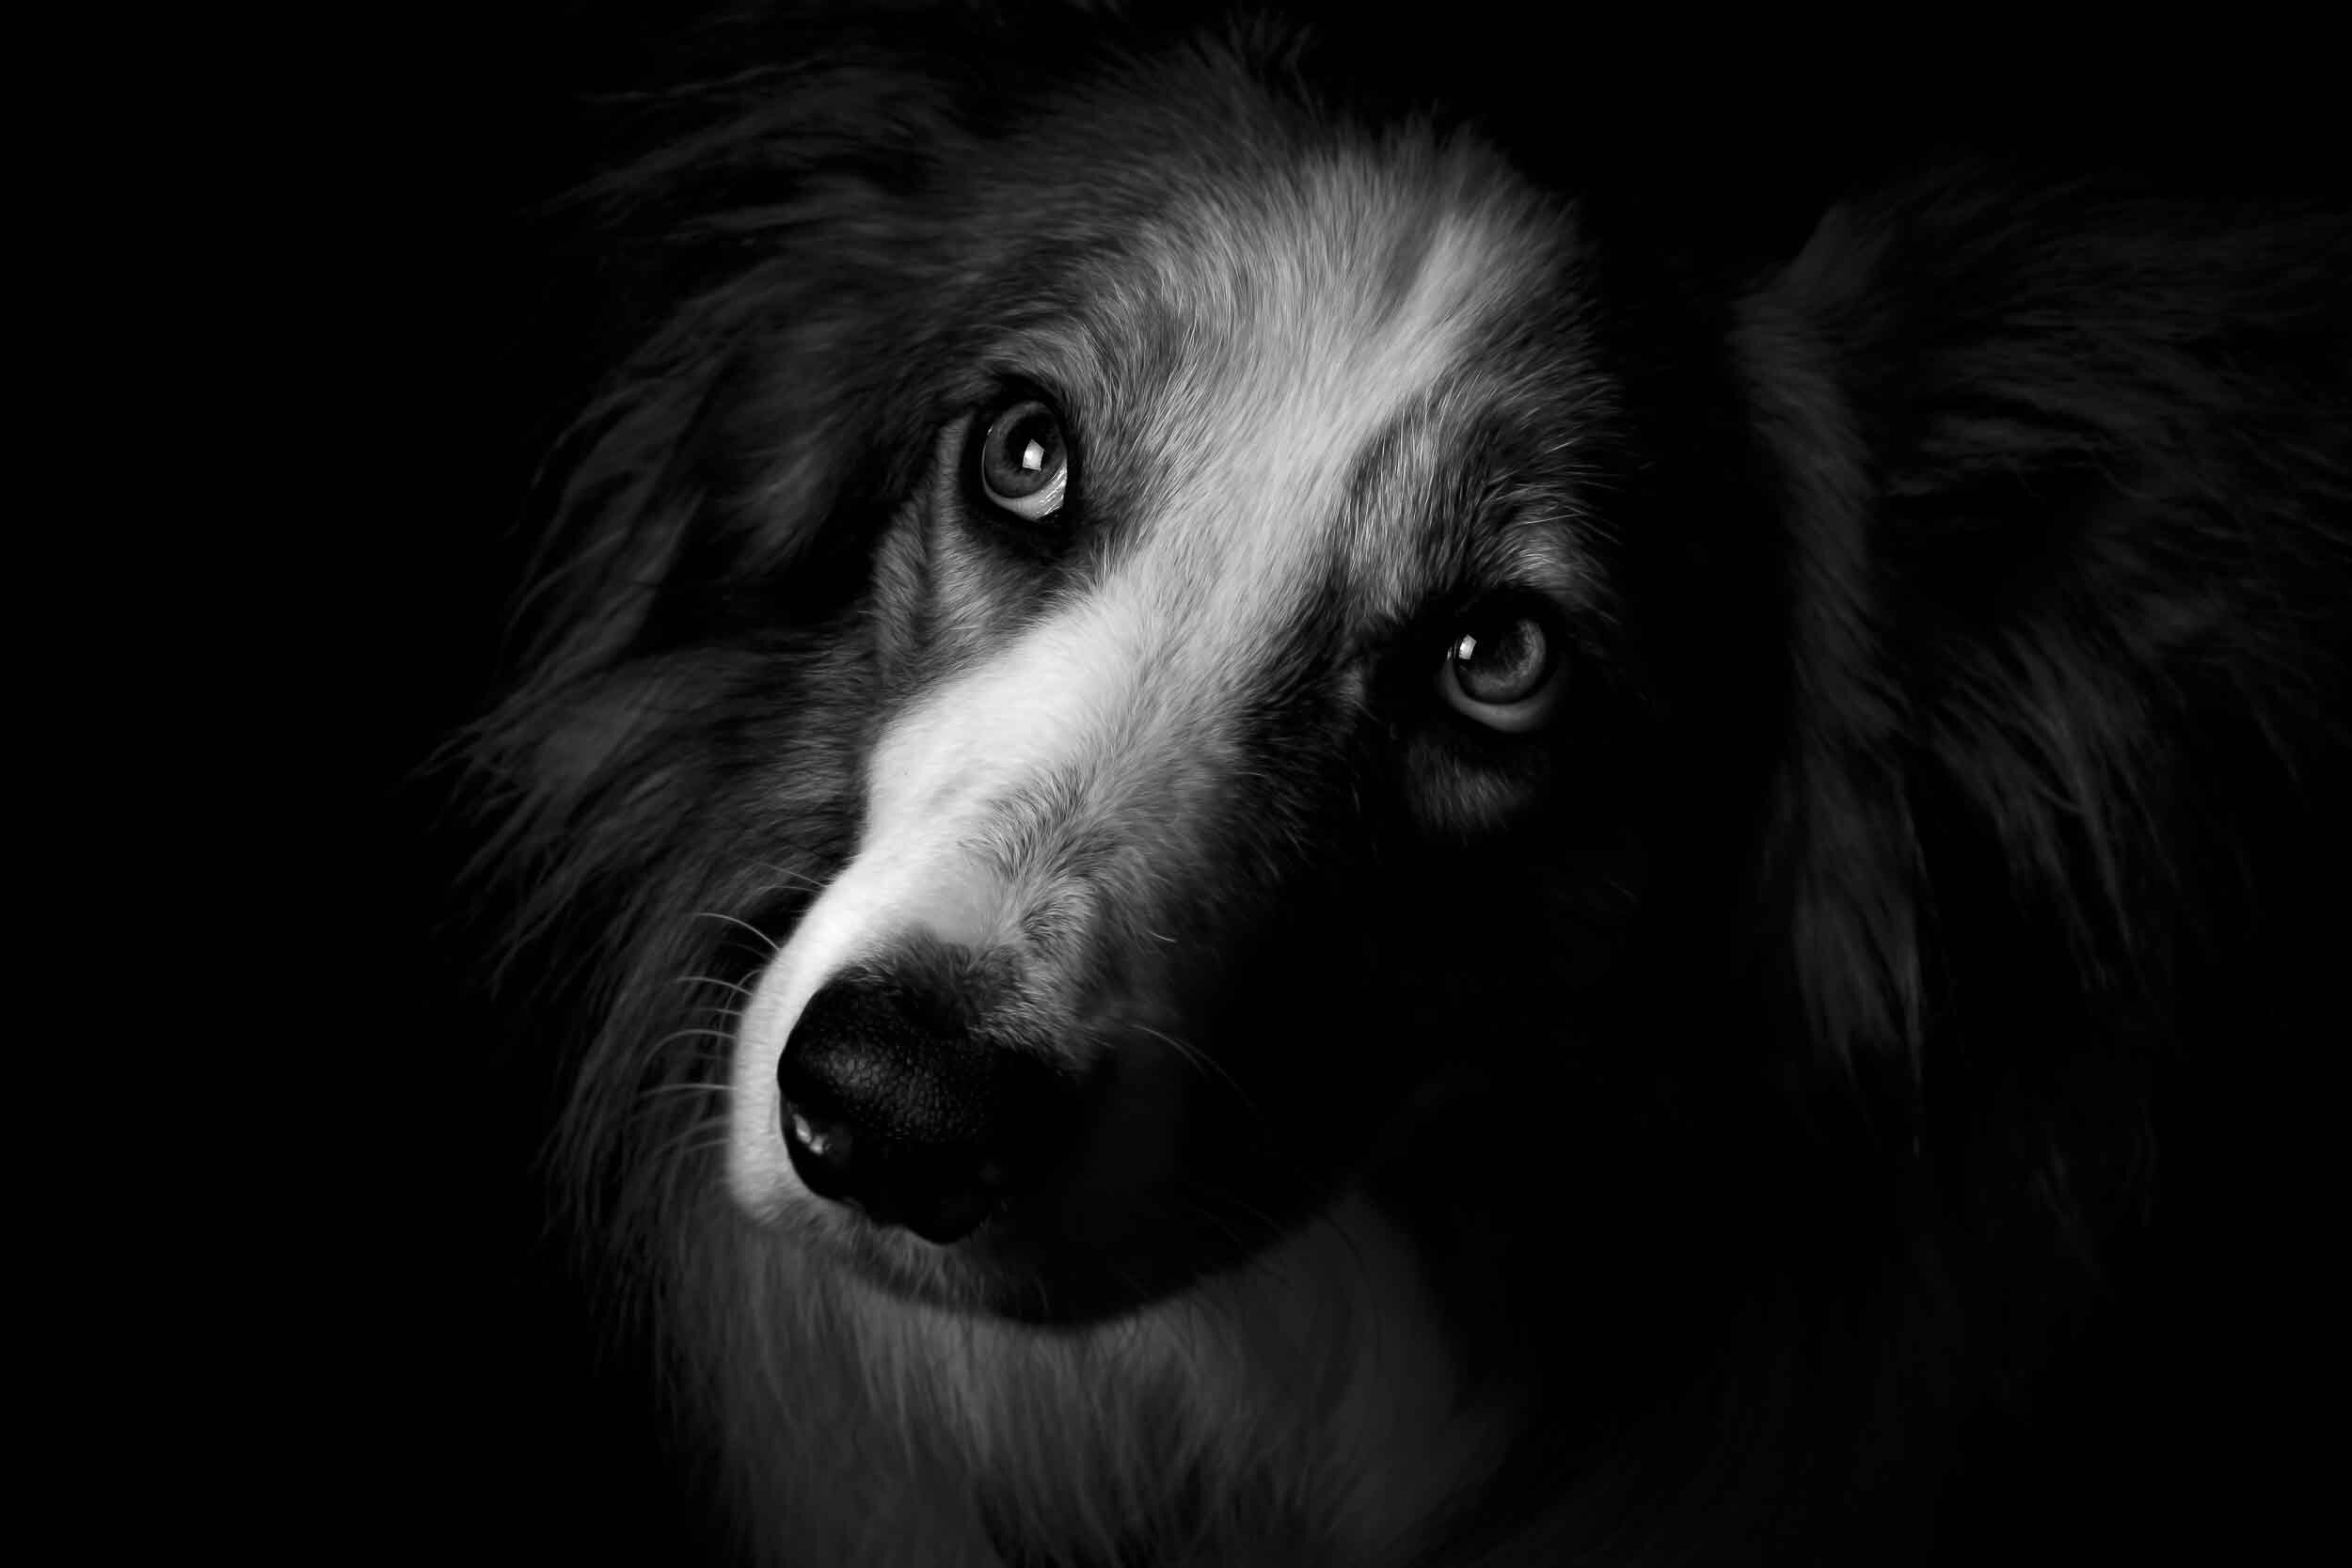
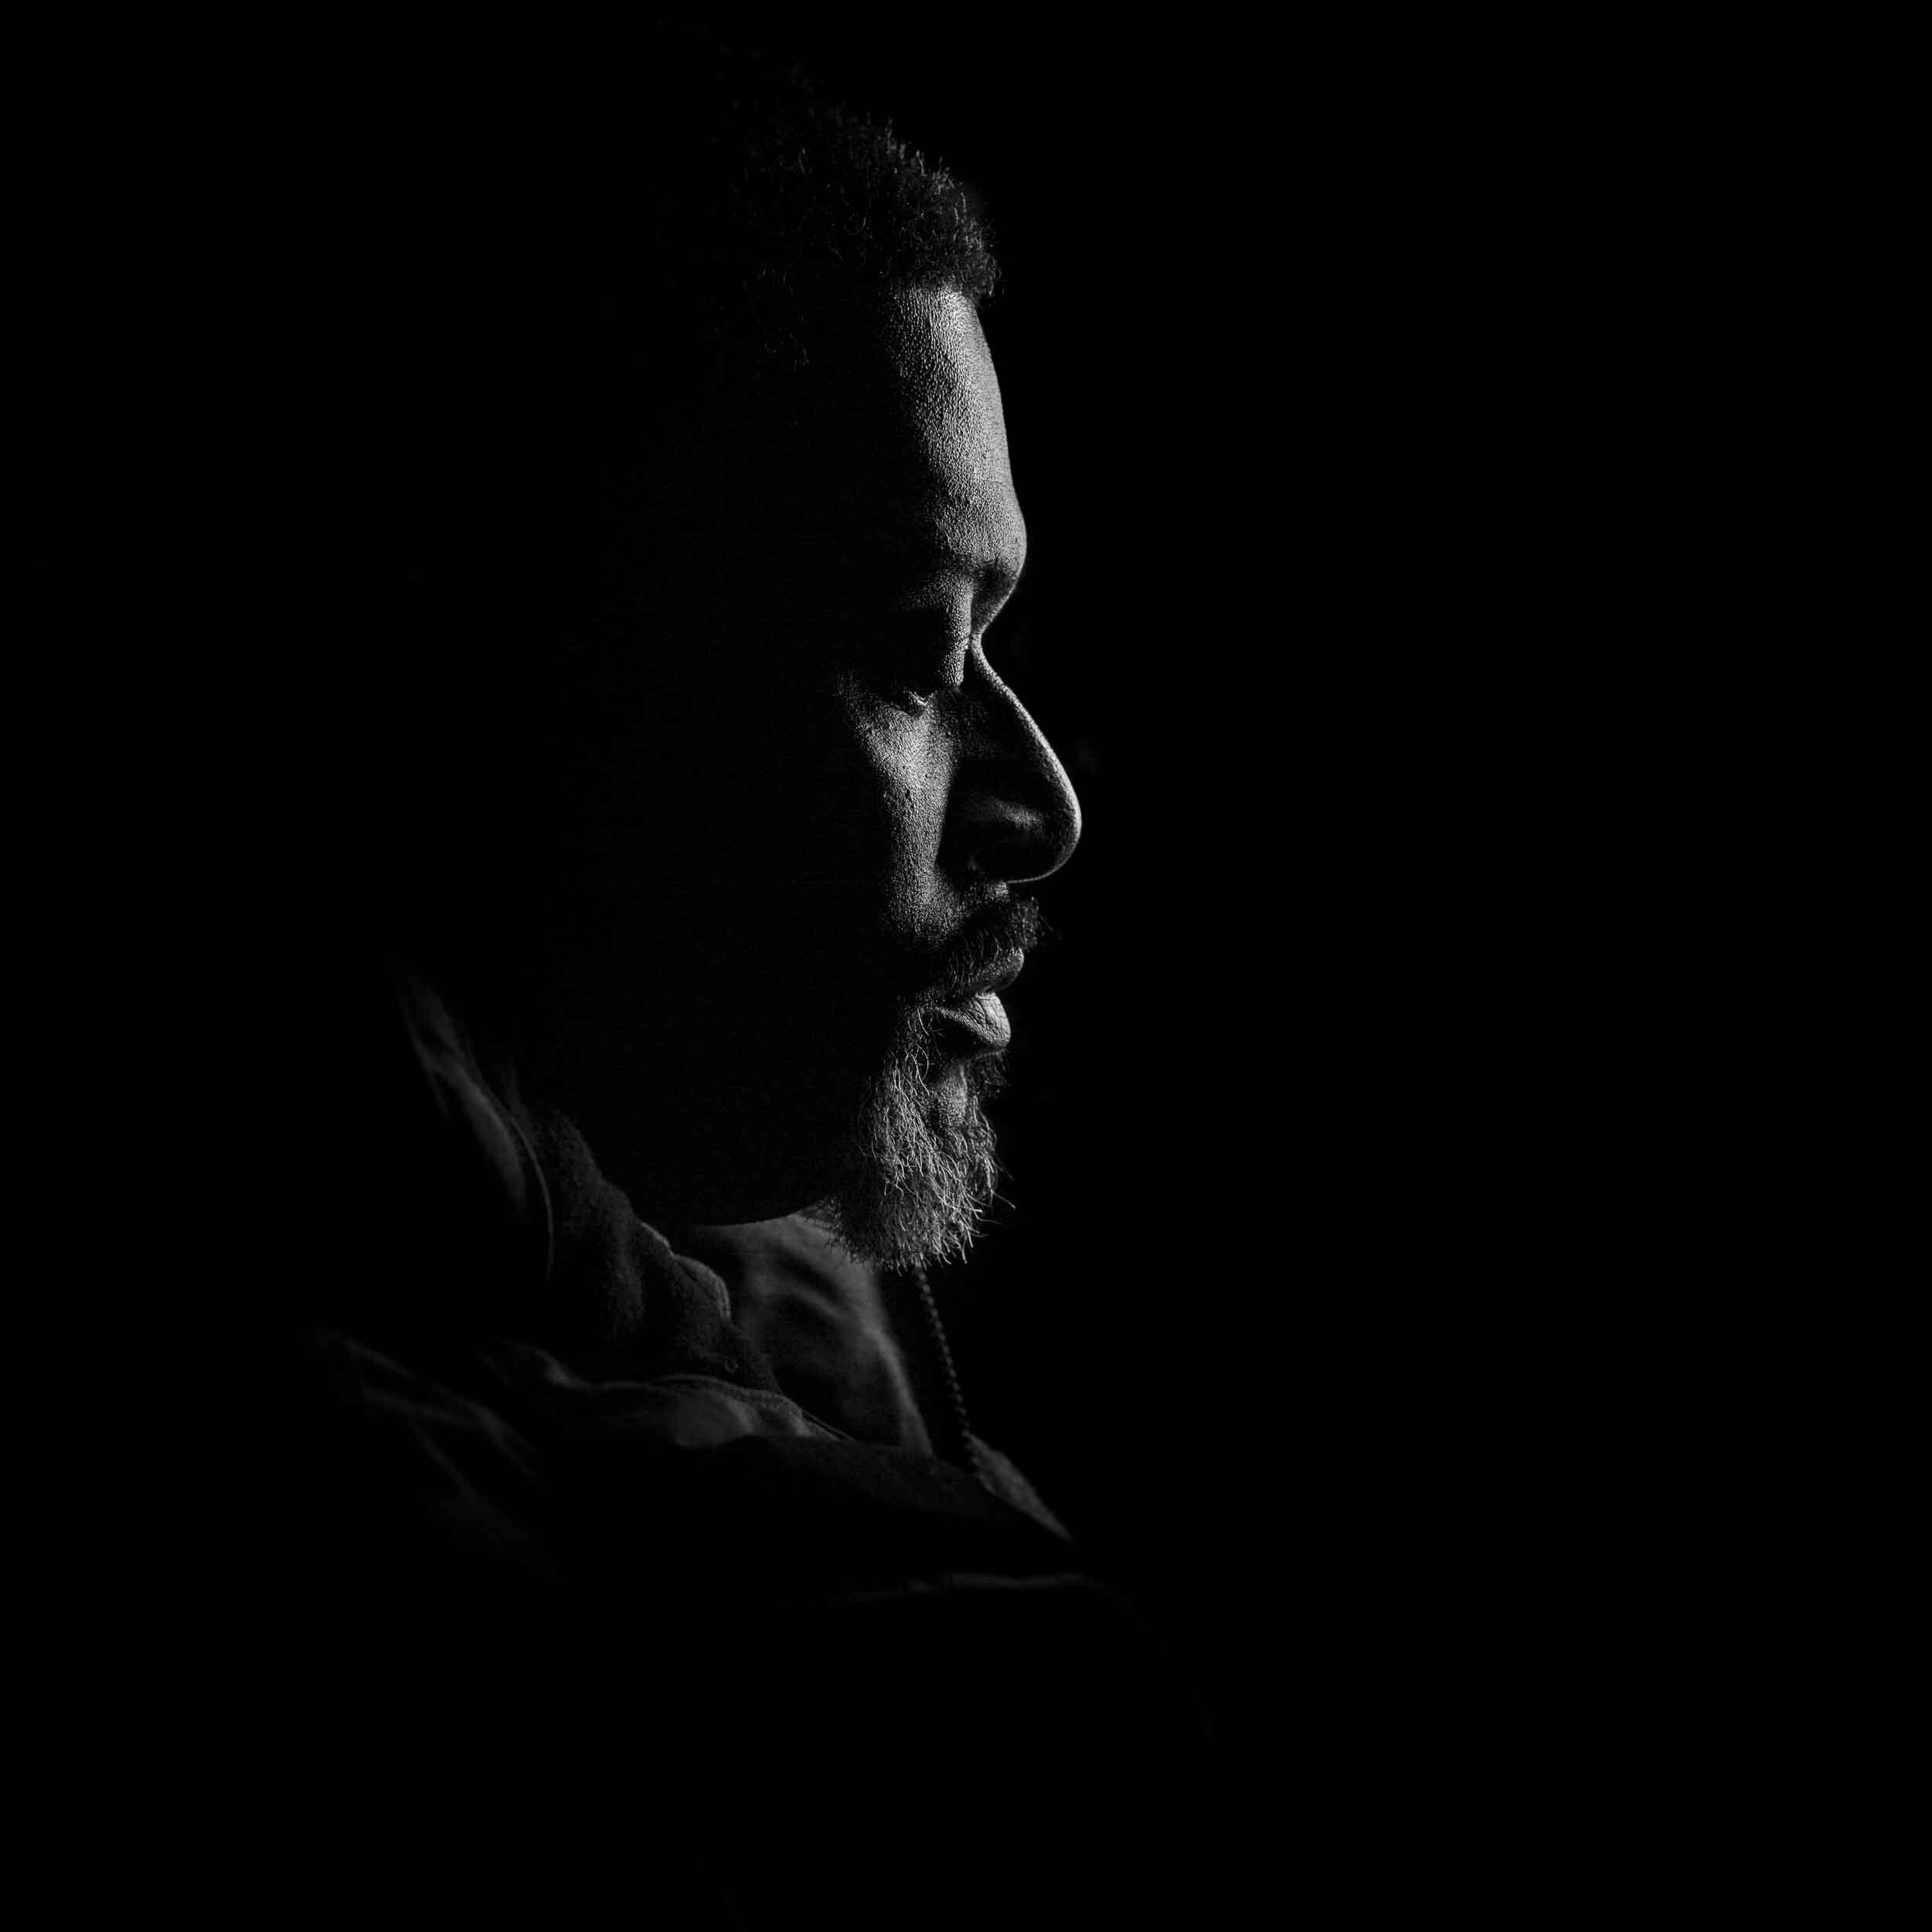
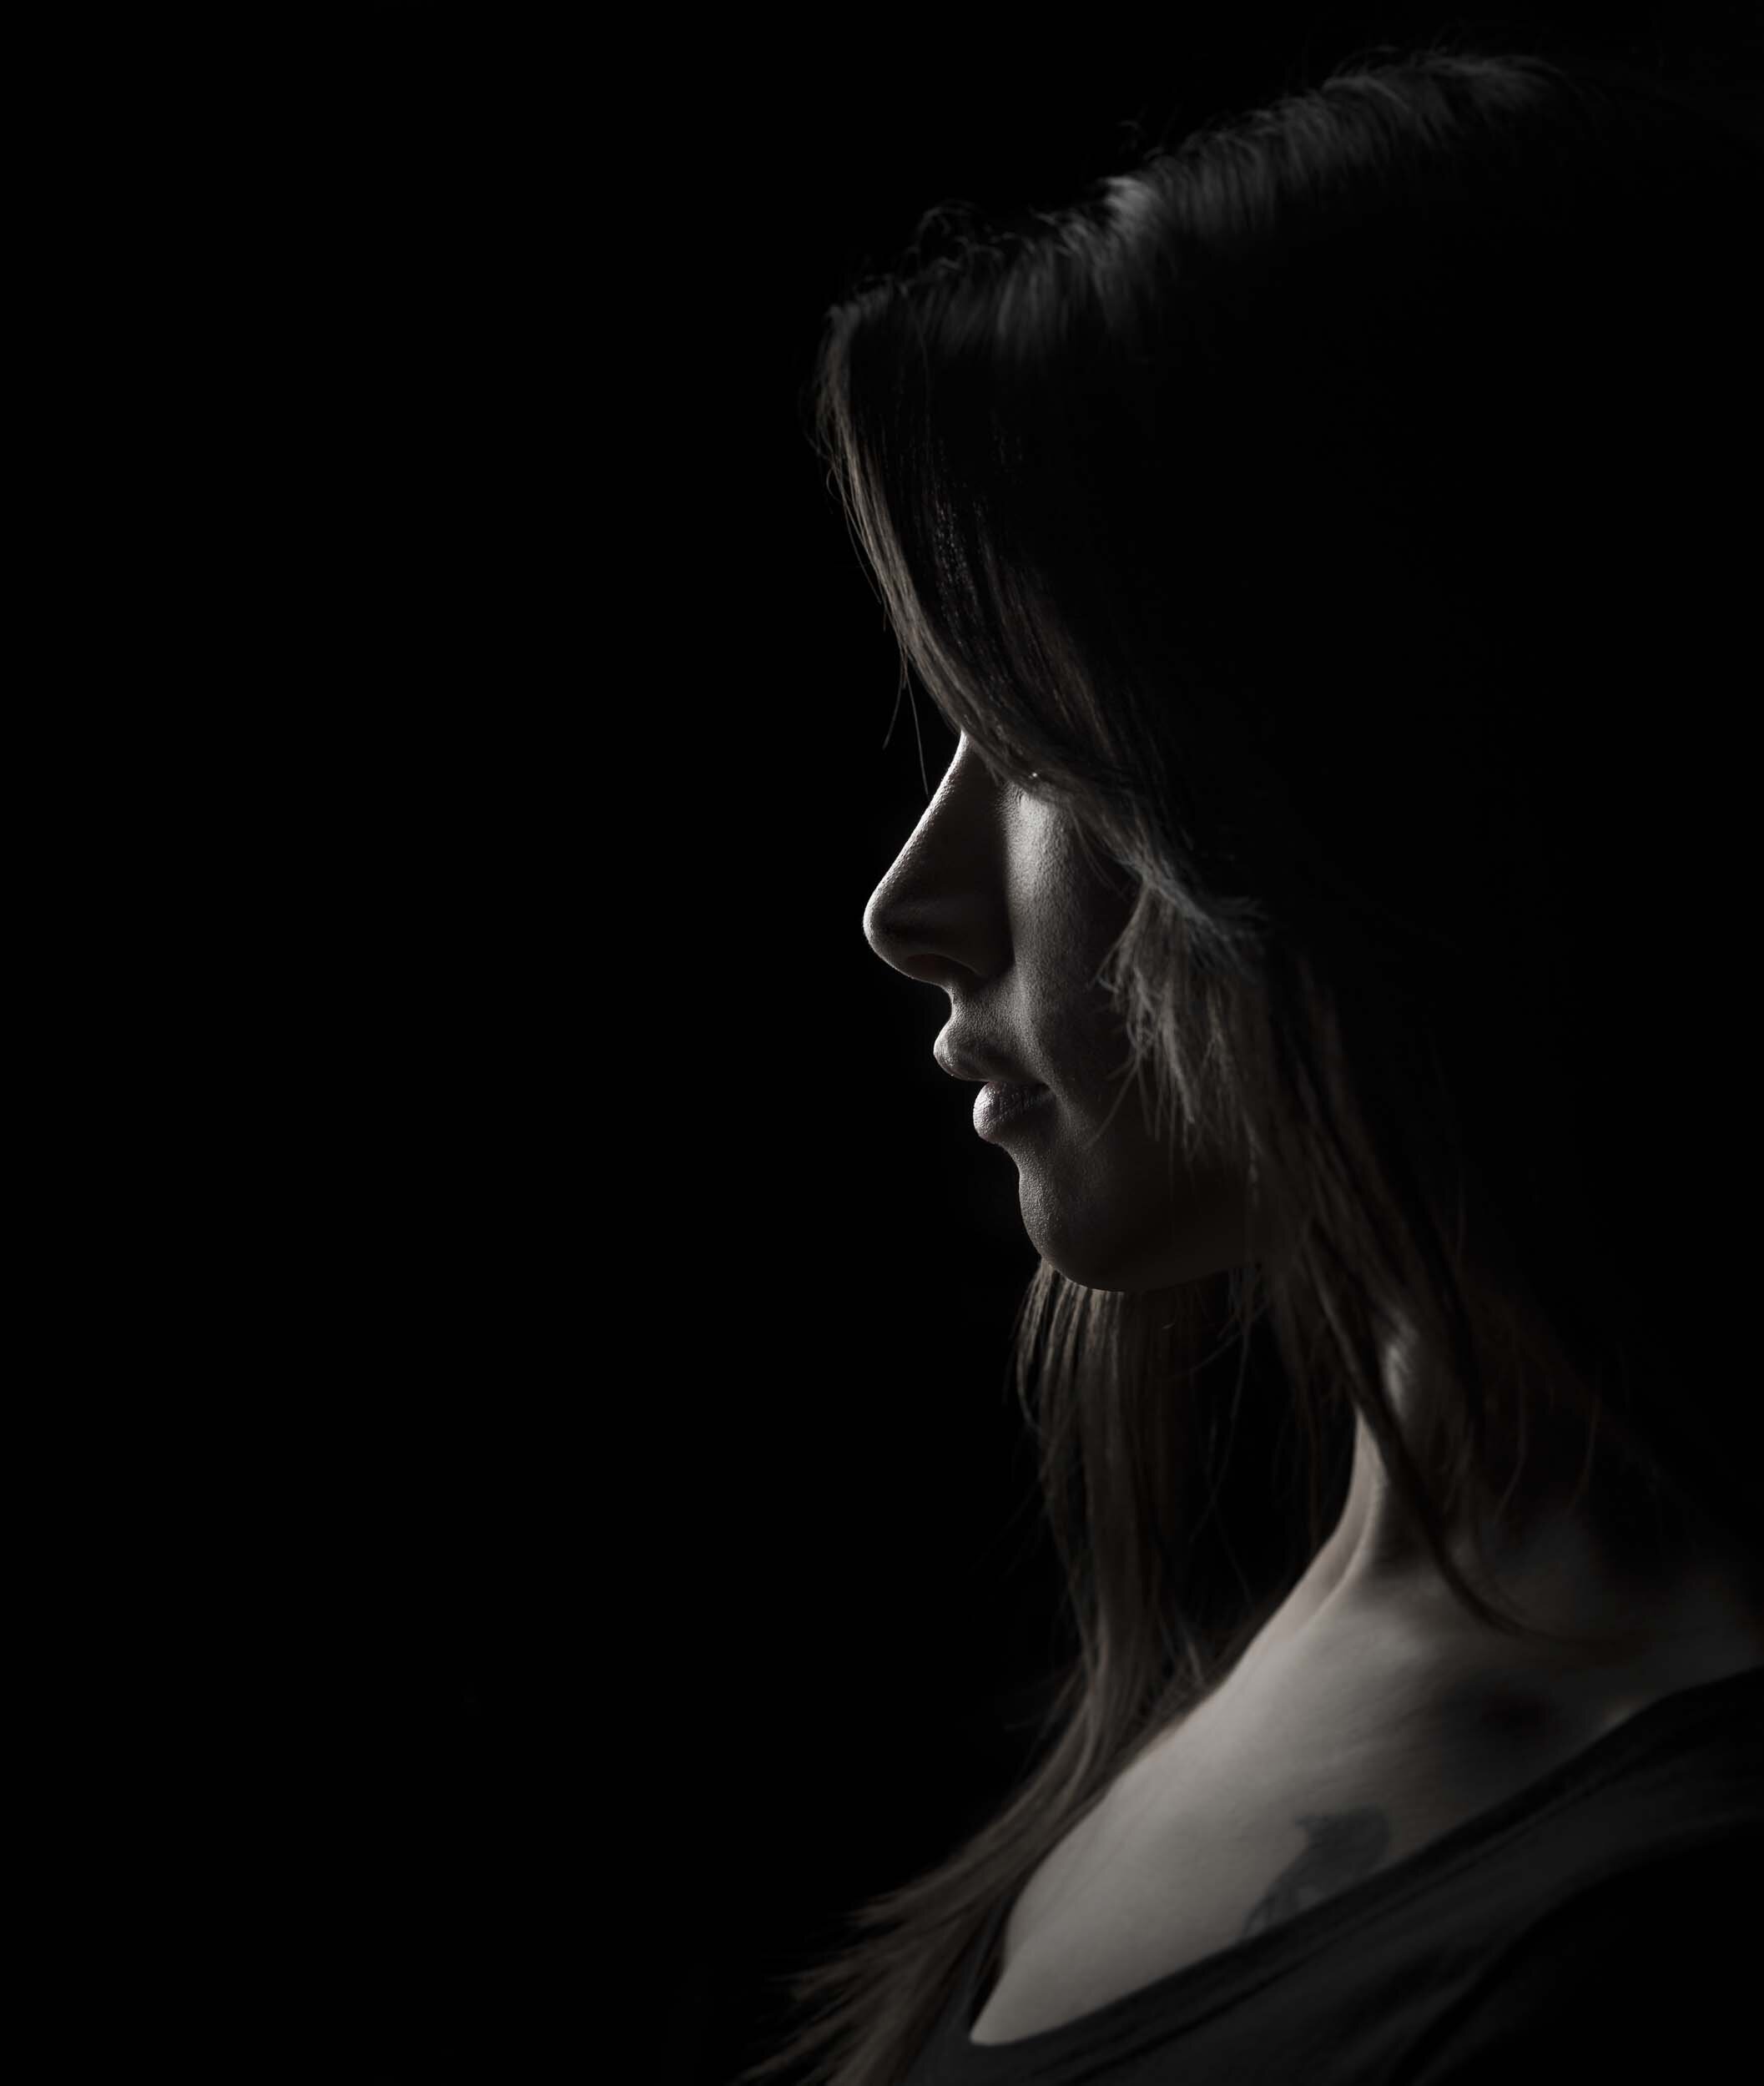
Anyway, as part of the moving process I connected my Google Analytics account to the new site and what was really interesting to see was that ‘Invisible Black Background’ was still ranking high up there as one of the search terms used by folks and that lead them to my site. If you didn’t know, ‘Invisible Black Background’ refers to a photograph technique I named and that was featured in the New York Times, and is basically a way to make it look as though you took a photograph in a studio with a black background behind the subject, when in fact you didn’t; it could have been taken outdoors in bright sunlight because of how the technique works.
I need to record a new and updated video going through the technique because with advances in technology a few things have changed, however that said, the principles are still the same and the original technique still stands.
The Invisible Black Background
The idea behind the technique is really simple and needs minimal kit; just a camera and a flash (preferably an off camera flash).
The first thing to do is to get the camera settings dialled in…
ISO
We need to make our camera as least sensitive to light as possible, so take the ISO down as low as it can go eg ISO 50, ISO 100.
Shutter Speed
This is where things have changed over recent years because now we have amazing technology such as High Speed Sync which is where we can use a flash with our cameras at up to 1/8000sec! That is nothing short of incredible and I’ll be covering exactly this in the updated video, but for now let’s take it steady and keep it simple. For now let’s just talk about using the Maximum Sync Speed which is basically the maximum speed we can set the shutter to and that will still allow all the light from our flash to fill the sensor. Again, forgetting High Speed Sync, but ordinarily a shutter speed that is too fast when using flash would result in a black area appearing in our pictures.
Aperture
The last part of the equation is the aperture, and this is where we' need to take a few test shots (without the flash being on for now). So, start off with something like F/8.0 and then take a photograph. If you can see nothing but a blak screen on the back of the camera then you’re sorted; you have undeexposed the ambient and this will end up being our black background.
If however you can still see stuff, then you need to darken the image down some more and the only option you have is to use the aperture. So, go to something like f/11 and take another test shot, and so on until you get a completely black screen on the back of the camera when viewing the photograph you’ve just taken.
And that’s all there is to it!
Now there are things to consider when doing this such as…
If you’ve had to go to something like f/22 to get a black screen then your litle 4 AA Battery Speedlight might not be powerful enough to light your subject, so this is where you need to use a more powerful light … or take the pictures later in the day as I used to have to do.
If you’re doing this indoors then you need to consider reflections. You may well get a black screen with the camera settings but as soon as you introduce a flash you start seeing stuff in the background. This is just going to happen so to prevent the ‘light spill’ we just need to use a modifier that will control where the light falls.
Anyway, more of this stuff I’ll cover in the updated video but for now, here’s the original one I recorded and that still gets great viewing figures on YouTube.
As always, any questions then make use of the comments section below and I’ll make sure to get back to you.
Cheers,
Glyn