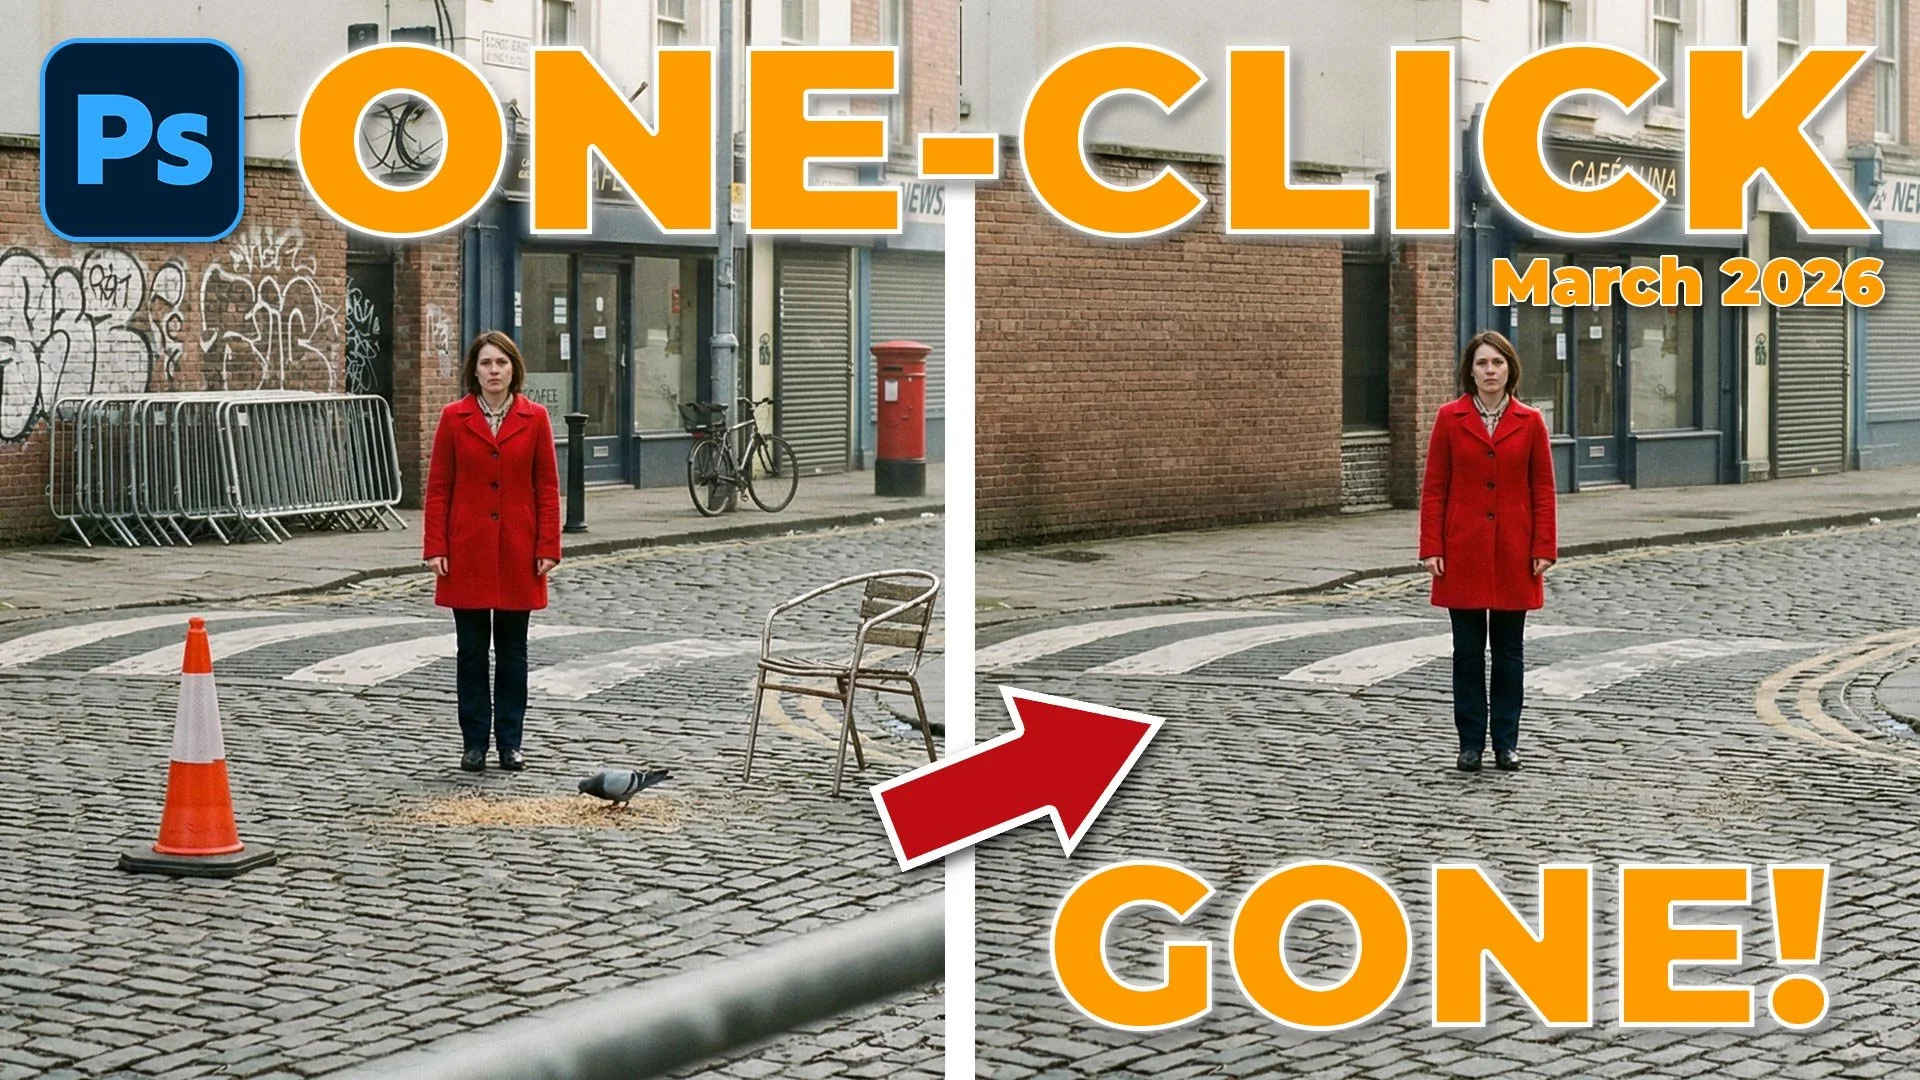
Adobe has just dropped a seriously powerful update to the Remove Tool in the Photoshop Public Beta (version 27.6.0), and it’s a total game-changer for cleaning up your photos. It can now automatically scan your entire image, identify distractions across 26 different categories, and let you remove them with a single click.
Here is a quick look at how it works and how you can start using it to save yourself hours of manual cloning and healing.
What is the New "General Distractions" Feature?
Previously, the Remove Tool had specific buttons for "Wires and Cables" or "People." This new update introduces General Distractions. It uses generative AI to find things like trash cans, signs, vehicles, and even stray animals that might be cluttering up your shot.
How to Use It: A 3-Step Tutorial
Before you start, make sure you have GPU hardware acceleration turned on in your Photoshop settings (Preferences > Performance) to ensure the tool runs smoothly.
1. Select the Remove Tool
Head over to your toolbar and select the Remove Tool. In the options bar at the top, make sure Sample All Layers is ticked and, most importantly, check the Create New Layer box. This acts as a fail-safe, putting all your removals on a separate layer so you can easily bring things back if you change your mind later.
2. Find Your Distractions
In the options bar, click on the Find Distractions dropdown and choose General Distractions, then click Find. Photoshop will take a few moments to scan the image. When it’s finished, it will highlight potential distractions with color-coded overlays.
The cool part? The list of categories it shows you is dynamic. It won't show you all 26 categories; it only lists the ones it actually found in your specific photo—like "Vehicles," "Animals," or "Urban Elements."
3. Refine and Remove
You have total control over what stays and what goes:
Toggle Categories: You can untick specific categories in the dropdown if Photoshop picked up something you actually want to keep (like a cool cloud it mistook for a "light diffusing element").
Manual Overwrite: Use the plus (+) or minus (-) brush icons in the options bar to manually add areas to be removed or protect areas you want to save.
The Big Reveal: Once you're happy with the selection, click the Tick icon. Photoshop will work its magic, and the distractions will vanish, seamlessly filling in the background.
Why This Matters
I've been testing this on complex street scenes and busy beach shots, and the results are mind-blowing. It handles everything from removing pigeons at someone's feet to rebuilding stone walls where a trash can used to be. It’s not just a time-saver; it’s doing work that used to require advanced cloning skills in just a few seconds.
Since this is currently in the Public Beta, if you run into anything unexpected, be sure to use the "Feedback" icon in the top right of Photoshop to let Adobe know. The more feedback we give them now, the better the final version will be.