behind the scenes

I did a Workshop in Oxford at PhotoHubs

A couple of weeks back I was in Oxford at PhotoHubs on behalf of the Guild of Photographers who asked if I would do a workshop for some of their members.

I've not done 'in person' workshops for a few years now but this was so much fun with such a great group of folks.

I went through how I take portraits in the style of my veterans project but also other equally simple set ups that can create some great results. It was so good to see everyone active , chatting and enjoying the time we spent together. THE most important part of the time together though was showing how important 'talking / conversation' is in making your subject more comfortable and relaxed in front of the camera.

At the end I couldn't resist grabbing a quick portrait myself using just one light and one reflector ... I mean when one of the attendees has such a great look, how could I not??? 😃

Thanks so much to everyone who came along and especially the folks at The Guild for inviting me in and for looking after me so incredibly well ❤️

KIT / SETTINGS:
Sony A7RIV (1/250 , ISO 100 , f/8.0)
Sony 85mm GM
Westcott FJ400 Strobe
Westcott Rapid Box Switch Beauty Dish
Westcott Silver Reflector
Westcott X-Drop Pro with my new material Glyn Dewis Vintage Grey Background

You can see all of this kit over on my GEAR page ( LINK )

Cheers
Glyn

DOG PORTRAIT from START to FINISH in Lightroom and Photoshop

Did you see the dog portrait I did a couple of weeks back?

If not, this is the one.

The dog belongs to my friend Trigga, and I I took it after I’d finished taking his portrait…

So here’s a video showing all the editing / retouching I did in both Lightroom and Photoshop …

Hope you like it, but as always, if you have any questions, just post them in the comments section below and I’ll make sure to reply.

Cheers,
Glyn

Portrait of a Biker with his Triumph on Dartmoor (Behind the Scenes)

So last week I was out in the Dartmoor National Park in the South West of the UK photographing a GREAT Guy and a GREAT Motorcycle.

With rolling hills and roads that twist and turn and disappear over the horizon line, Dartmoor is a fantastic location for photography … especially the motorbike kind, so when Matt agreed to being in front of my camera, we just had to head out …

When there, the very first thing to do was to find a composition; not an easy task with so many possibilities but so few safe areas to park up with the roads being narrow.

Finding the composition is always the hardest part, and it’s all about finding a fine balance between the background, but also where you are going to place the subject.

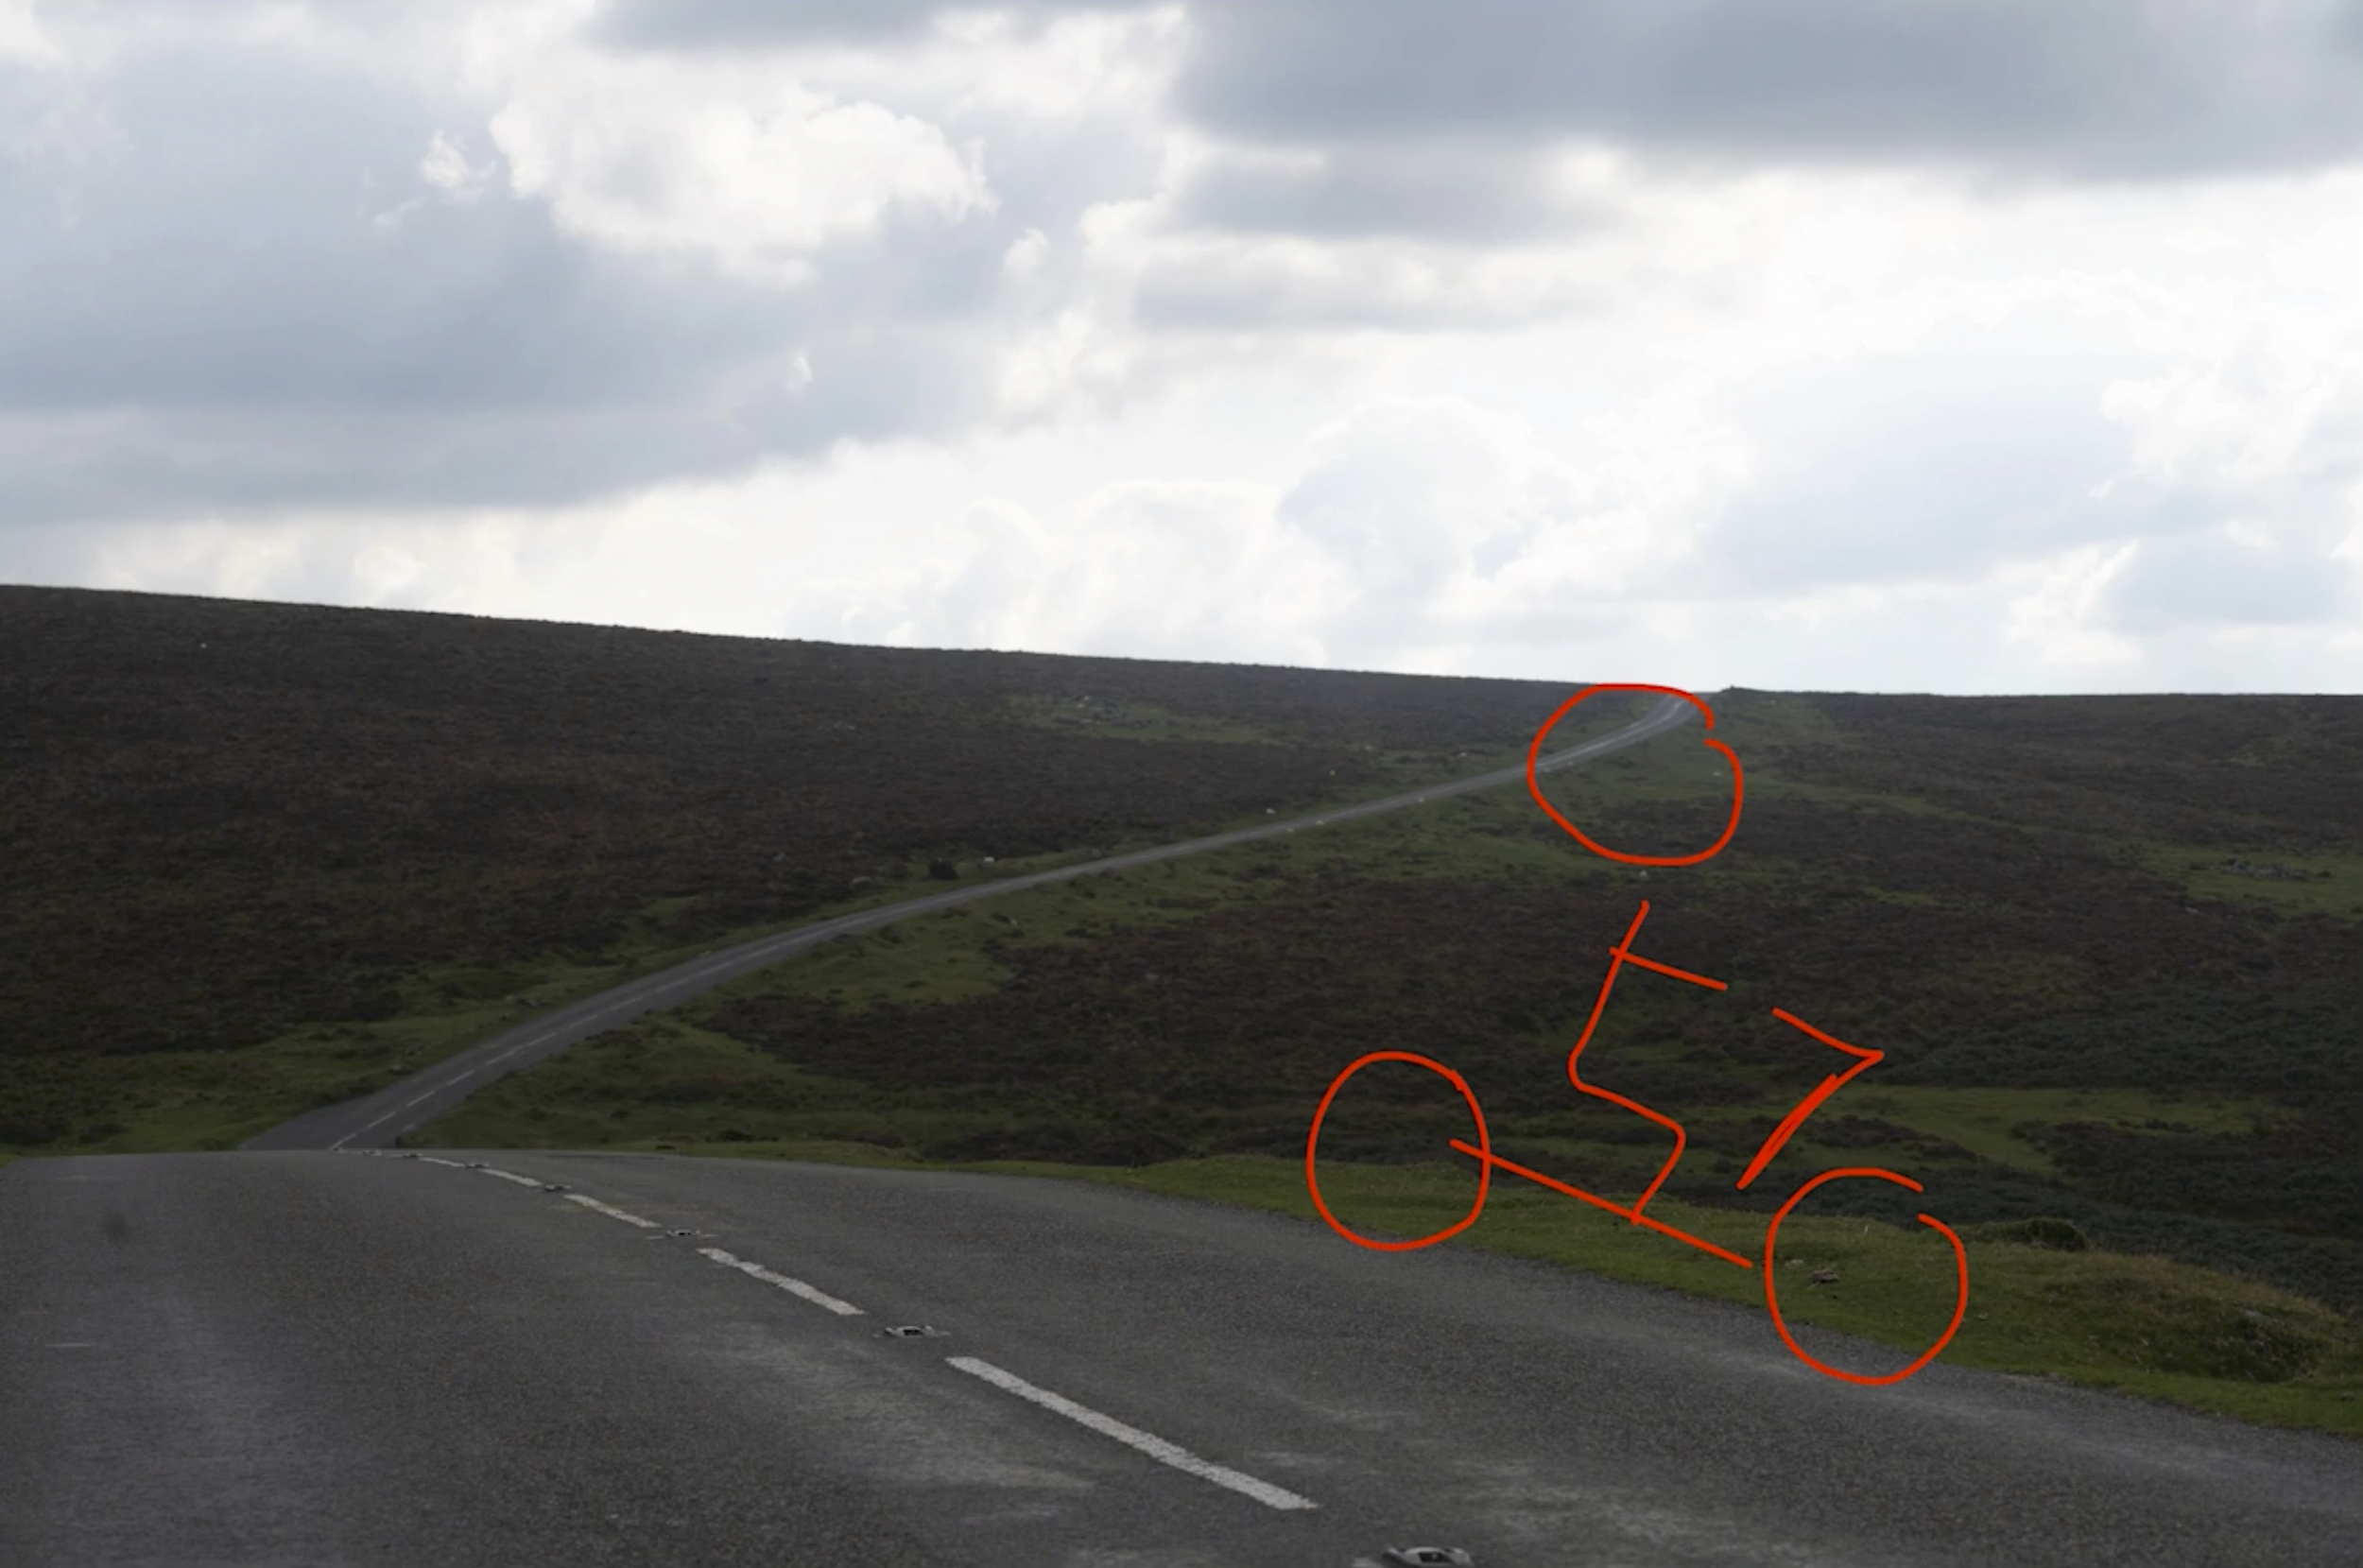
Now this here (below) would have been great, and maybe I'll try next time, but placing the subject (Matt and his Triumph) to the right of the frame would have meant that his head would be blocking part of the road in the distance.

So that didn't work for me.

We tried moving along a little bit and tried some different compositions, some with the camera angle, much lower down so that Matt was above the horizon line to give a bit more of a dramatic feel …

But, the one I was most happy with was the one below, which to me gives a nice balance between the scenery, the road and the biker, and although you don't see the way the road twists off to the left down and then up, you do still know it's the same road that the bike is on, that then goes off into the distance …

LENS CHOICE

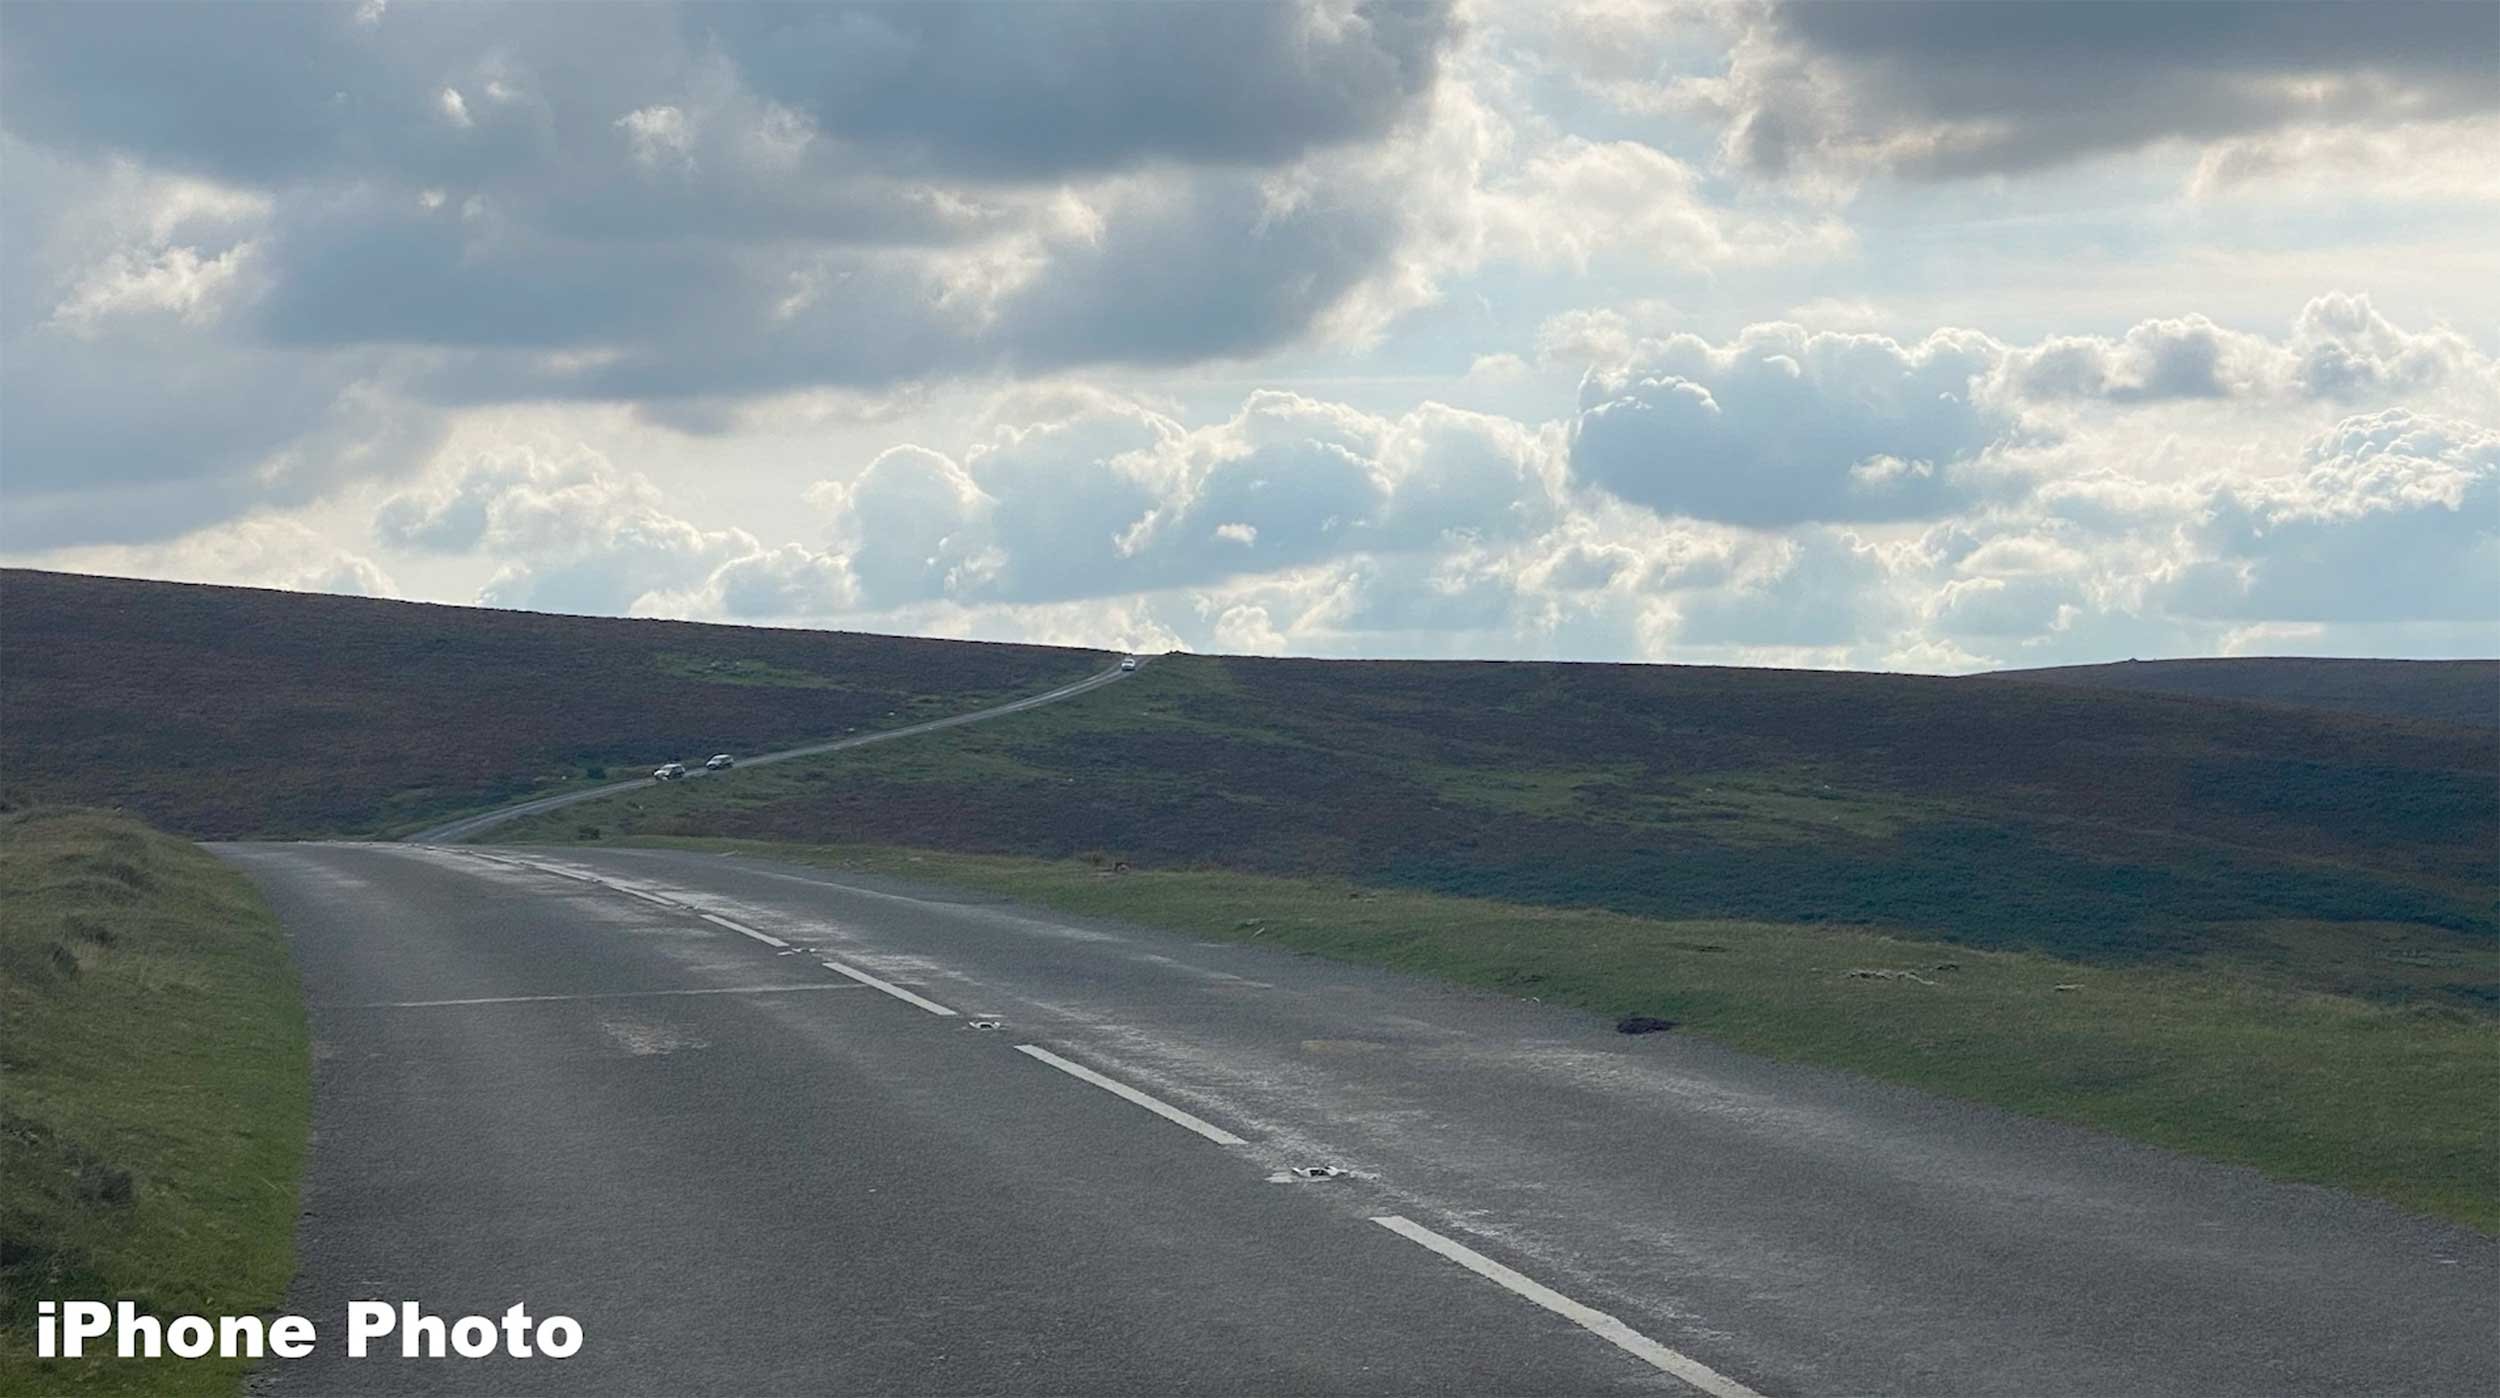
Now you'll notice in this behind the scenes pictures that I'm using a telephoto lens, this was a 70 to 200mm f/4 lens, and I used that to compress the background because a telephoto lens will bring those distant areas much closer to form part of the final picture.

You can see what I mean here with this photograph taken with my iPhone from when I was looking for a composition, how the distant road just seems so well, distant …

But compare that one to the final retouched image and hopefully you can see how the road in the distance has been brought closer by the using that telephoto lens …

LIGHTING

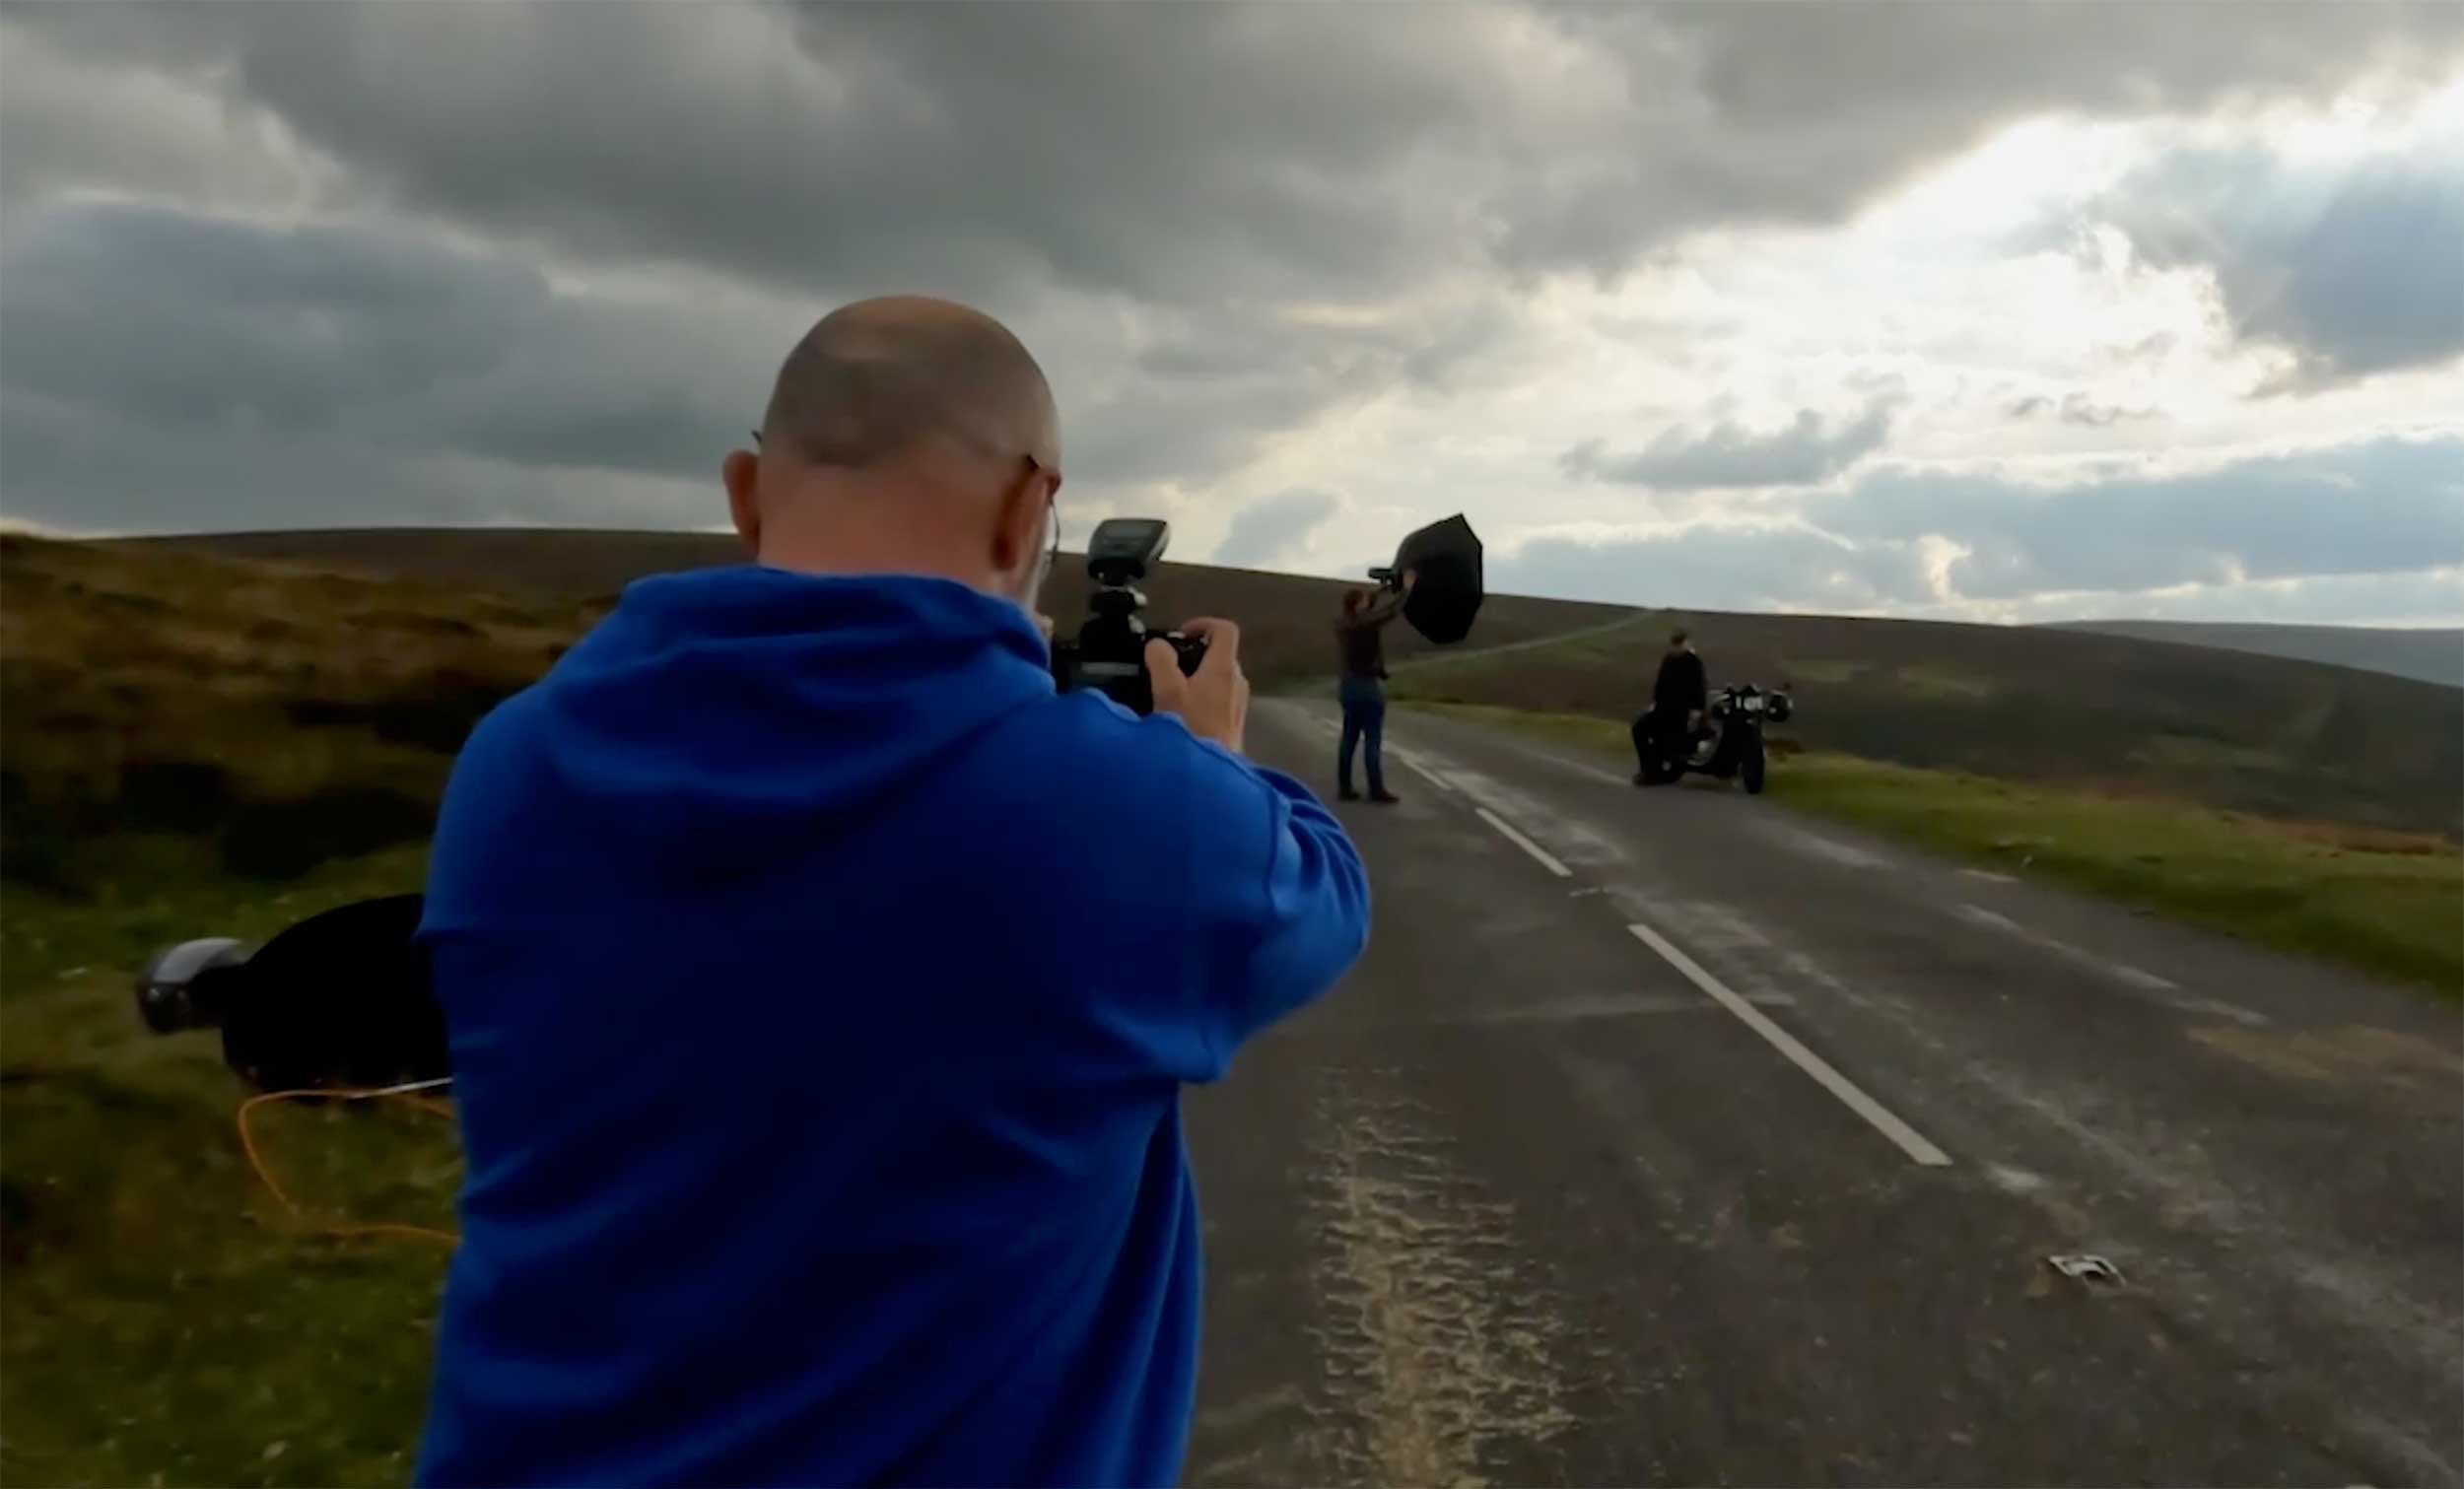
For the lighting side of things, this was actually quite a challenge because even though the location felt like it was in the middle of nowhere, the road we were on did end up being quite busy.

We had to go back in and out of the road with the lighting (thanks Jacob) , but also the clouds in the sky … one minute they were there, the next minute they were gone. They were moving incredibly fast.

This meant one moment we had nice soft diffuse lighting and the next minute we had quite harsh lighting.

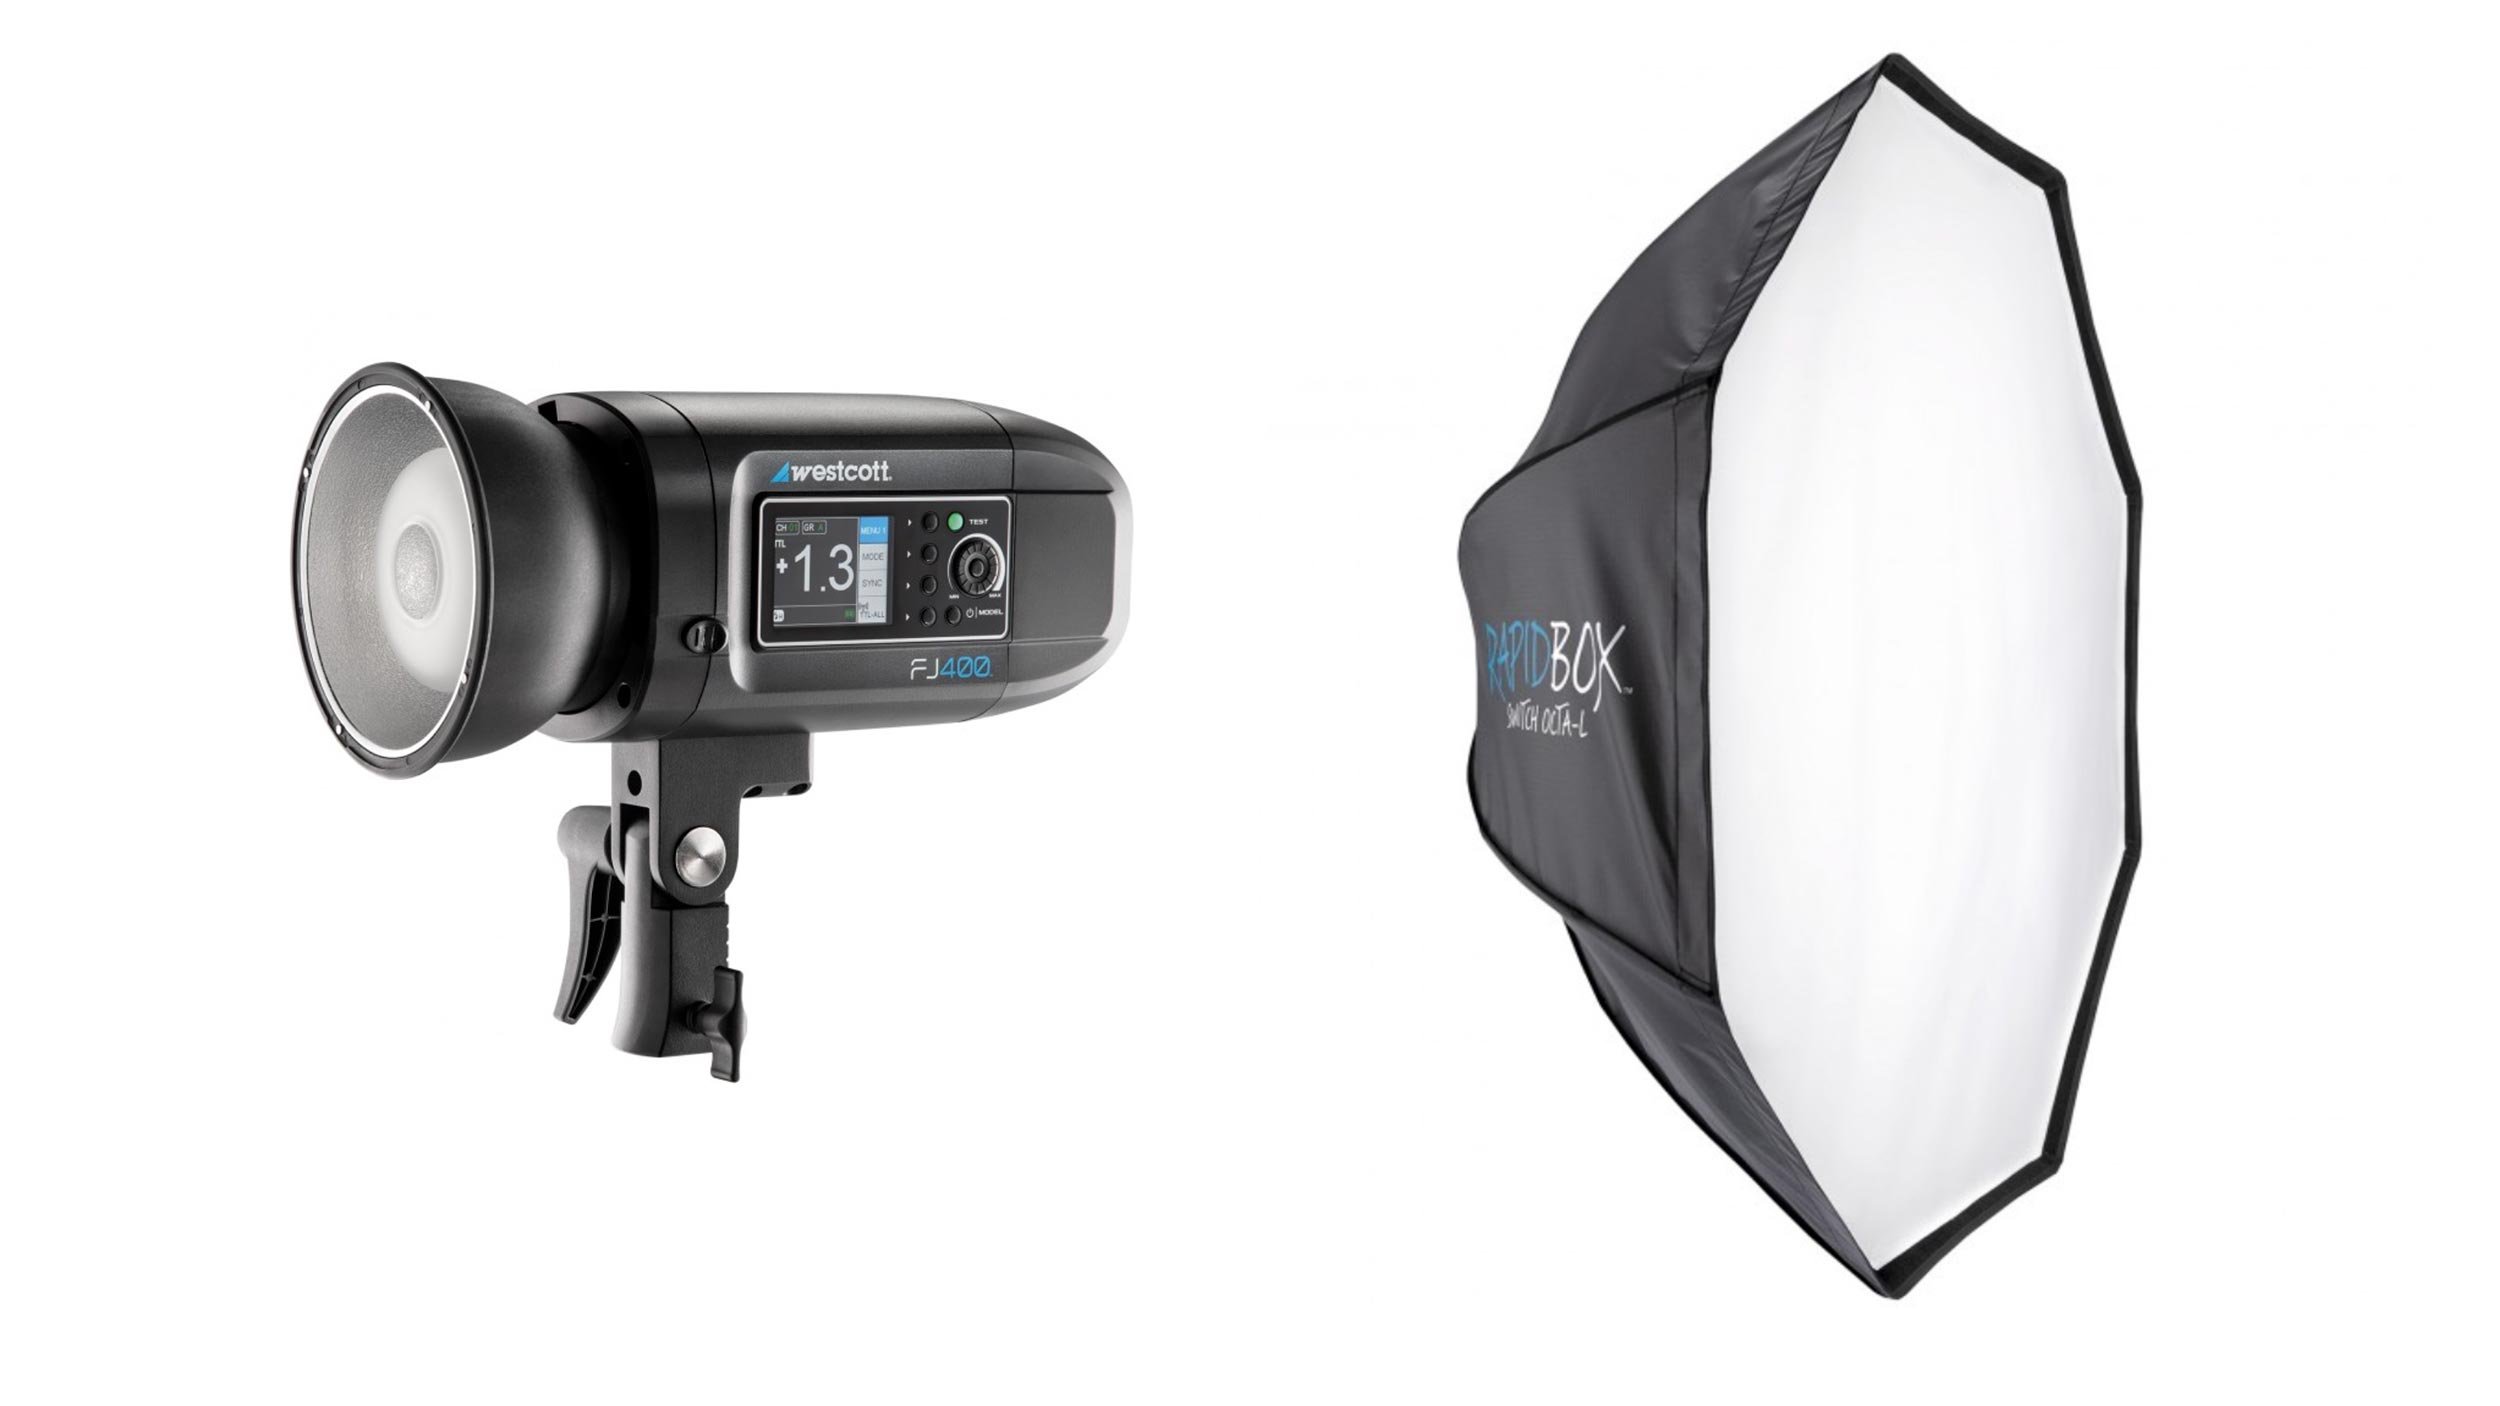
The light I used was a Wescott FJ 400; a 400ws light that has its own battery, and I used that with the Large Octa (Rapid Box Switch) which measures 48 inches; the combination of these made them very portable and easy to move around (thanks again Jacob)

Now because it was a bright day I needed as much power out of the light as possible, but I also needed a soft-ish kind of light to match the lighting in the scene. So to do that, I removed the outer diffusion material of the soft box, meaning there was only one layer of diffusion.

This gave just the right amount of balance between softness and hardness, but also didn't kill too much of the power out of the light (roughly one stop)

Because I was tethering to my laptop I was able to see, on a larger screen, what the images were looking like and check things such as sharpness, composition and so on.

This also really helped with checking out the detail in the sky and although in the out of camera shots there looks to be no detail, there was actually plenty of information there to bring back during post production. No sky replacement needed here 😃

This ultimately meant that I didn’t need to use High Speed Sync (HSS) which although great, because of how it works reduces the output of the flash / strobe so it needs to be in closer. Not using HSS meant I could have the light positioned further away out of the frame.

So there you go, a quick run through of what went on Behind the Scenes.

With the location and the conditions presenting a few challenges, keeping things simple definitely help but also the tethering came in very handy being able to not just see the images that were coming through and REALLY see what was there.

As always, if you have any questions just add them in the section below and I’ll make sure to respond.

Cheers,
Glyn

Trigga: Portrait Shoot on Location and Behind the Scenes

Here’s the result from a recent portrait shoot with Trigga whom I met at a GREAT local Bikers' Café; a completely free spirit who lives life his way embracing and respecting nature and his surroundings.

This was our first shoot together; completely relaxed and gave us time to hang out and chat, so now I simply CANNOT wait for the next one which will be out on location in the Devon Countryside with a Harley.

I get a real kick out of how, by using lighting, we can change the look and feel of a location taking especially when doing so takes just a small amount of kit…

Behind the Scenes

If you’re like me, I love to see Behind the Scenes (BTS) so I thought I’d share a grab shot that I took with my phone just before packing away, that gives you a look at what I used and where it was positioned to take the portrait of Trigger…

Lighting

Background

Tethering

This was actually the first photo shoot I got to use the new X-Drop Pro Background Stand and my new Glyn Dewis Vintage Grey Canvas Background that is now a material and able to be folded making it way more convenient to transport, PLUS it comes in 8‘ x 8’ and 7‘ x 5’ sizes.

I’ll be sharing a video very soon giving a look at the new X-Drop Pro because, if you’ve seen or have the original X-Drop, this new Pro version is VERY different in a VERY good way!

You can check out the kit above and the new X-Drop Pro over on my GEAR Page.

Anyway, I really hope you like the portrait of Trigga … such a great guy, and I’ll be sure to share images when we get out in the Devon Countryside taking photographs of Bikers and their Harleys, Triumphs, Royal Enfields and so on…

Cheers,
Glyn

Photographing The Joker

Looking through some files in my Lightroom Catalogue the other day and I noticed a series of images that I took when presenting for Sony at their Roadshow last year showcasing the new Sony A7IV.

The Joker

I put together a video giving my feedback on the new camera that I only got my hands on the day before the Roadshow started, and in that video you can see snippets of when I was photographing my friend Graham Currey who was dressed as The Joker..

As for the set up, I used just the one light which was positioned above Graham, slightly forward of him and angled directly down to the floor so that I could also bounce some light into his face using a silver reflector.

The resulted in a version of what is commonly called horror lighting or up lighting, and which I thought would work great for the Joker character and give the pictures a much more dramatic look.

Kit:

  • Camera: Sony A7IV

  • Lens: Sony 85mm f/1.4 G Master

  • Lighting: Westcott FJ400 + Silver Reflector

Settings:

f/5.6 , 85mm , 1/160sec , ISO 200

Hope you like the results, and as alway, if you have any questions / comments, please do make use of the comments section below and I’ll be sure to respond.

Cheers,
Glyn

❓WHO is Glyn Dewis and WHAT is this CHANNEL❓

At the beginning of the year, one of my priorities and things I wanted to spend more time on developing was my YouTube Channel, and over the past (almost) 6 months I've thoroughly enjoyed it.

I'm having so much fun putting videos together the way that is 'me' and each week learning and trying something new to add to the production value.

One thing that's been missing though is a Trailer; something that in 60 seconds or less tells folks that haven't subscribed, the WHO, WHAT, WHERE, WHY, WHEN and HOW of me and what the Channel is all about, but yesterday I put some time aside and did it…

Hope you like it 😉

I DID IT 🌳 I used my DRONE to photograph this INCREDIBLE Lone Tree (Settings + Editing)

Using a Drone for Photography is FANTASTIC! So many new and unique compositions!

In this video I finally photograph an incredible tree that would have been impossible to do on foot BUT thanks to my Drone it became possible! I go through the Drone Camera settings and then dive into Lightroom to create a HDR and finally into Photoshop and jump in and out of Topaz Studio 2 to create a painterly effect.

Hope you enjoy it
Glyn

The Lone Tree and my Drone - An Obsession

This tree has become a bit of an obsession.

I first noticed it when helping friends move home. They didn’t move far. Just further down the lanes in Mid Devon but to a beautiful new spot. So incredibly peaceful. The silence only broken by the sound of the wildlife and that’s to be relished.

It was when driving through the lanes on the back and forth trips I saw the tree high up on a hill, all alone. Couldn’t decide if it felt proud or lonely. It was screaming out to be photographed though.

With it being across a ploughed field perched on top of a hill in another field and quite some distance from the lane I’d stopped in, there was no way to get close on foot. But then I do have a drone. That could work.

I was thinking of maybe doing a long exposure with the clouds over the top of the tree but I’ve lost count how many times I’ve headed over when I thought conditions were right. It’s only a short drive. Well 30 minutes-ish from home but incredible how in such a short journey the conditions can change. Maybe that’s just a Devon thing.

I tried an evening shot with the setting sun but got there a little too late. Didn’t work out too bad though I guess.

Then followed several more aborted missions.

The other day though things started to slot into place.

Blue skies. Fluffy white clouds. No wind. Well…very little.

Using my DJI Air 2S Drone, I took off vertical from where I’d parked up to make sure there were no livestock over the other side hill. Didn’t want to disturb them or worse still…scare them.

All clear.

Set the drone to take 5 Raw photographs at 5 different exposures. Made a HDR image in Lightroom.

Originally thought about just including the tree and the arc of the hill.

Changed my mind and included part of the ploughed field.

Glad I did.

Edited the resulting file in Lightroom and Photoshop.

Finished off with one ‘look’ using Topaz Studio 2.

Hope you like it.

I’ll do a Behind the Scenes video showing this on my YouTube Channel.

I'M ADDICTED!!! 📷 Long Exposures by the Sea (HOW TO) BASIC to BEAUTIFUL 😍

It's incredible how using a long exposure can completely transform the look and feel of a location.

In this video I take you through the Photography showing how a 30 second long exposure can smooth out waves to create a glass like surface, to the retouching in both Lightroom and Photoshop, also showing how to make selections and cuts with one slider.

Enjoy,
Glyn

WORTH THE RISK? Taking Photographs over the SEA with my Drone

In this latest video I take you behind the scenes from the first day with my new drone; the DJI Air 2S as I dare to fly it out over the Atlantic Ocean in Cornwall to capture a photograph that simply would not be possible without it…