kit

Returning to Composites: Ragnar Viking Portrait

It’s been a good few years since I did any compositing but recently I’ve been getting the urge to get back to it again. I don’t know if it’s because of all the updates that have come into Photoshop over the past few years or what, but something is drawing me back to start working in this area again … and I’m really excited about it.

So rather than just start creating random images, I’ve taken my own advice and decided on a project that brings together my photography, retouching and something outside of that world that I have a genuine interest and fascination with … and that’s Vikings. I’m a BIG fan of the Vikings Drama Series on Amazon Prime with incredible characters like Ragnar Lothbruk and Ivor the Boneless.

So not being one to hang around I started gathering ideas for the first pictures I wanted to work on and so for this I made use of technology that wasn’t available a few years ago when I was last doing composites … Adobe Firelfy AI and the ‘Text to Image’ technology.

This is such an incredibly useful piece of technology for coming up with concepts by simply writing your idea.

So using the Generate Image function in Photoshop I wrote …

Viking with beard and plaited hair and holding an axe stood on cliff looking down onto the sea

… and this is just some of the results that were created …

Now with images of what ideas I had in my head it was so much easier to first of all message my friend Simon Fowler aka Foxy and send him a picture of what I wanted to create of him as a Viking.

Then it was time to source the appropriate clothing for Foxy to wear, and for that I headed to Marigold Costumes in Cardiff and arranged to meet Simon and another friend Anthony Crothers there.

I’ve used Marigold Costumes a few times in the past for other photo shoots as there’s such a huge choice of costumes, and sure enough within no time we’d sorted out what was needed …

With clothing sorted it was then just a few days until the gang were all together in the studio for the photo shoot.

Here’s a look at the set up for the first image which is the one where the Viking will be looking down from the cliffs onto the sea below …

Doing this using the LED Constant Lights made it so much easier for everyone to see what was being captured … before it wss captured. It also made setting up so incredibly easy.

kit used:

To the front of Foxy I used the light and soft box combination below …

This was used to mimic the light / highlights coming from the sun.

Now when it comes to composting, I was always someone that liked to get the backgrounds first and then photograph the model / subject. I did this because having the background first meant I then had a light style and direction to mimic in the studio.

However I knew where I was going to photograph the background location … Hartand Quay in North Devon.

This is a location I have been to many times and know really well. It’s perfect for the picture I had in mind. I also had a good idea of where the sun would be located at a certain time of day which is why I positioned the light as I did to the front of Foxy.

I did check using the PhotoPills App though just to be sure …

And here’s one of the ‘out of camera’ shots, which as you can see shows that I also photographed Foxy against a grey background.

The reason for this is two-fold; firstly it contrasts against Foxy so makes it easier to cut him out later in Photoshop. Secondly, because it enables me to capture the real cast shadows, and being grey gives me the option of using a blend mode later in Photoshop to retain them and have them appear in the final composite rather than me paint them in …

The background / scene

As for the background I intend to add the photograph of Foxy into, I headed over to Hartland Quay over this past weekend with my friend Brian Dukes.

Conditions ended up being perfect with the clouds and incoming tide, and in addition to getting the shots I wanted, it made for a great day hanging out with a close friend in a fabulous location …

back to the studio

Anyway, back to the studio, there was one more shot I wanted and that was with Foxy stood facing directly towards the camera. I had an idea of creating a movie poster type of picture.

the set up

For this picture I changed the set up having rim lighting on either side of Foxy and a single light infront …

I really should get another 1x4 Softbox to use for the rim lighting, but as it happened, just using the 3x4 softbox and positioning it facing directly across the back of Foxy and him slightly forward worked out just fine. The other 1x4 I positioned on the opposite side, again facing directly across the back of Foxy.

The light directly to the front of Foxy was another Westcott L60-B Bi Color LED and this one was in a Westcott Rapid Box Switch Medium Octa (36”).

With it being on a C-Stand and on a boom, it was easy to get the camera on the tripod directly below so the light was on camera axis.

Here’s the out of camera photograph …

And below is the final edit.

Genuinely loved working on this adding textures, shadows on the background, dodging and burning, lighting effects, colour grading and creating the text from scratch along with the glow from the fire below and the sparks.

It was so much fun seeing how the updates can help with what I’m doing such as using Adobe Express for the fire and sparks and also Generative Fill AI to change the look of the axe head. Loved it!

So that’s my new Viking Series officially started and I cannot wait to get working on the other picture from this photoshoot.

Needless to say I’ll share it once finished. I’ll also look at creating some tutorial walk-throughs going through all of the retouching for both.

It sure feels good to be back doing this kind of work 😃 and as always a BIG thank you to my ever supportive friends … Ian Munro, Foxy, Anthony Crothers, Gerwyn Williams and Brian Dukes.

SONY ... WHAT WERE YOU THINKING? 🔥 ZV-E1 Overheating FIXED but it COST ME MONEY

I love my ZV-E1 for filming video content and for LIVE Streaming but even in the lowest recording settings it overheats!

This is now fixed though thanks to a Cooling System I weas recommended …

Links mentioned in the video …

Tilta Cooling System ( LINK )

Tilta Full Camera Body Cage ( LINK )

My ULTIMATE Desktop Set Up for Photography, Content and Zoom ( YouTube LIVE )

I'm often asked about the kit / hardware I use every day for photography , content and live streaming so in this video I'll go through the lot; EVERYTHING I use that makes editing (photography& video) and streaming so much easier.

You can see all of the kit I go through over on my GEAR page.

RØDE Wireless GO II ... A small but BIG Improvement

*Note … this article contains Affiliate Links

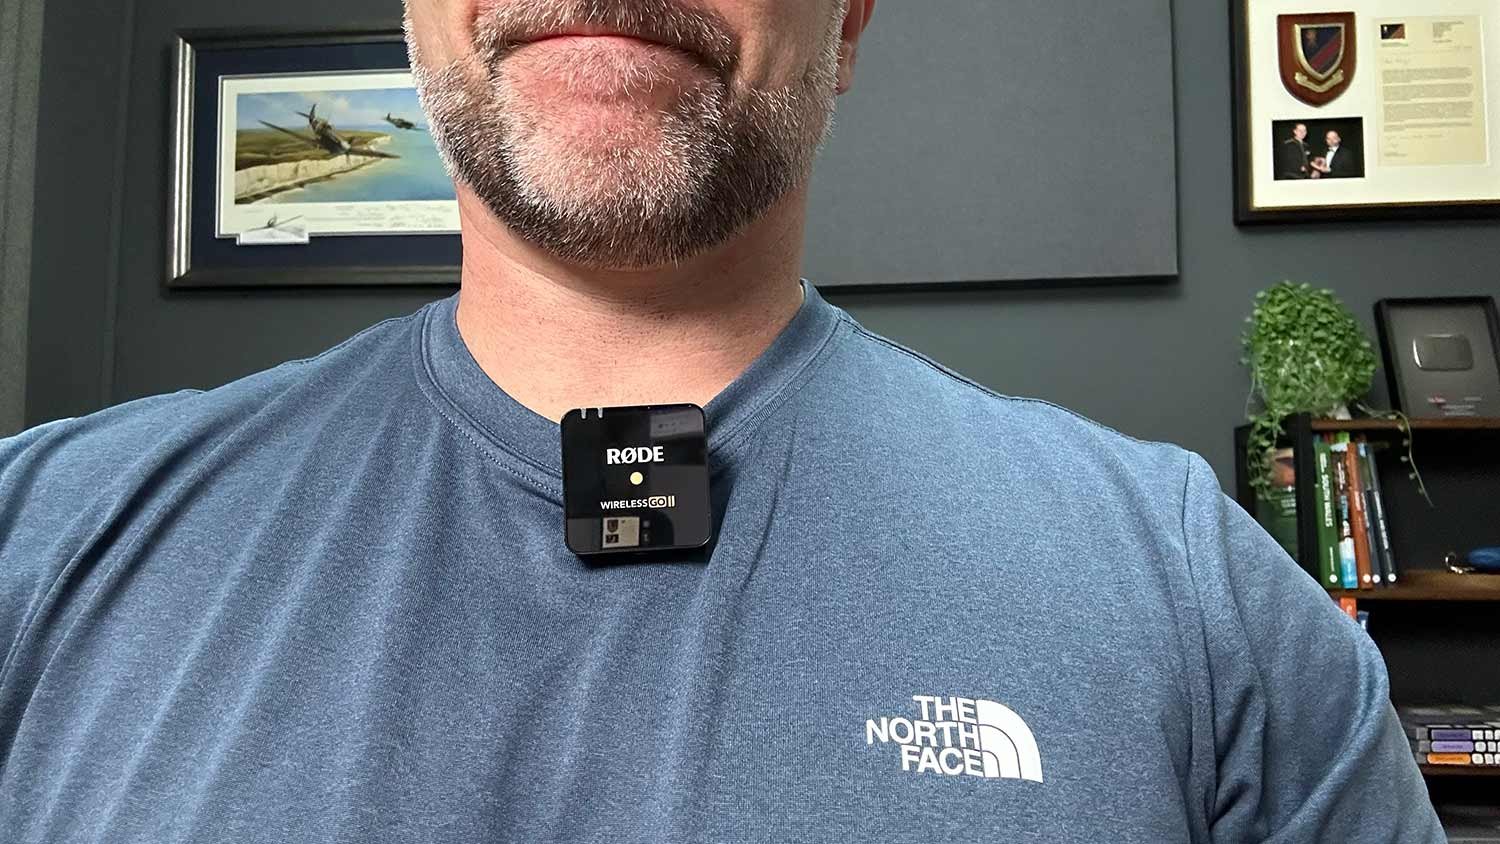
I love my RØDE Wireless GO II microphones but just over a year ago I (temporarily) moved away from using them for 2 main reasons …

  1. The Clip

  2. No Charging Case

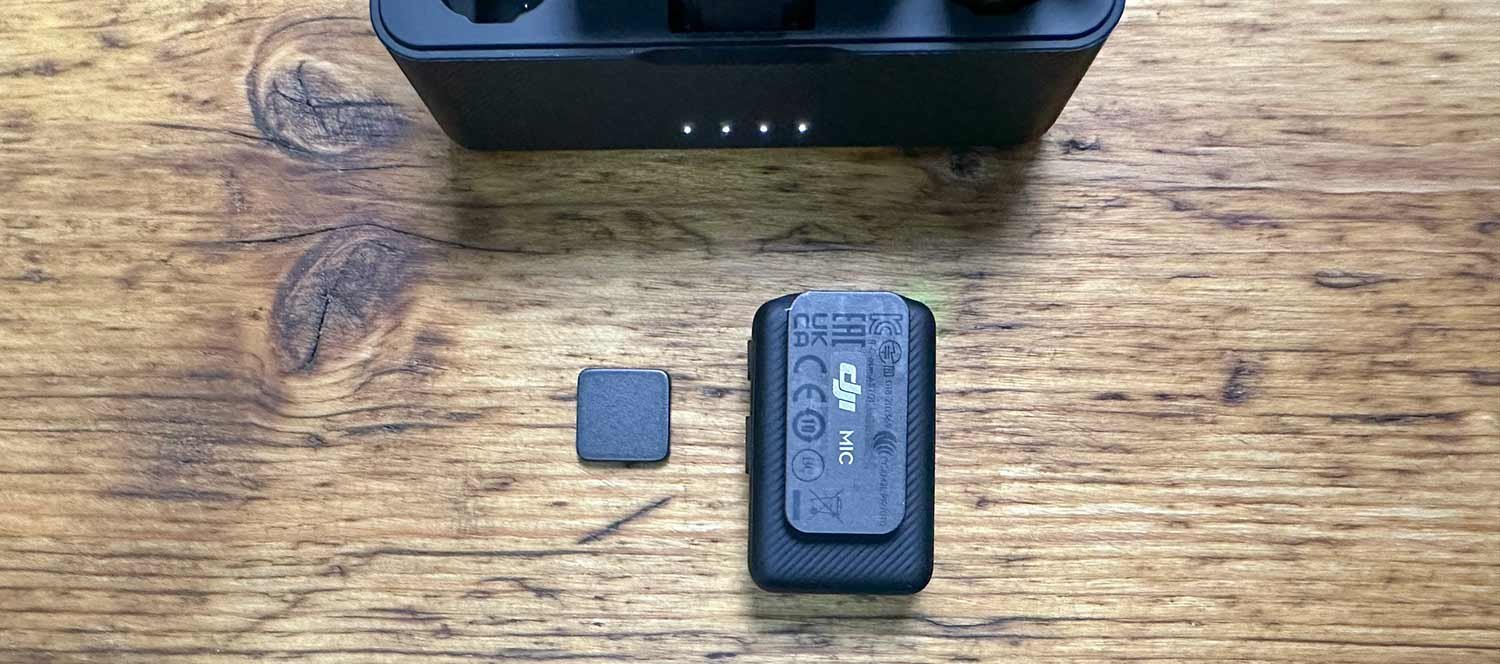
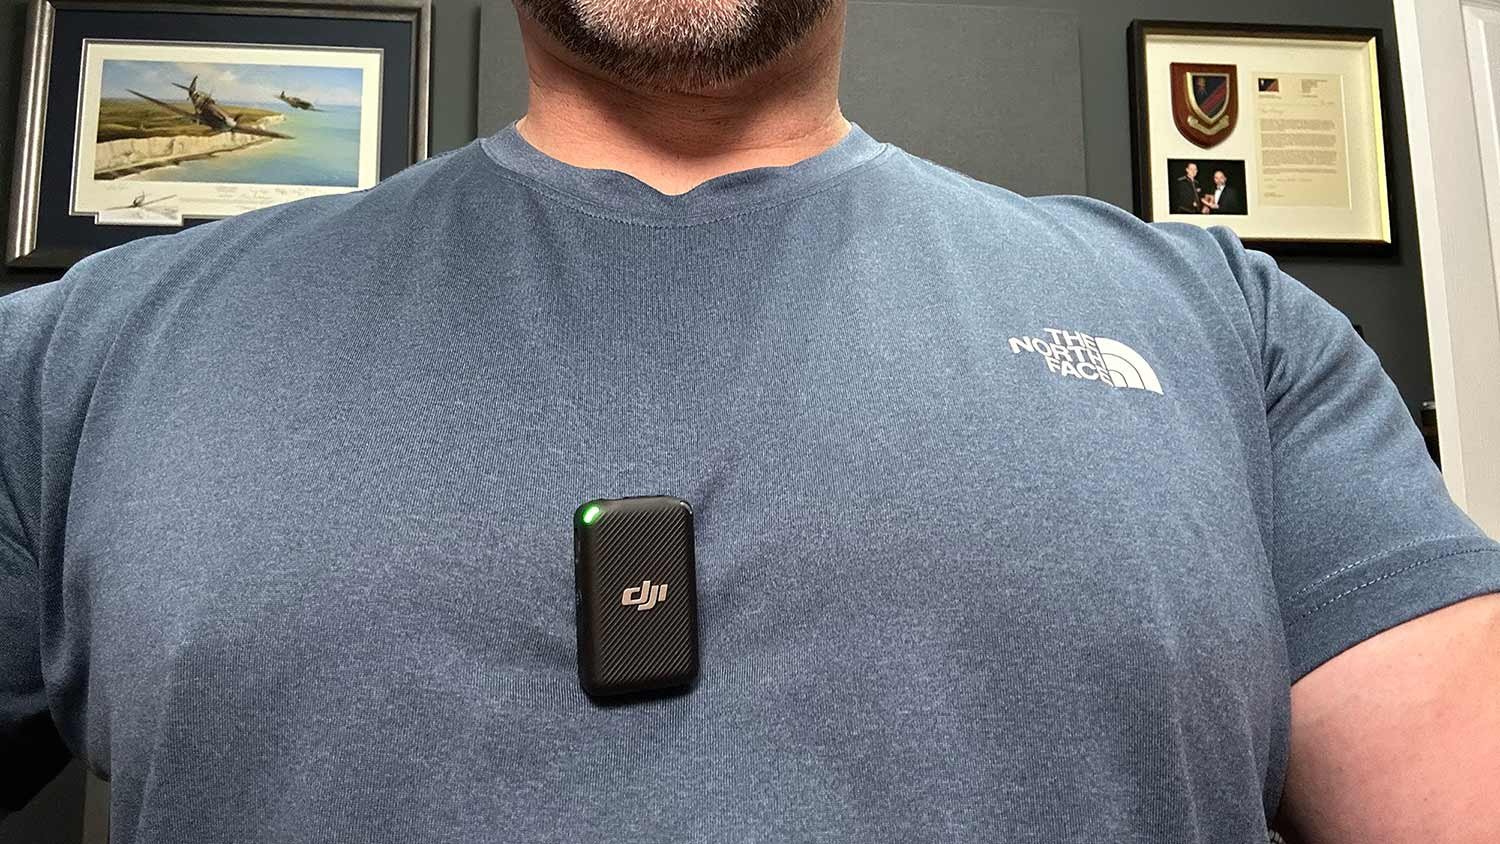
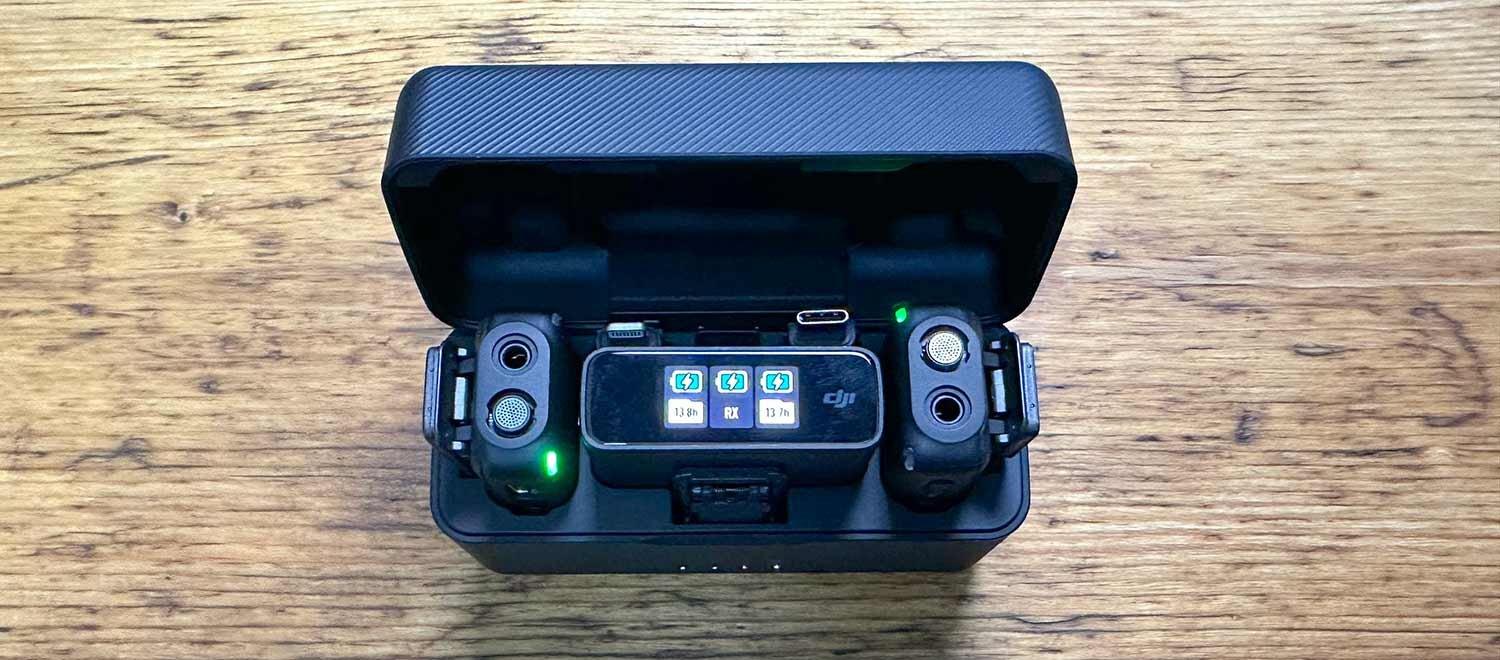
I ended up buying the DJI Wireless Microphone set which like the RØDE comes complete with 2 x Transmitters, 1 x Receiver BUT also a magnetic clip AND a charging / storage case.

So what’s the big deal about a magnetic clip ?

Well, it’s the fact that you can mount the transmitter so much easier onto your clothing.

With a standard clip you need a lapel for it to hold onto which is fine if you have one, otherwise you need to clip it onto your neckline / collar if you’re wearing a T-Shirt.

The problem doing this is that as you move your head a little, your chin / neck can rub against the transmitter.

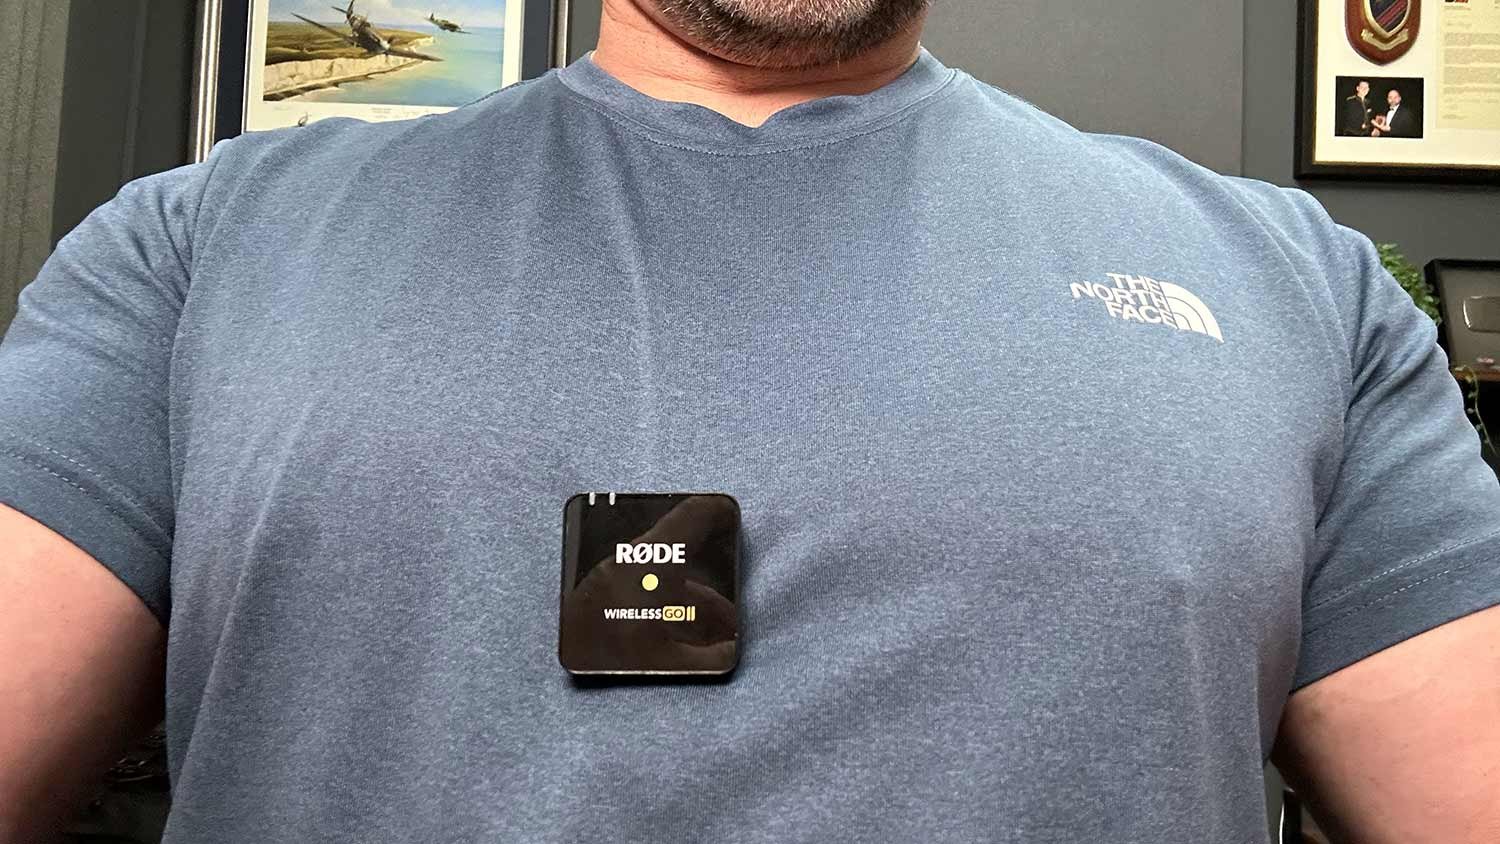
Having a magnetic clip means you can put the magentic block on the inside of your clothing and the transmitter on the outside, attaches to it and you’re good to go.

This along with the charging / storage case you would think would make the DJI Wireless Microphones my go to, however I’ve never been happy with the audio quality from them.

The microphones seem to have quite a bad ‘noise floor’ in my opinion (and others I’ve seen) and this gets even worse when you increase the gain, which you need to do. This ends up with you having to do extra processing on the audio to improve it in Adobe Audition, and even then the audio just never sounds as good as the RØDE.

Happy Accident

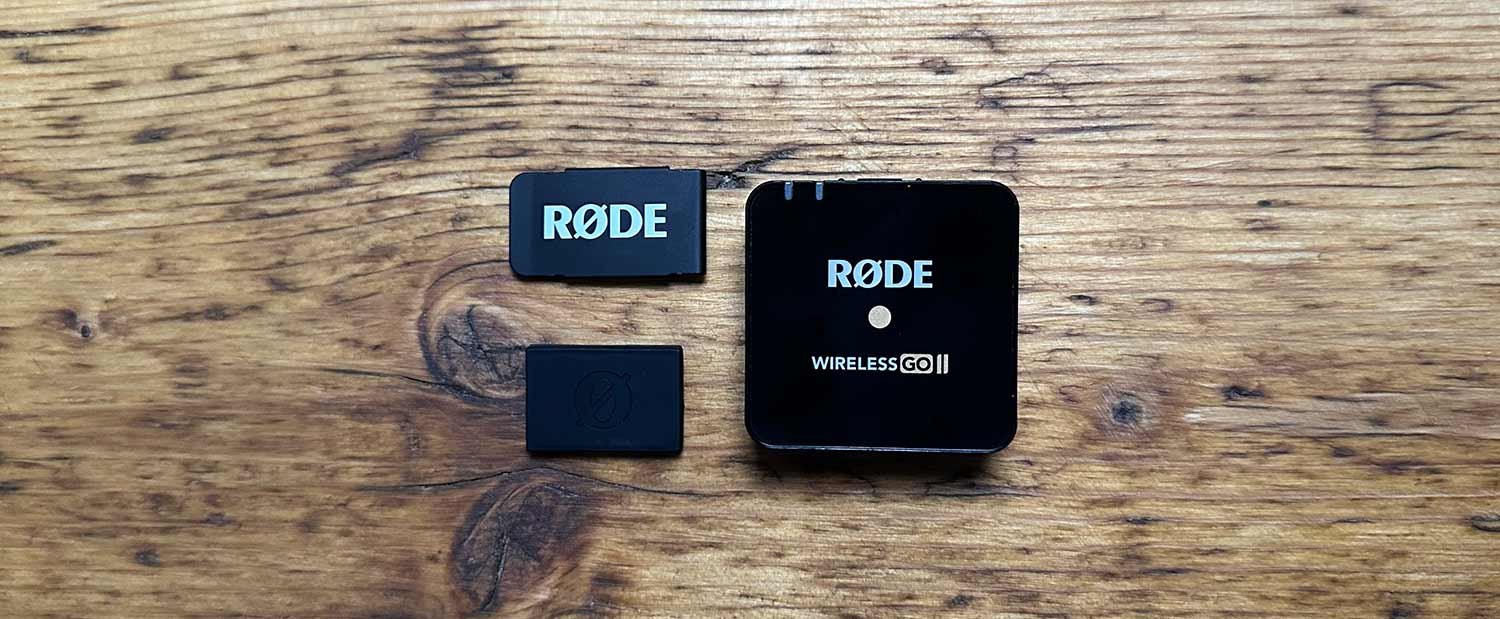
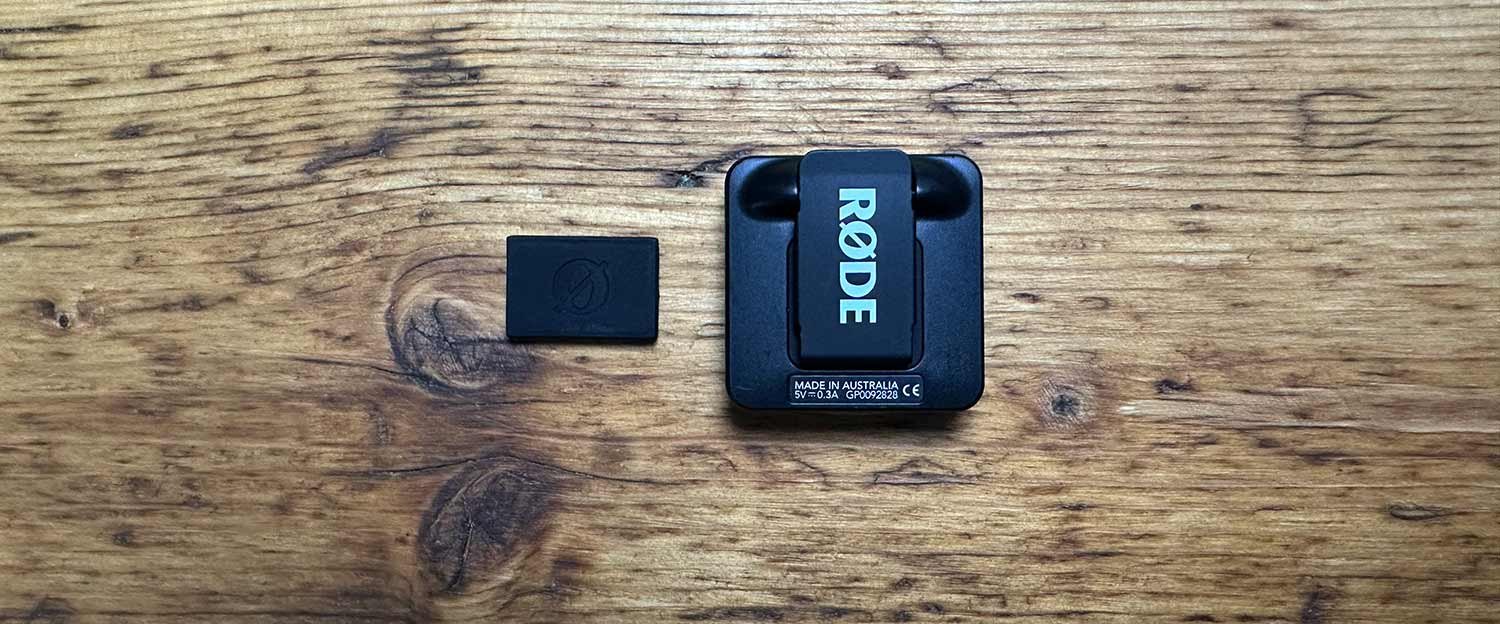
So very recently whilst browsing the RØDE website looking at some new products (RØDE NT1 5th Generation Microphone and the RØDE Caster Duo) purely by chance I ended up scrolling through the Accessories section and that’s when I stumbled upon this … RØDE MagClip GO Magnetic Clip attachment for the RØDE Wireless GO II and Wireless ME …

This is EXACTLY what I’ve been looking for; in fact I’d even drawn up a sketch of the very same and was going to get in touch with RØDE to see if they would make something like it, but it turns out they already have and it works a treat!

All you have to do is to slide the metal sleeve over the clip on the Wireless GO II and then use the the magentic block just as you would with the DJI WIreless Microphones to attach anywhere on your clothing.

Fantastic!

Now you might be thinking … “ Why not just stick the transmitter in your pocket and use a Lav Mic? “

Well there’s a couple of reasons …

  1. Convenience. Having to feed a cable through your clothing so that you can have a Lav Mic, is well, a pain in the a$$. The cable can get caught on clothing as you move, you have to keep taking the transmitter out of your pocket to turn it off and on inbetween recordings and all of this just makes it less user friendly and again being honest, less desire to use them. Just being able to quickly place the transmitter on your clothing and be up and running is so much better!

  2. A decent Lav Mic isn’t cheap. These transmitters are superb. The audio quality is outstanding so I don’t want or need to have to buy an extra Lav Mic to fit into them if I don’t have to. Plus the quality of the transmitters being as good as they are I wouldn’t want to use a cheap Lav Mic; that would be like having a VERY expensive lens and putting a cheap ND filter on the front of it.

The MagClip GO works so well and makes these great little microphones even better, and at around £15 I totally think it’s worth it.

Needless to say, I’m back using my RØDE Wireless GO II’s and VERY happy.

Oh and the charging / storage case … watch this space 😉

My NEW Favourite Phone Holder for my Tripod

Found my new favourite phone holder for mounting on my tripod … the ULANZI ST-27

Not exactly cheap but well worth it. VERY well made ( metal construction ). Slots straight into the ARCA mount on my tripod. Locks phone in place and separate turn knob to lock in vertical or horizontal.

Lately we’ve had few spells of high winds on the coast and I found that although the SmallRig I have been using is pretty stable on the tripod, the support for the phone itself I’ve never trusted 100%

This new holder though is rock steady on the tripod and the hold it has on the phone is VERY secure with a turn of the red metal dial The inner black metal dial you turn to lock the orientation of the phone ( vertical / horizontal )

. The fact that it is so small too is definitely a bonus!

Check it out on Amazon using the *link below …

*affiliate link

I PRINTED a 72" iPhone Photo and you WON'T BELIEVE THE RESULT !!!

Yes you read thar right … a 72” print of an iPhone photograph!

In this video I not only show ther print but also give you a look at the kit I used along with my favourite iPhone App for creating Long Exposure Photographs.

I also show what I used to upscale the original image more than 4 times, taking up to the final 72 inches!

The future of mobile photography is VERY exciting 📱😃

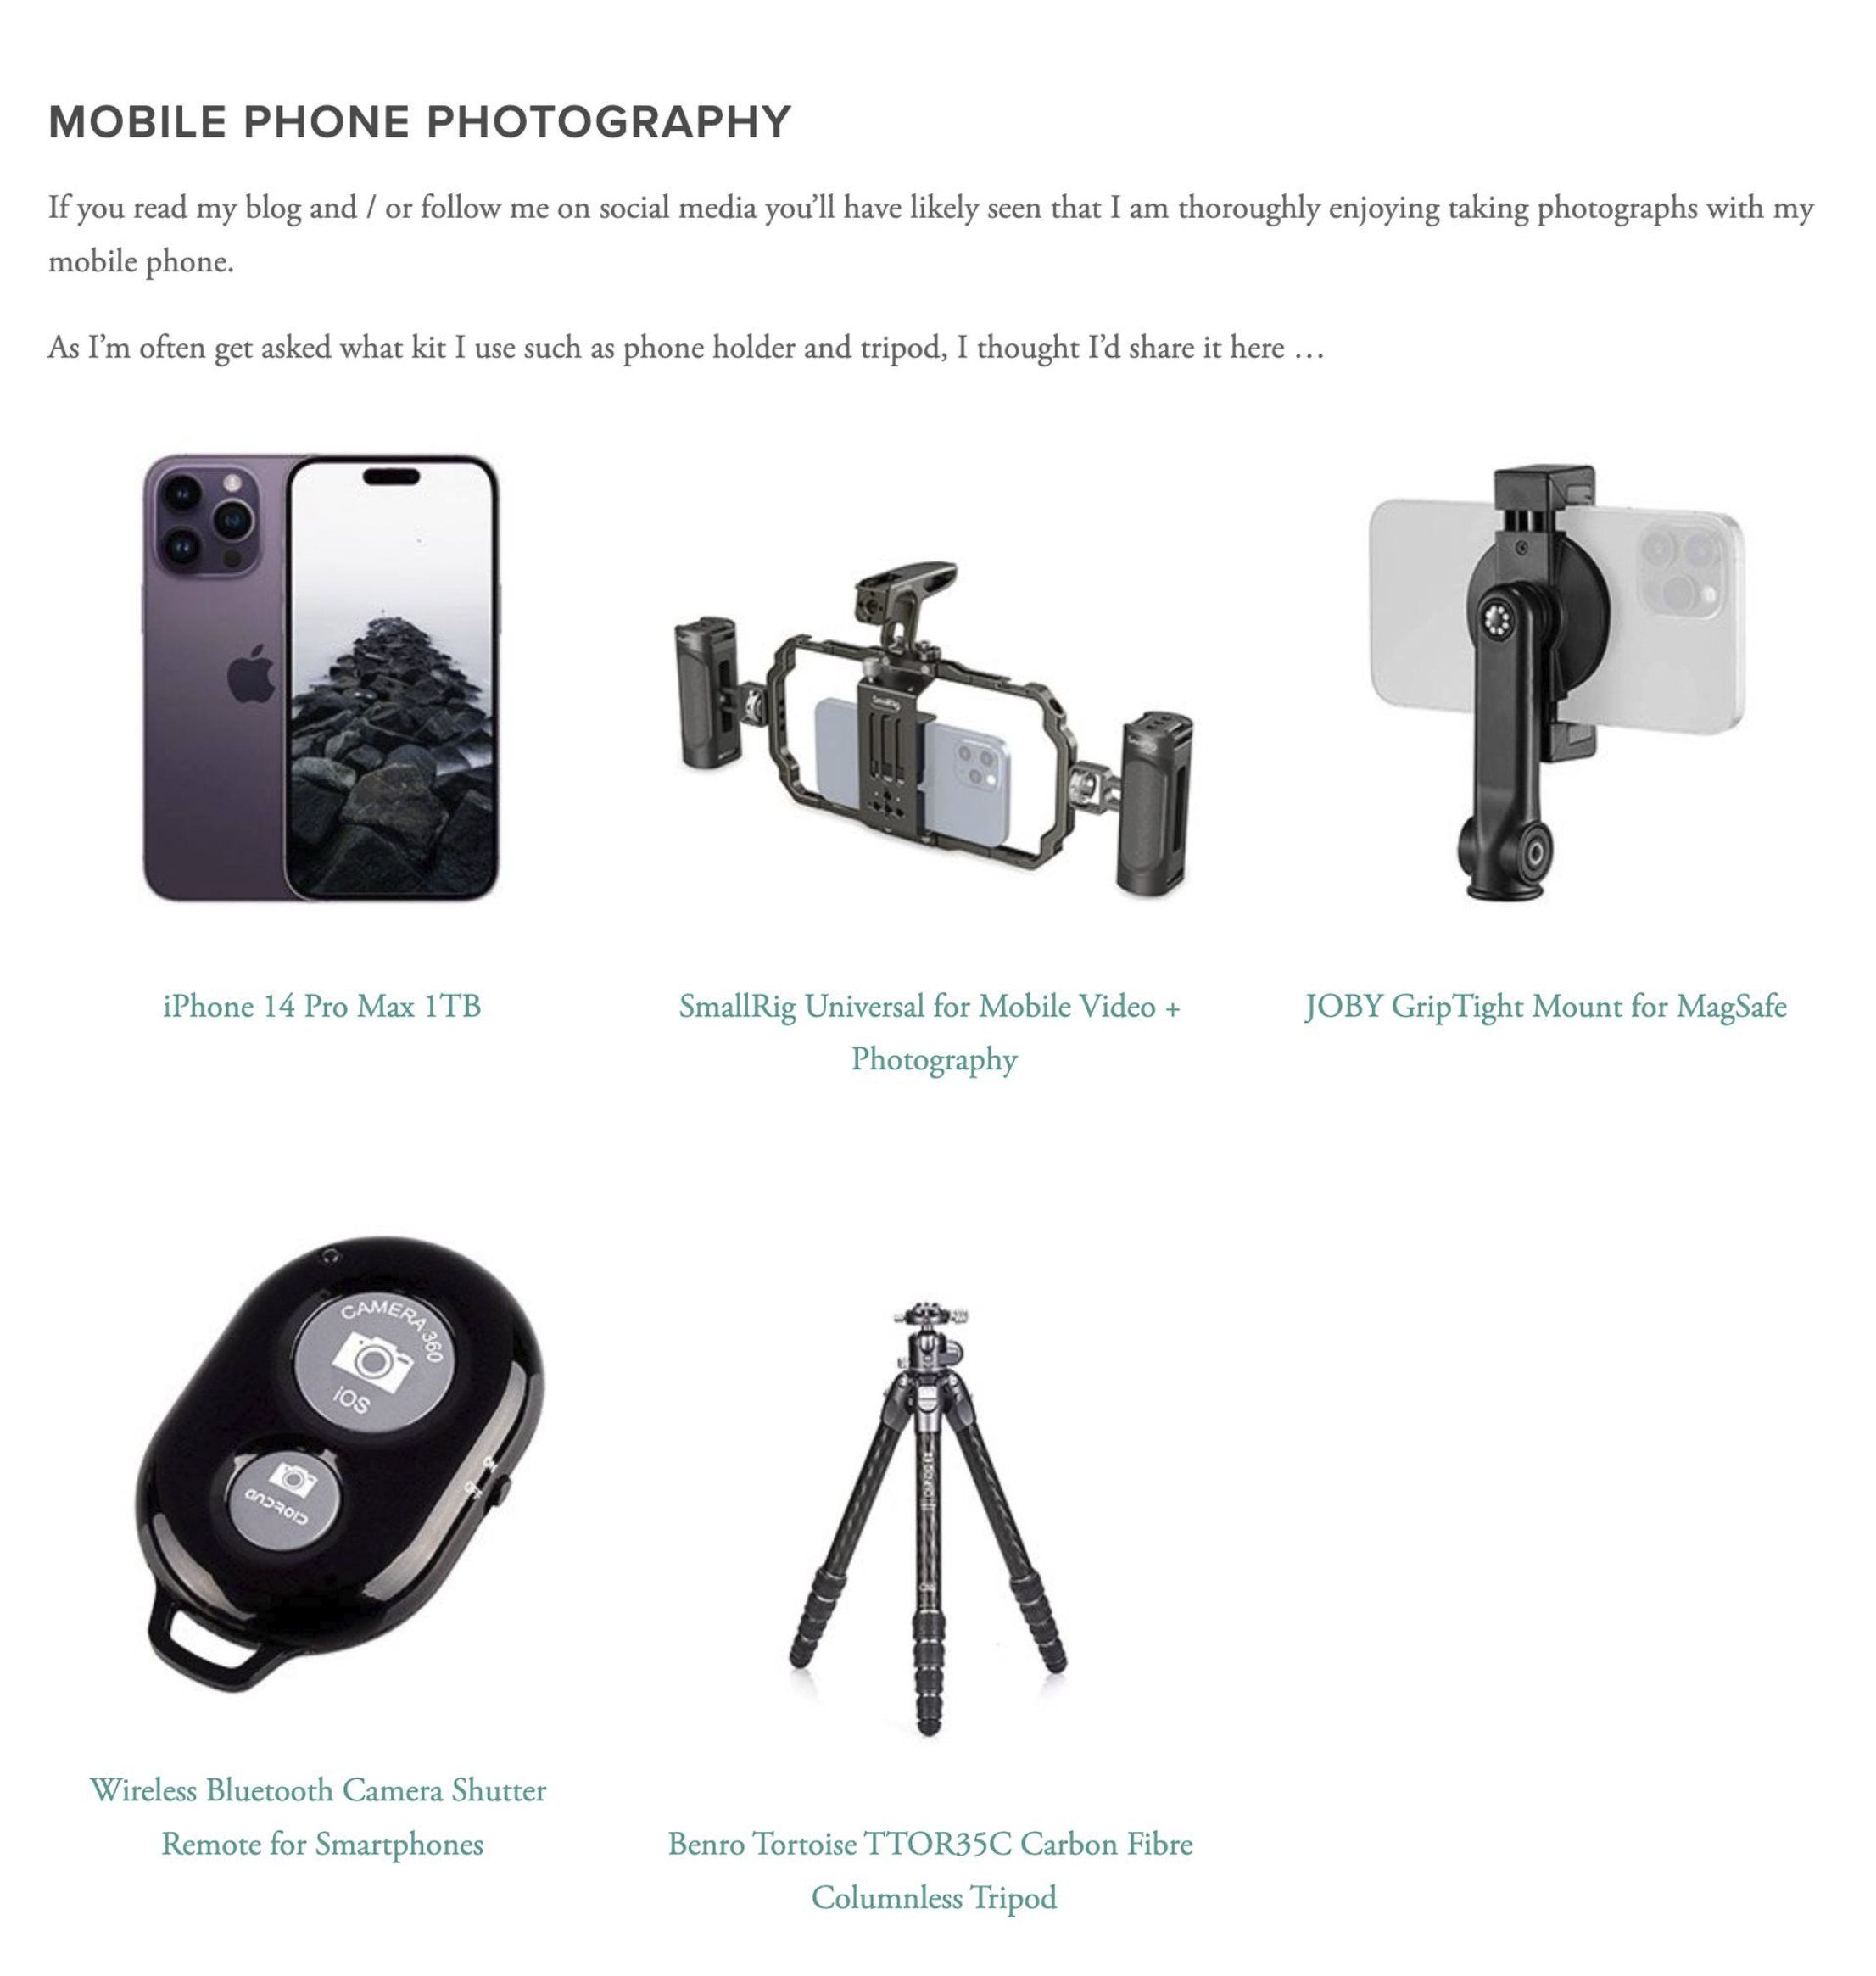
My Mobile Phone / Smartphone Photography Kit

With me doing more and more photography with my Smartphone (iPhone) these days, I often get asked what kit I use with it ... Phone Mount? Tripod? Trigger?

So I thought I’d share it here as well as adding it all into the GEAR Page where you’ll see ALL the kit I use for Photography and Video …

*To use the phone holders on my tripod, I purchased a few extra Arca Plates that screw into them

There’s also various apps I’m using so I’ll make sure to share details of those and any future kit I try out … especially as I intend to be doing some portrits using off-camera lighting triggered by my phone 😃

iPhone Photography: A Misty Morning at Lyme Regis in Dorset

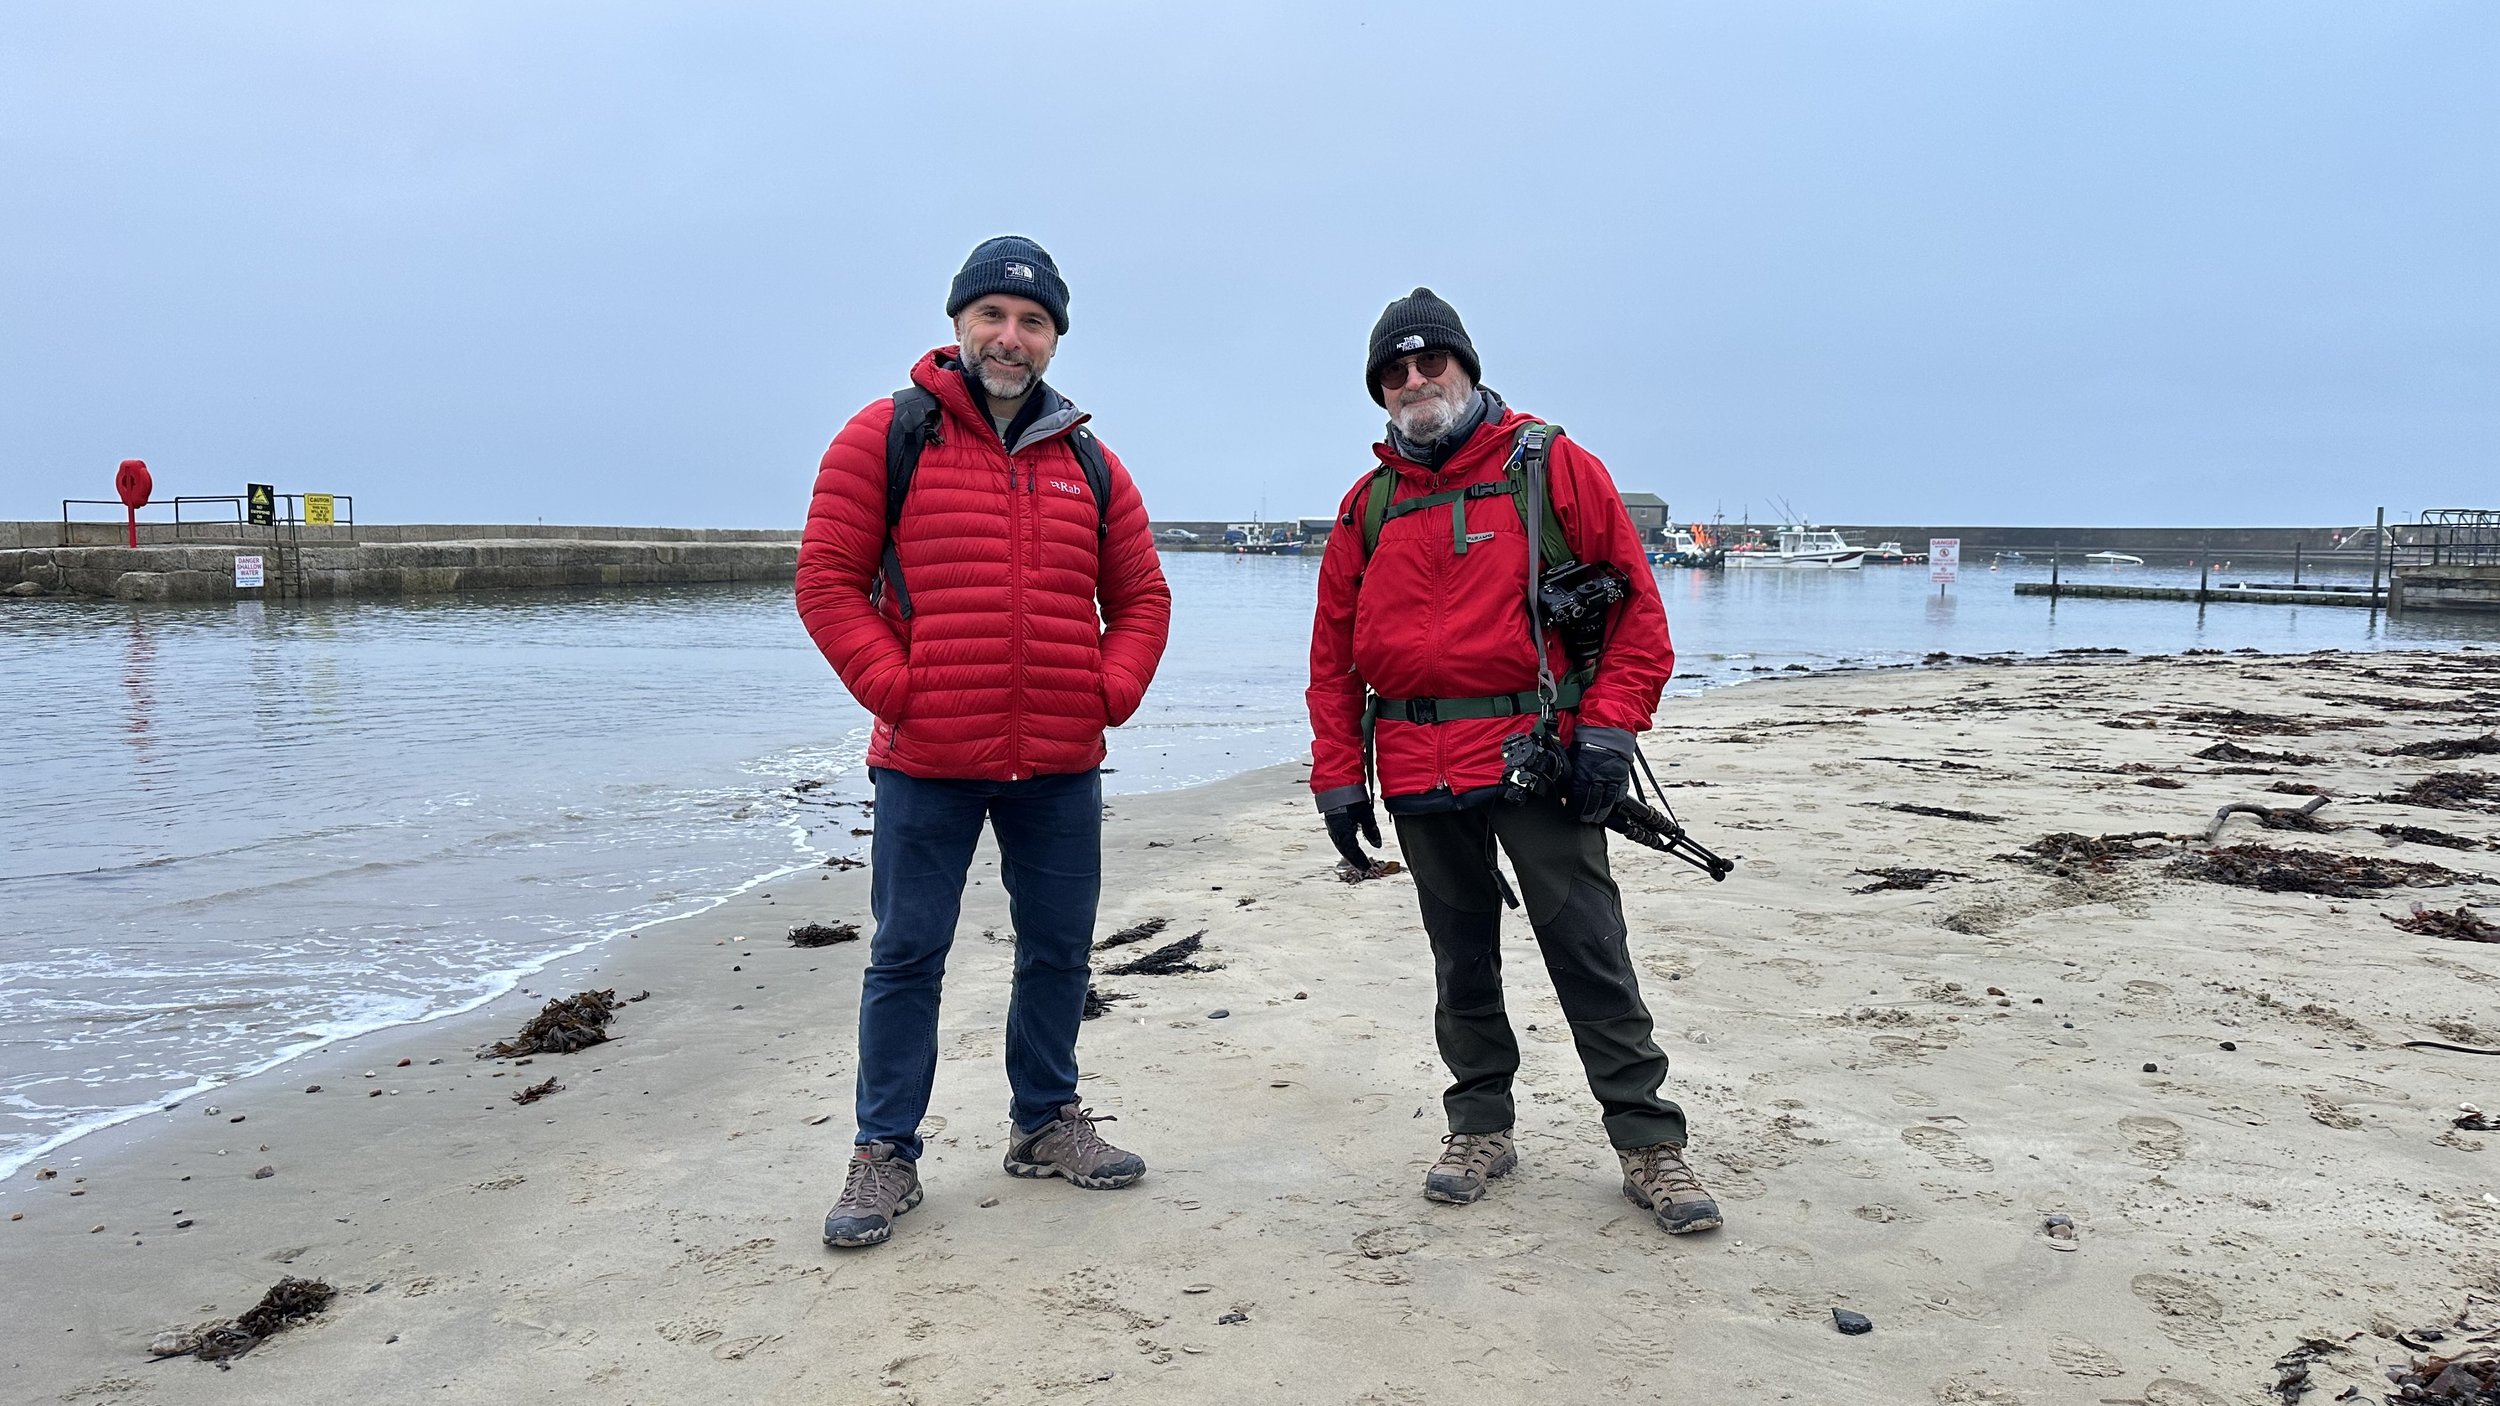
The misty conditions last Wednesday were nothing short of perfect for some minimalist photography, so I popped out early morning and took the short drive to meet up with my friend Steve Healy down at my favourite of all places, Lyme Regis.

True to the weather apps, the conditions were as predicted; a wonderful misty morning, an incoming tide with the surface of the sea as flat as a sheet of glass, hardly a breeze in the air and looking out across the sea, at times it was almost impossible to see the distant horizon line.

Absolutely Perfect!

I should have sent a memo about dress code 🤣

Taking along minimal kit as I did when photographing the Prince of Wales Bridge a couple of weeks back, I stuck with using my iPhone 14 Pro Max, but this time made use of my new JOBY MagSafe Mount ( LINK )

This worked an absolute treat holding my iPhone rock steady and was so incredibly quick and easy to adjust and rotate from portrait orientation to landscape orientation …

Long Exposure Photography was definitely order of the day to enhance the calm, relaxing feeling of the light and the mist, and of course smooth out the water surface even more.

I’ve a few long exposure apps installed on my iPhone at the moment that I’m testing out to see which I prefer, but on this morning I opted again to use EvenLonger …

For the image above, I used a 60 second long exposure.

We then moved along to The Cobb, which looked incredible amongst the mist and surrounded by a glass flat high tide …

The tide was particularly high this morning, meaning the groin at the far end of The Cobb was much less visible.

In this image and the one above, you can really see how the mist made the horizon barely visible, which when combined with a long exposure worked, I feel, so incredibly well …

In each of these images you will have spotted that there were Gulls flying. To include these, once I had taken the long exposure, I then jumped back to the regular camera on my iPhone and waited for the moment when Gulls flew through the frame.

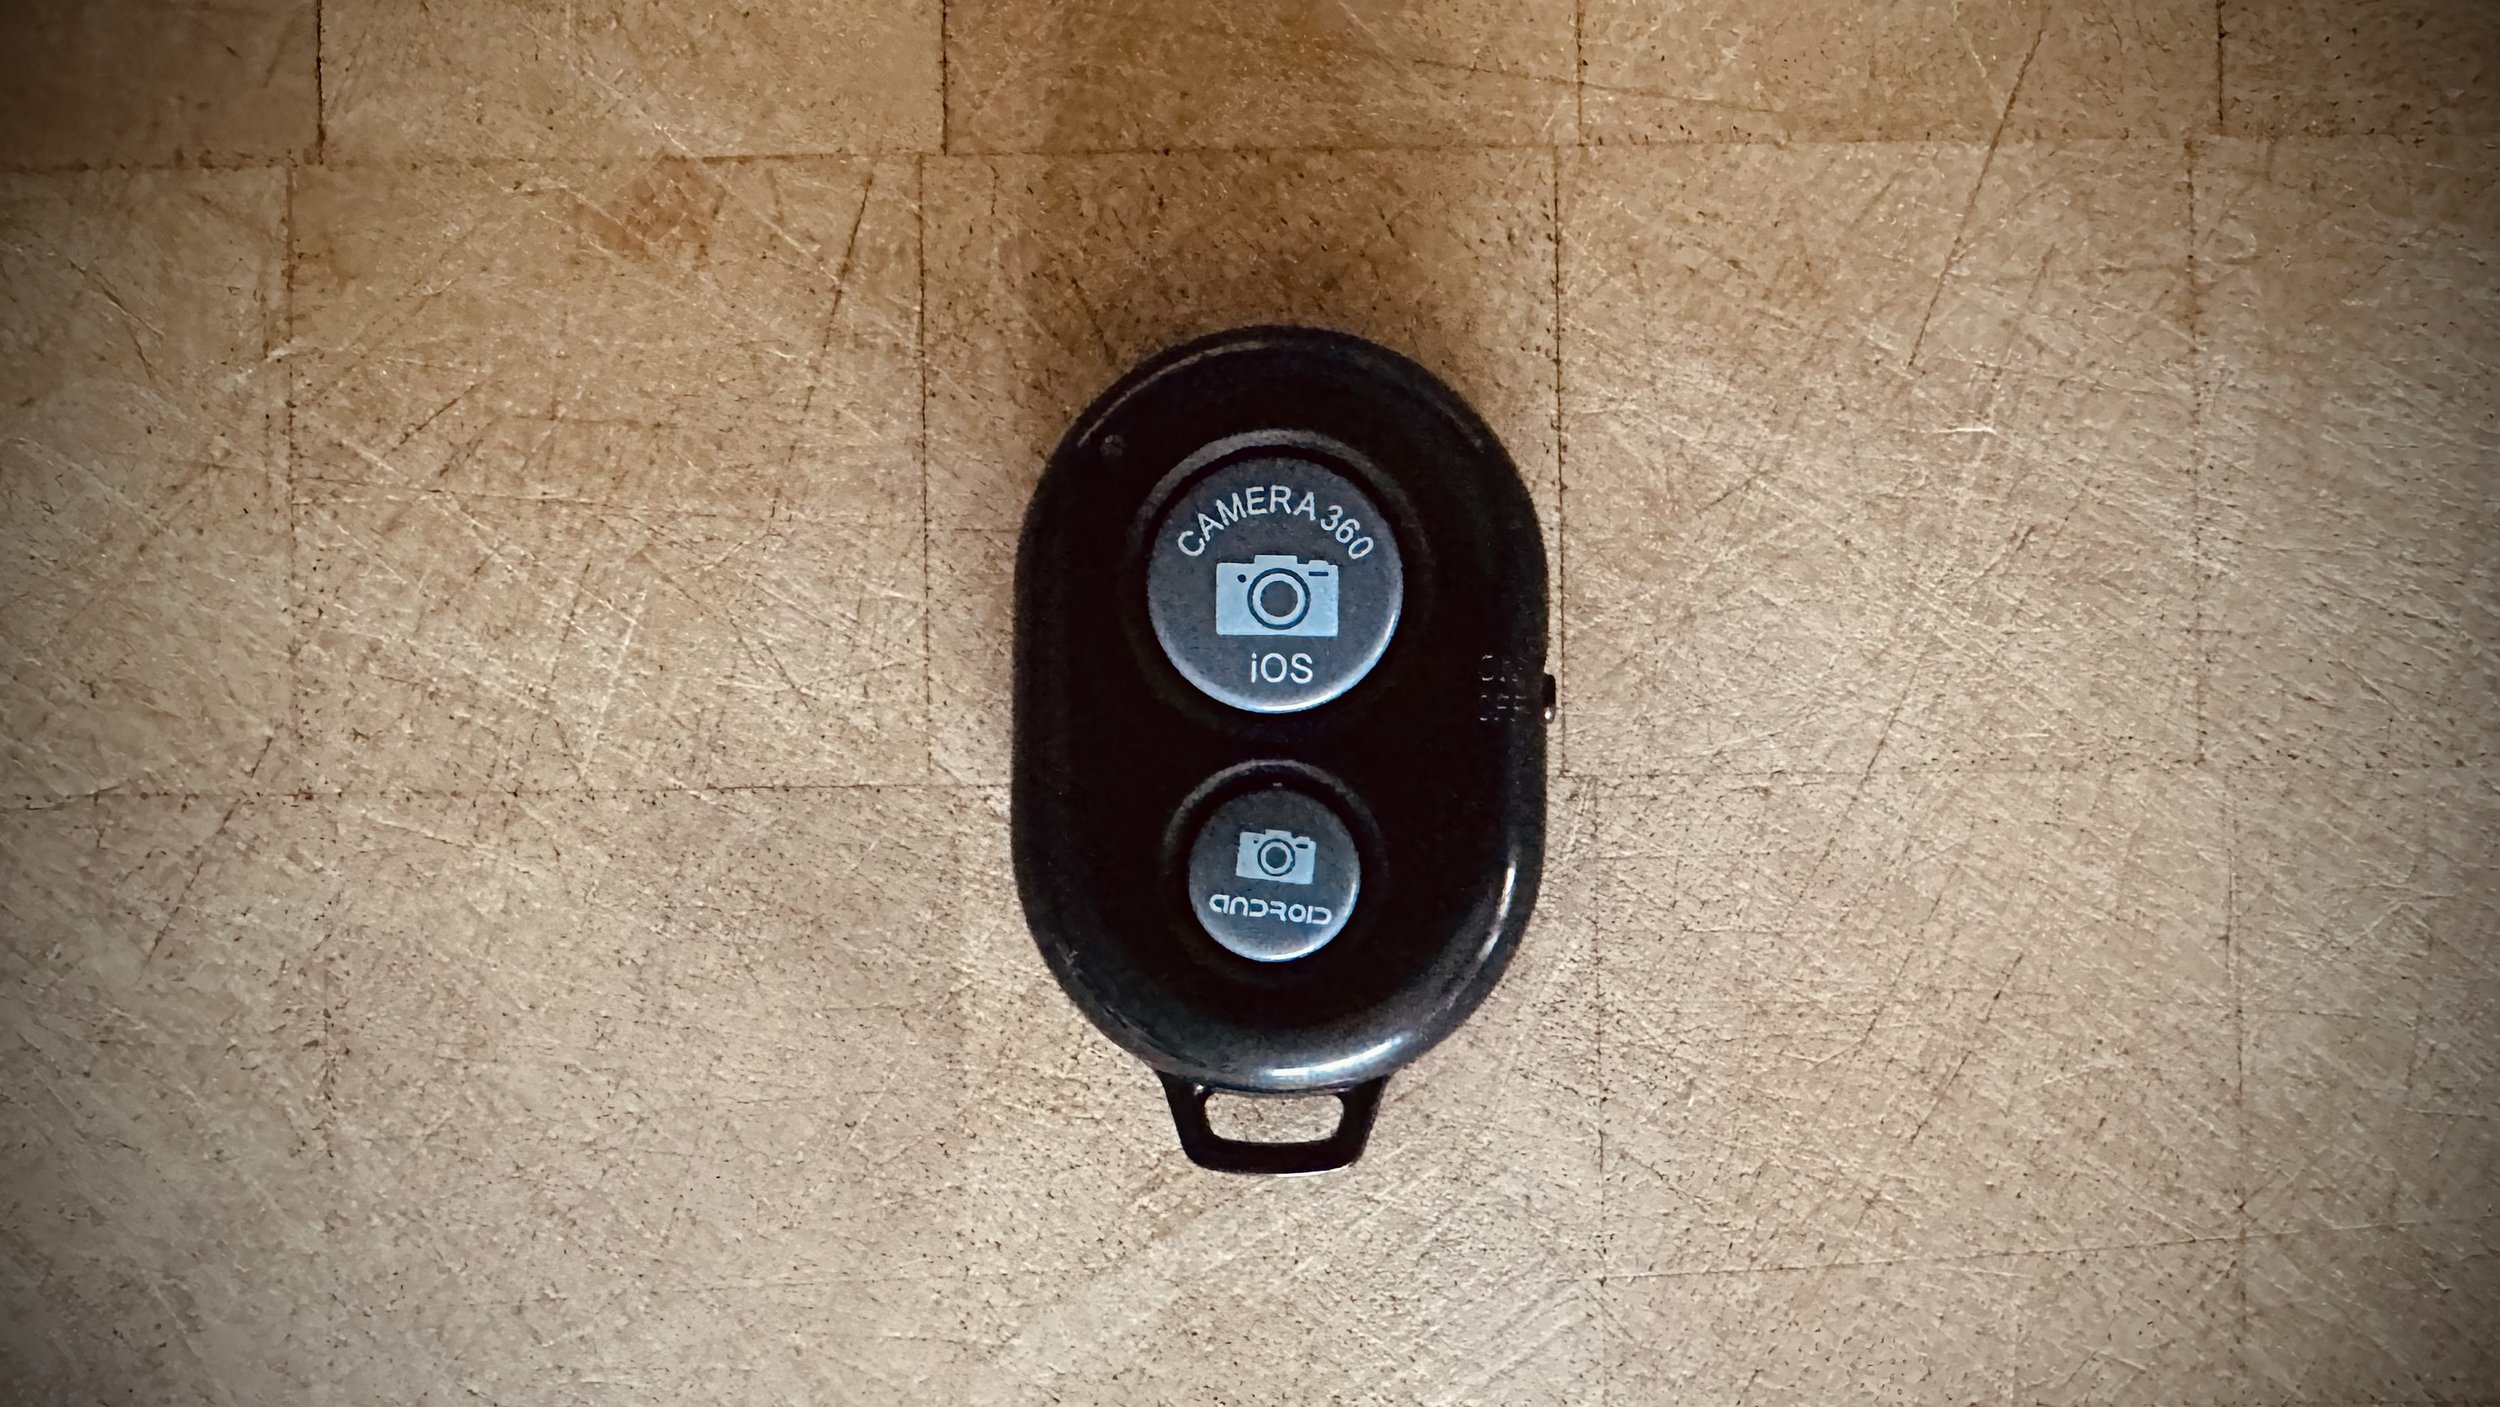
When they did I pressed the shutter a number of times using a Bluetooth Shutter Release which works a treat and only cost £3.99 off Amazon ( LINK )

99% of these images I edited in Lightroom Mobile and Photoshop on my iPad, but to add the Gulls I used Photoshop CC on my desktop as I needed to use a filter and (at the moment) that filter isn’t available in the mobile version of Photoshop.

That said though, the process was so incredibly easy editing on my iPad, and then because everything I do syncs automatically with every device I have Lightroom installed, I could then finish off on my desktop without having to export anything or import from memory cards.

Everything I do on any device be it my iPhone, iPad or Desktop, syncs across each other making it instantly available everywhere.

Oh and the text and graphics were added using Adobe Express …

So another incredibly relaxing morning out taking photographs with my iPhone.

Minimal kit. No swapping out lenses. No attaching filters. No cables.

All of this for me makes for such a wonderful experience, enabling me to relax and just enjoy being where I am and absorb the sights and sounds.

The experience of taking photographs just doesn’t get better!