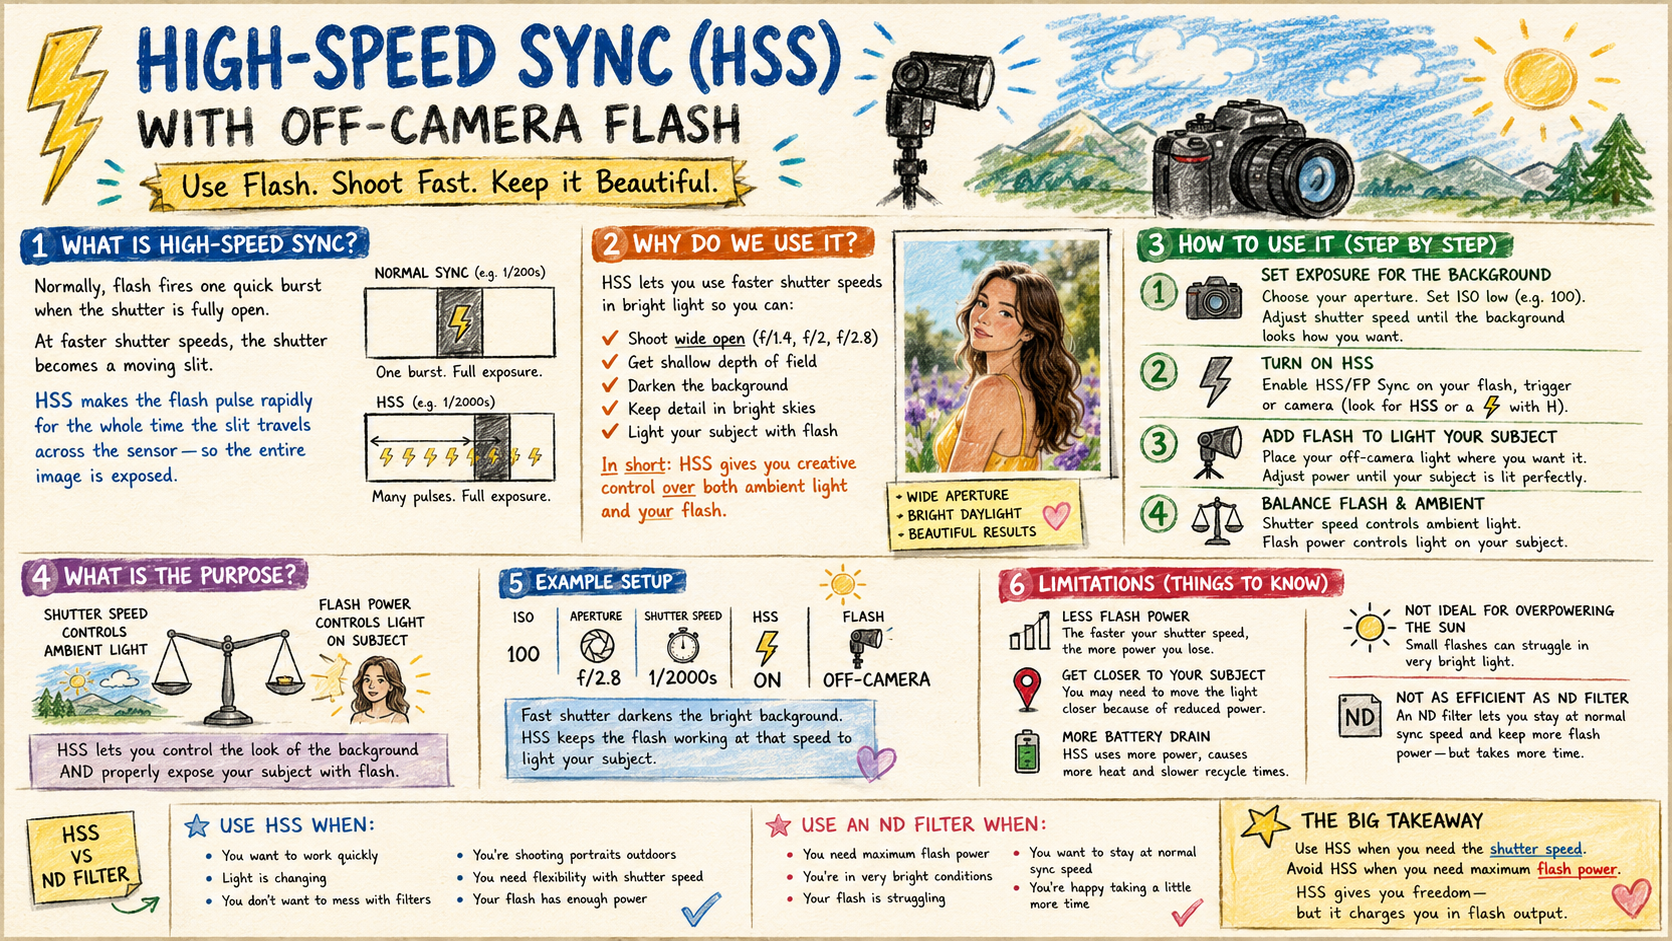

TTL has a bit of a reputation. People find it unpredictable, they get one shot that looks perfect and the next one that looks nothing like it, and they quietly go back to manual and never touch it again.
I understand why, but it's worth persevering, because TTL is not actually unpredictable. It's very consistent at doing the one thing it was built to do. The trick is understanding what that one thing is, and knowing when it's the wrong thing so you can step in. Once you have that, TTL stops being a mystery and becomes a genuinely useful tool.
So here is the whole thing in plain language.
What TTL is
TTL stands for Through The Lens; it's an automatic mode for your flash.
Instead of you deciding how much power the flash puts out, the camera and flash work it out for you, aiming to give your subject a sensible exposure.
The single most important thing to understand from the start is this … TTL is a flash mode, not a camera mode. It decides flash power; it does not decide your shutter speed, your aperture or your ISO. Those are still yours. Hold onto that, because it answers most of the questions people have about what overrides what.
How it works on a digital camera
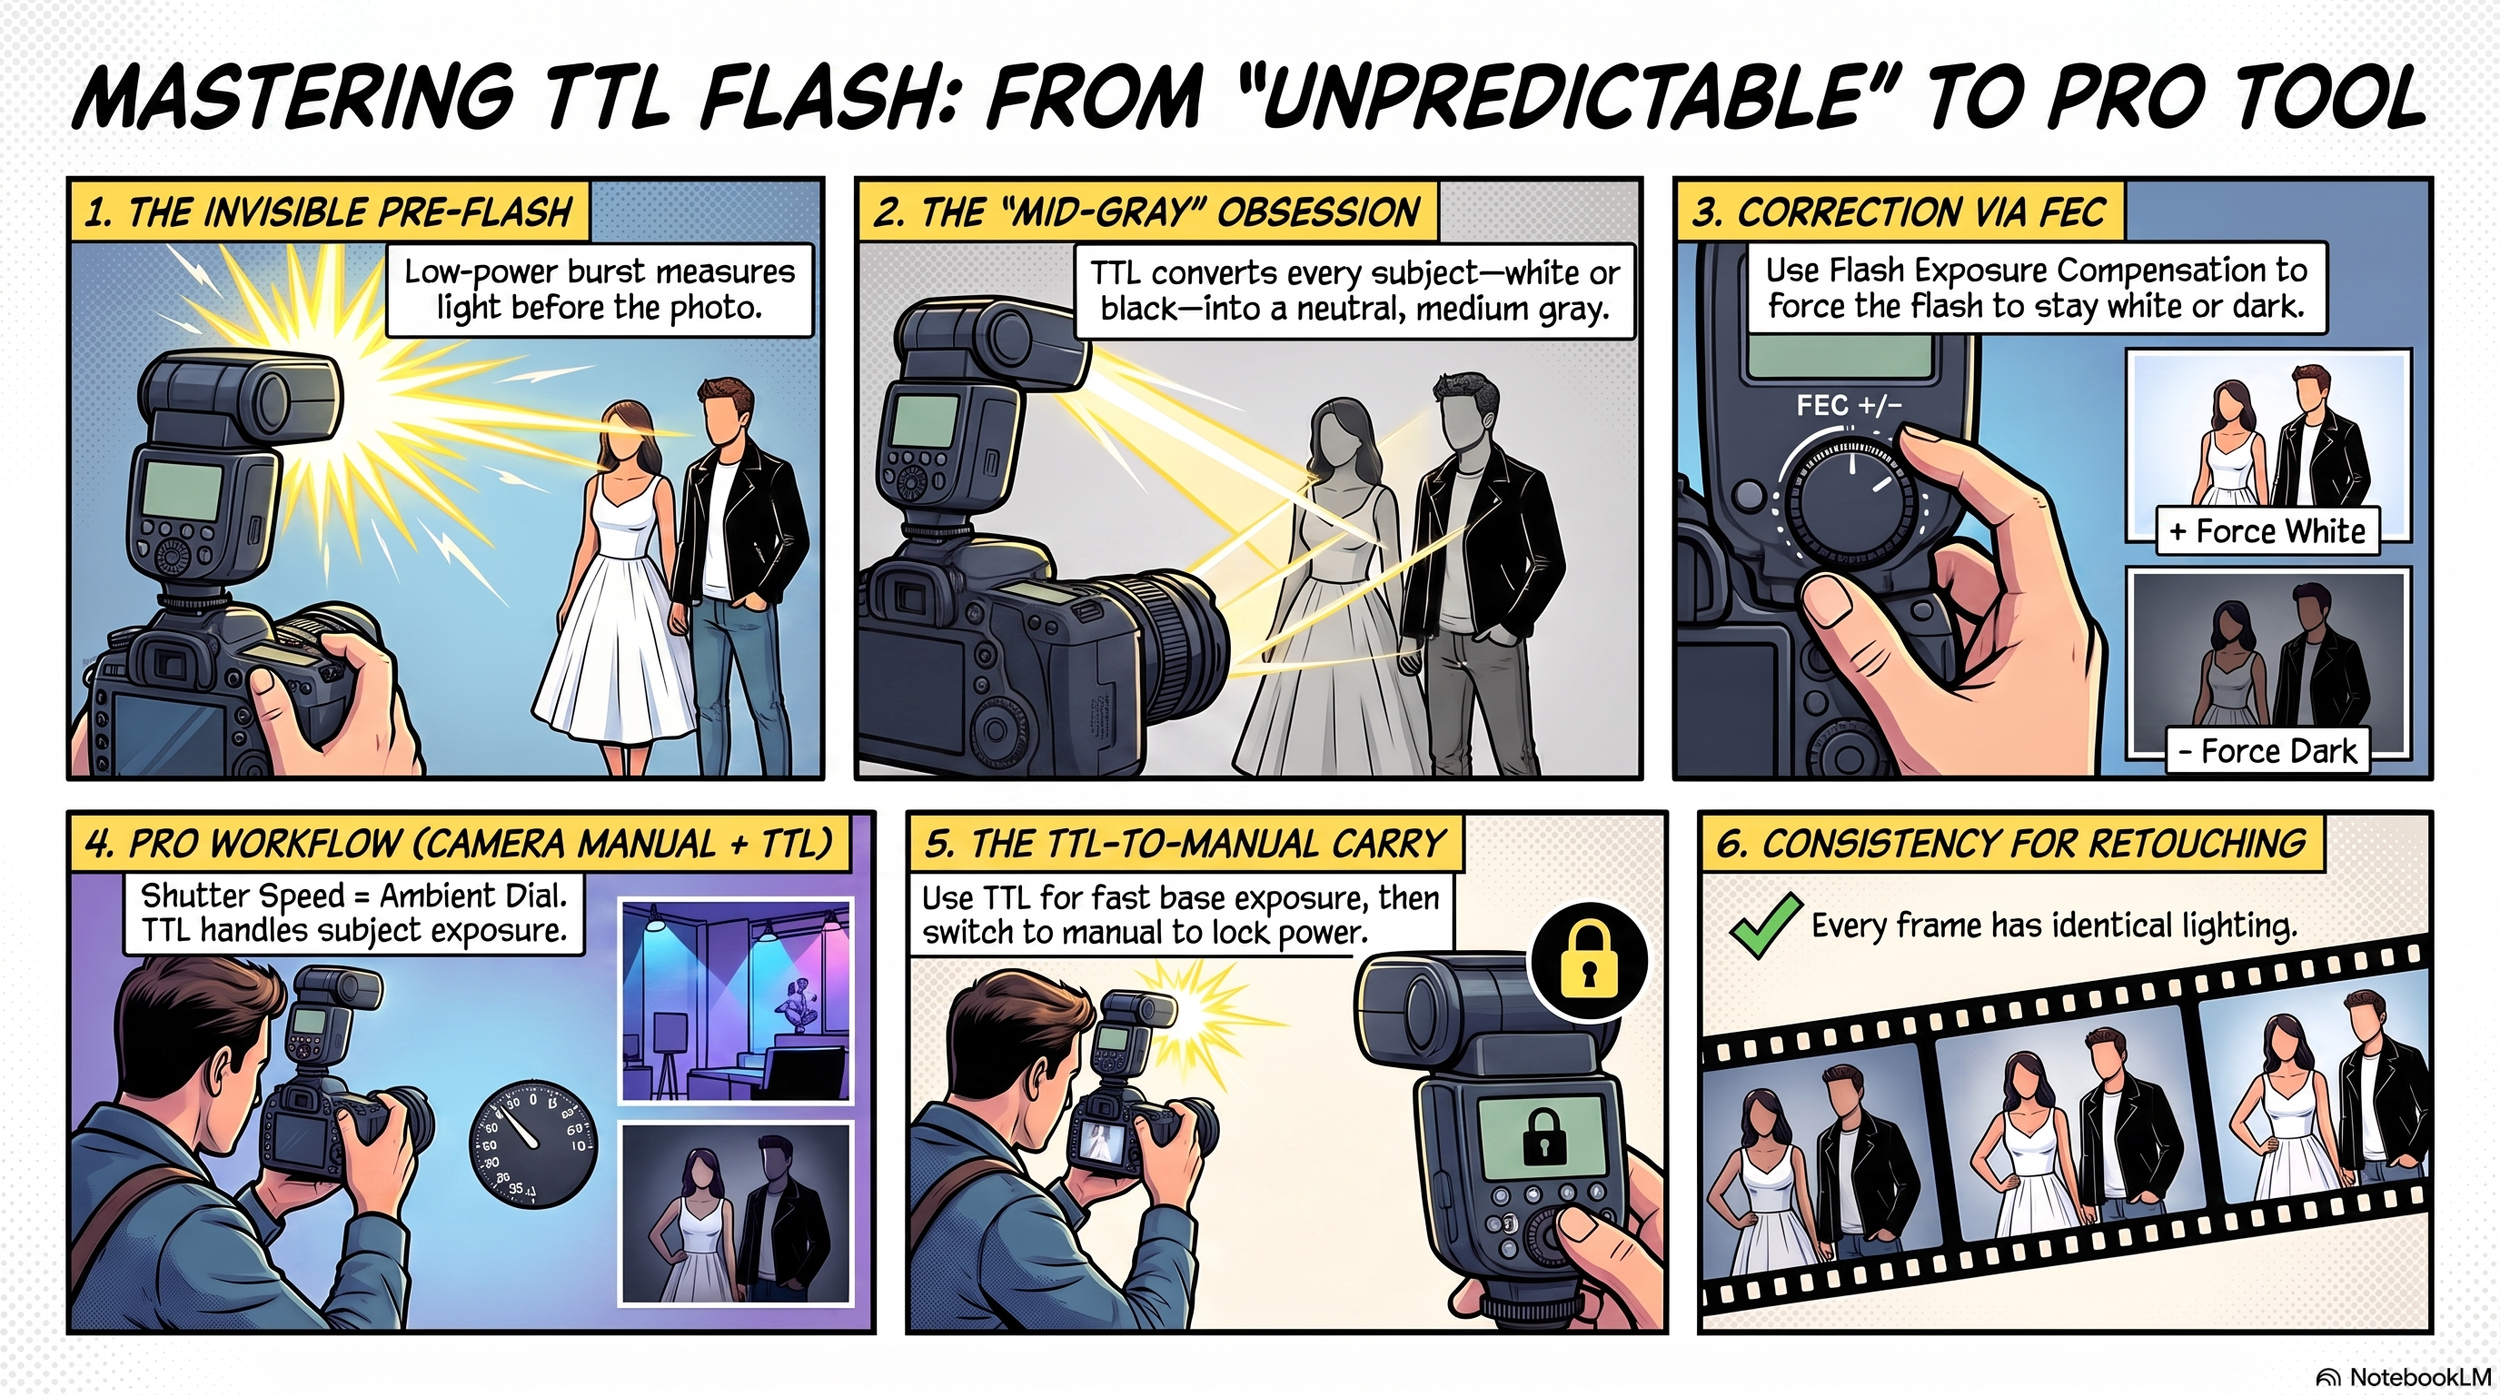
On a digital camera, TTL works using a pre-flash.
When you press the shutter, the flash fires a quick, low burst of light a fraction of a second before the picture is actually taken. That burst bounces off your subject, comes back through the lens, and lands on the camera's metering sensor. The camera reads how much light came back, works out how much the real flash needs to put out, then fires the main flash at that power as the shutter opens. All of it happens in a few thousandths of a second, so in normal use you never see the pre-flash as a separate pop.
It works this way for a reason. On film, the camera could read the light reflecting off the film surface during the actual exposure and cut the flash the moment it had enough. A digital sensor is not reflective enough to be read like that, so the pre-flash method replaced it. Every current system does this, whether it's Canon, Nikon, Sony or Fujifilm. They all fire a pre-flash to measure before the shot rather than during it.
What the metering actually is
This is the part that explains nearly every frustration people have with TTL.
TTL metering is reflective metering. It measures light bouncing back off your subject, and it has no idea what it's looking at. It cannot tell a white wedding dress from a black dinner jacket. All it knows is how much light came back, and its goal is always the same. It wants to render whatever it measured as a mid-tone, a medium grey.
That works beautifully when your subject is roughly average in tone; it falls apart when it's not. Point it at something white and bright and it assumes plenty of light is coming back, so it holds the power down and the white comes out grey and underexposed. Point it at something dark and it assumes too little is coming back, so it pushes the power up and the dark comes out washed and overexposed.
So TTL is not unreliable; it's reliably aiming for grey. The skill is knowing when grey is the wrong target and telling it so, which you do with Flash Exposure Compensation. FEC adjusts only the flash output and leaves your ambient exposure alone. White subject looking muddy, dial in some positive FEC; dark subject blowing out, dial in some negative. In real use it tends to live somewhere between minus two and plus two stops depending on the subject and the scene. There is no single setting that works every time, because there are too many variables. It's an educated adjustment, and the back of the screen tells you when you have it right.
Do your other camera settings override TTL?
They do not override it, but they absolutely shape what it does, and this is the mental model worth having.
Your aperture and ISO set the box TTL has to work inside. Open the aperture or raise the ISO and TTL simply needs less power to get there. Stop down or drop the ISO and it needs more. TTL adapts to your settings, it does not fight them. You can back it into a corner though. Shoot at a very narrow aperture and very low ISO and the flash may need more power than it physically has, so you get underexposure even at full output. When that happens the answer is not more compensation, it's changing your aperture or ISO to bring the flash back into range.
Shutter speed is the odd one out, because within your sync speed it does not change the flash exposure at all. It changes how much of the existing room light or daylight you let in around the flash. That is why I think of shutter speed as the ambient dial and flash power as the subject dial. They are largely independent, and that independence is what makes flash so controllable once it clicks.
If your camera is in manual, does that override TTL?
No, and this catches a lot of people out.
Your camera's exposure mode, whether that is Manual, Aperture Priority or Program, and your flash's metering mode, TTL or manual, are two separate systems. You can have the camera in full manual and the flash still in TTL, and the flash will happily keep metering with its pre-flash and adjusting its own power shot to shot.
That combination is actually one of the most useful ways to work. Camera in manual gives you a fixed, deliberate ambient exposure that will not drift between frames. Flash in TTL then tops up the subject automatically as you move around. Change your shutter speed and the background gets brighter or darker while the subject stays put. Change your aperture and TTL quietly compensates to keep the subject exposed. You get consistency in the ambient and convenience in the flash at the same time.
The trap is the opposite setup, camera in Program or Aperture Priority with TTL as your main light. There the camera keeps shifting your shutter speed between frames, your ambient drifts, and nothing feels consistent. If you want predictability, put the camera in manual and let TTL handle only the flash.
How I actually use TTL, and why I don't carry a light meter
Here is the bit that ties all of this together into something practical, because it's exactly how I work.
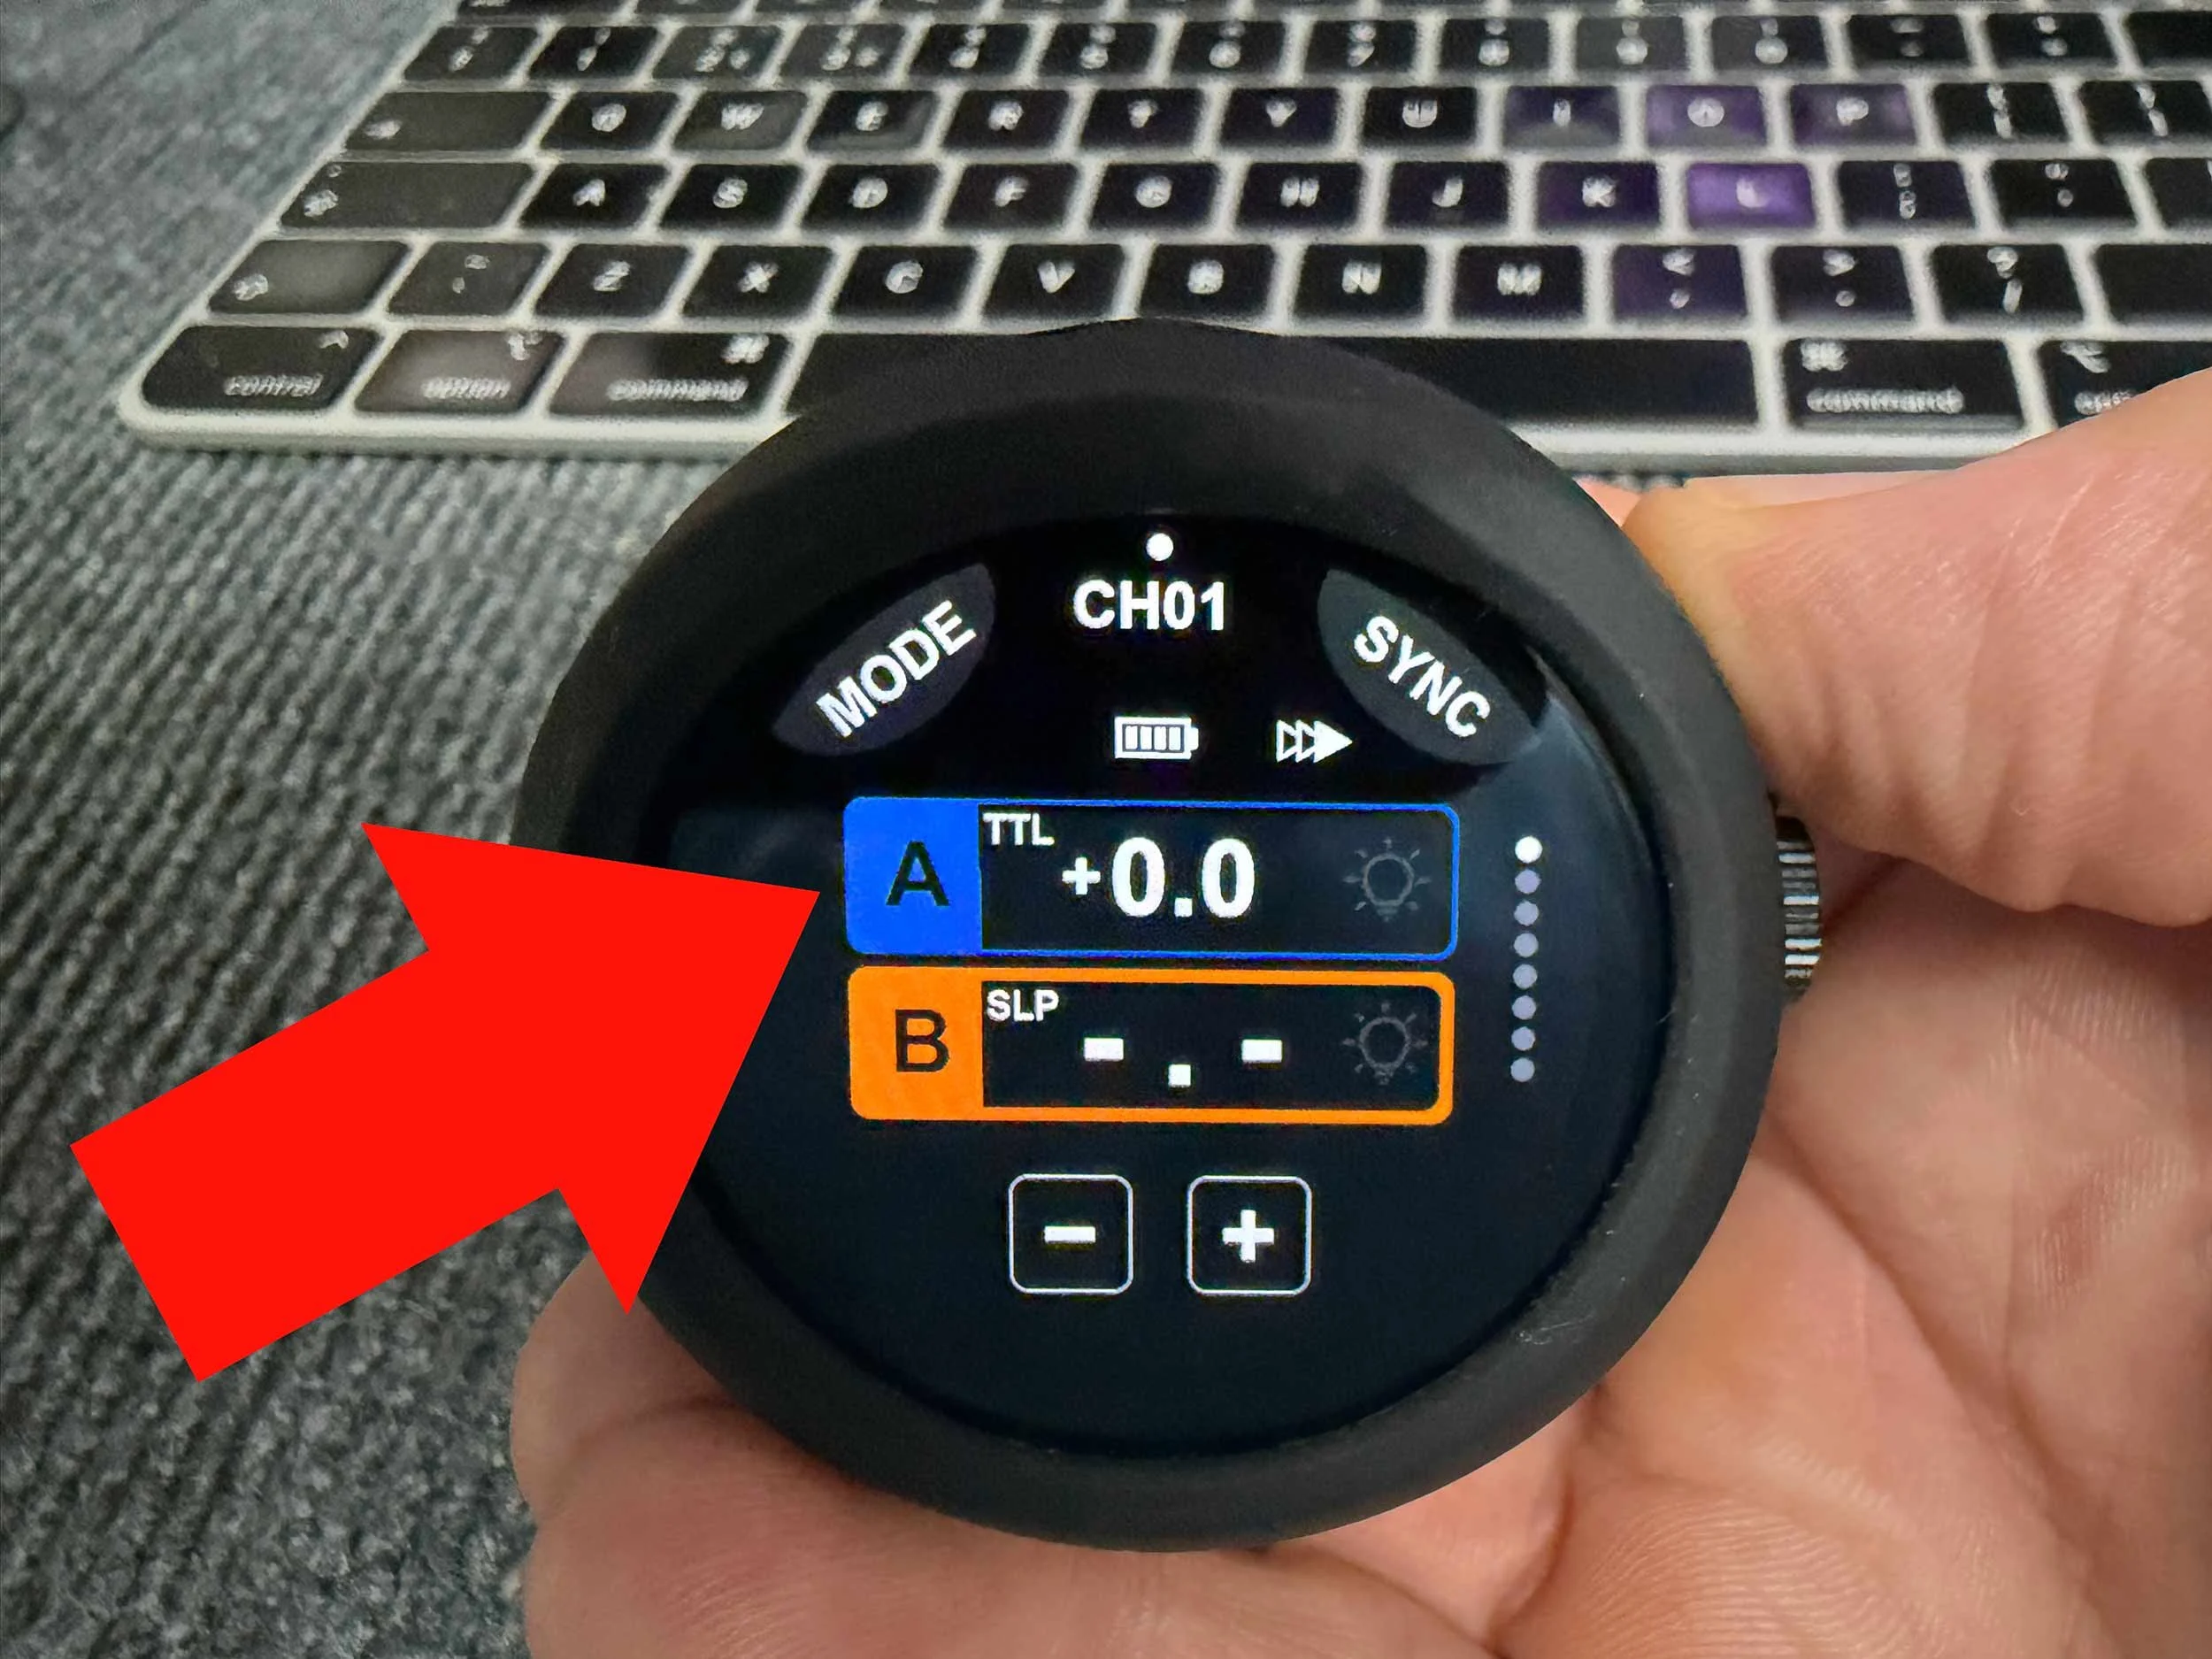
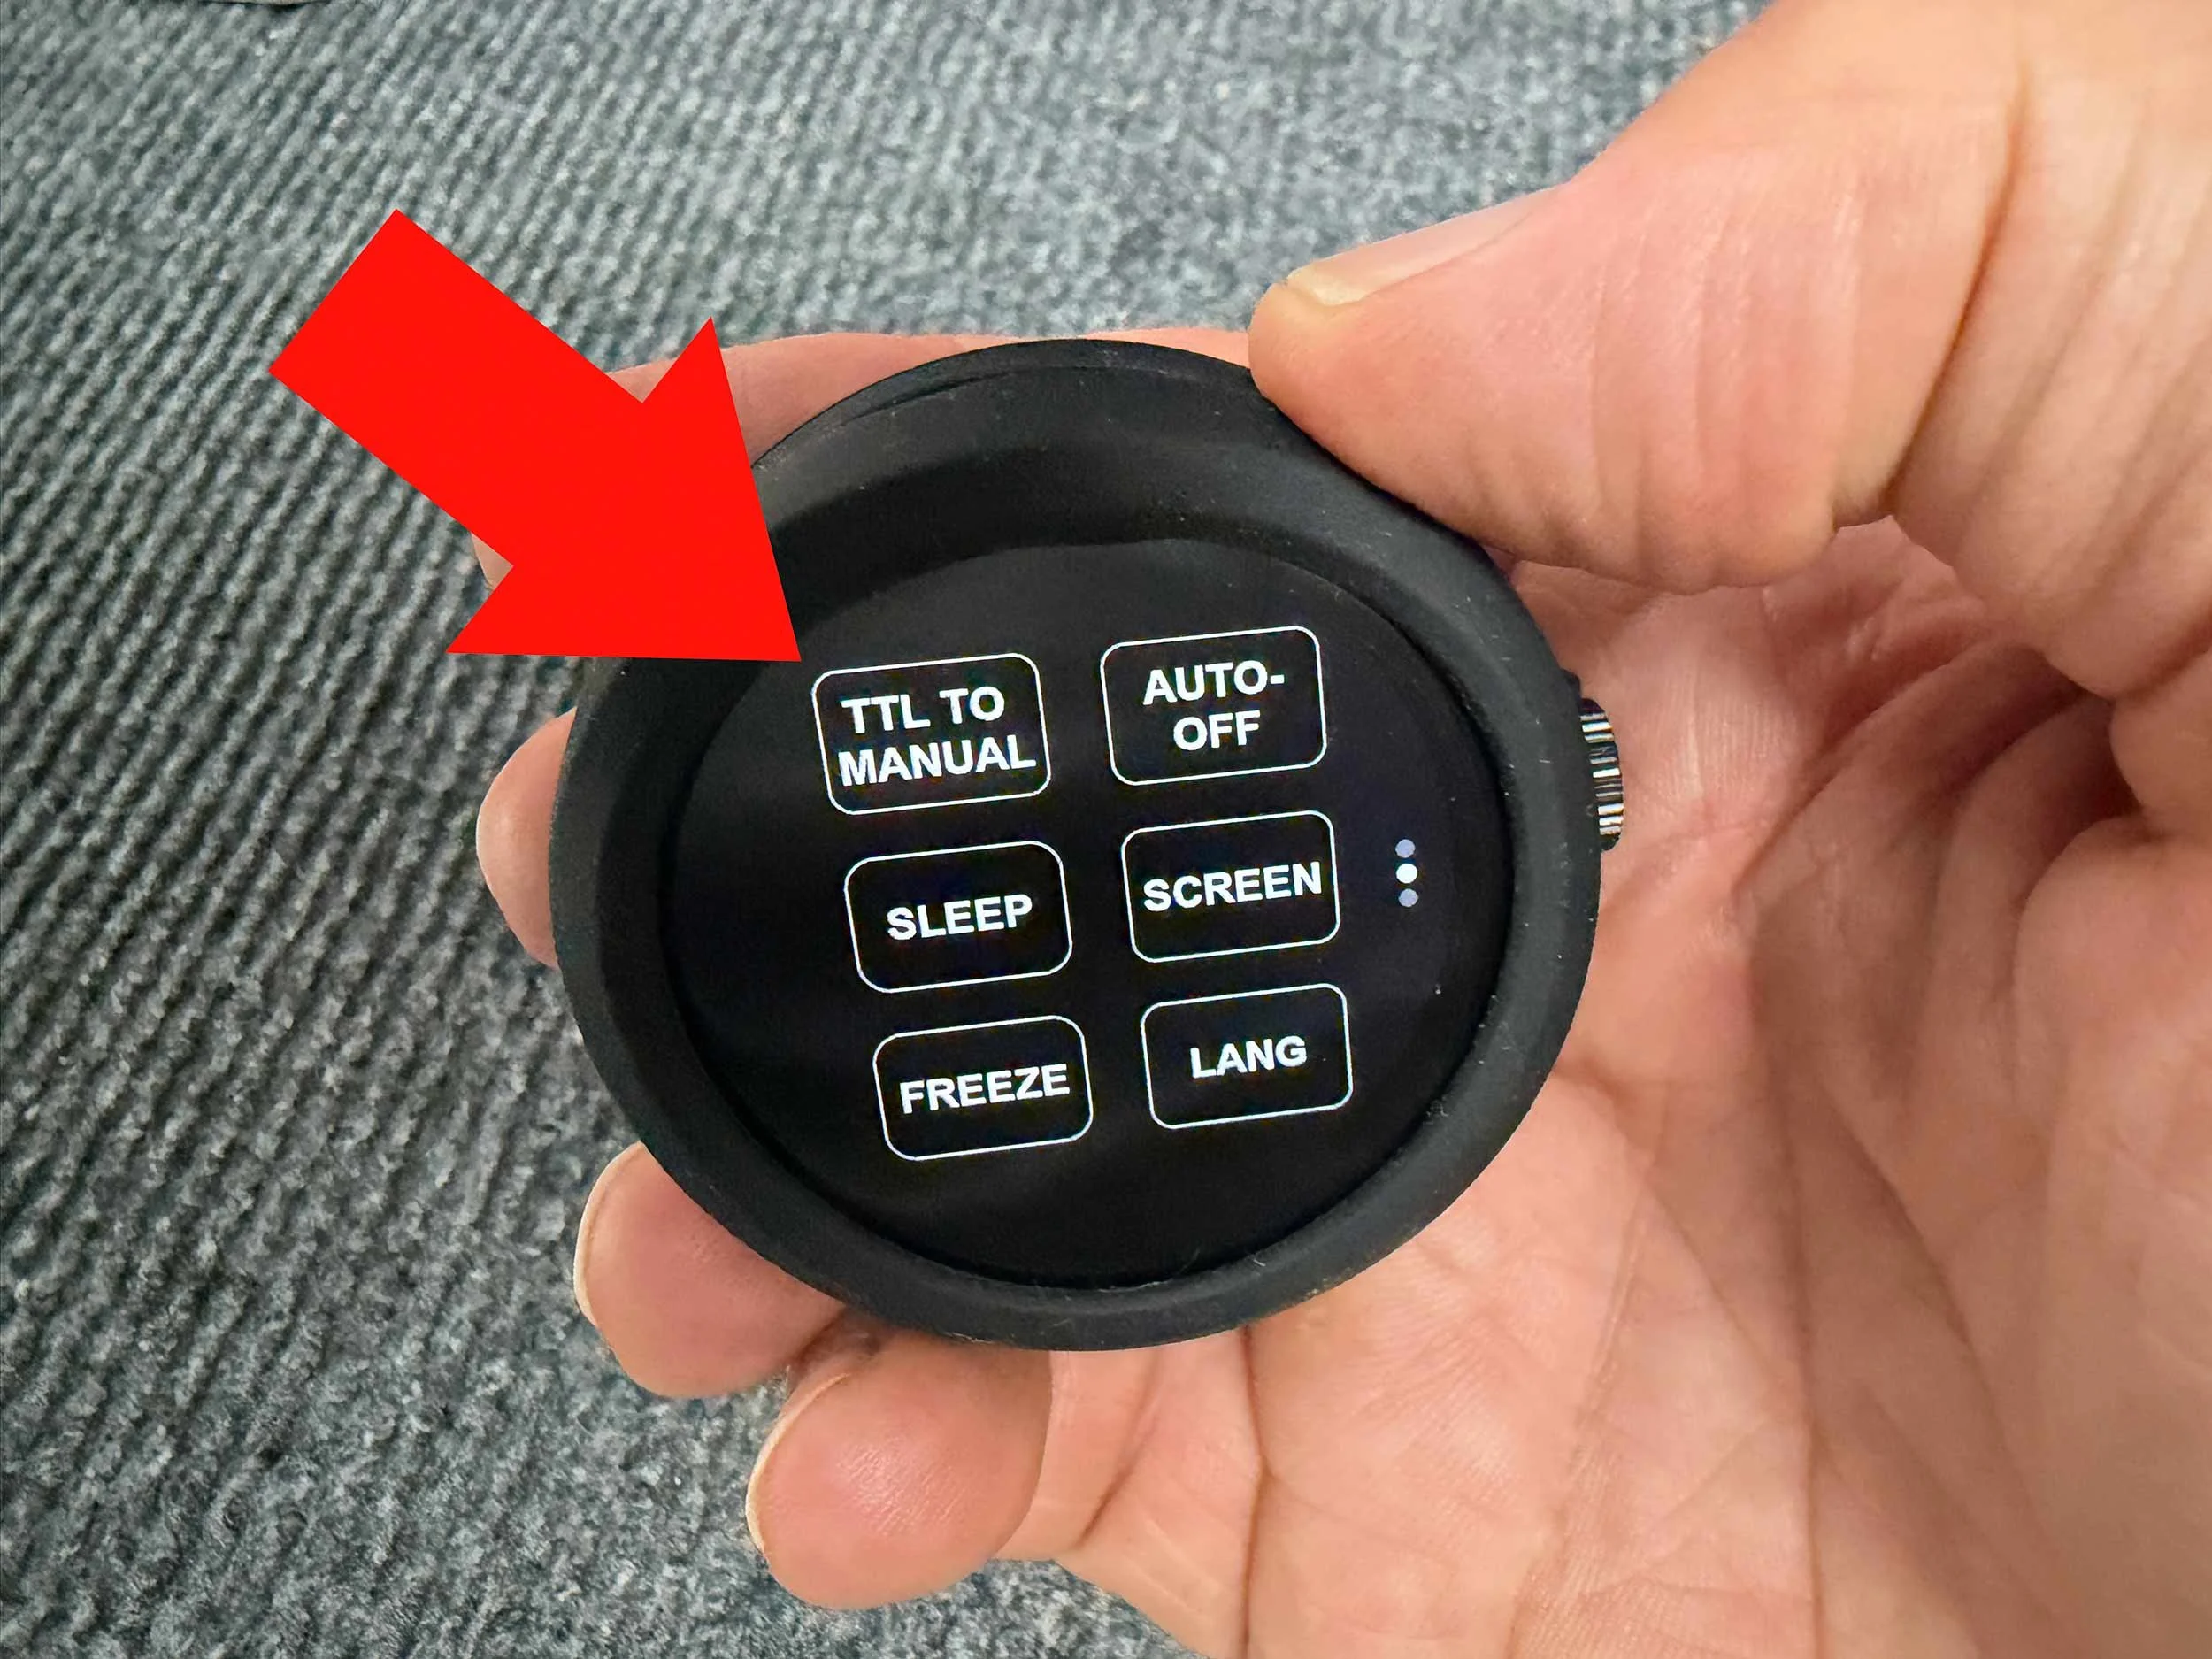
I shoot the Westcott FJ system, and my trigger is a universal, multi-brand unit, so the same trigger sits on top of whatever camera I am using rather than being locked to one brand. That is handy in itself, but the feature I lean on most is the TTL to Manual carry-over.
In TTL the flash recalculates its power for every single frame. Convenient, but it means the power can wobble slightly from shot to shot as the metering reacts to tiny changes in the scene. For portraits I am going to retouch as a series, I do not want that; I want every frame identical.
So my routine is simple. I set the flash to TTL and take a shot to get a good base exposure in seconds. Then I hit the TTL to manual function, which carries that exact TTL power output straight over into manual. From there the power is locked. If I want it a touch brighter or darker I nudge it from that known starting point, and once I am happy every single frame fires at precisely the same output. Nothing drifts.
That is the reason I do not carry a handheld light meter. TTL gets me to the right ballpark faster than metering ever would, the carry-over locks it in, and my own eyes on the back of the screen do the fine tuning. For the way I shoot, a meter would just be an extra thing to hold.
Worth knowing if you are not on Westcott, this is not a Westcott-only idea. Some other brands have their own equivalent technology, so whatever system you are on, it's worth checking whether you already have this feature sitting there unused. It's one of those things that quietly changes how you work once you start using it.
A word on Fuji face and eye detection
I shoot Fuji, and a question I get asked a lot is whether having face and eye detection switched on matters when you are using flash. It does, and in a good way.
Start with the obvious. Face and eye detection's main job is autofocus, and that alone is reason to leave it on. Eye detection is really just face detection refined to lock onto the eye, which is exactly where you want critical focus on a portrait.
Here is the part people miss. On Fuji, TTL meters the flash essentially the same way the camera meters ambient light. And when face detection is active, the camera biases that metering towards the detected face, to the point where it takes over from whatever metering mode you had selected. Put those two facts together and you get something genuinely useful. With a face detected, your TTL flash exposure is weighted towards exposing that face correctly, rather than being thrown off by a very bright or very dark background behind it.
In practice that means better, more consistent skin exposure straight out of camera when you are working quickly in TTL. It's not a pure spot reading off the face, it's more of a blend under the bonnet, and Fuji do not spell out the exact recipe, but the result is reliable and it works in your favour for portraits.
Two things to keep in mind. First, because face detection takes over your metering, do not rely on the Fuji spot meter for an ambient reading while it's active, because a detected face will quietly override it. If you want a spot reading off a specific tone, take it with detection off, then switch detection back on for the shoot. Second, none of this applies once your flash is in manual power. If you have locked your power in manual, including straight after the TTL to manual carry-over above, the flash fires at the set power regardless, and detection is back to doing nothing but focus. Which, for a controlled portrait, is exactly what you want anyway.
wrapping up
TTL is an automatic flash mode that sets flash power and nothing else. On digital it uses a pre-flash to measure light bounced back through the lens, then fires the main flash to match. It always aims to make what it measured a mid grey, so it gets fooled by very light or very dark subjects, and FEC is how you correct that. Your aperture and ISO define the box it works inside, shutter speed handles your ambient, and TTL adapts rather than getting overridden. Putting your camera in manual does not switch TTL off, and camera manual paired with flash TTL is a strong, consistent way to work. And if your kit has a TTL to manual carry-over, use it, because it gives you the speed of TTL and the consistency of manual in one move.
Get those few ideas straight and TTL stops being the thing you avoid and becomes another tool you can reach for when it suits the shot.