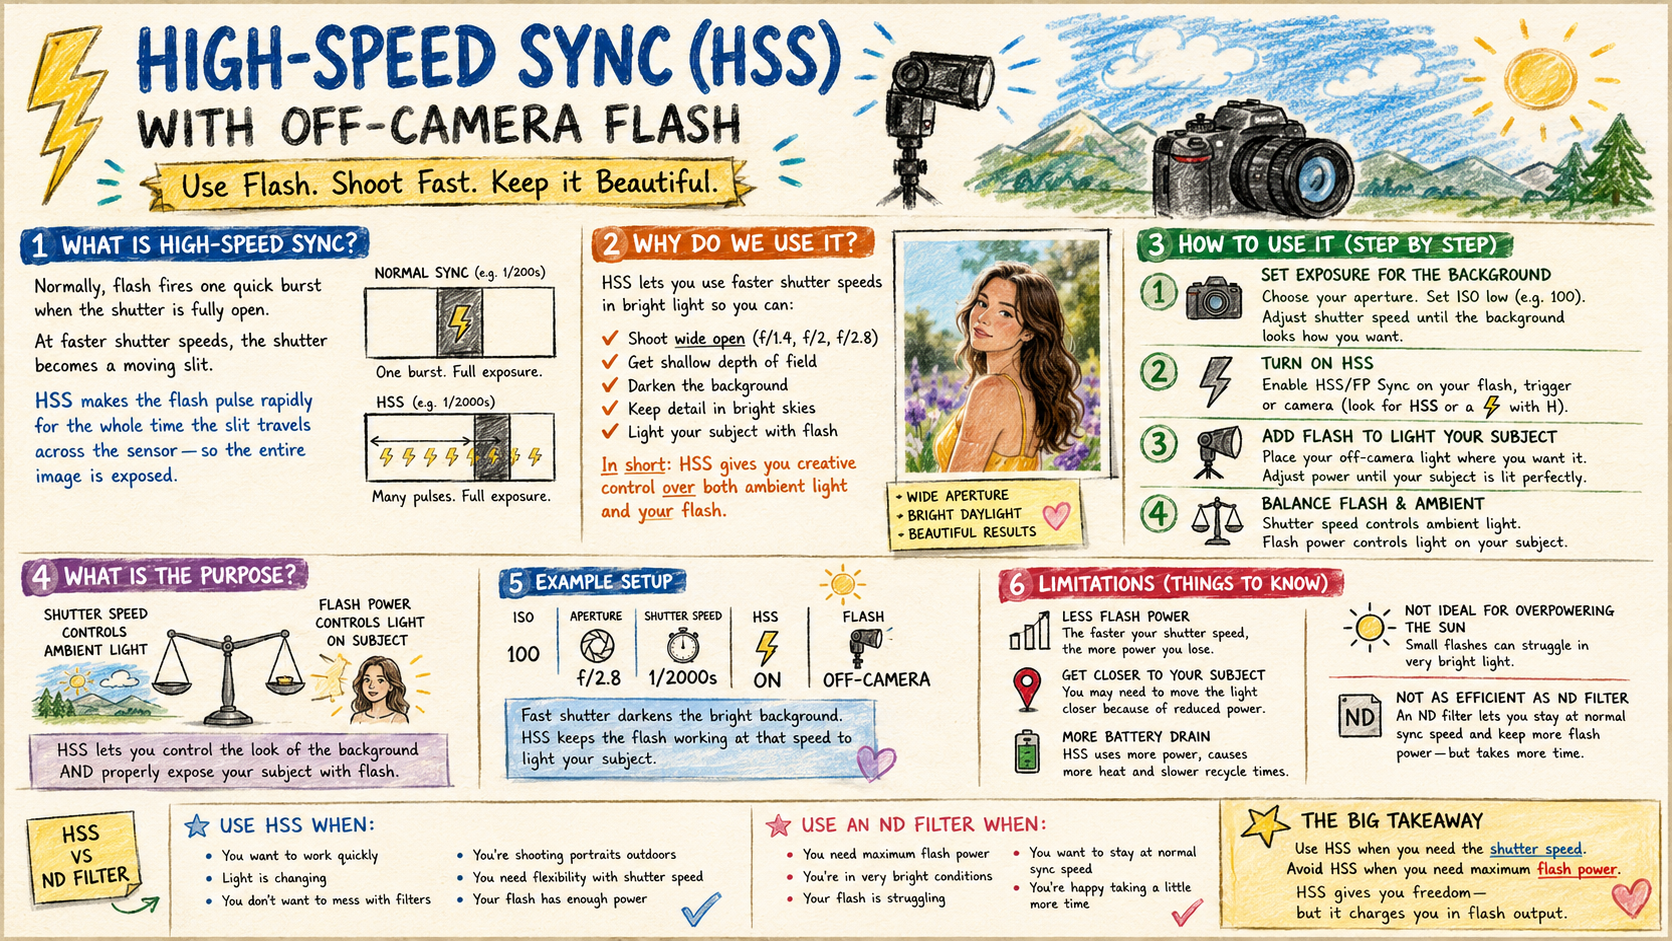
When you shoot with flash at a slower shutter speed, the camera is really recording two things at once.
The first is ambient light, which is controlled mainly by your shutter speed. The second is the flash, which freezes or highlights your subject.
Curtain sync simply decides when the flash fires during that exposure. It is one of those settings most people never touch, but once you understand it, you have a lot more creative control.
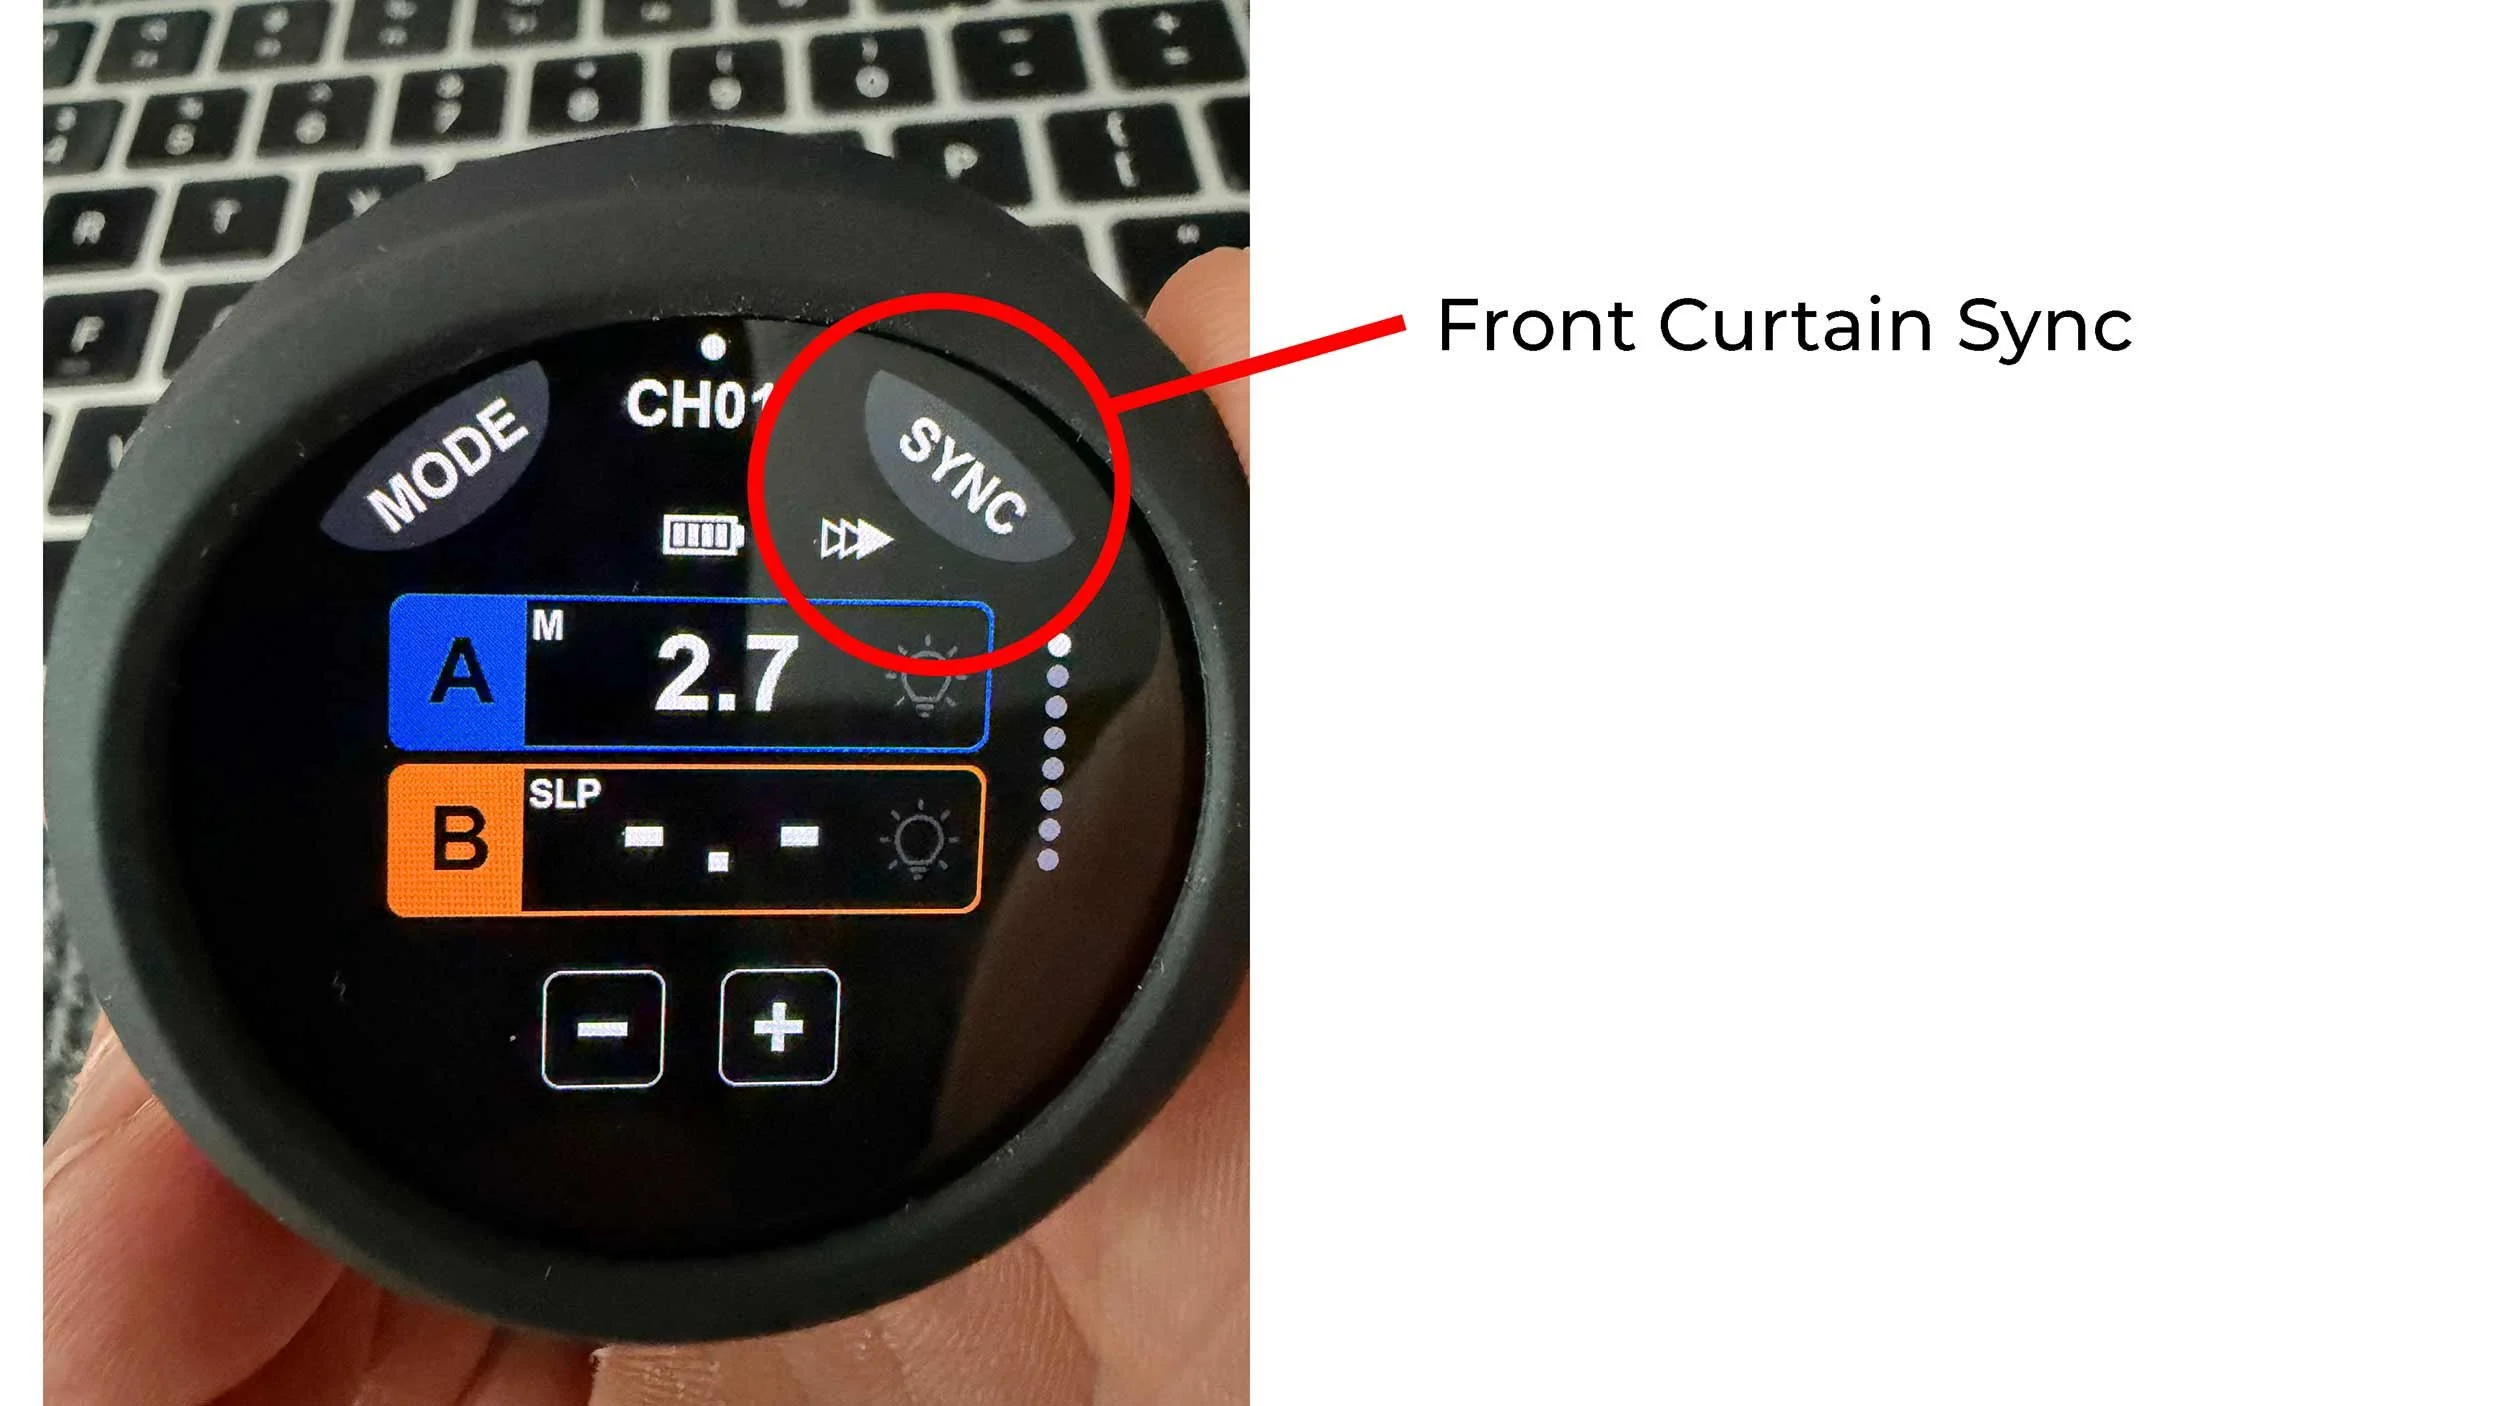
What is front curtain sync?
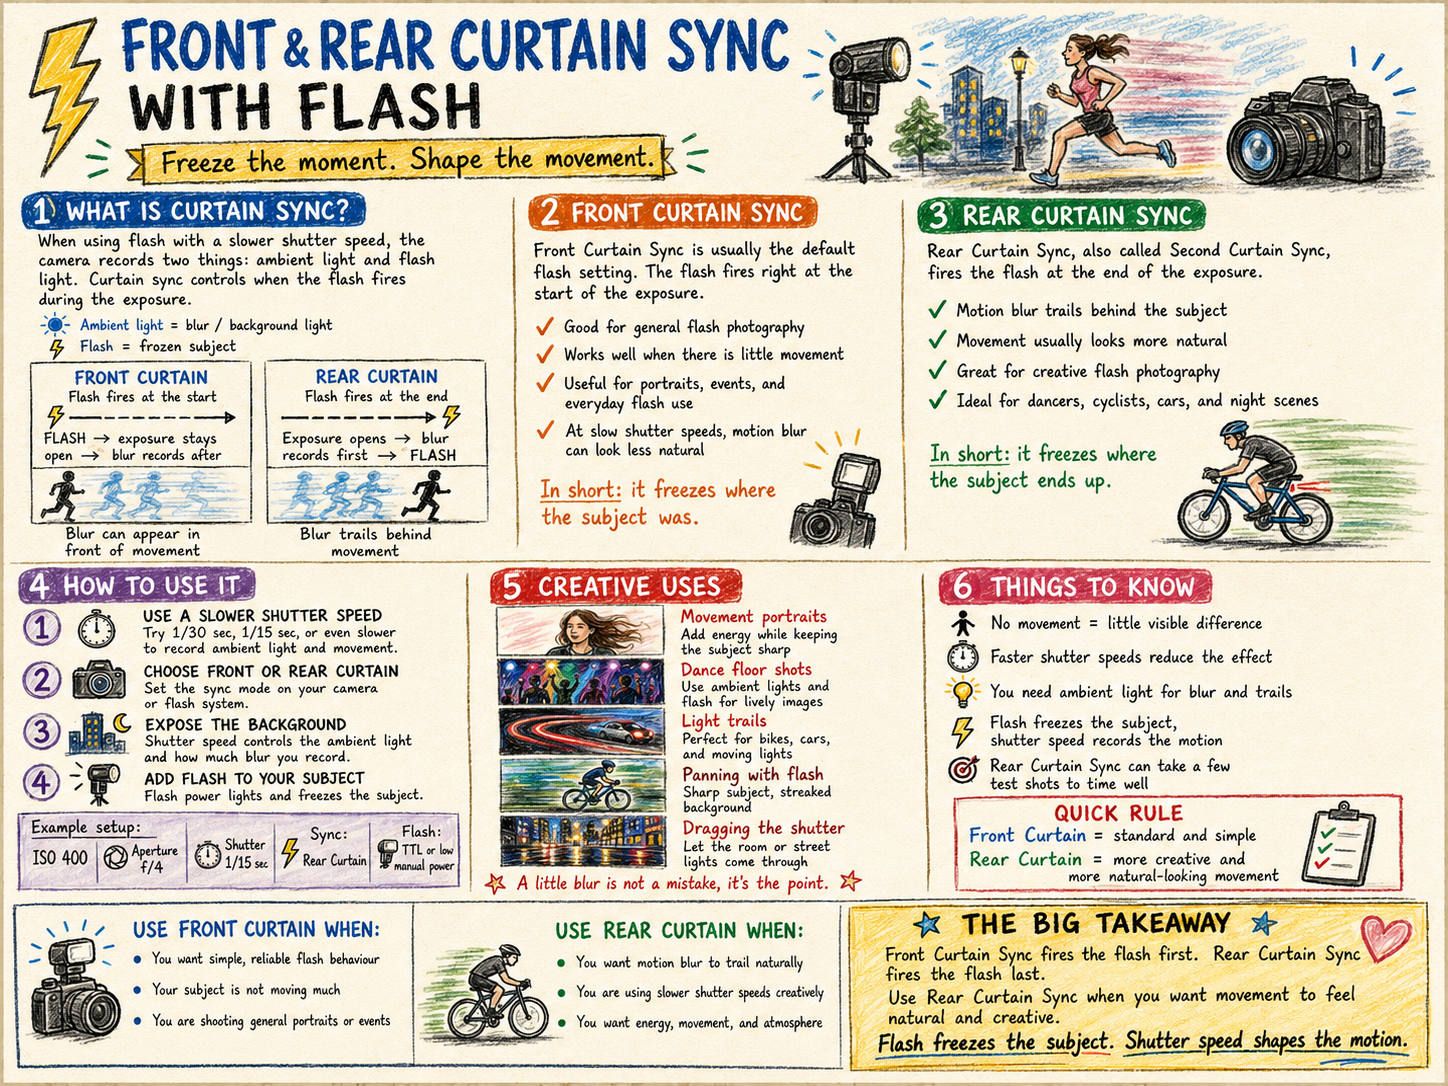
Front curtain sync means the flash fires at the start of the exposure.
So the order is this. The flash fires, the shutter stays open, and any ambient blur records afterwards. This is the default setting on most cameras.
What does front curtain sync look like?
If your subject is moving, the flash freezes them at the very start, then any motion blur appears in front of them, ahead of the movement.
This can sometimes look a little odd, because the blur seems to be heading the wrong way.
Picture someone walking across the frame. The flash freezes them first, then their movement creates blur after that frozen moment. The result can make the blur look like it is leading the subject rather than trailing behind. Basically, the blur looks like it got up early and left before the subject did.
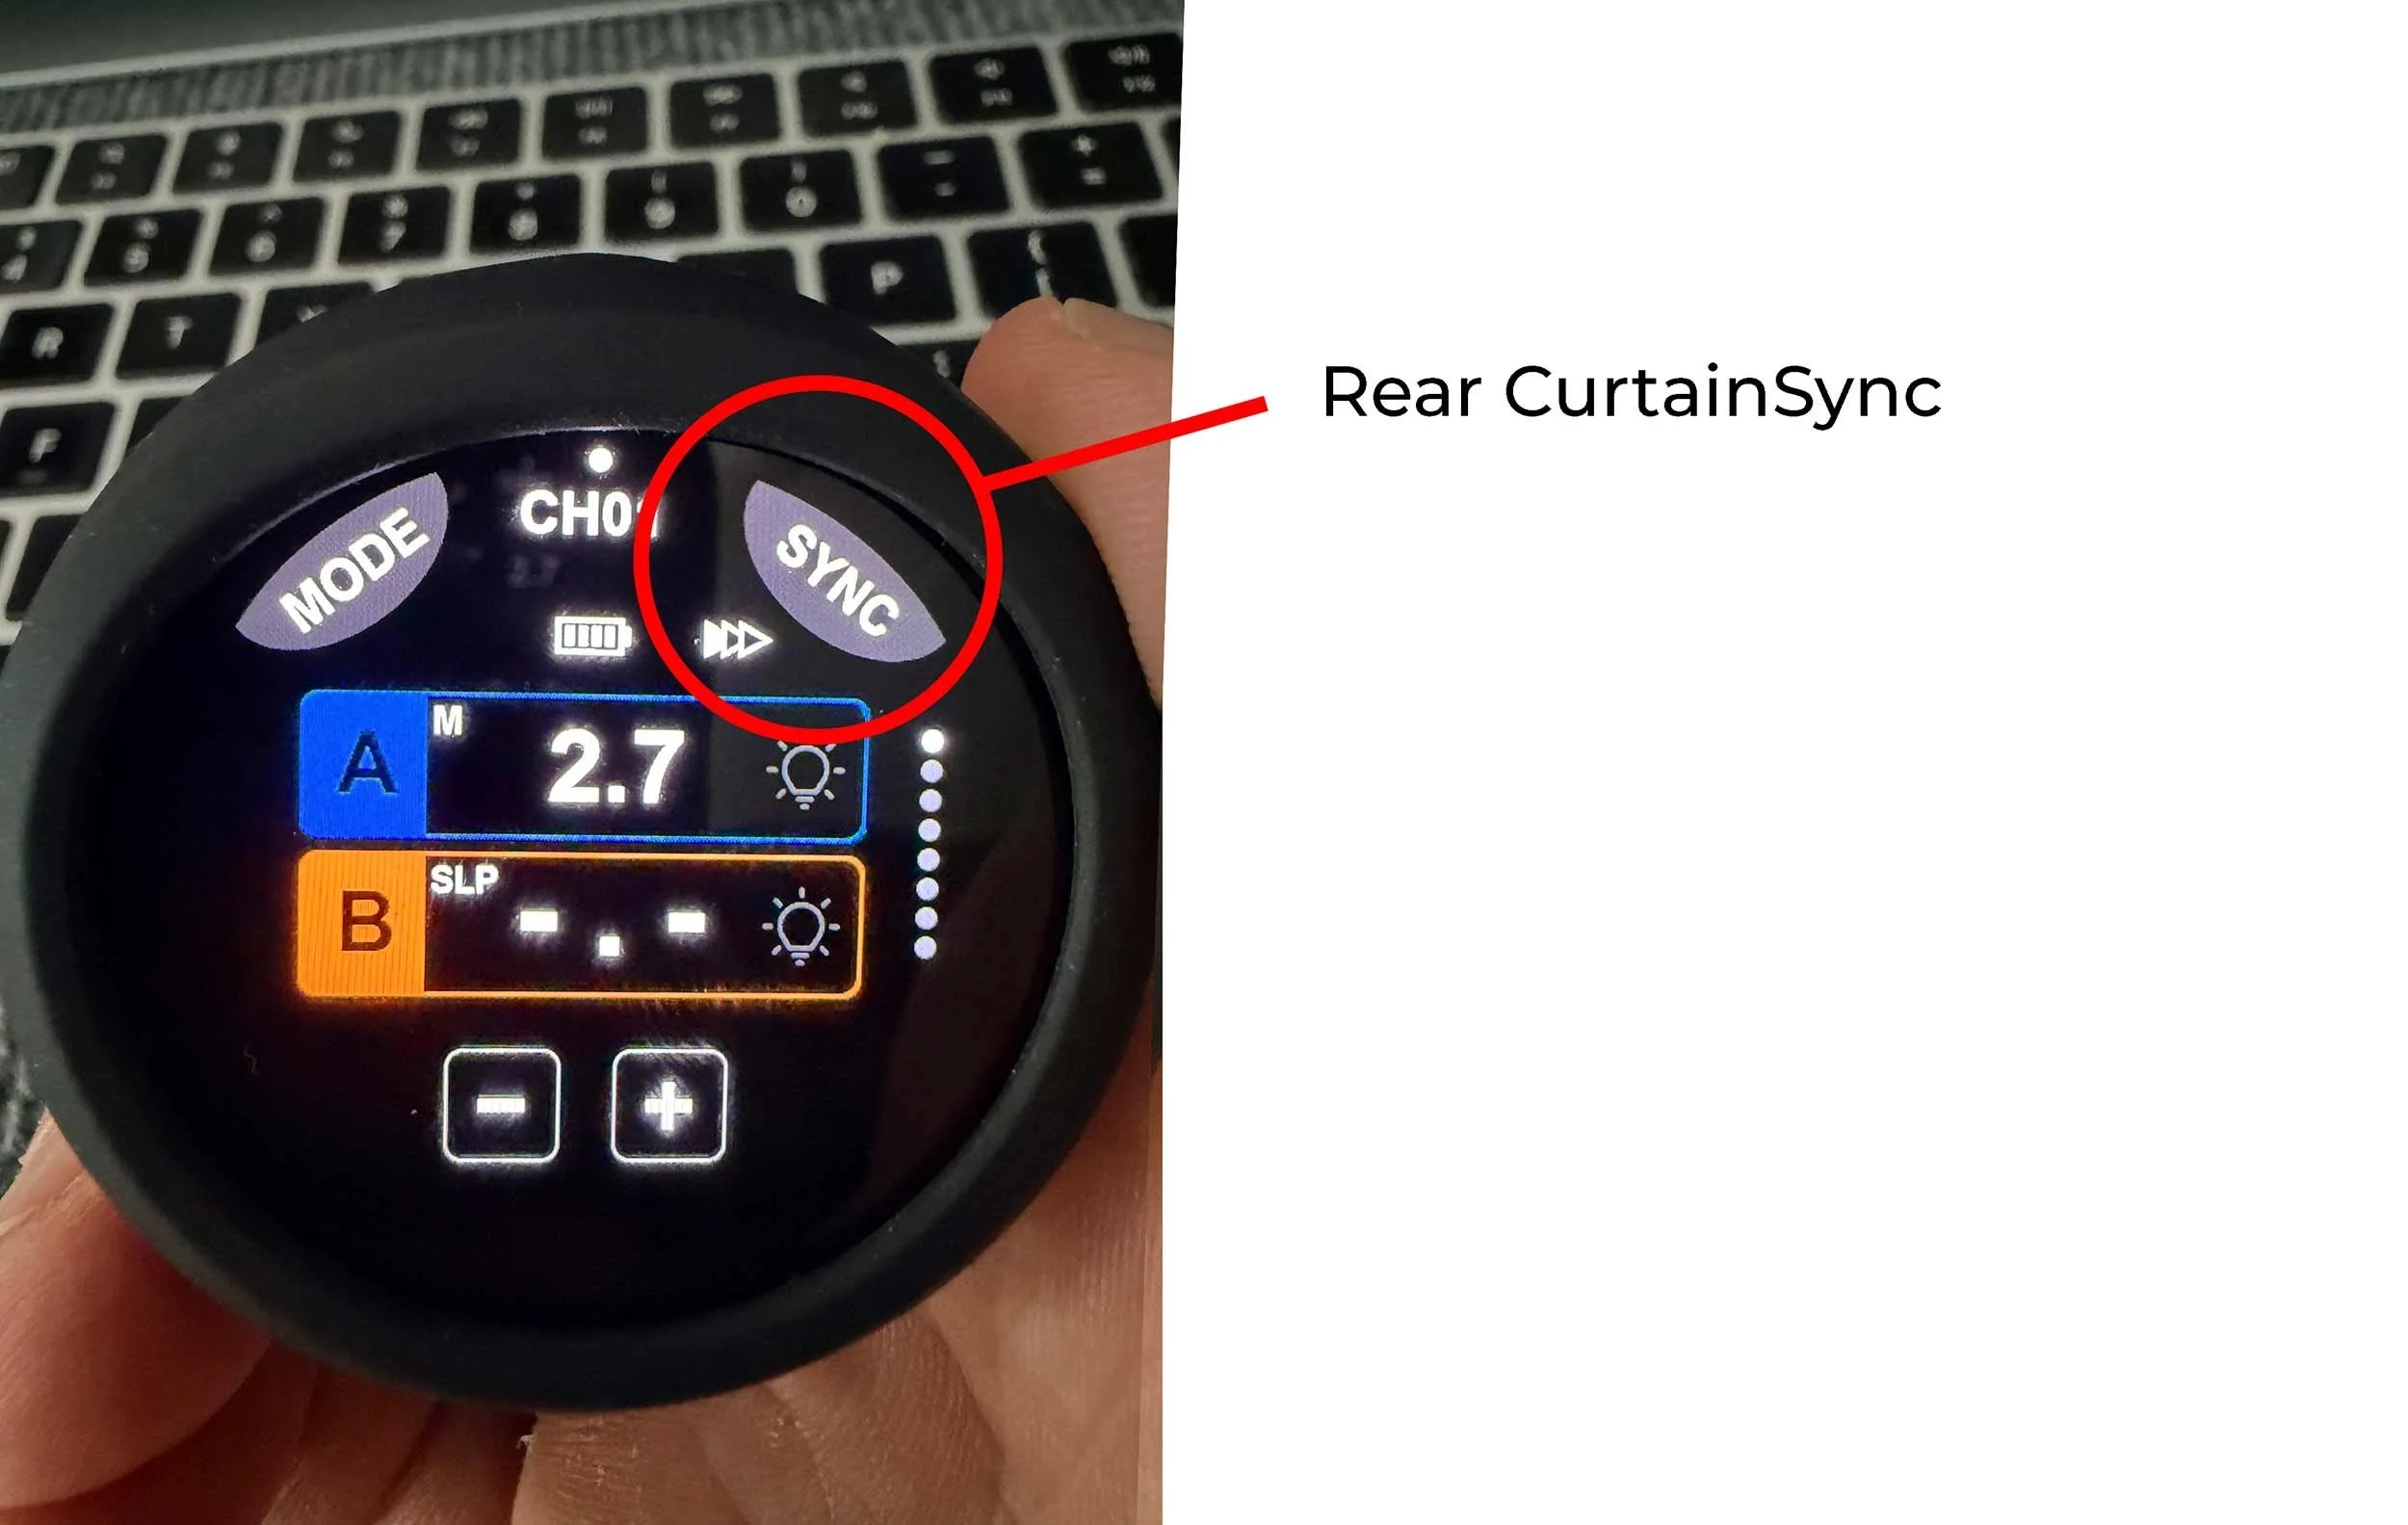
What is rear curtain sync?
Rear curtain sync means the flash fires at the end of the exposure.
So the order flips. The shutter opens, the ambient blur records, then the flash fires right at the end. This means the motion blur appears behind the subject, which usually feels far more natural.
What does rear curtain sync look like?
If someone is moving through the frame, the camera records the motion blur first, then the flash freezes them at the end of the movement.
This gives the sense that the subject is moving forward with the blur trailing behind. That is why rear curtain sync is so often used for more creative flash work.
The simplest way to remember it
Front curtain sync freezes the subject first. Rear curtain sync freezes the subject last. That is the whole difference in two sentences.
Why use front curtain sync?
Front curtain sync is useful when you want the flash to fire immediately and you are not too worried about the direction of motion blur.
It works well for:
general flash photography
portraits with little or no movement
event photography
situations where you just need reliable flash timing
faster shutter speeds where blur is not visible anyway
Most of the time, front curtain sync is perfectly fine.
Why use rear curtain sync?
Rear curtain sync comes into its own when you want movement to feel natural or creative.
It works well for:
dancers
musicians
runners
cyclists
cars
wedding dance floors
people walking through a scene
creative portraits with intentional blur
street photography at night
light trails
It gives the image more energy, because it shows the movement before freezing the final position.
Creative uses
Movement portraits
Use a slower shutter speed, ask your subject to move slightly, then let the flash freeze them at the end. This is great for musicians, athletes, dancers, and fashion or editorial portraits. You end up with a sharp subject surrounded by movement and atmosphere.
Dance floor shots
Use rear curtain sync with a slow shutter speed and a little camera movement. The ambient lights create streaks and colour, then the flash freezes the people at the end. Very useful for weddings and events.
Light trails
Photograph a cyclist, a runner, a car, or someone holding a light source. Rear curtain sync keeps the trail behind the subject rather than awkwardly in front.
Dragging the shutter
This is when you deliberately use a slower shutter speed to bring in more ambient light. Instead of shooting flash at 1/200 sec and letting the background go dark, you might shoot at 1/15 sec or 1/30 sec to let the room, the street lights, or the sunset show through. The flash freezes the subject while the slower shutter records the atmosphere.
Camera movement
You can twist, pan, zoom, or gently move the camera during the exposure. With rear curtain sync, the flash fires at the end, giving you a sharp subject after the creative blur. Done well, it looks dynamic. Done badly, it looks like the camera sneezed. Both are educational.
How to use it
Set your camera or flash system to rear curtain sync, sometimes labelled second curtain sync.
Then choose a slower shutter speed, such as:
1/30 sec
1/15 sec
1/8 sec
1 second or longer for more extreme effects
The slower the shutter speed, the more blur and ambient light you record. Keep your flash power controlled so the subject is still lit properly.
Things to watch out for
It needs movement. If nothing is moving, front and rear curtain sync will look almost identical.
Shutter speed matters. At faster shutter speeds you probably will not see much difference. The effect becomes obvious only when you slow things down.
Ambient light matters. No ambient light means no visible blur or trails. You need some available light in the scene for the movement to record.
Flash freezes, shutter blurs. The flash gives you the sharp subject. The shutter speed controls how much movement or background light appears.
Rear curtain sync can feel less predictable. Because the flash fires at the end of the exposure, the timing feels a little strange at first. For moving subjects, you may need a few attempts to land the perfect position.
Best starting settings
For a simple test, try this:
Mode: Manual Shutter speed: 1/15 sec Aperture: f/4 ISO: 400 Flash: TTL or low manual power Sync: Rear curtain sync Subject: Ask someone to walk across the frame or move their arms
Take one photo with front curtain sync, then one with rear curtain sync. The difference will be obvious.
Front vs rear curtain sync at a glance
Feature Front curtain sync Rear curtain sync Flash fires At the start At the end Motion blur appears Often in front of subject Usually behind subject Best for General flash use Creative movement Looks More standard More dynamic Useful with slow shutter speeds Yes, but can look odd Yes, often more natural Default on most cameras Yes No
The key teaching phrase
Front curtain sync freezes where the subject was. Rear curtain sync freezes where the subject ends up.
Or even simpler. Front curtain sync starts the story with flash. Rear curtain sync ends the story with flash.
TO summarISE
Rear curtain sync is usually the better choice when you want movement, blur, trails, and energy to look natural in a flash photograph.