
In this latest video I take you behind the scenes from the first day with my new drone; the DJI Air 2S as I dare to fly it out over the Atlantic Ocean in Cornwall to capture a photograph that simply would not be possible without it…
Look Up Tables (LUTs): THIS is what you're doing WRONG! How to MAKE, SAVE, EXPORT and EDIT
A few weeks ago I shared a video on my YouTube Channel showing how to install and use Look Up Tables (LUTs) in all versions of Lightroom, per it Lightroom Classic, Lightroom, Lightroom Mobile and Lightroom on the Web.
Following on from that I did get a few questions asking about problems using LUTs in Photoshop with error messages being thrown back and images being made to look, well, awful.
So, here’s a video I’ve put together to show how to Make, Save, Export and Edit LUTs without any errors.
Enjoy
Photographing Whiteford Lighthouse in South Wales with my Drone
So a few days ago I headed back to photograph Whiteford Lighthouse in South Wales; the very same place that only a couple of weeks ago I very nearly smashed my camera, lens and a filter.
Not one to give in though, this time I headed back but with a completely different game plan … to use my Drone instead of my main camera.
My reason for this was that ordinarily to photograph the lighthouse, you have to be near to it so that you can photograph it at the right angle and for that you need to wait for the tide to be out as it is such a long way offshore. Trouble is I didn’t want to photograph the lighthouse when the tide was out so that it was stood on a flat, dry, rocky sea bed with no water around it.
The solution would be to use my DJI Air 2 drone; the question though is, would the quality from the drone be good enough?
Well, I’m VERY happy to say the answer to that question is a definite YES…

This time everything came together…
I was joined by my dear friend Anthony Crothers, and having checked the weather, the cloud cover, the tide times and the drone flying zones, when we finally got to the location, it simply couldn’t have been better.
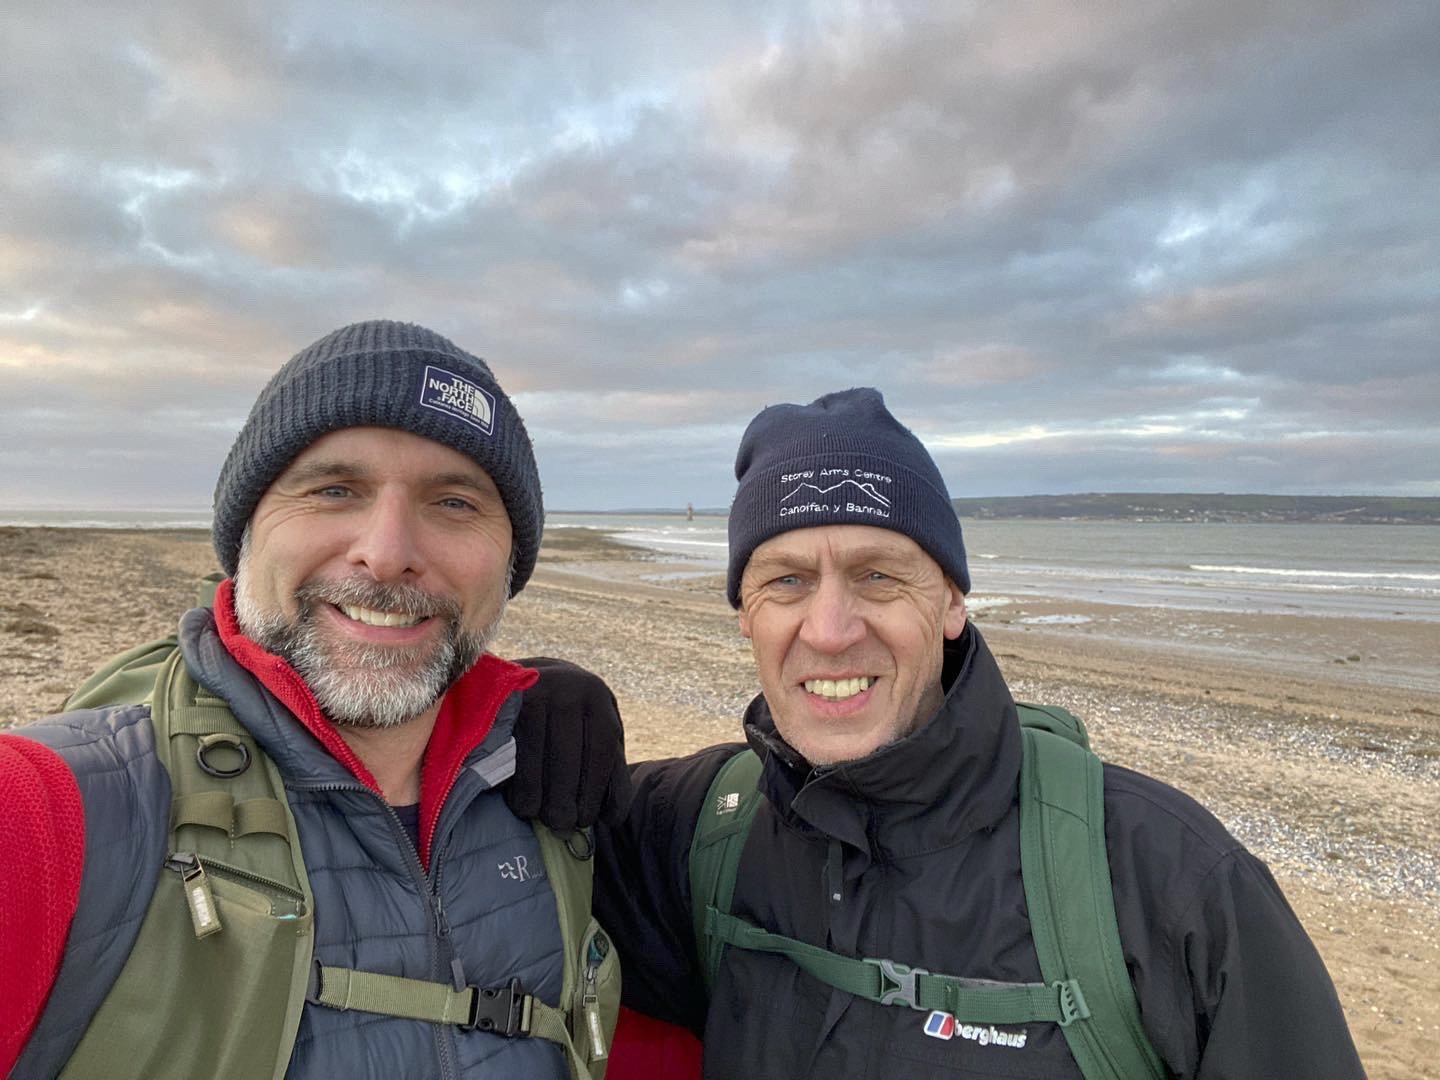
So, here’s a Behind the Scenes video PLUS I go through as bit of the retouching of the final image in both Lightroom and Photoshop…
Photoshop Layers and Selections Webinar with Rocky Nook Publishers
Thursday of last week I presented in a webinar hosted by my publishers, Rocky Nook all about my latest book, The Photoshop Layers and Selections Workshop.
It was so good to see so many people tune in LIVE and also to see the numbers of folks that had signed up to be sent the recording.
If you missy it and fancy checking it out, Rocky Nook have also now posted the webinar on their YouTube Channel that I’ve now added below…
At the end of the presnetation we went through a Q&A and one of the questions posted asked about the new selections and masking function in Camera Raw and Lightroom, and in particular about using the Color Range option…
Susan asked…
“Can you only subtract one colour point at a time or can you click multiple times on slight variations in the color in the same subtract operation?”
Originally I answered that I ‘thought’ you could only do one at a time however a friend of mine Trevor Ager messaged me to say that you can actually add more by holding down the Option (Mac) / Alt (Windows) keys and clicking.
Hope you enjoy the video.
Cheers,
Glyn
CROP your images BIGGER: 3 Right Ways and 1 Wrong Way
Composition is so incredibly important; it can make or break a photograph.
Here's 3 ways that we can alter the composition and make images bigger using the CROP TOOL in Photoshop to show our pictures off at their VERY BEST for screen, print or social media.
Hope you like it,
Glyn
TRY THIS if you need BIGGER BACKGROUNDS in your Photo Shoots
If you ever place backgrounds behind people (individuals or groups) when taking photographs and wish the background was bigger, here’s how you can use Photoshop to do all the hard work blending images together to fake it.
Enjoy,
Glyn
FINALLY! Look Up Tables (LUTs) in Lightroom (Install, Use, Manage)
Colour Look Up Tables (LUTs) are a Game Changer when it comes to colour grading your images in Photoshop, but what if you do more in Lightroom or maybe Lightroom is all you use; can you still use them?
The short answer is YES.
However, they do need to be installed first of all and to do so, although a simple process, doesn’t just mean clicking an “INSTALL LUTs” button.
There’s just a few steps involved as well as a hidden keyboard shortcut, but I promise you that it is an easy process as you’ll see in the short video below…
In the video when going through the steps to install LUTs into Lightroom (Cloud) , I show how you need to navigate to a specific folder on your computer where Camera Raw has previously stored them.
Here’s where you’ll find the folder depending on whether you’re using Mac or Windows:
Mac
~/Library/Application Support/Adobe/CameraRaw/Settings
Note: On a Mac, you can use the keyboard shortcut of Command + Shift + G to bring up the ‘Go to Folder’ dialog
Windows
C:\Users\[user name]\AppData\Roaming\Adobe\CameraRaw\Settings
*Replace [username] with the actual username you use for that specific computer
Hopefully that’s now got you all sorted Importing, Using and Managing LUTs in whichever version/s of Lightroom you use, but if you do have any questions / comments then as always, feel free to make use of the comments section and I’ll get back to you..
Cheers,
Glyn
Autumn / Fall Effect: Transform your Landscape Photographs
It’s my own fault that this year I didn’t manage to grab one single Autumn / Fall photograph; I’ve spent every opportunity photographing down on the coast here in Devon or over the border in Cornwall.
Until next year though (when I WILL get some Autumn / Fall photographs) here’s a couple of ways we can use Photoshop to fake it; the first using a single Adjustment Layer and the second using a new Neural Filter.
When you see the video, which one do yo think works / looks best?
Enjoy,
Glyn
TRY THIS and get PERFECT PRINTS Every Time! (Lightroom + Canon Printers)
Printing can be incredibly frustrating and costly if it doesn’t turn out right.
Despite following the advice of calibrating your screen and using paper profiles, the results just don’t look good and certainly don’t match what you see on the screen.
Good News though…it might not be down to something you’re doing wrong; it may actually be an issue somewhere with the software and / or the printer.
In this video, I show you how we can fix that if you’re using Lightroom as your printing software AND Canon Printers…in particular the newer models.
Enjoy,
Glyn
SKIN RETOUCHING: How to fix Sunburn Skin FAST and EASY with Photoshop
If only it was this easy in real life to get rid of sunburn!
Alas no…but here’s a super fast and easy technique for dealing with sunburnt skin in your pictures by making use of just one Hue & Saturation Adjustment Layer.
Hope you like it,
Glyn