So today (Tuesday 21st May 2024) Adobe made available some fantastic updates and enhancements to both Lightroom v 7.3 (including Mobile) and Lightroom Classic v 13.3 which amongst other things sees the integration of Adobe’s AI, Adobe Firefly and (finally) tethering support for Sony amongt others things.
So, here’s a run through of the changes from today in this recording of a LIVE Broadcast I did on the day of release, and also below I’ve written down all the detailsincluding useful links…
PERFORMANCE UPDATES
In addition to some bug fixes and stability improvements across all platforms, you’ll also notice a speed increase when using Denoise.
Also in addition to the updates and additions detailed below Adobe also mention …
HDR Optimisation
Instant Access to Photo Libraries in Lightroom Mobile and Desktop apps
Lightroom’s all new mobile editing experience streamlines the mobile toolbar to prioritise the most popular features, whilst making it faster and more intuitive to edit.
SLIDESHOW IN DESKTOP
It’s now possible to show images in a slideshow from within Lightroom Desktop.
To start a slideshow you access it via the View > Start Slideshow

On release, the controls and the look of the slideshow are very limited with the images playing at full screen and being able to adjust whether the slideshow loops and adjust the speed of the slideshow to be Extra Slow, Slow, Medium and Fast.

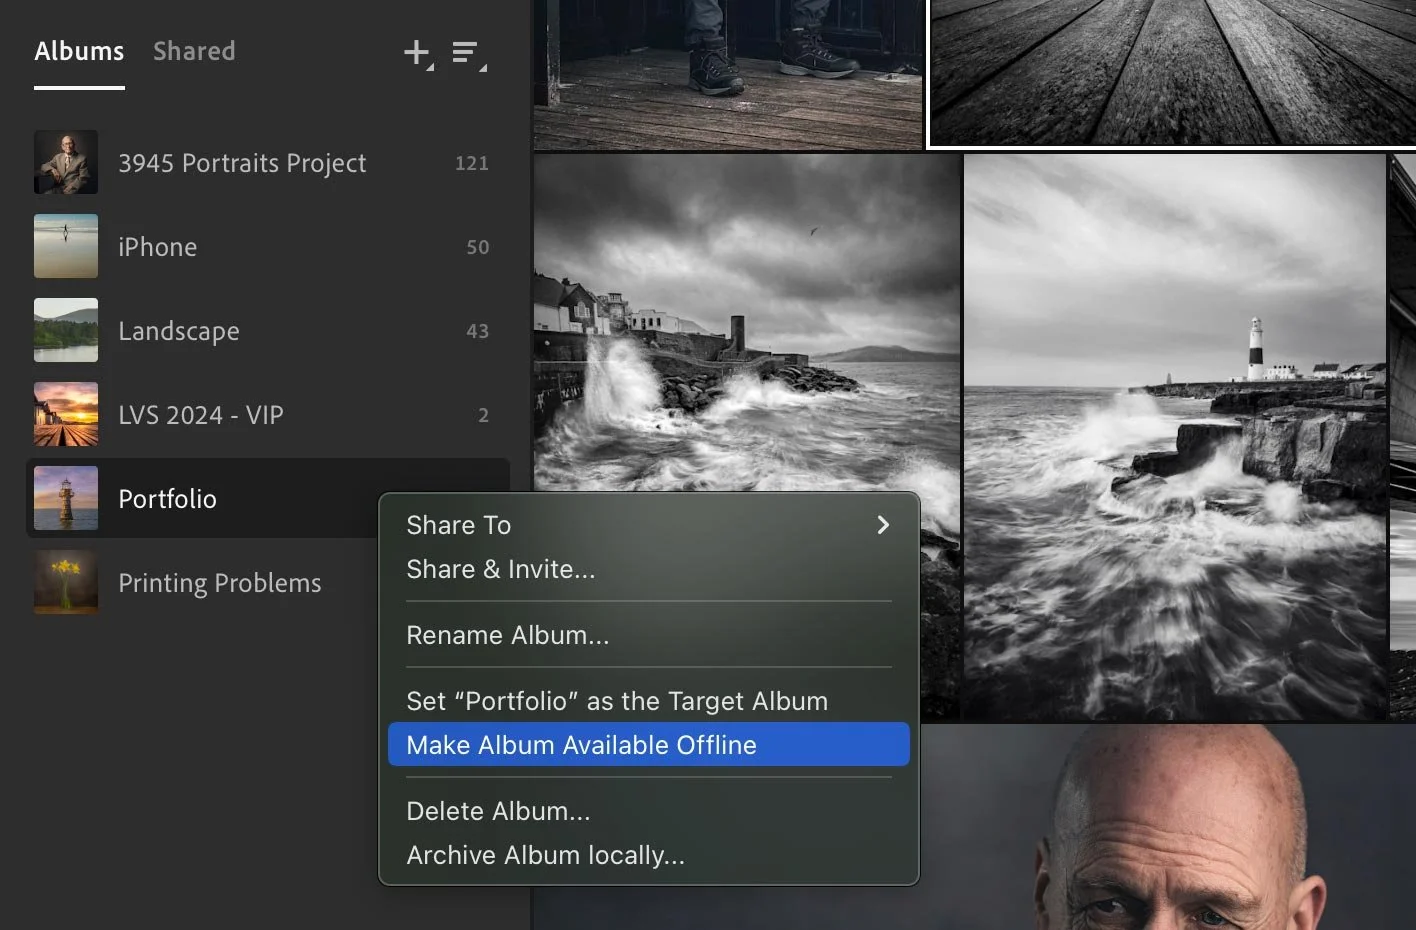
CLOUD TO LOCAL STORAGE (DESKTOP)
Until now it was only possible to have cloud based albums in Lightroom Desktop, but with this update that all changes because from now, we can make Albums available and viewable offline just like Collections in Classic where we could sync them to the cloud or not.
To do this simply right-click on an Album and choose Make Album Available Offline …
SONY TETHERING SUPPORT (CLASSIC)
It’s taken some time but finally Adobe have worked closely with Sony and as a consequence, Lightroom Classic now supports Sony Tethering.


Sony Tethering in Lightroom Classic offers full control over main camera settings, capture and LIVE view
CURRENTLY SUPPORTED SONY CAMERAS …

The process for tethering to Lightroom Classic with a compatible Sony camera is a very simple process, working exactly the same as it does for other compatible brands.
• Note: Camera needs to be in Remote Shooting or PC Remote mode via USB Connection settings.
A full list of ALL cameras that are supported (not just Sony) can be found here: LINK
TONE CURVE IN VIDEO (DESKTOP)
I’m not someone that edits video within Lightroom but I know that there are many that do, so the addition of Tone Curve in Video for Lightroom Desktop is going to be a very welcome update.
Adobe state that …
You can now edit the Tone Curve when editing video in Lightroom Desktop
These edits are viewable across Mobile and Web
Videos now supports Presets with Tone Curve information
LENS BLUR ENHANCEMENTS
The Lens Blur Effect is finally out of Early Access and available to all, and Adobe states that its release also brings with it …
Copy and Paste Support
Added focus slider in Mobile
Support for Presets and New Adaptive Presets
Improvements to the subject detection and complex edges

Lens Blur

NO Lens BLur

With Visualise Range turned on to show which areas of the image are in and out of focus
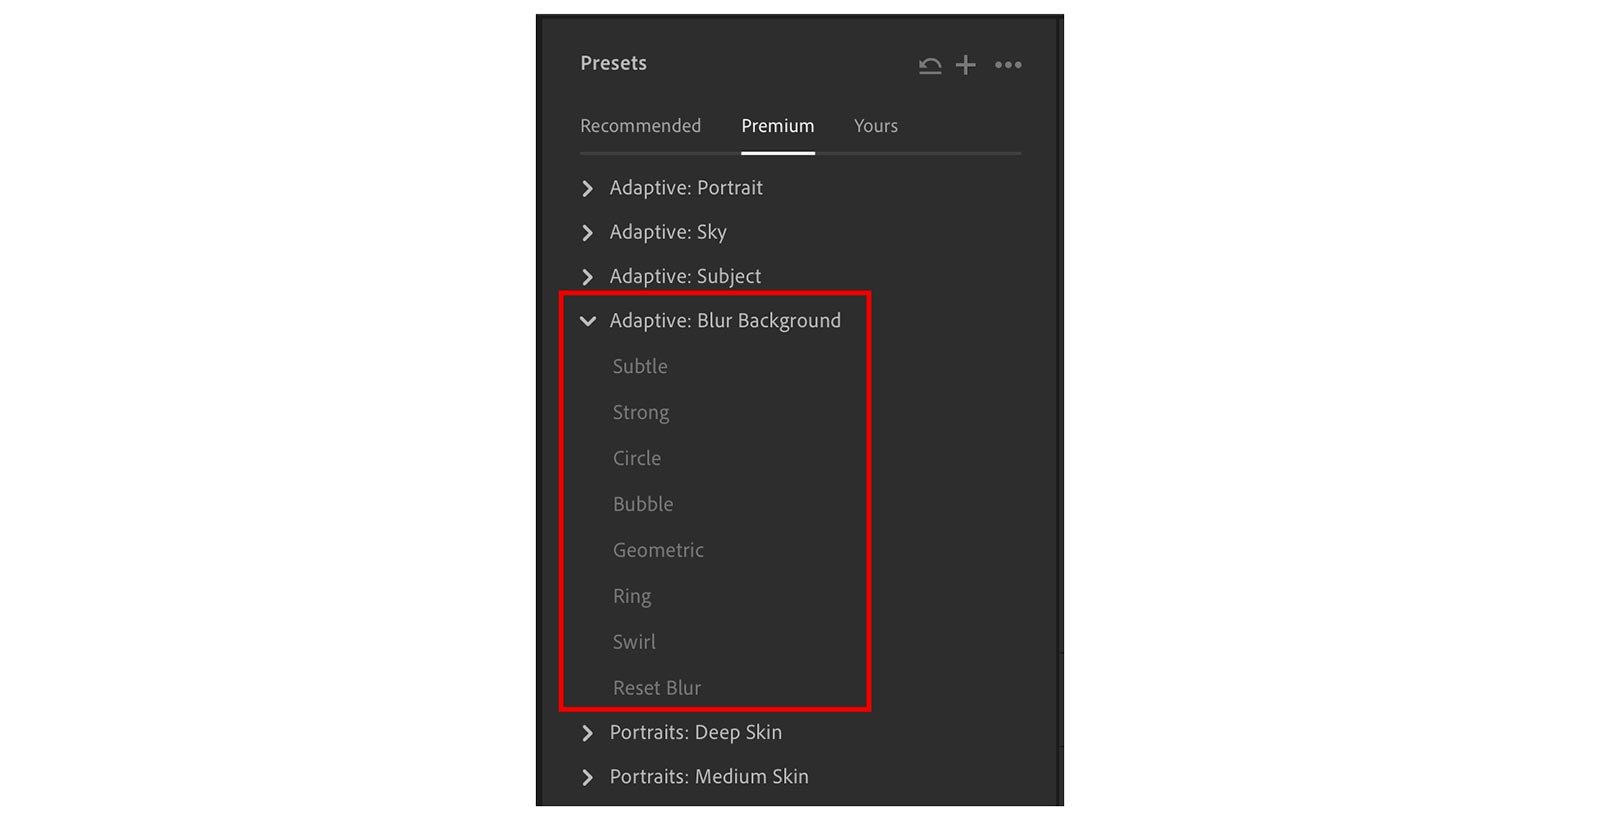
Lens Blur Adaptive Presets
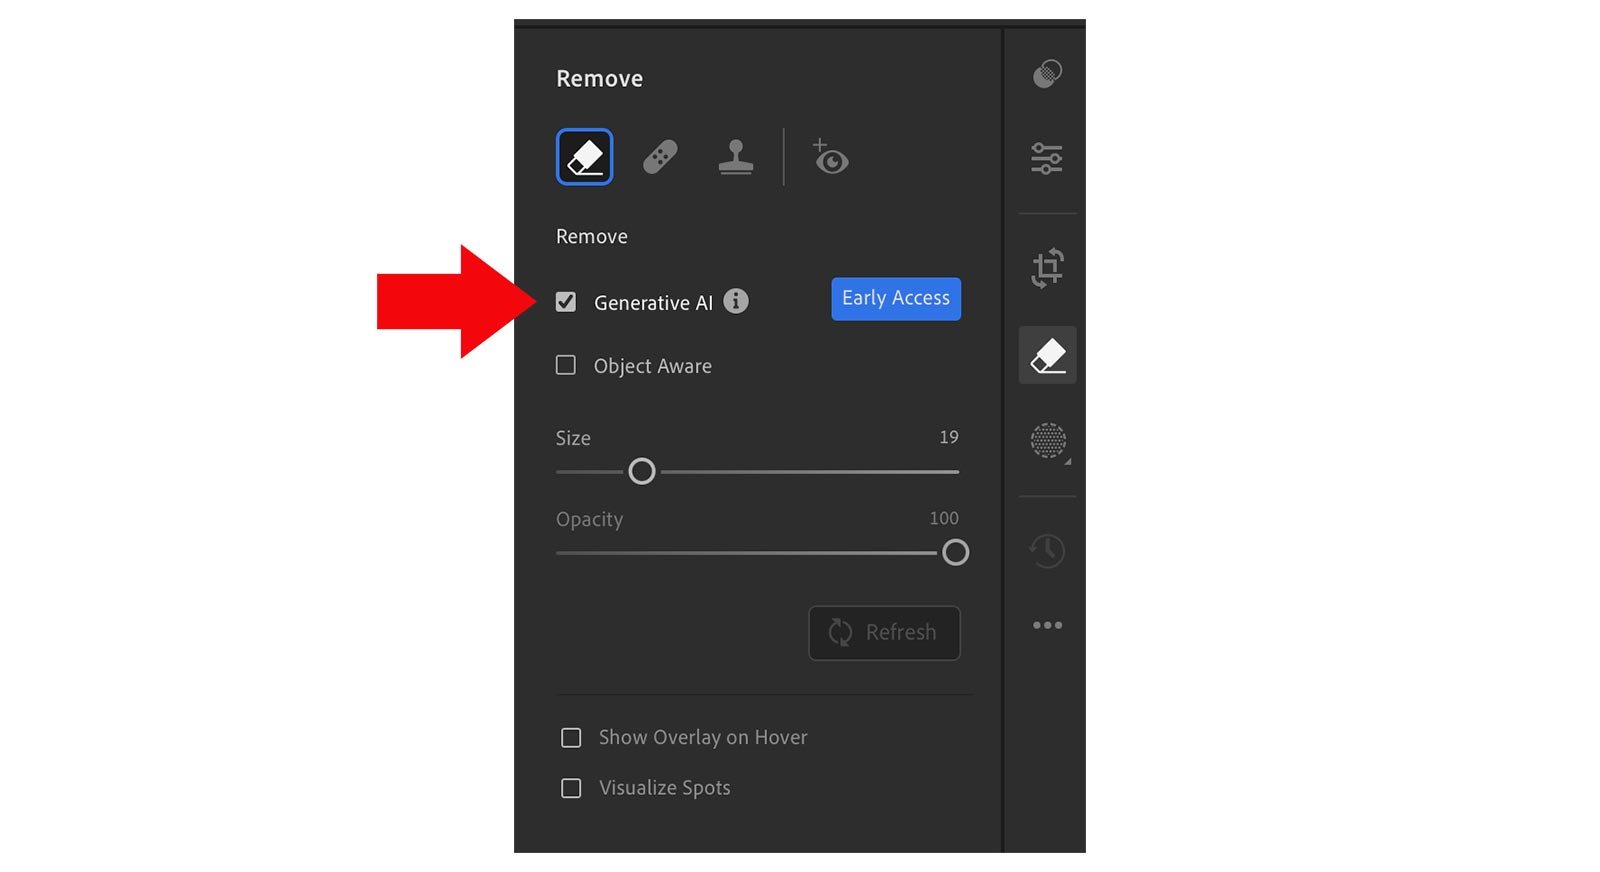
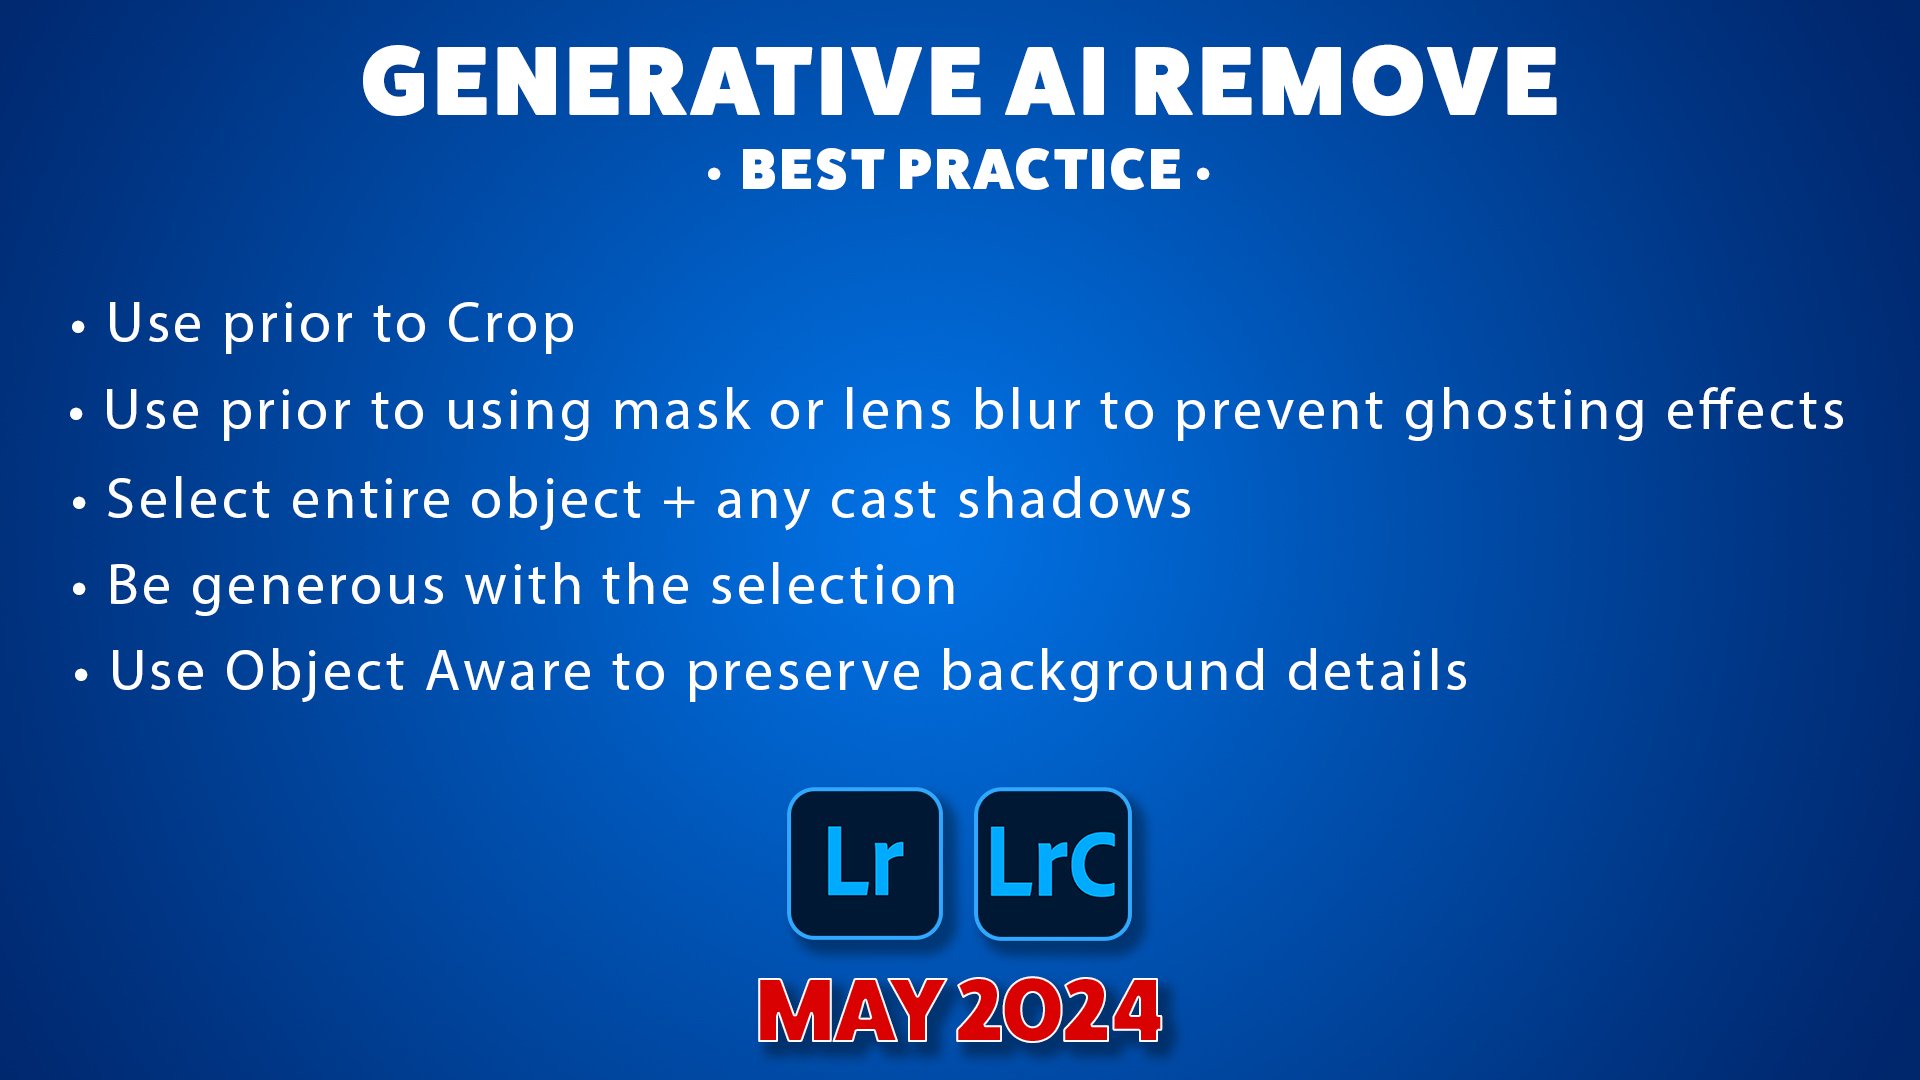
GENERATIVE AI REMOVE
Adobe have now integrated their Adobe Firely AI as Early Access into Lightroom Desktop, Mobile, Web and Lightroom Classic for the purpose of … Removing distractions and unwanted objects from your photos
Found in the Remove section amongst the exisiting Remove Tool, Heal Tool and Clone Stamp Tool (and Red Eye Removal) you use it in conjunction with the Remove Tool by simply ticking the Generative AI checkbox …
Maximum Resolution of the ‘Removed’ area is currently 2K, so a very generous starting point considering this is to be used purely for removing unwanted distractions and objects …

To use Remove with Generative AI simply brush generously over whatever it is that you want to remove.
You can then Add or Subtract from this area to refine it …

3 variations are then given and you can click through to see which you prefer OR simply Refresh to try again until you get a result that you’re happy with …

There is also an Object Aware checkbox which Adobe state is to to be used to Preserve Background Details whereby the AI will analyse the initial selection you made and identify what it is you want to remove without having to fill in the entire selection, meaning you could just brush around the outside.

So for example in the picture below, let’s say that I want to remove the cardboard box and string that the little boy has over his shoulder …

I’ll use Generative AI Remove but also use Object Aware, so then rather brush to select the entire box I’ll just quickly brush around the outside including the string …

The AI then looks at what I’ve drawn around to ee if it can identify the main object, and looking at the selection it made below it did a pretty good job …

I then use the Add option in the Refine section to brush over the string that was missed, so that it’s included in the remove …

… and this is the result

As with all features and tools there are ways to use them to produce more pleasing results, so here’s just a few for Generative AI Remove …
There a couple of differences when using Generative AI Remove in Lightroom Desktop and Lightroom Classic and I show those in the LIVE Broadcast recording at the top of this page
Finally (for now) keep a look out for some more videos coming soon where I take a deeper dive into some of the new features, but in the mean time here’s a link to the official news release from Adobe ( LINK )
Cheers,
Glyn