Trigga: Portrait Shoot on Location and Behind the Scenes

Here’s the result from a recent portrait shoot with Trigga whom I met at a GREAT local Bikers' Café; a completely free spirit who lives life his way embracing and respecting nature and his surroundings.

This was our first shoot together; completely relaxed and gave us time to hang out and chat, so now I simply CANNOT wait for the next one which will be out on location in the Devon Countryside with a Harley.
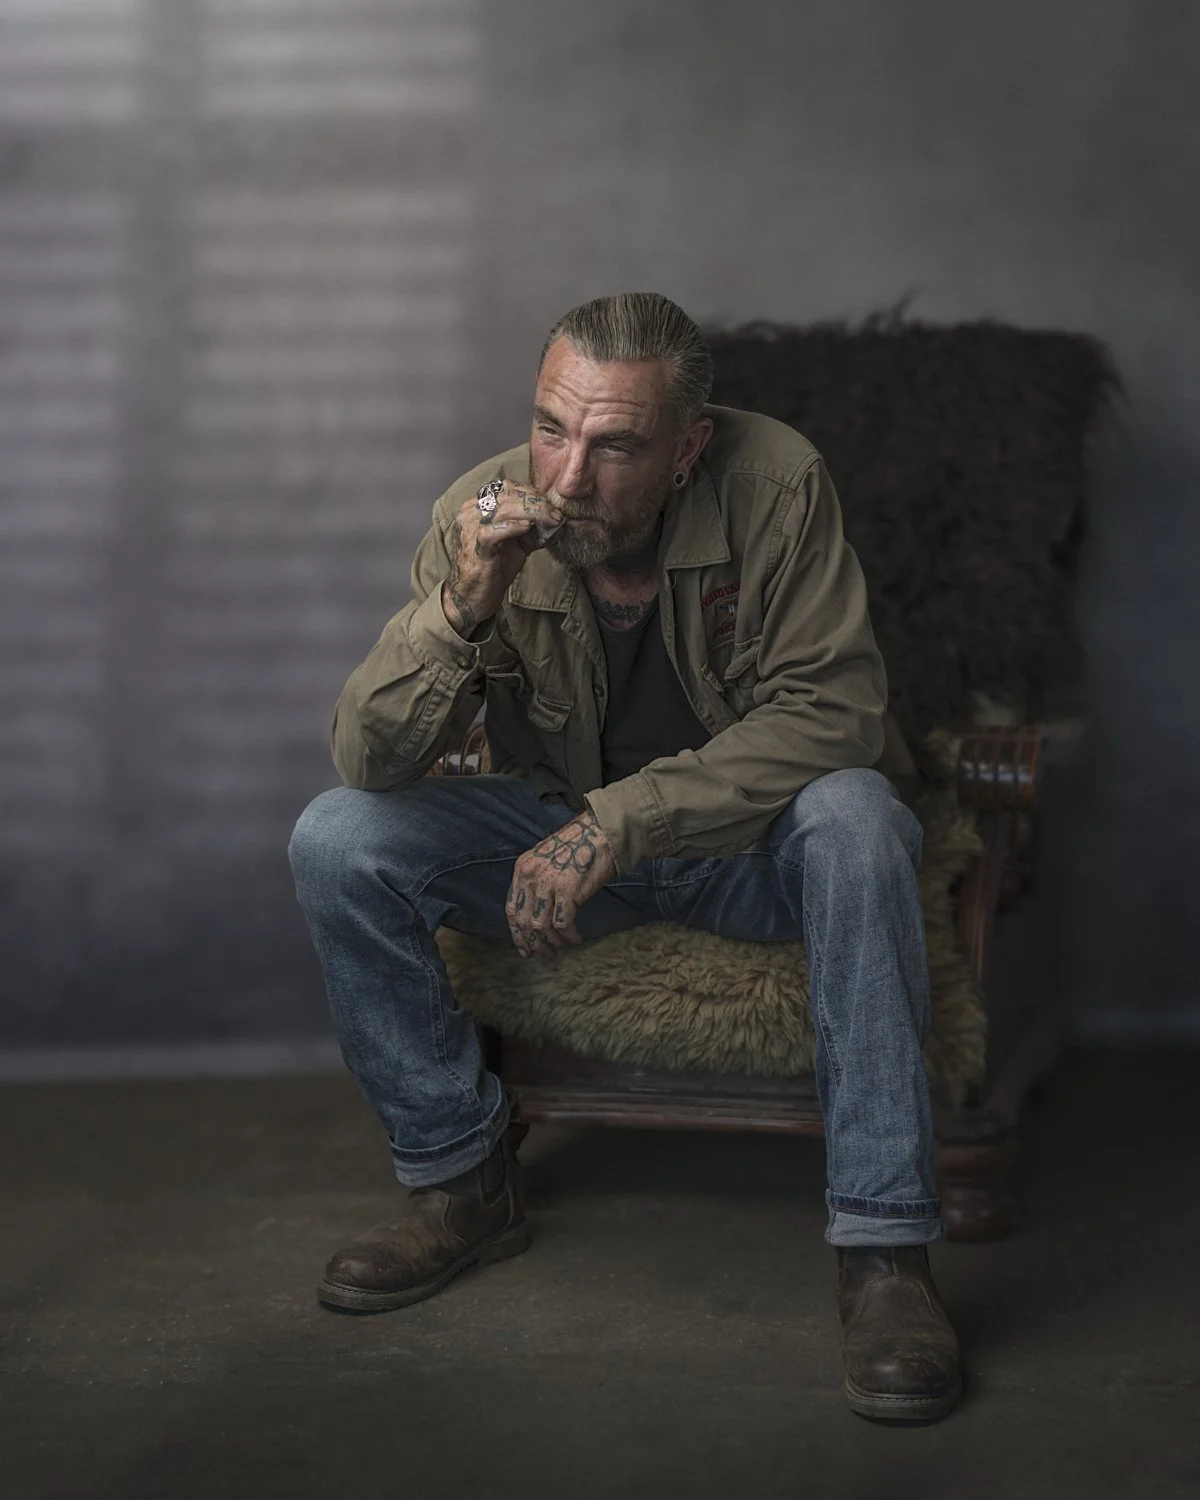
Man in a khaki jacket seated in a worn armchair, resting his chin on his hand, against a dark backdrop

I get a real kick out of how, by using lighting, we can change the look and feel of a location taking especially when doing so takes just a small amount of kit…

Behind the Scenes

If you’re like me, I love to see Behind the Scenes (BTS) so I thought I’d share a grab shot that I took with my phone just before packing away, that gives you a look at what I used and where it was positioned to take the portrait of Trigger…

Lighting

Background

Tethering

Behind the scenes in a garage with labelled Westcott lights, backdrop, reflector and tether cable

This was actually the first photo shoot I got to use the new X-Drop Pro Background Stand and my new Glyn Dewis Vintage Grey Canvas Background that is now a material and able to be folded making it way more convenient to transport, PLUS it comes in 8‘ x 8’ and 7‘ x 5’ sizes.

I’ll be sharing a video very soon giving a look at the new X-Drop Pro because, if you’ve seen or have the original X-Drop, this new Pro version is VERY different in a VERY good way!

You can check out the kit above and the new X-Drop Pro over on my GEAR Page.

Anyway, I really hope you like the portrait of Trigga … such a great guy, and I’ll be sure to share images when we get out in the Devon Countryside taking photographs of Bikers and their Harleys, Triumphs, Royal Enfields and so on…

Cheers,
Glyn
Xencelabs Discounted Price Offers on Pen Tablets: Up to 30% OFF

Just a quick one…

i’v recently seen that Xencelabs (makers of the Pen Tablet I use) currently have some Special Offers on some of their product range with up to 30% OFF

Valid until the 15th September 2022, the discounts are…

  • 15% OFF the Pen Tablet Medium

  • 30% OFF then Pen Tablet Small

  • 15% OFF the Pen Tablet Medium Bundle SE

Thought I’d let you know 😉

Check out the *link below …

*Affiliate Link

💥 NEW FEATURE in Photoshop: REMOVING OBJECTS just got EASIER!!!

Removing objects using Content-Aware Fill in Photoshop got better with this new feature, which lets you use content from a second image, even one with a completely different composition. Here I show how it works and how it's making challenging selections and cloning a thing of the past for this kind of job. It can save a load of time compared with working through it by hand using selections and the cloning tools.

I'm on Vero and so far I'm liking it 👍🏻

It's not like we really need, or more to the point, want another Social Media platform, but the way they're all going with more ads and sponsored content showing up than the people you want to be 'social' with, I thought I'd check out Vero.

I guess it's still early days but so far I'm liking it: pictures, comments, interaction, recommendations and so on ... kind of how ''social media" should be, but like I say...early days.

Liking it because you can check out some nice photographs, interact and then dive out without being sucked in.

If you’re on Vero, send me over a connect 👍🏻

iPhone showing the Glyn Dewis profile page on the Vero app

🔪 TRY THIS if you DON'T LIKE the PEN TOOL: Razor Sharp Selections made EASY!

If you find the Pen Tool in Photoshop frustrating, difficult or just plain annoying, then give this a try. I show how to take a regular selection and turn it into a pin sharp selection that's as good as anything you'd make with the Pen Tool, but without having to use it at all. It's a great option for anyone who needs clean, crisp edges on their selections but has never got on with drawing paths.

✅ My FAVOURITE technique for MATCHING SKIN TONE using Photoshop

The best way to learn is by experimenting and playing, and that's very much the spirit of this one. I show how a simple Curves adjustment and a little bit of masking can be used to match skin tone between two different people, which is my favourite way of doing it in Photoshop. Along the way I also have some fun with the same tools, giving an instant six pack.

❌ DO NOT USE THIS if you PRINT PHOTOGRAPHS! USB Connection v Apple AirPrint (wireless)

Even if you do everything right when printing your own photographs, they might still not look as good as they should, and it might not be your fault. If you're a Mac user connecting wirelessly to your printer with Apple AirPrint, that could well be the reason. Here I show why AirPrint is a no-go when printing photographs and why a USB connection is the best way to connect to your printer.

📷 EDITING in LIGHTROOM is getting FASTER and EASIER !!!

With the recent updates to Lightroom, including presets and masking, it's possible to edit images faster and more easily than before. Here I quickly go through the editing and retouching steps from a recent landscape and seascape shoot with my drone. It runs from capture, through blending and changing the perspective, to colour grading and finally printing, so you can see how the whole edit comes together in Lightroom.

Drone Photography at Boscastle, Cornwall

  • Weather Apps … ✅

  • Tide Times … ✅

  • Drone Assist and NOTAMS … ✅

  • Kit Checked and Batteries Charged … ✅

With everything ready, a couple of evenings ago we popped down to Boscastle, Cornwall with the idea of grabbing dinner and taking some photographs in what can only be described as a stunning location.

As it happens, although I had intended to, I didn’t end up taking any photographs with my main camera BUT thankfully had brought along my drone (DJI Air 2S) and with conditions being perfect for some aerial photography, I couldn’t resist…

Drone view of a rocky coastline with a small white lookout tower on a headland at golden hour

For the above image looking out from mouth of Boscastle Harbour across the sea, I set the drone up to take 5 photographs in quick succession with each a different exposure (AEB) and then blended them together in Lightroom to create a HDR (High Dynamic Range) image.

Drone panorama of a rugged headland and islands in deep blue sea at Boscastle, Cornwall

I love creating panoramic shots with my drone too; this one and the one below taken using the 180 pano setting in Raw, and then merging together in Lightroom to create the stitched together image.

Wide drone panorama of the Boscastle coastline with sunlit cliffs and calm sea

And of course, I couldn’t resist a Top-Down …

Top-down drone view of a rocky Cornish headland surrounded by deep blue water

All of the images were processed using both Lightroom Classic and Lightroom Cloud; using both together opens up so many more editing possibilities due to the cloud and Adobe’s A.I. which is a great way to edit fast and get inspired.

I’m thinking about covering this in an video over on my YouTube Channel so if you think it would be worth doing, I’d really appreciate a YEs or a NO in the comments section below.

Also I’m looking at putting together a video and post showing what I check (weather, no fly zones, NOTAMs etc), what I take with me and everything I do to ensure a safe (and legal) and successful flight with my drone when filming or taking photographs, so again if you think that would be something worth sharing, just let me know.

Thanks for looking in,
Glyn

GOODBYE WACOM and HELLO XENCELABS 👍 FINALLY a Pen Tablet that WORKS !!!

Is a pen tablet just a pen tablet? Xencelabs sent me their Medium Bundle to try out, and the big question was whether it would be better than the Wacom I'd been using. The answer was a definite yes. In this short video I explain the main points that made the difference for me: the driver, the wireless connection, the battery life, the aspect ratio and the Quick Keys.