iPhone

My iPhone Made Me a Better Mirrorless Photographer

It sounds like an unlikely claim; smartphone making you better with a professional camera system, but for me, it is exactly what happened, and the journey that brought me there started in the strangest of circumstances: a global pandemic, an empty coastline, and a camera bag I eventually stopped reaching for.

When Lockdown Pushed Me Towards the Coast

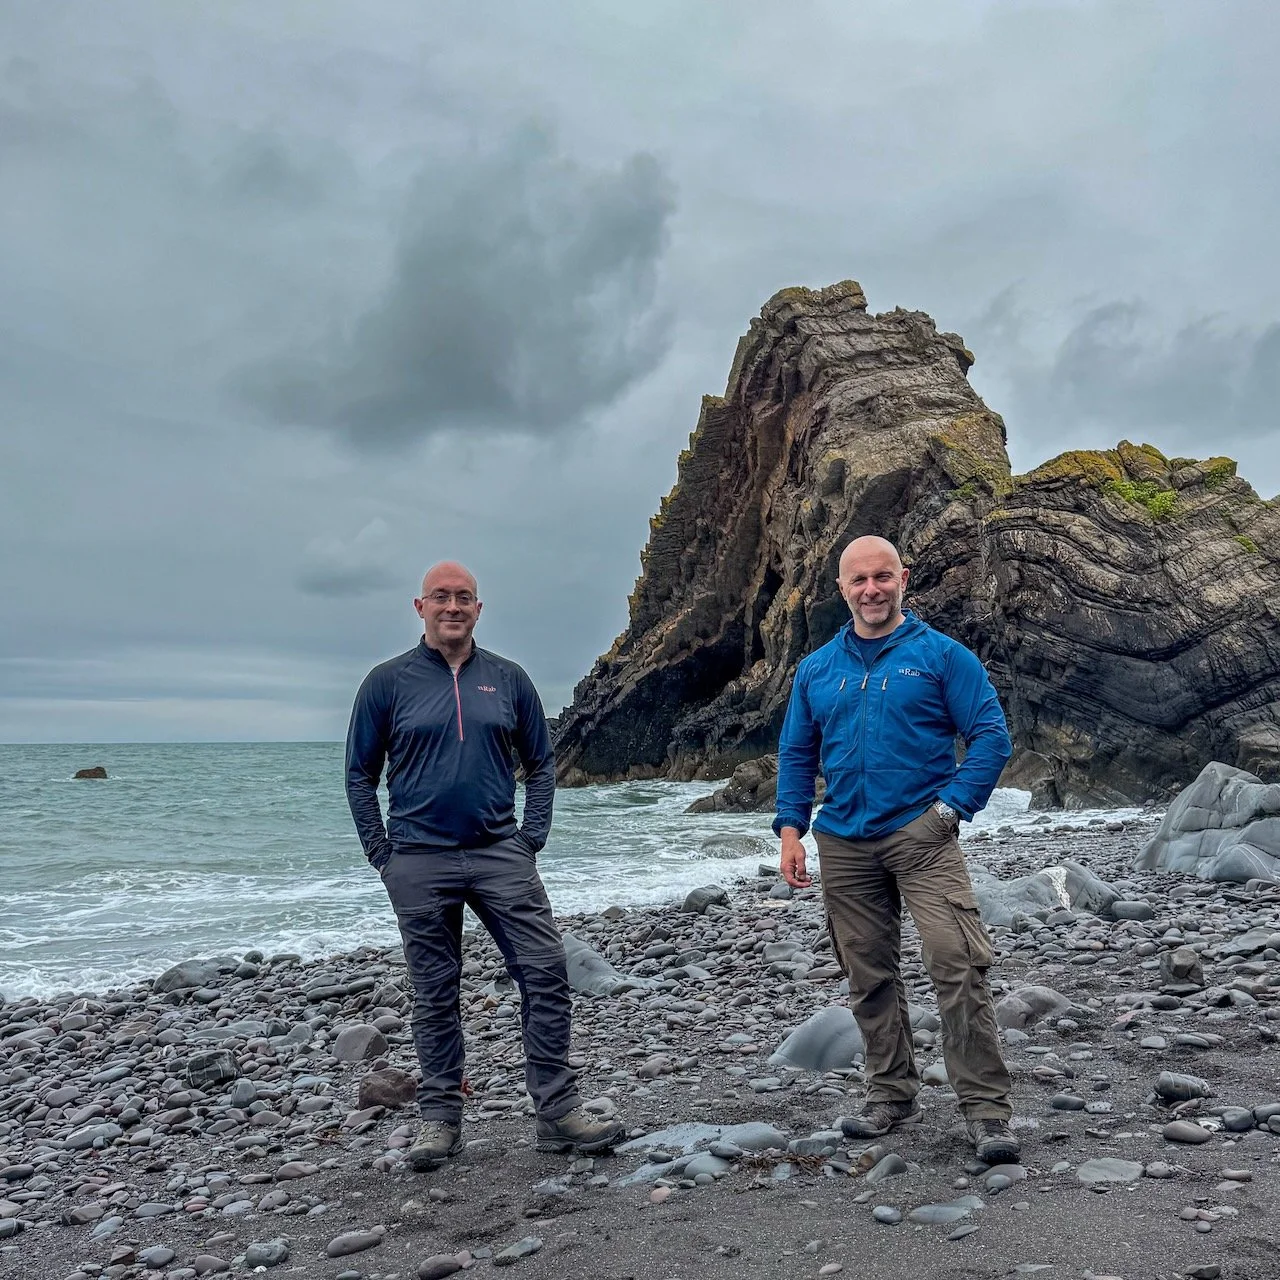
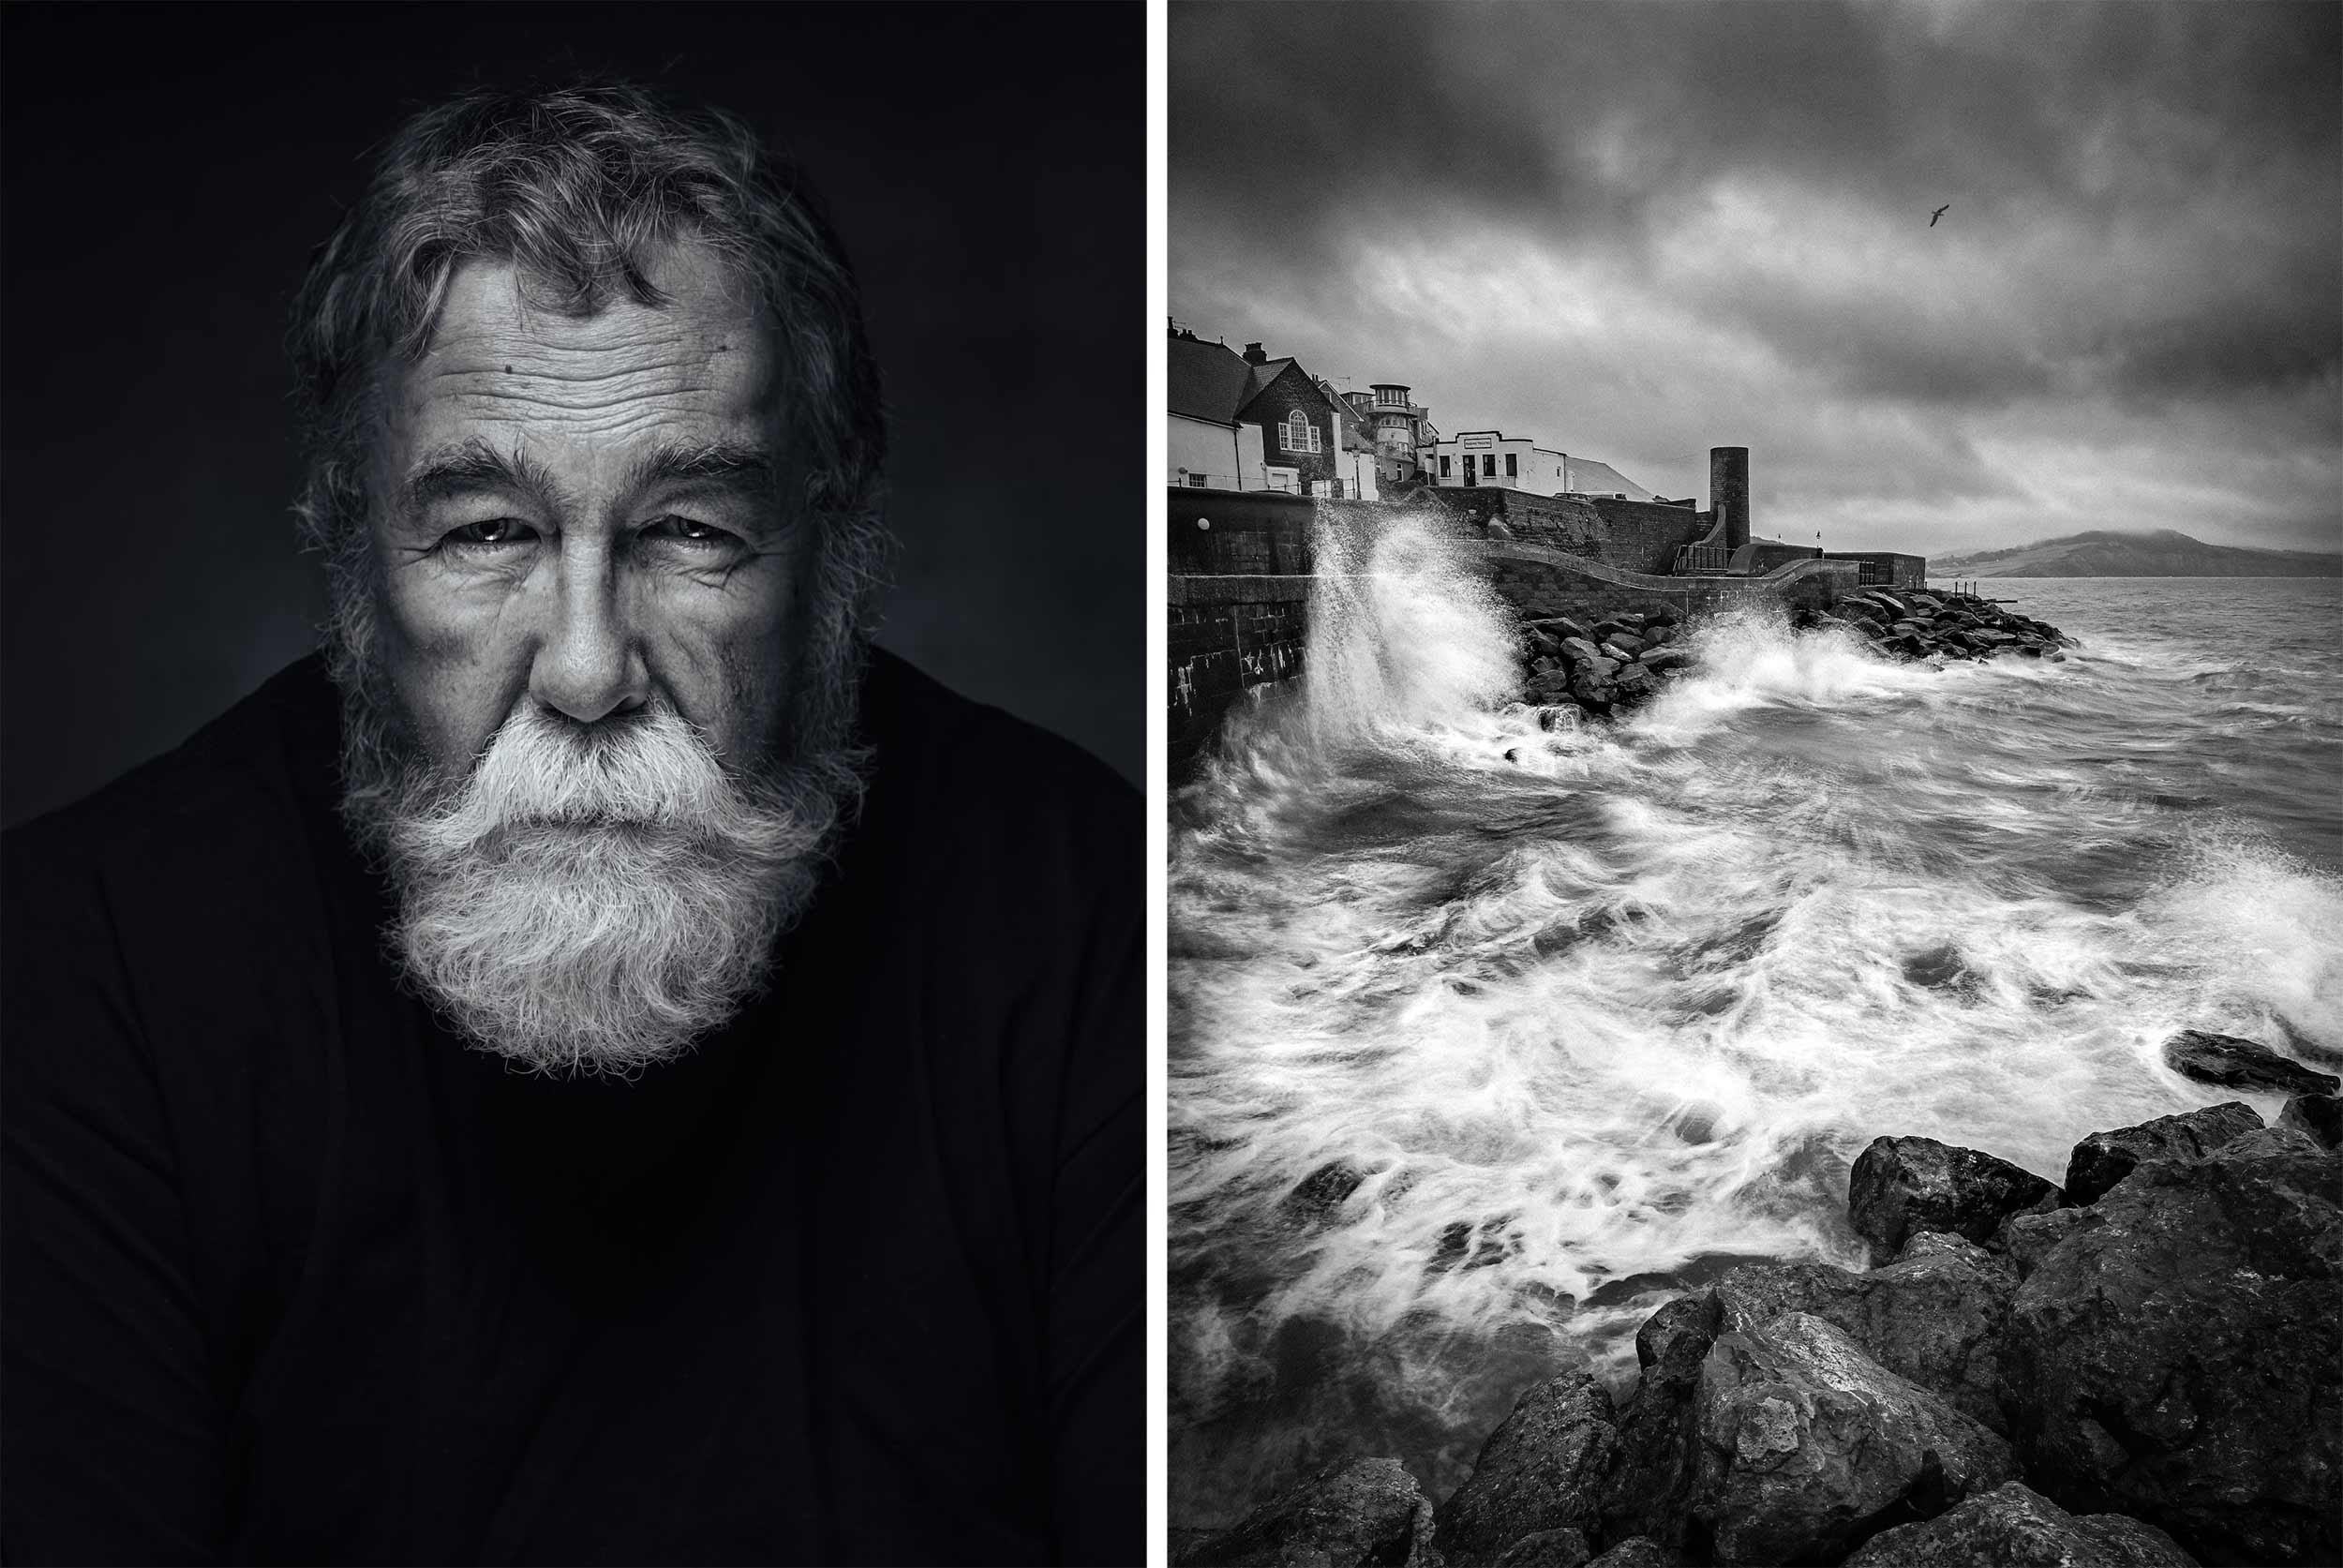
Portrait photography is what I do, it’s the heart of my work, but in the early days of the COVID pandemic, with people unable to gather, I needed an outlet. I needed to get out and stay creative. Fortunately, the nature of my work meant I had the permission to do so, even when so many others could not.

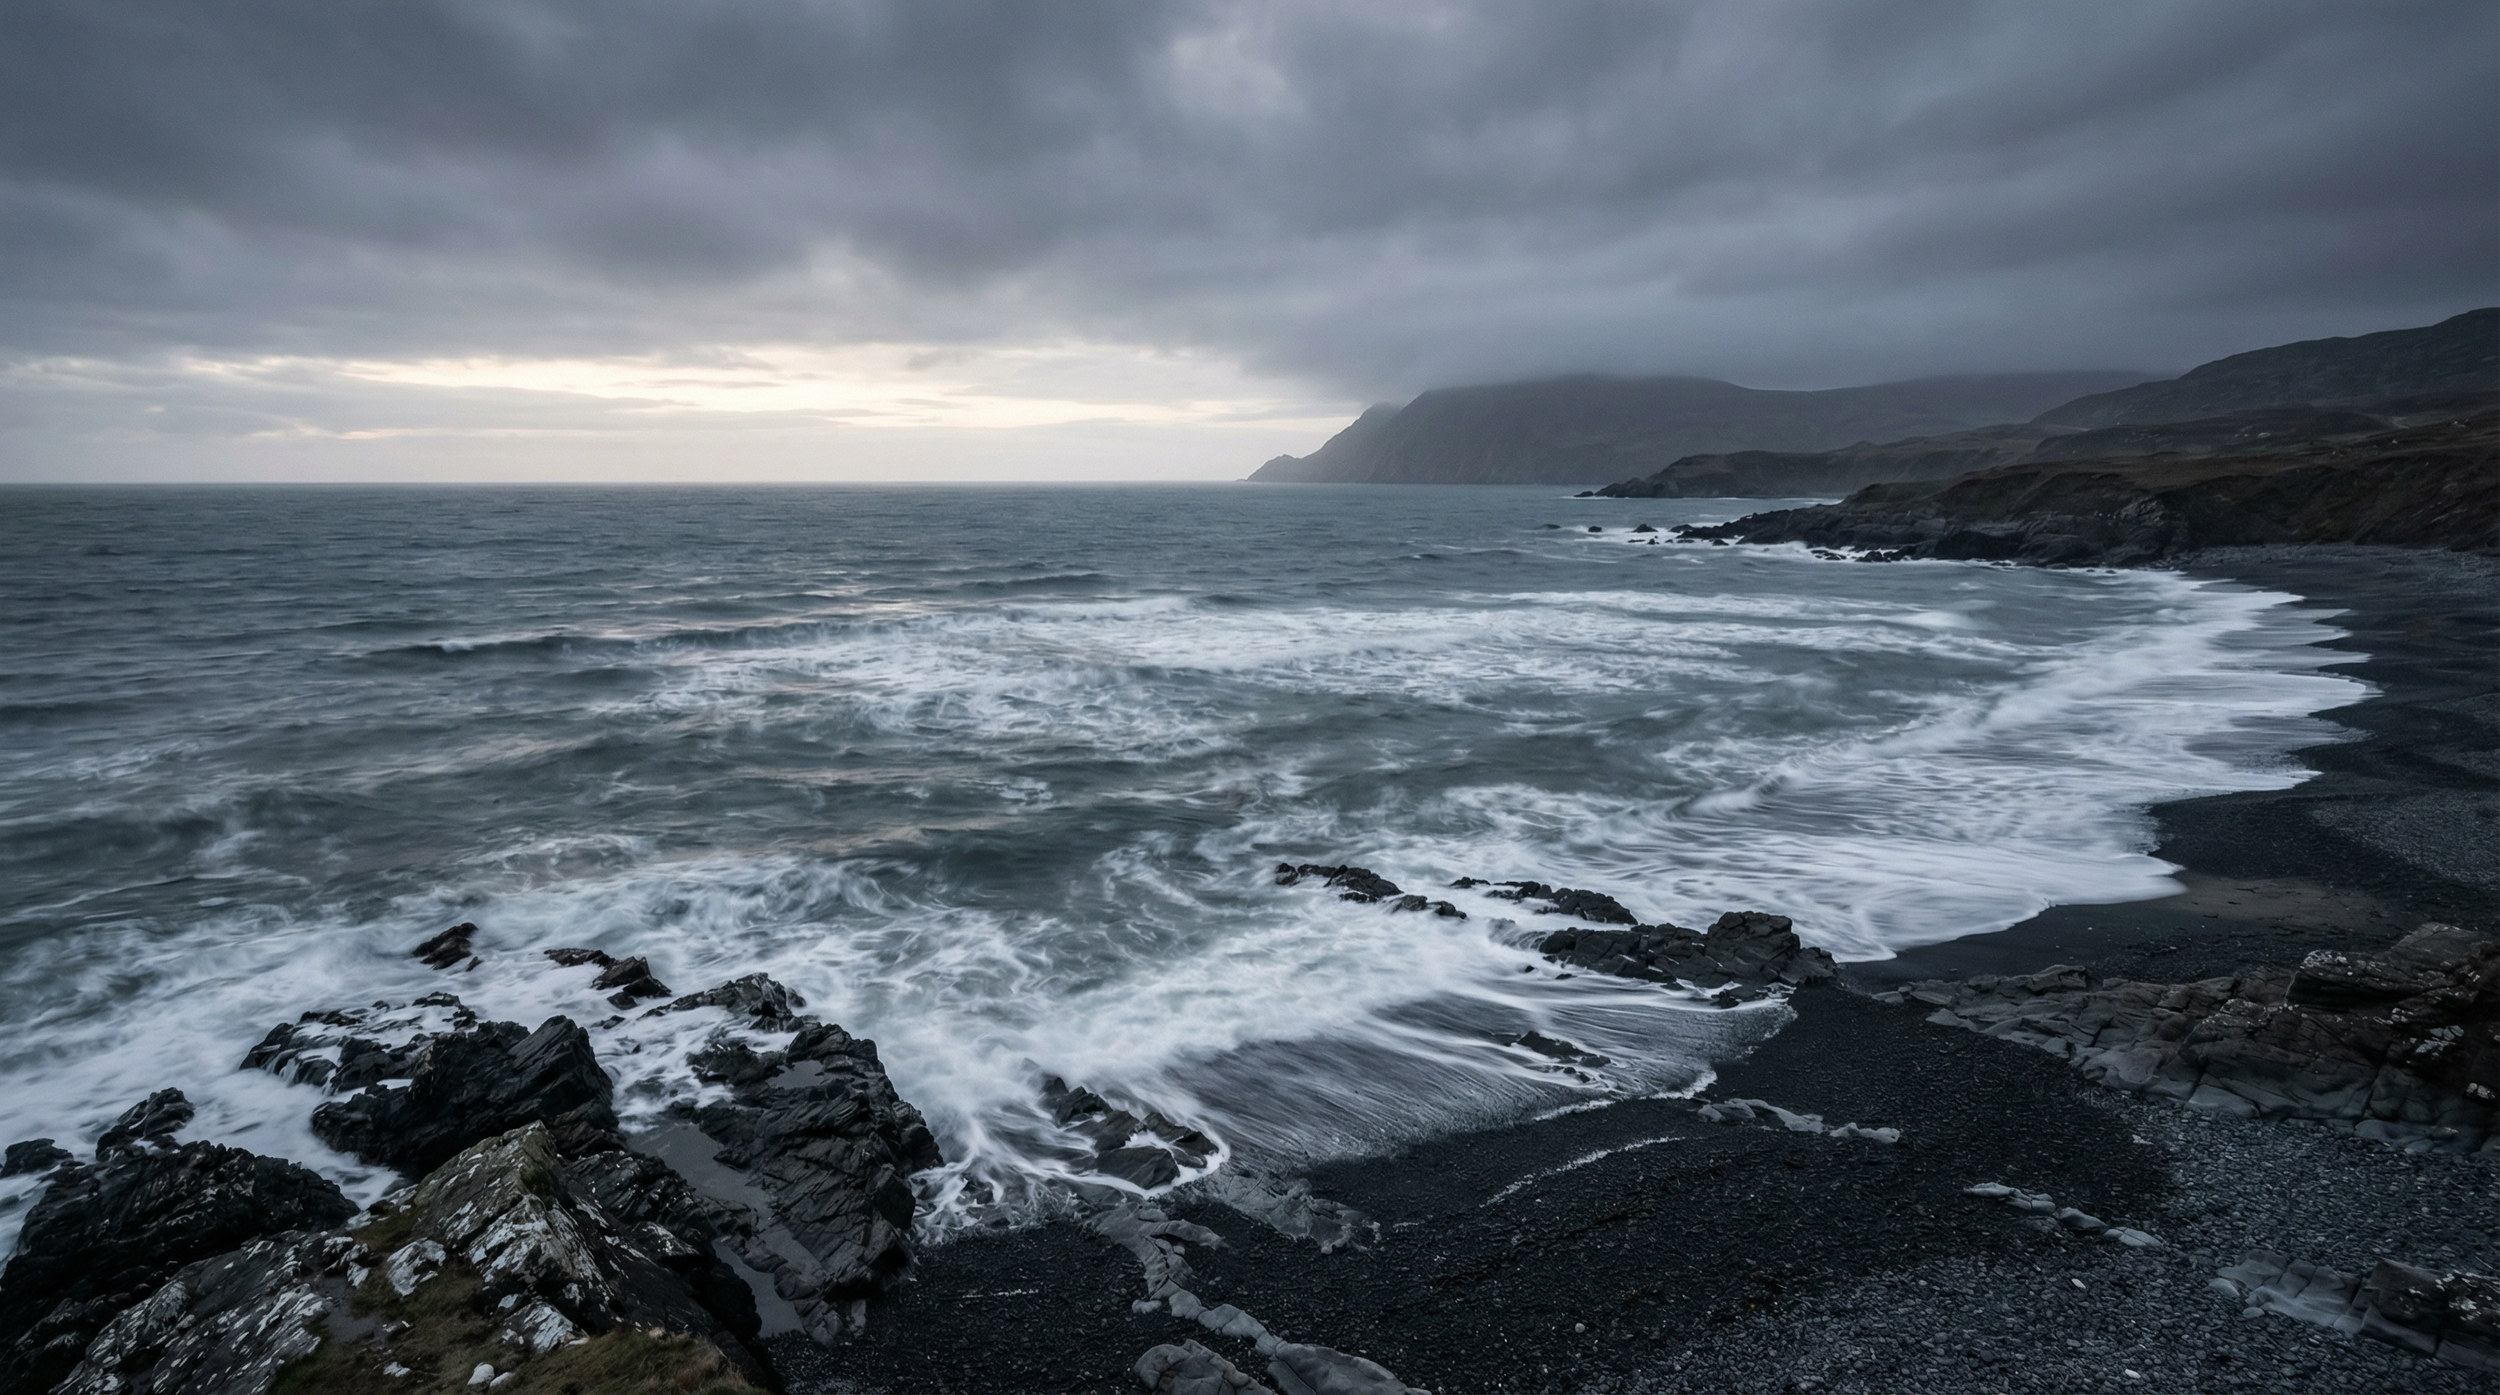
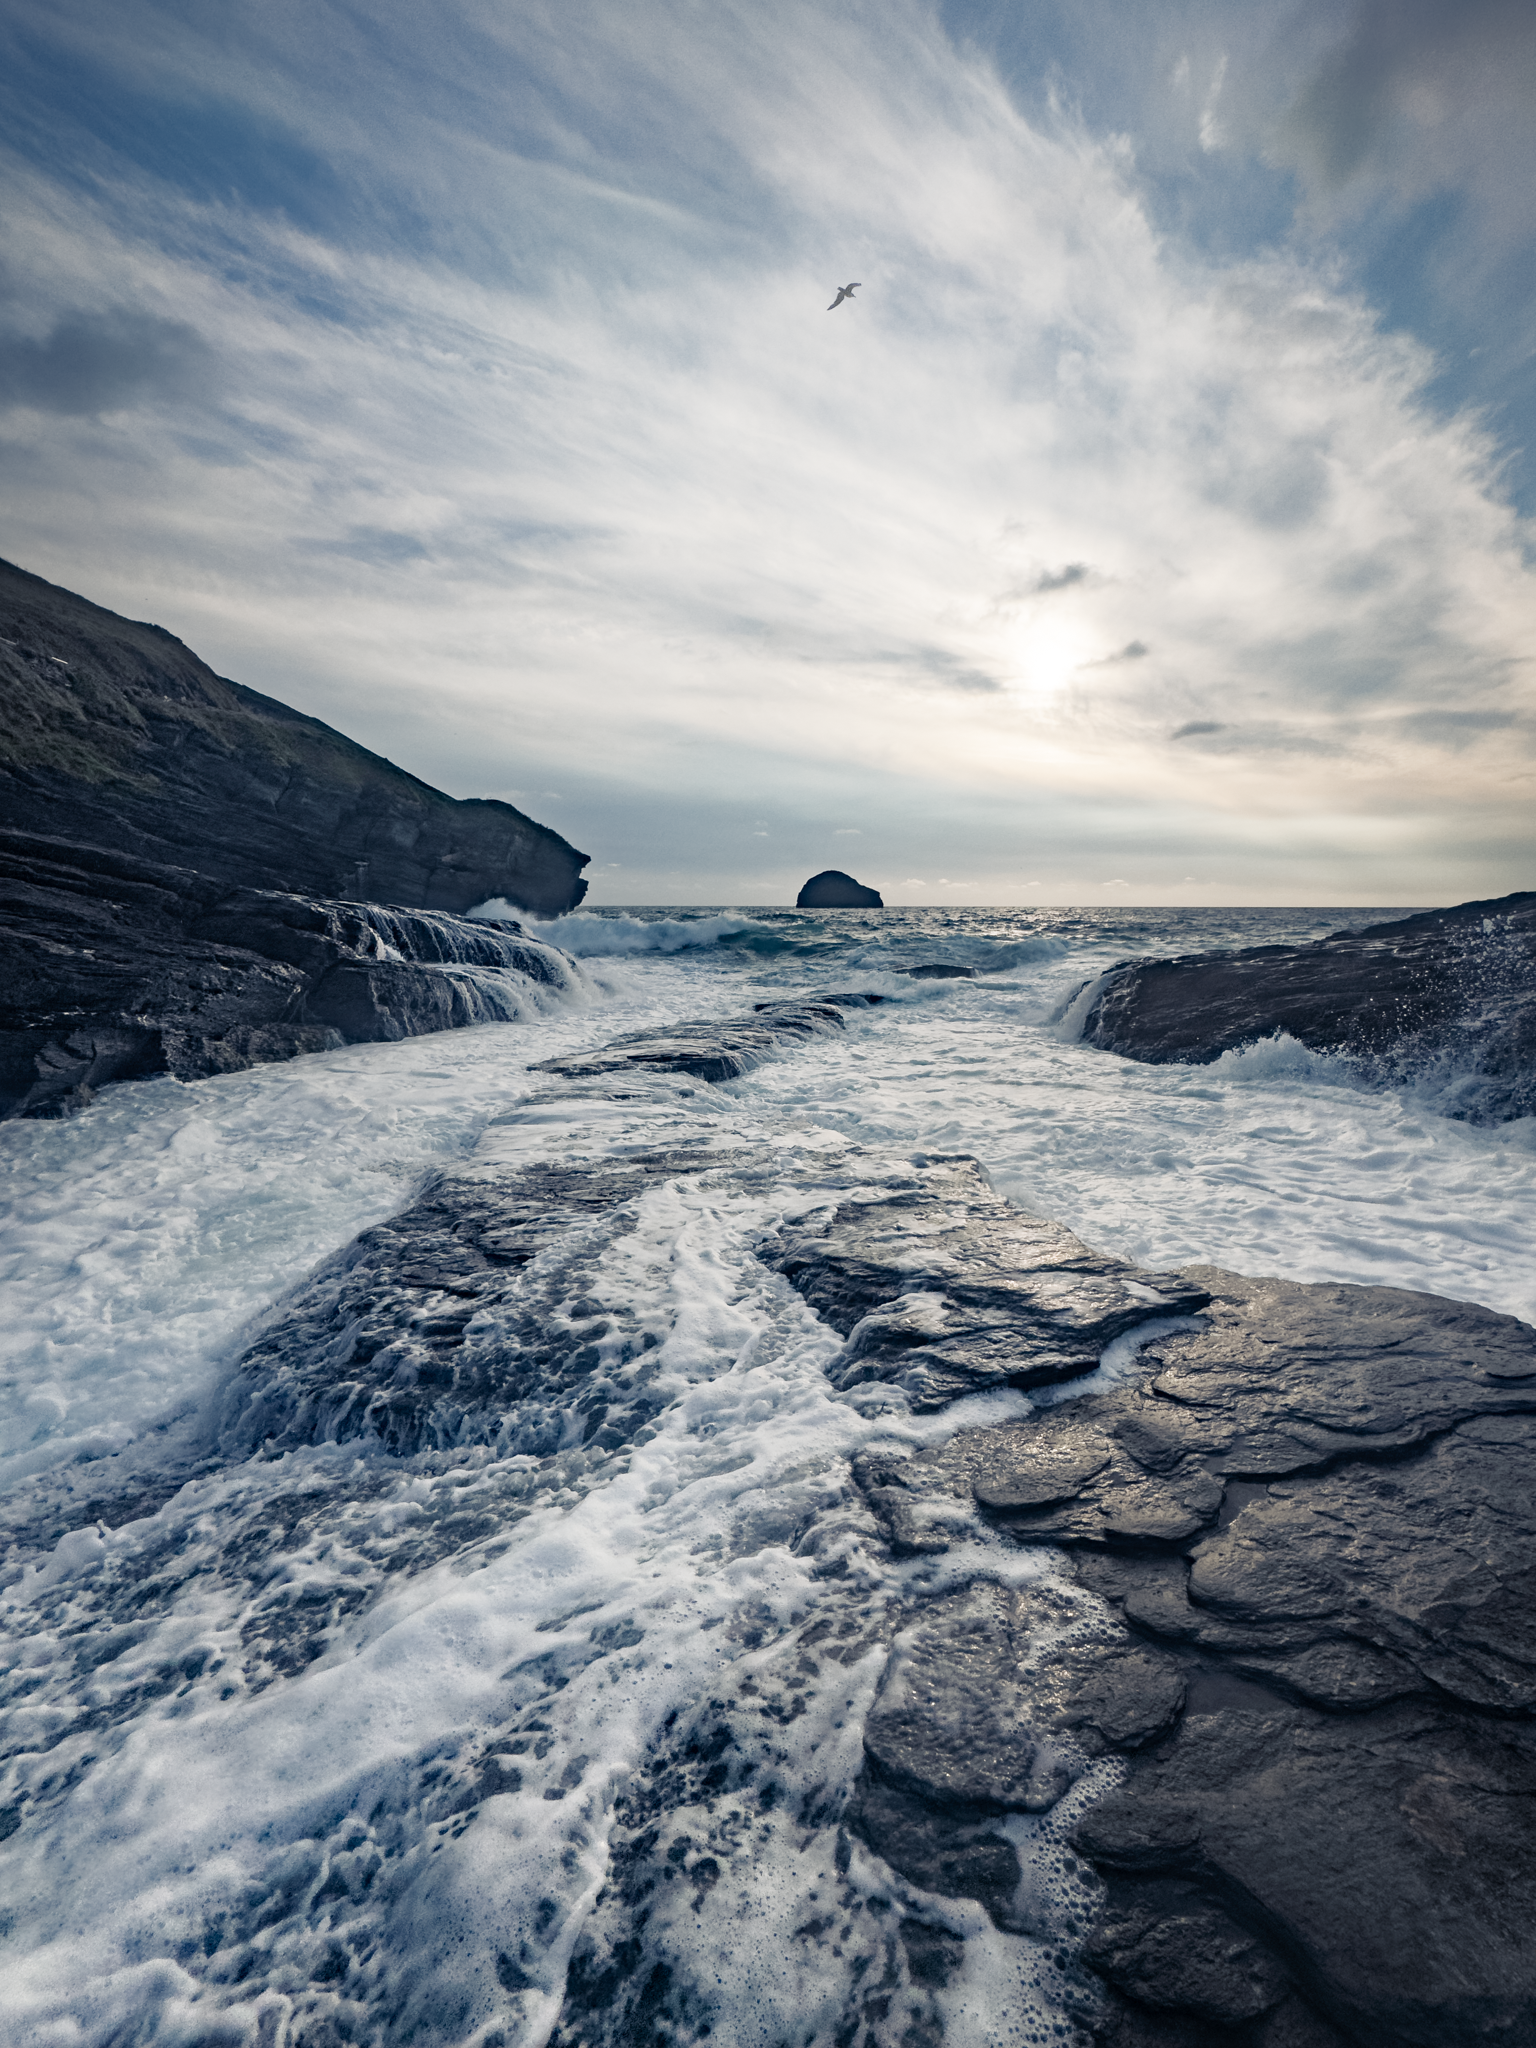
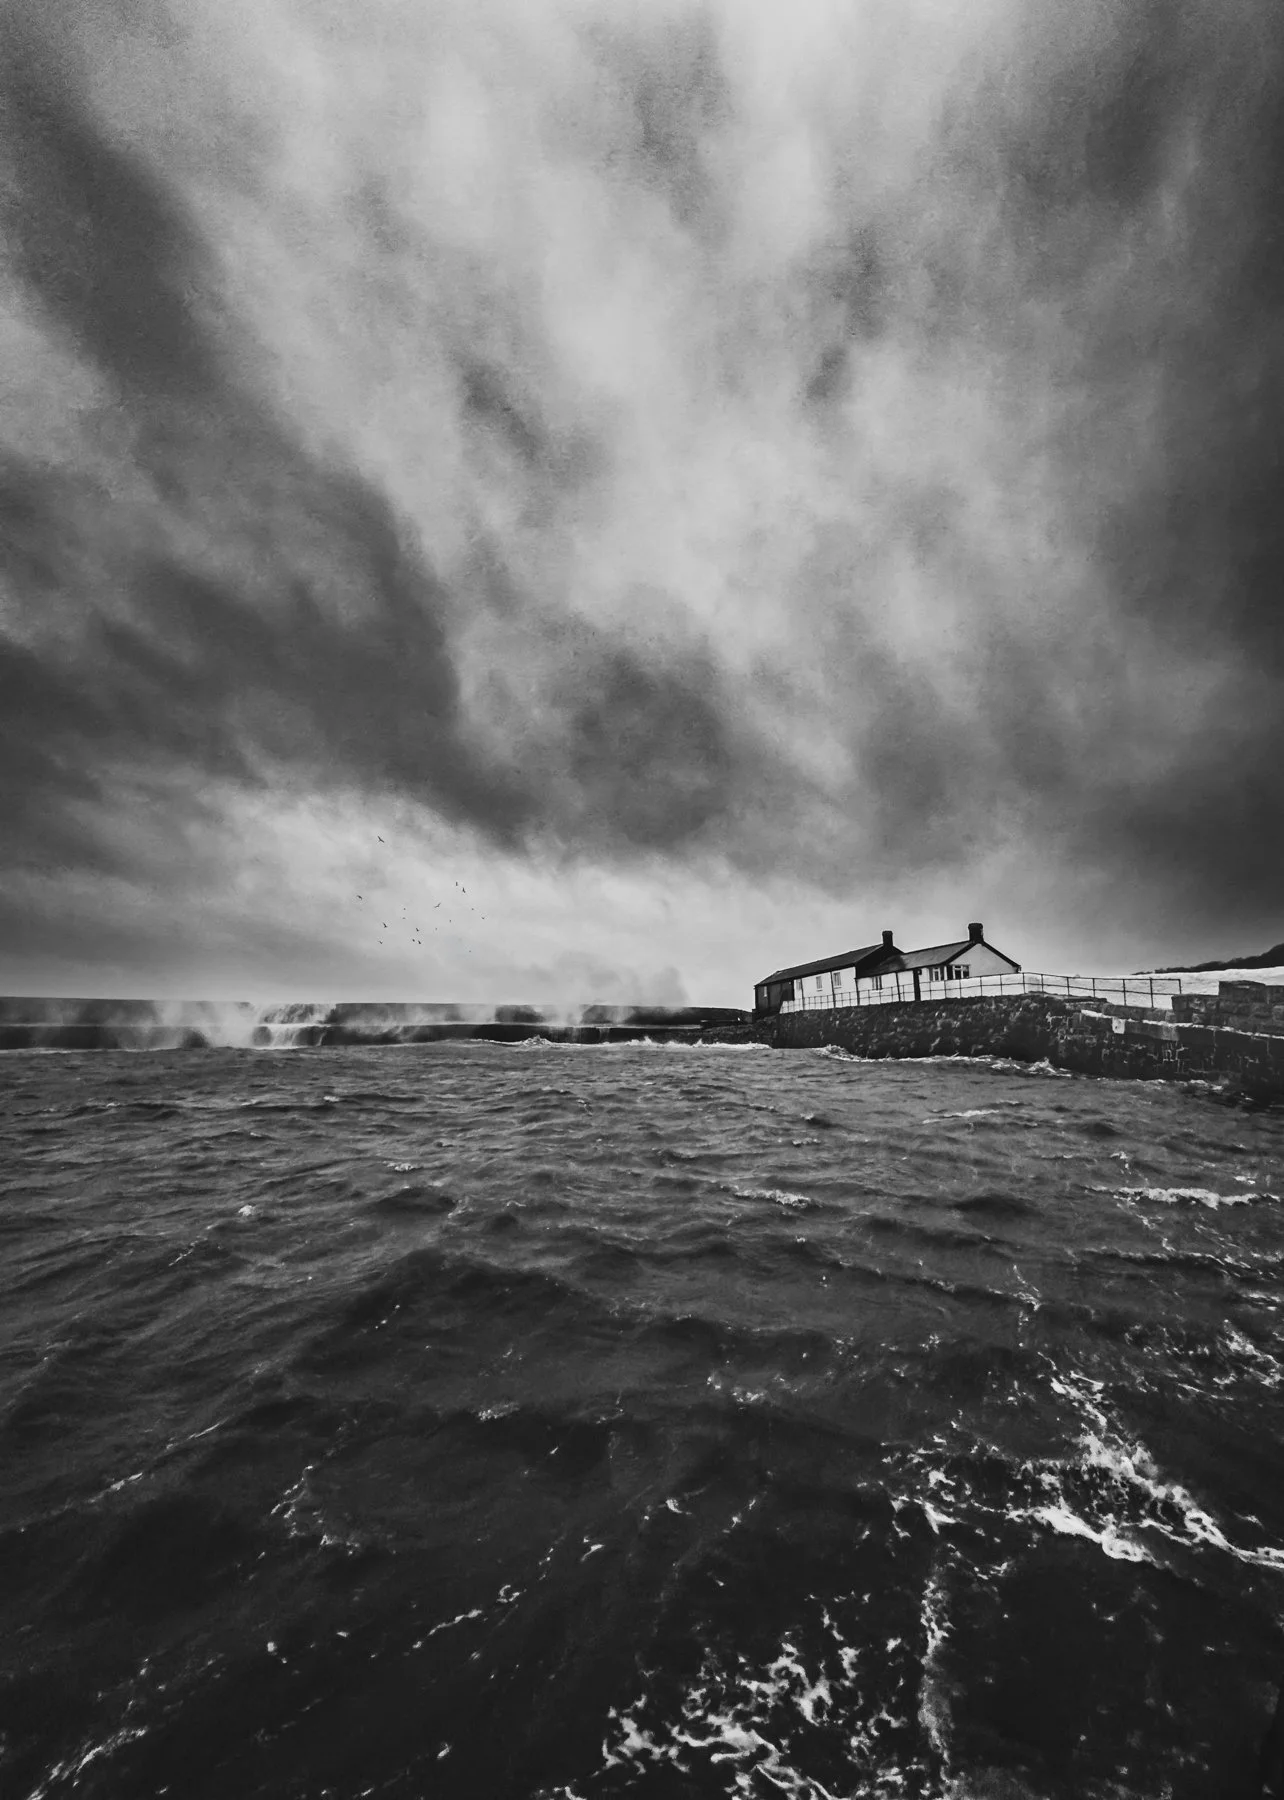
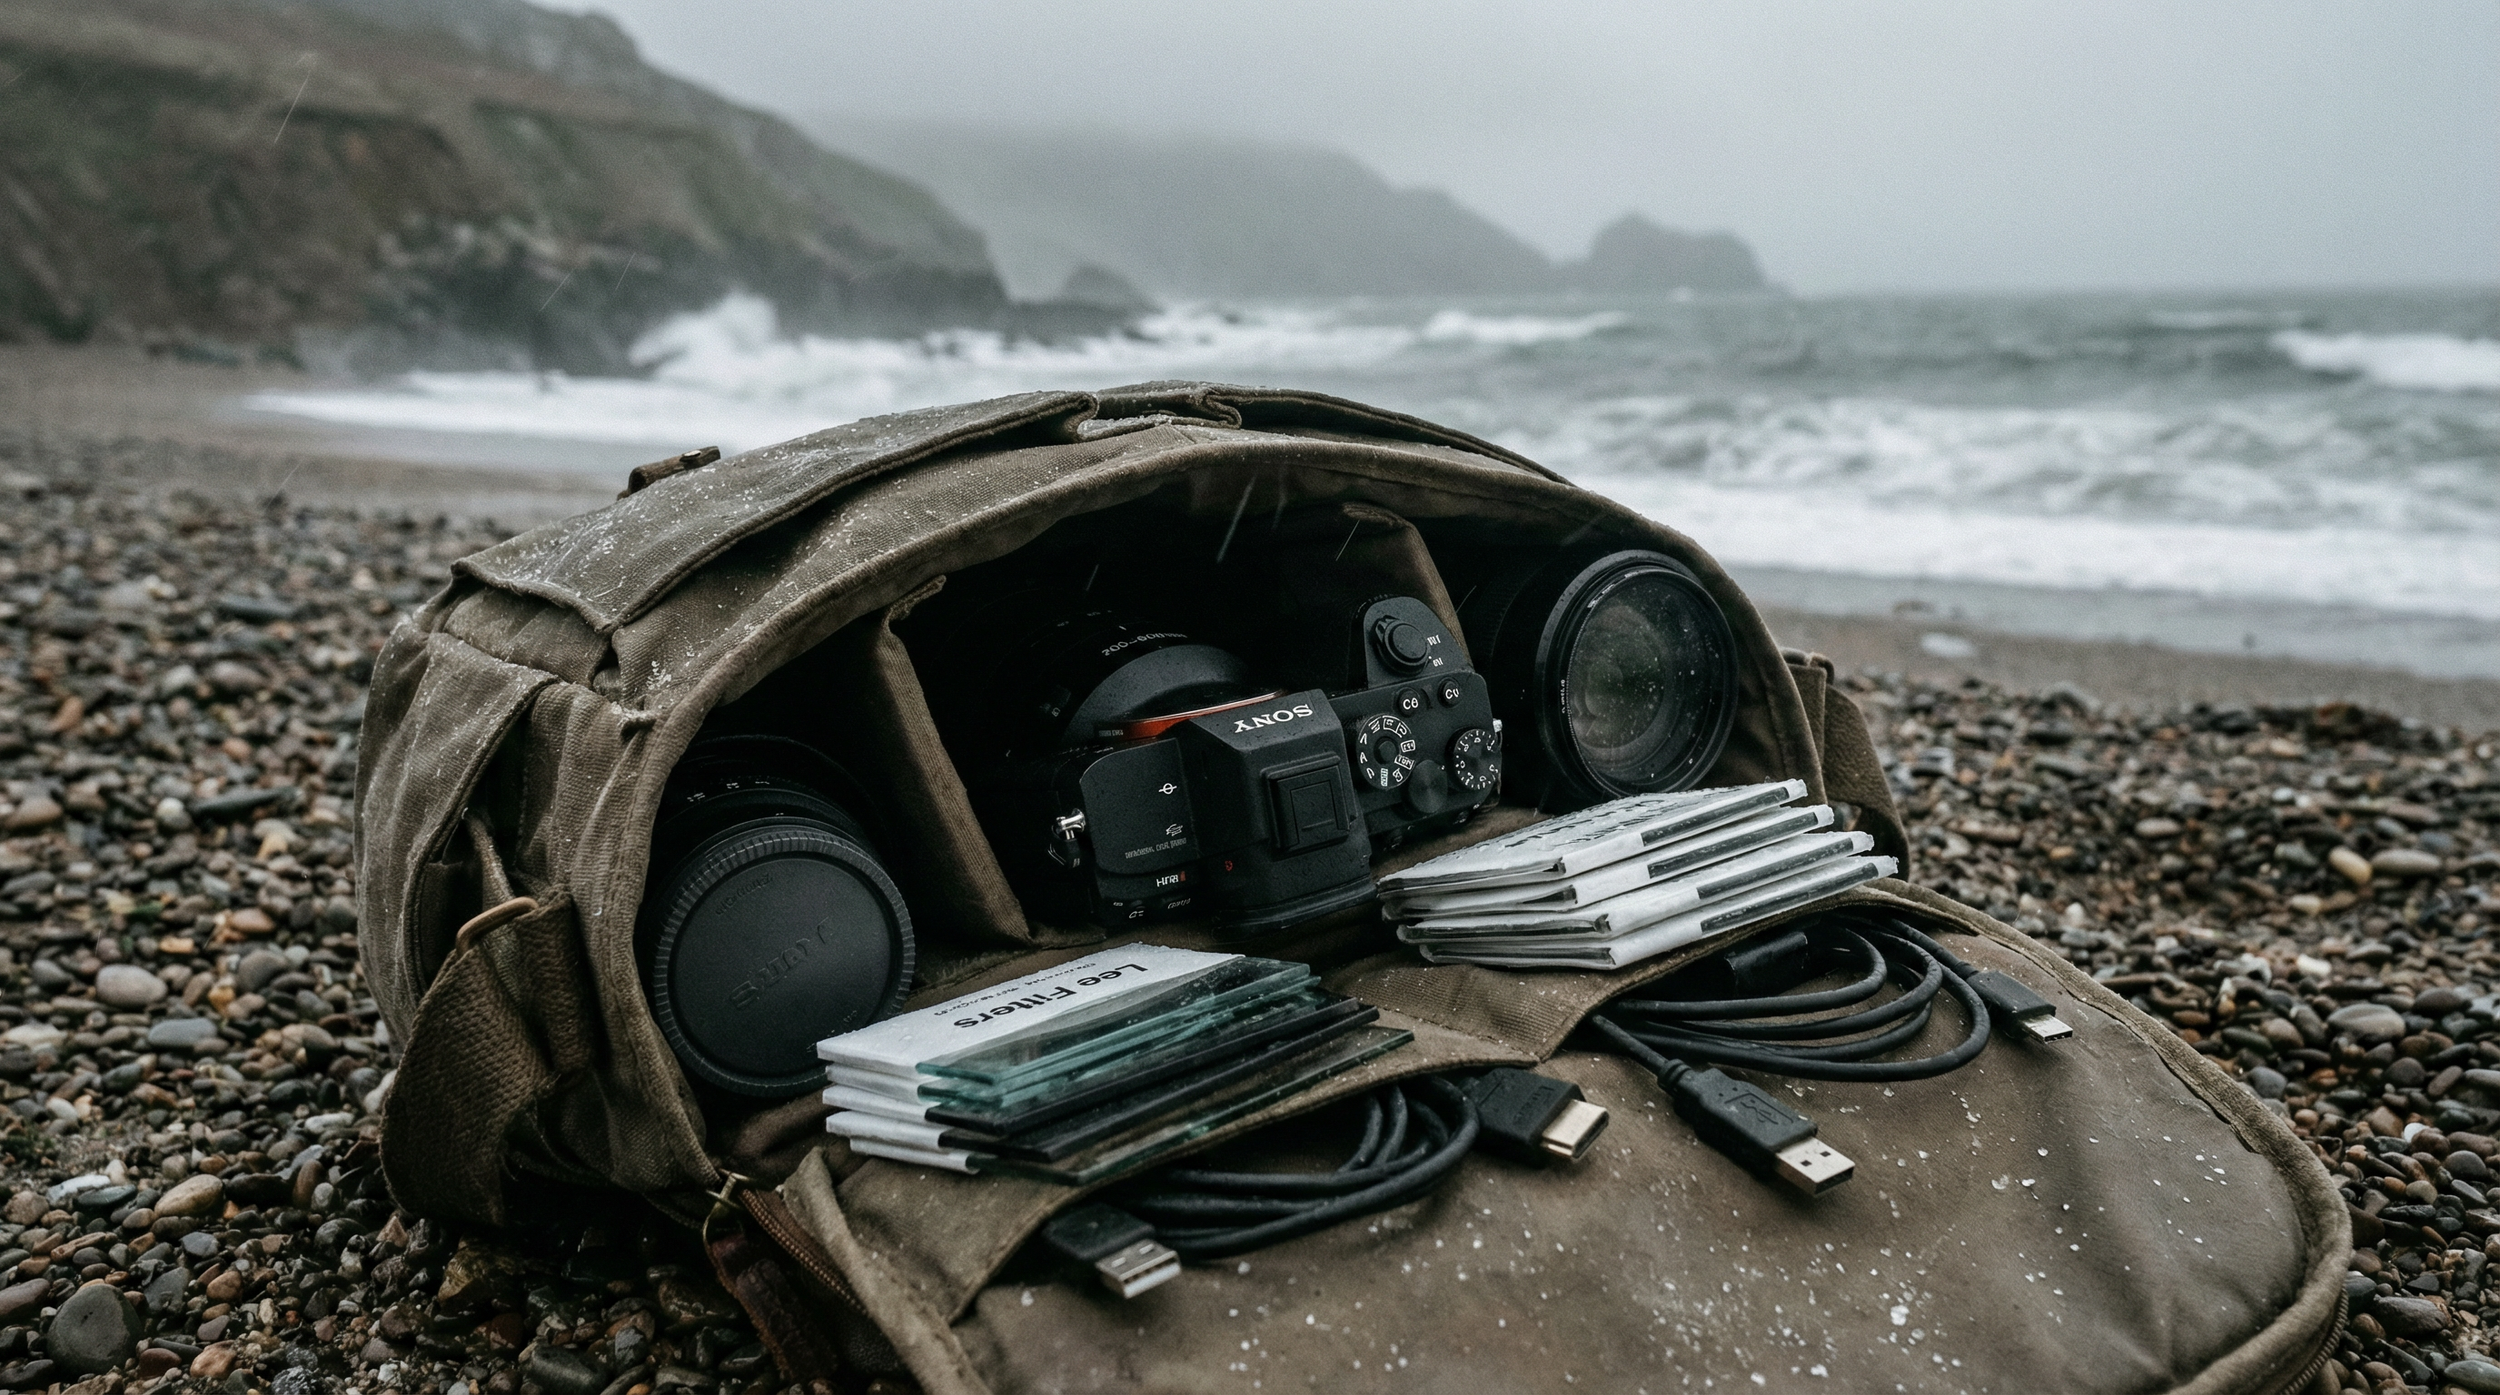
So I turned to landscapes, and more specifically, seascapes. I headed to the coast with my Sony A7R IV, invested in filters and all manner of specialist kit, and prepared to throw myself into a new discipline. What I found instead though, was that I had thrown myself into a wall.

The Problem with Too Much Kit

The gear was overwhelming. I was new to landscape photography, new to reading the light in that environment, and new to the entire creative process involved.

Instead of being absorbed by the scene in front of me, I was absorbed by the technical decisions.

Which filter? What exposure? How do I handle this brightness range?

The equipment that was supposed to help me create better images was, in practice, creating a barrier between me and actually photographing the scene.

Out of frustration more than strategy, I started leaving the heavy camera bag in the car when I first arrived at a location. I would take my iPhone and simply walk, scout, and look for compositions before going back to collect the proper gear.

But, what was meant to be a workaround, turned into a revelation.

When the iPhone Stopped Being a Scouting Tool

The images I was capturing purely for composition reference were genuinely looking good; not just useful as guides, but good in their own right.

That realisation shifted everything. Suddenly, the iPhone was not just a note-taking device; it had become a creative challenge: could I get a shot with my mirrorless that was meaningfully better than what I had already captured on my phone?

That question drove me forward, and over the years that followed, I found myself thoroughly absorbed in seascape photography, increasingly using the iPhone as my primary tool at the coast. My portrait work never wavered, that always remained with my mirrorless system, but for the seascapes, the iPhone became its own discipline.

Reexpose and the Long Exposure Workflow

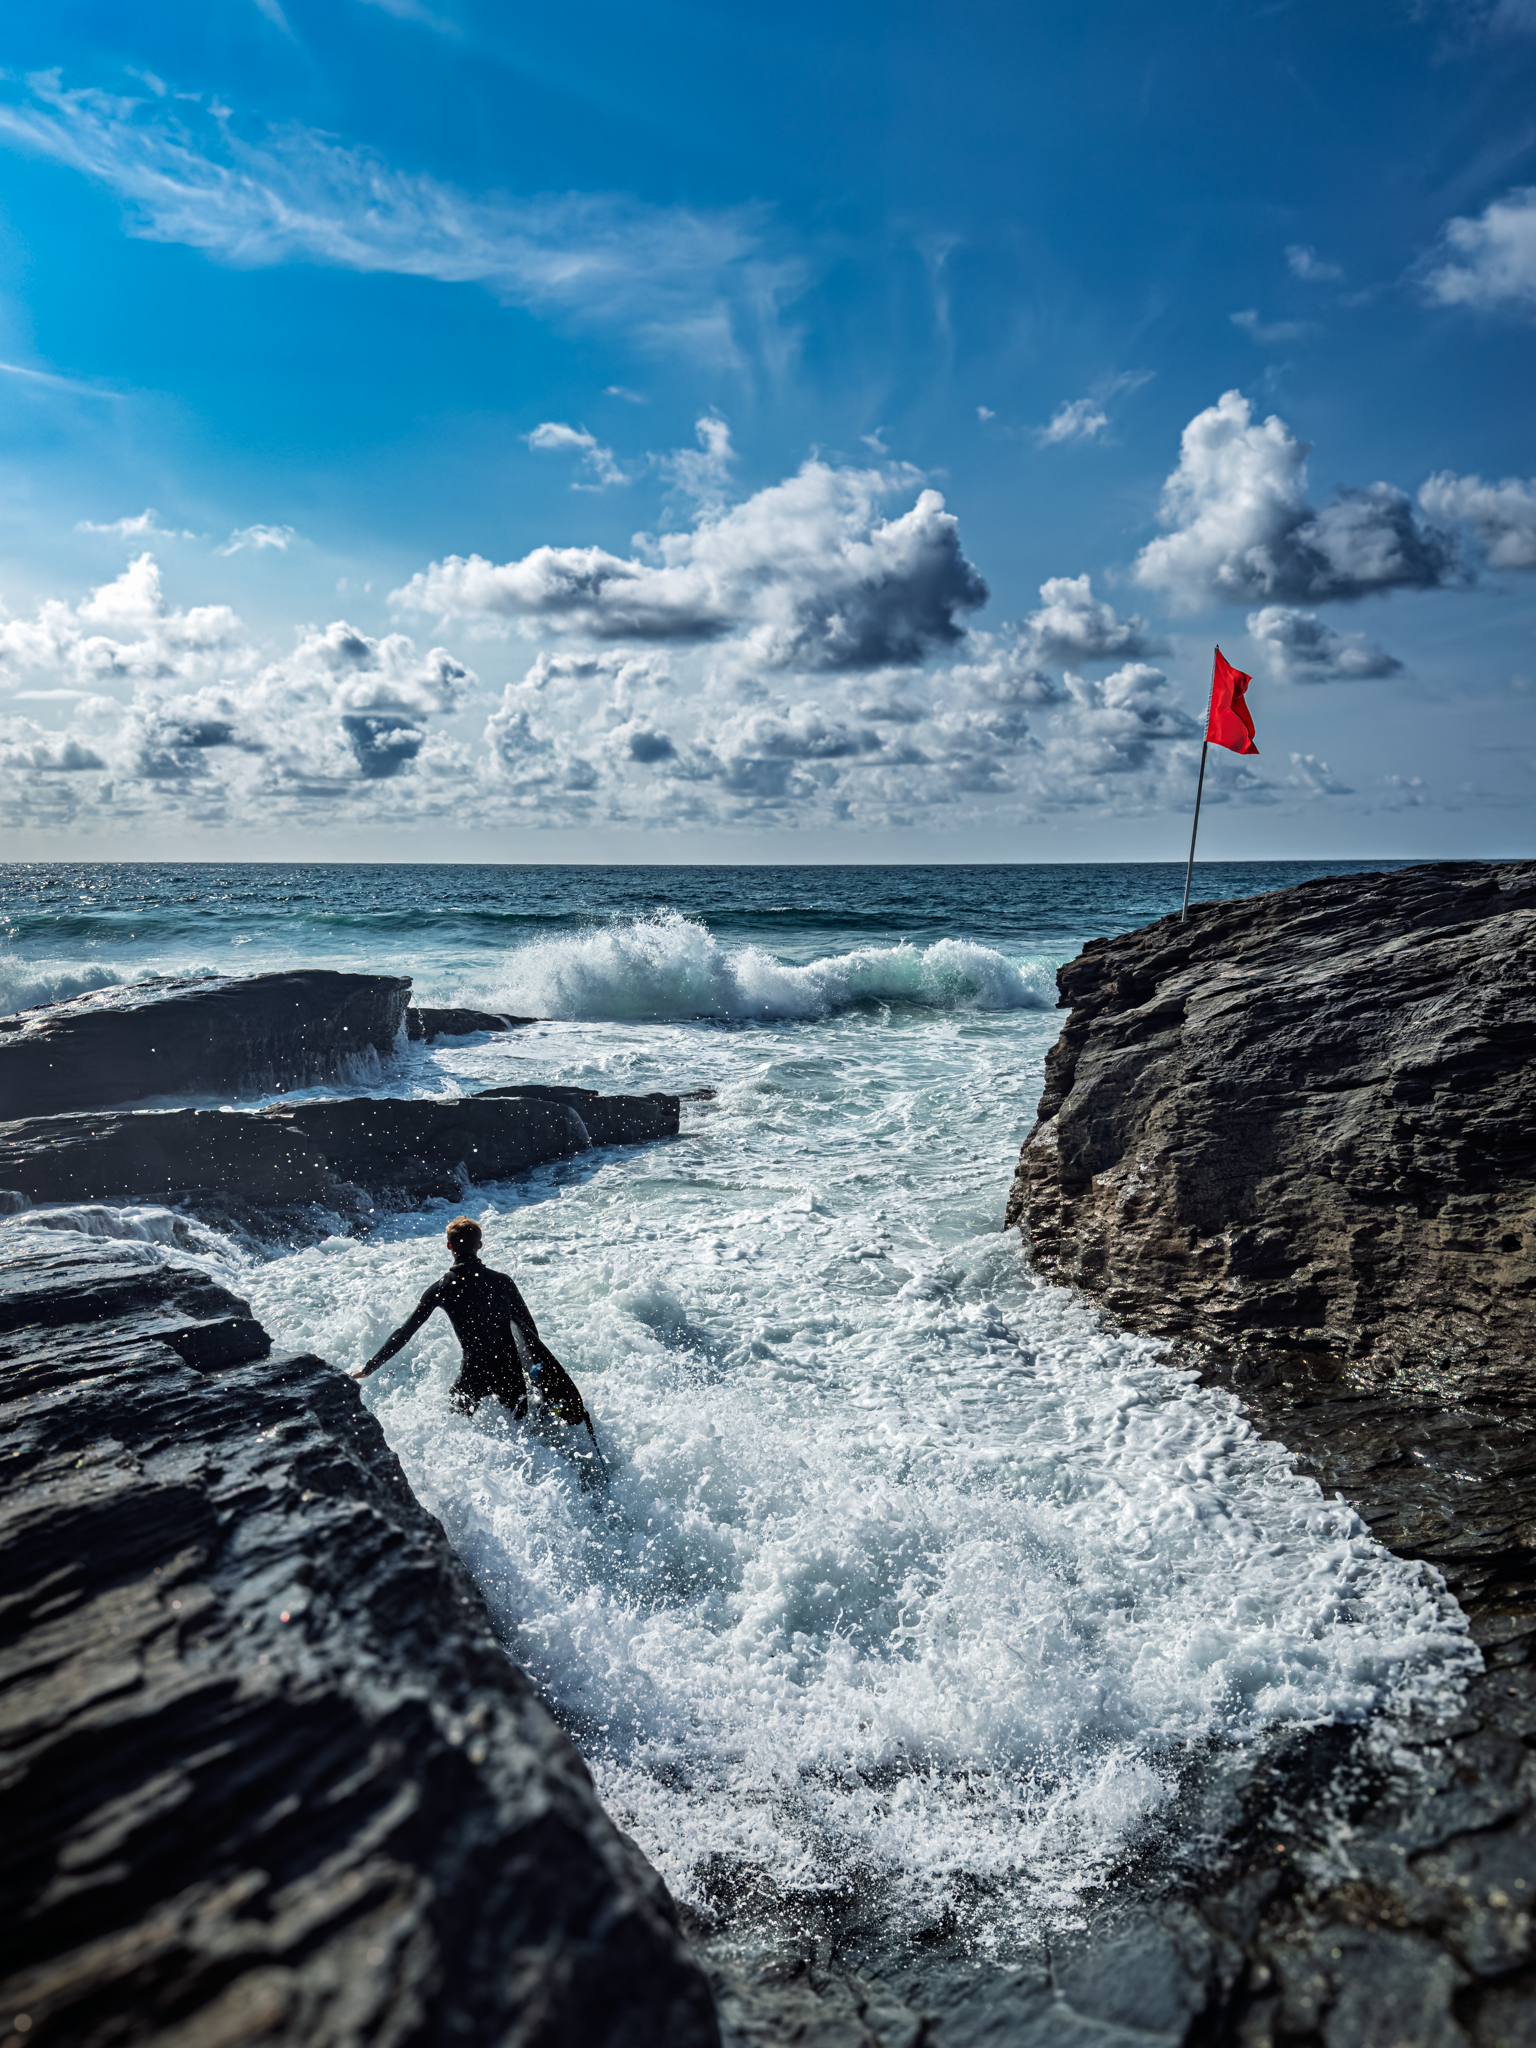
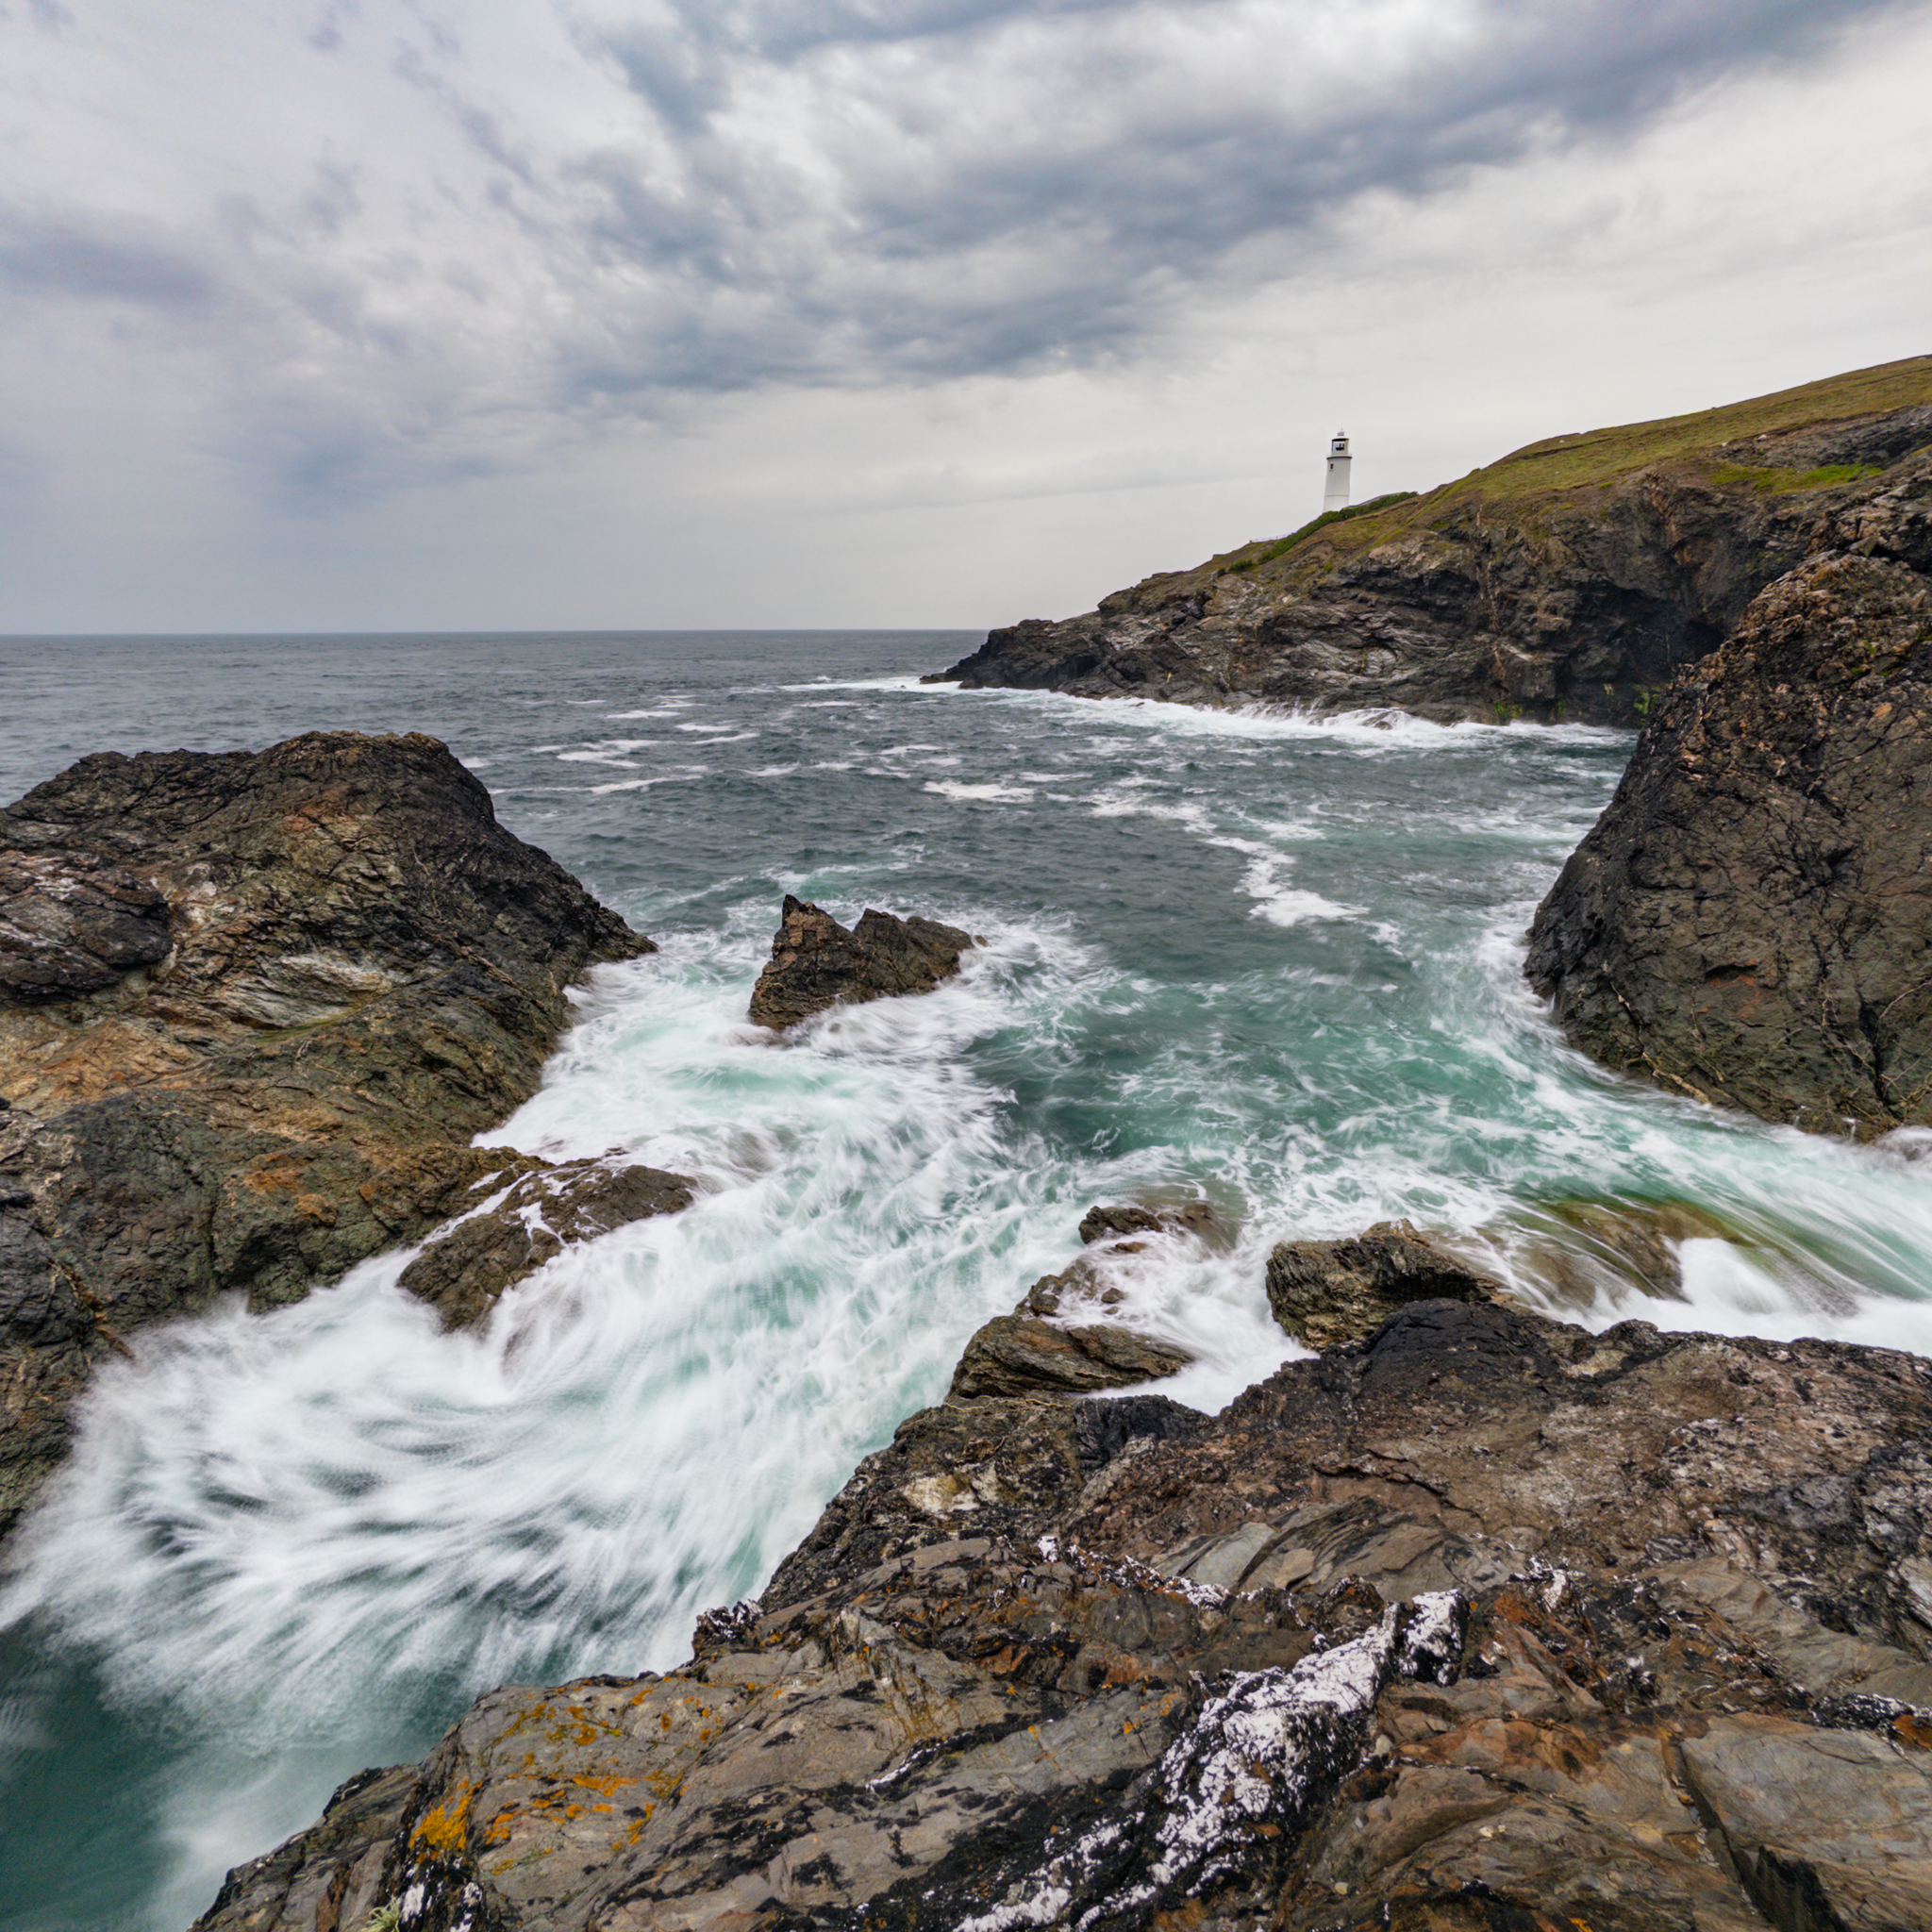
A big part of what made this work was discovering the Reexpose app. Long exposure photography, the kind that smooths water into silk and turns crashing waves into mist, had always required filters, tripods, and careful technical management with my mirrorless. With Reexpose on the iPhone, I could achieve genuinely compelling long exposures without any of that overhead.

This is the nature of computational photography. The iPhone handles so much of what would otherwise require deliberate technical decisions, and for a long time, I thought that was the whole story. Remove the friction, get the shot, enjoy the process.

But what I came to understand was that the phone was doing something far more valuable than saving me time.

What the iPhone Was Actually Teaching Me

Without the weight of technical decisions pulling at my attention, I began to truly absorb my surroundings. The sights, the smells, the sounds, the feeling of being somewhere specific at a specific moment. I was learning to read light not as a technical problem to solve but as something to feel and respond to. I was developing an instinct for composition that no amount of deliberate study had given me.

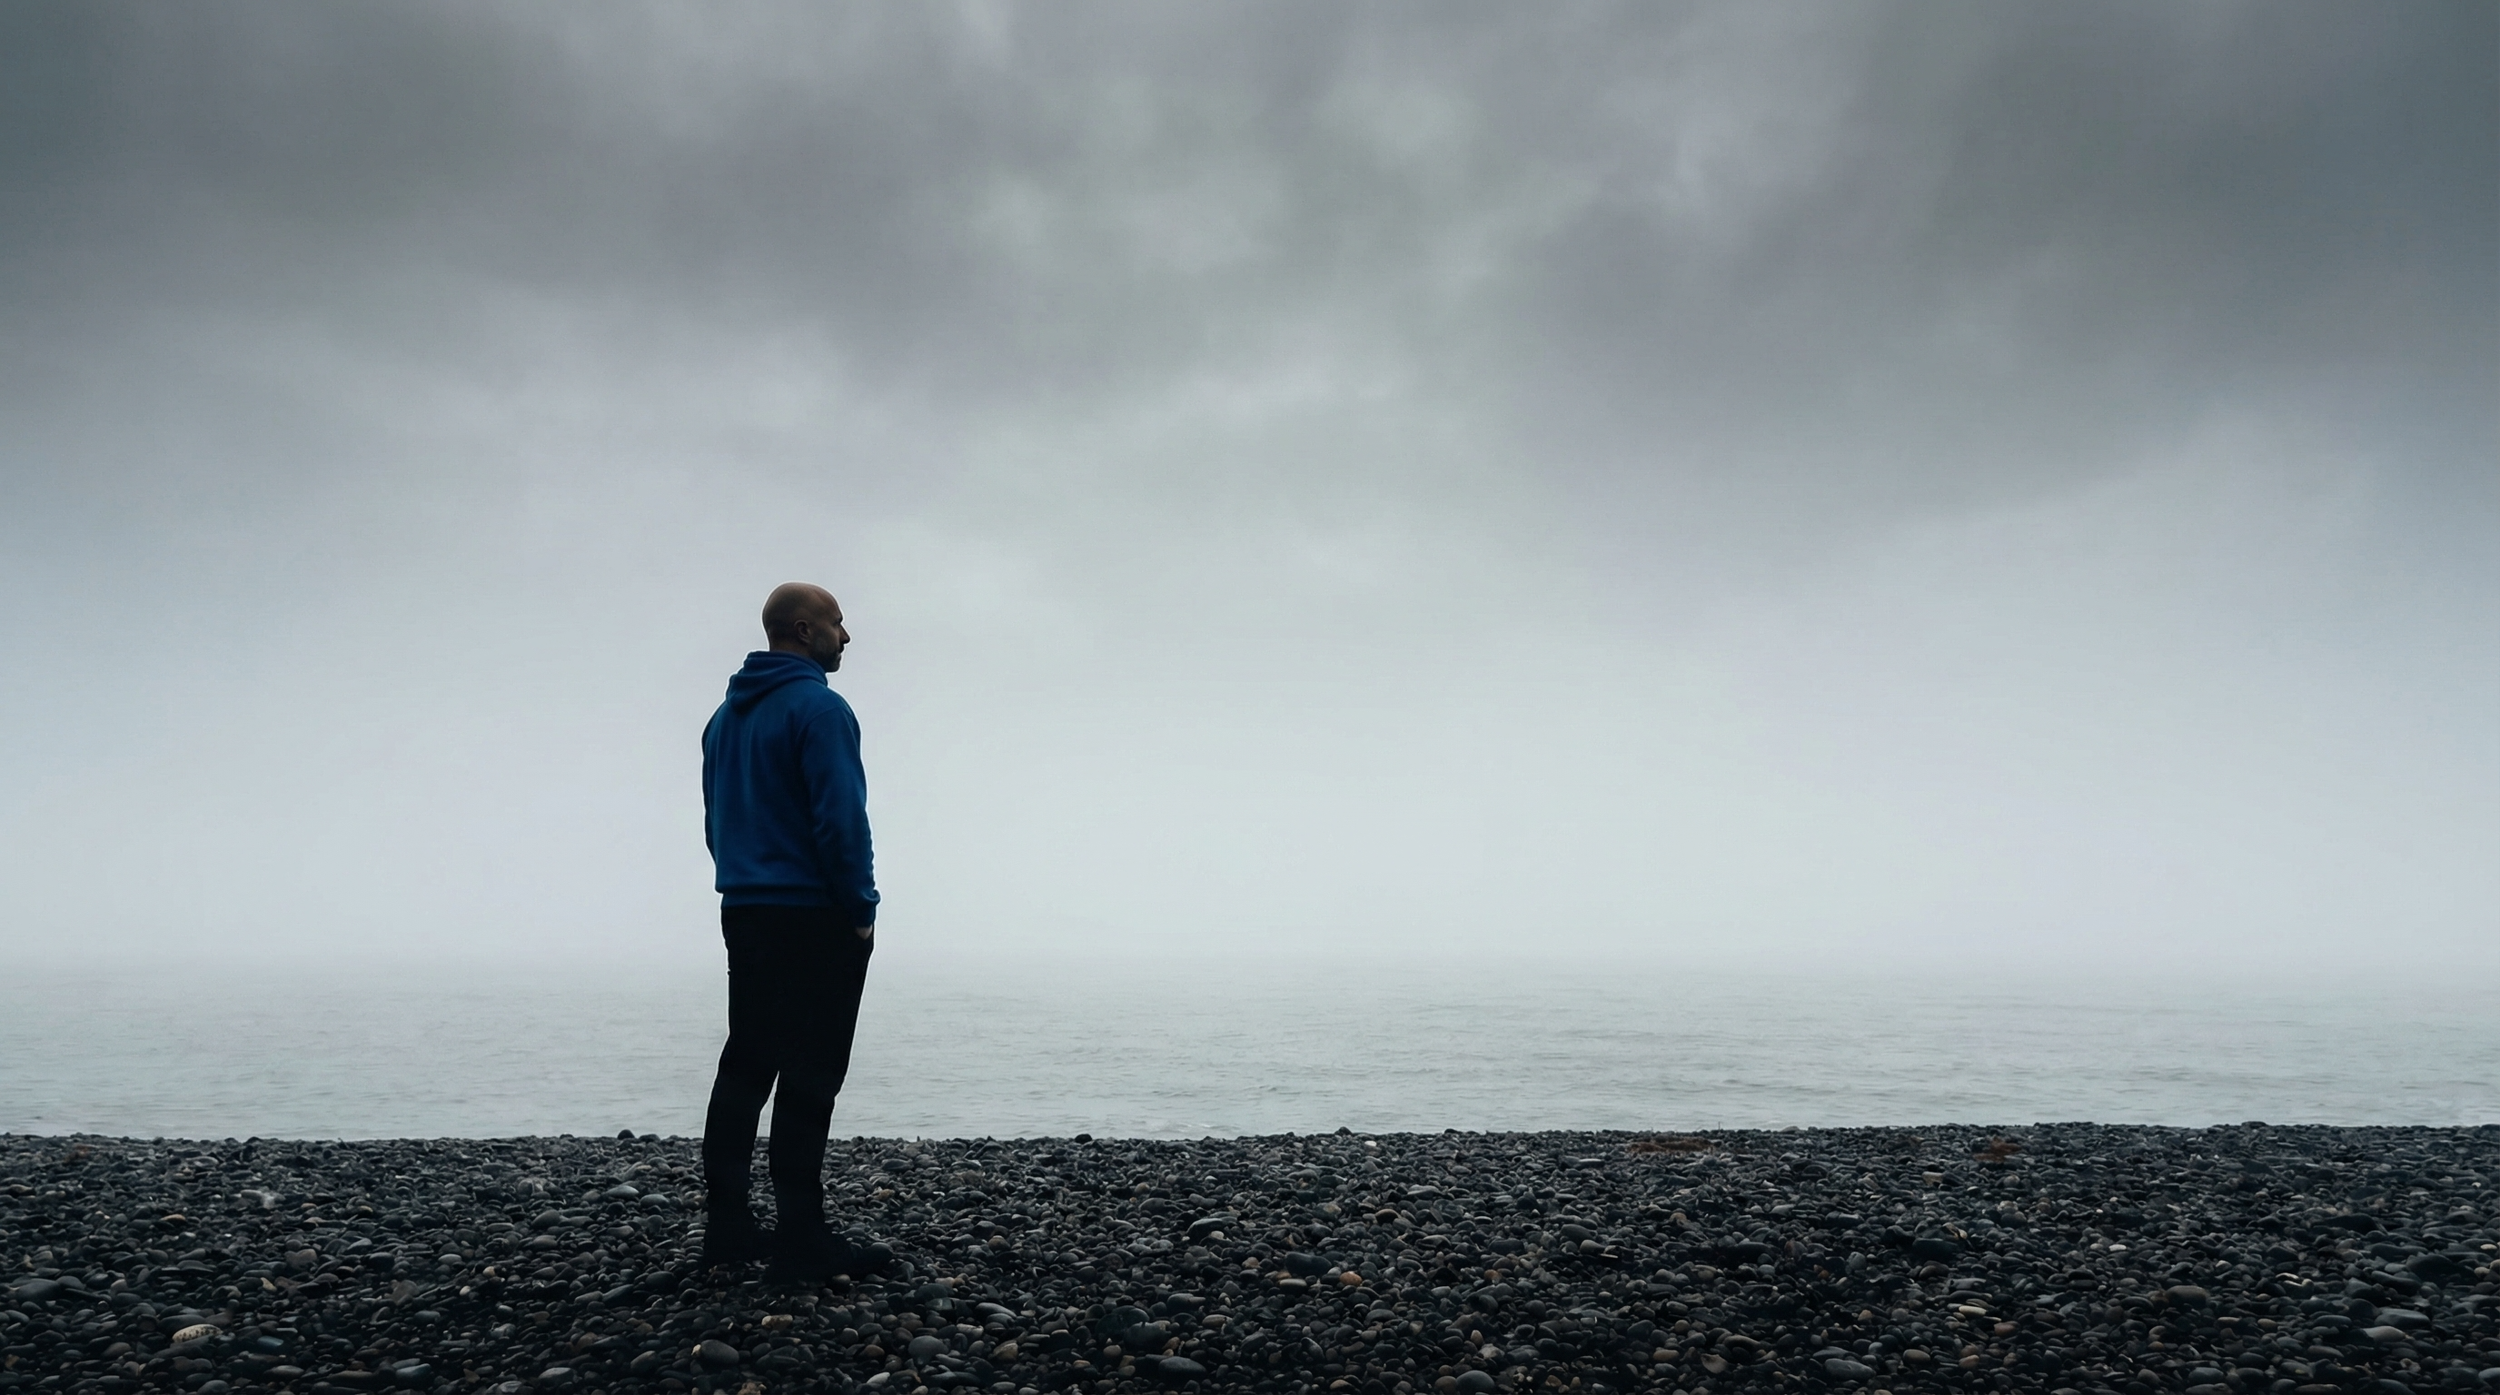
The iPhone removed the friction that had always sat between me and pure creative engagement, and in doing so, it allowed me to build a visual language and a sensitivity to light that I was then able to bring back to my mirrorless work.

The technical side of things, the things I had found so overwhelming at the start, began to feel natural; not because I had studied harder, but because I had spent years simply being present with the subject, free from distraction. The craft followed the instinct, rather than fighting against it.

The Lesson for Any Photographer

Don’t get me wrong here … I’m not suggesting everyone should put down their camera and reach for their phone. What I am suggesting however, is that whatever removes the barrier between you and creative immersion is worth taking seriously, regardless of how unconventional it looks.

For me, it happened to be seascapes with an iPhone during a pandemic. For you, it might be something else entirely. But the principle holds. When you can stop thinking about the tool and start thinking about the image, something shifts, and that shift stays with you, long after you pick the bigger camera back up.

The iPhone did not replace my mirrorless photography, it made it better, and I suspect it will keep doing so for a long time yet.

2 Day Cornwall Photo Road Trip with just my iPhone

Two Days on the Road: Cornwall & North Devon – Shot Entirely on iPhone

On the morning of July 26th, my friend Andy Hughes pulled up outside my place ready for two days of coastal exploring. Andy’s someone I first met through my Photography Community, and like so many photography friendships, it has quickly grown beyond just swapping images online. Now we were heading off on our first road trip together with cameras ready, or in my case, just one very capable phone.

This trip was going to be different. I left the heavy camera gear at home and relied entirely on my iPhone 15 Pro Max. For the long exposures, I used the Reeflex ReeXpose app, and for everything else, I shot in ProRAW with the native camera app. It was part challenge, part experiment … could I come home with portfolio-worthy shots using nothing but the phone in my pocket?

We hit the road towards North Devon, the playlist set, the weather promising clear skies and soft light.

Day One – Arches, Harbours & Evening Glow

Our first stop was Blackchurch Rock.

That iconic arch rises from the sea like something from another world. We timed our arrival with the tide and hung around, waiting for the light to hit just right. The ReeXpose app worked perfectly here, smoothing out the water and pulling movement from the clouds.

From there, it was on to Sandymouth; a stretch of golden sand with the kind of long, rolling waves that hypnotise you if you watch for too long. Light wasn’t great with it now being midday and a high sun with little cloud so instrad we sat, we had a cold drink and chatted enjyoing each others company.

The afternoon took us down to Boscastle, a small harbour village packed with detail; stone walls, colourful boats, and weathered textures everywhere you looked.

By evening, we rolled into Trebarwith Strand. The sea was glowing, the rock formations catching the last light of the day. Condioptns weren’t ideal but a little patience and I grabbed this shot of a surfer about to brave the battering waves…

Then it was time for some dinner (which was delicious) and then stepping outside Andy suggested we maybe take some shots of the incopming tide and wow … amd I glad he did because the conditions were stunning!

We then drove to Wadebridge and checked into the Premier Inn for the night which I have to say was spotless with quiet surroundings, and just the right amount of comfort after a day of climbing over rocks and chasing light.

Day Two – Lighthouses & Seals

The next morning, we were up early and heading for Trevose Head. The air was fresh, the waves were crashing, and the lighthouse stood tall against a blue sky. As we stood there framing shots, a seal surfaced just off the rocks. Beautiful andthe sort of unexpected moment you always hope for on a trip like this.

Before the drive home, we swung by Bude for breakfast. It was one of those meals that feels even better because you’ve earned it after days of fresh air, walking, and late nights on the coast.

Light, Patience & a Pocket Camera

Both days gifted us exactly what we were hoping for; perfect light, a touch of drama, and just enough waiting around to make the results feel even more rewarding. Shooting entirely on the iPhone was freeing. No heavy gear, no fuss … just ProRAW files for maximum editing control and the ReeXpose app for those silky long exposures.

Two days, five locations, countless photos, and one very good reminder: the best camera really is the one you have with you.

Project Indigo: Adobe Release NEW Pro Camera App for Mobile

A Research-Based Mobile Camera App

OVERVIEW

Project Indigo is a free experimental camera application developed by Adobe Labs, available for iOS devices starting from the iPhone 12 Pro and all non-Pro models beginning with the iPhone 14.

The app is intended as a platform for exploring advanced photography workflows on mobile devices. It combines traditional manual camera controls with computational imaging methods to improve photo quality and give users greater flexibility over how images are captured and processed.

Image Processing and Output

Unlike typical smartphone camera apps that rely heavily on automatic adjustments and stylised enhancements, Indigo emphasises subtle, globally tuned image processing. It also supports capturing both JPEG and RAW (DNG) formats, with computational benefits applied to both. This allows users to maintain editing flexibility while still benefiting from improved noise handling and dynamic range.

One of the core features of Indigo is its multi-frame image capture system. Instead of taking a single photo, Indigo records a short burst of up to 32 frames per shot. These frames are underexposed and then computationally aligned and merged to reduce noise and preserve shadow detail. This technique is applied even when shooting in RAW formats, uncommon for mobile photography apps, and the result of which enables cleaner, more editable files with fewer artifacts.

Manual Controls

The app includes full manual controls, giving users the ability to adjust:

  • Shutter speed

  • ISO

  • Focus (including manual focus override)

  • White balance (with both temperature and tint sliders)

  • Number of frames to capture per burst

These settings allow photographers to fine-tune their exposure and image quality, and to optimize for different conditions such as low light or motion.

Specialised Shooting Modes

Indigo also introduces dedicated capture modes for specific photographic techniques. The Long Exposure mode allows users to create effects like light trails, or light painting using a mobile phone, without needing an actual long shutter time. This though I hasten to add is unlike Long Exposure in such apps as EvenLonger or ReeXpose where we simply choose a time period for the long exposure from 0.5 seconds up to Bulb Mode (ReeXpose) or 1 second to 24 hours (EvenLonger), and the app then creates the long exppsure.

Another feature, Super-Resolution zoom, enables extended zoom up to 10x on the 15 and 16 Pro Max model. It is model dependant how much you get however you can use it to pinch and zoom too and the results are actually impressive. This technology is definitely going to affect sales of add-on zoom lenses.

Super-Resolution zoom is active for 10x+ zoom levels, all the way up to 25x. What it does is it increases the effective resolution by 2x horizontally and vertically (4x in pixels). As a result of this, at 10x, instead of a 3MP image you get 12MP, and at 20x instead of 0.75MP you get a 3MP image

Lightroom Integration

For users working within the Adobe ecosystem, Indigo integrates directly with Lightroom Mobile. Images can be exported to Lightroom with a single tap. In the case of DNG files, Indigo embeds tone and color metadata that Lightroom can interpret and apply as default settings—though users retain full control to adjust or reset these as needed.

You can also set the Project Indigo camera to be used within Lighroom Mobile.

To do this make sure you have updated the Lightroom Mobile App. Once updated go the App settings from within the Lightroom Mobile App and then go to the EARLY ACCESS section and turn on the Use Indigo for Camera (Tech Preview)

Experimental Features

The app also includes access to experimental tools, that currently include AI DeNoise and Remove Reflections.

Personally I’d prefer to see these in the Lightroom Mobile App instead of inside the Camera App itself.

Planned Features and Roadmap

Looking ahead, Adobe plans to expand Indigo with several features:

  • An Android version of the app

  • Additional tone presets and photographic "looks"

  • Support for portrait, panorama, and video capture

  • Exposure and focus bracketing modes for use cases like astrophotography

INITIAL FEEDBACK

By far my favourite feature so far is the Super Resolution Zoom, but there are definitely things that I would want adding such as Burst Mode and a Long Exposure function that work very similar to EvenLonger and ReeXpose, so fingers crossed these appear sooner than later.

OVERHEATING

However, on release day I’ve already been receving feedback from folks saying that they are getting an overheating warning appear on their iPhone after only a short period of use.

This I discussed with the development team at Adobe during the time before this was released hen I was testing the app. I too noticed my phone getting much warmer than normal.

It was explained to me that this is in part due to the the fact that the App uses a different process when handling files in that it makes use of other hardware within the phone. Also because the heat dispersal of the iPhone 15 Pro Max which I currently have is known for not being good.

I have heard from folks using the 16 Pro Max and reporting the same warning appearing even though it has improved heat dispersal, so fingers crossed this is something Adobe are able to iron out in the near future.

Check out the official Project Indigo Blog Post for more information …

Photographing Cars with my iPhone 15 Pro Max

Now primariy I’m a Portrait Photographer however this past few weeks, for the fun of it, I’ve been experimenting with my iPhone to see how it would fare when taking pictures of my car … both still and moving.

So a few weekends back I met up with friends in South Wales and headed to Crickhowell; an area I’ve photographed in before when working on this Harley image …

kit used

For these car photographs I was using my iPhone 15 Pro Max along with …

  • Polar Pro iPhone Case

  • 67mm Filter Adaptor + 67mm Circular Polarising Filter

  • ReeFlex Pro Camera App

The circular polariser is the car photographers secret weapon because of how effective it is in reducing / removing reflections in the car windows and on the bodywork …

I used the ReeFlex Pro Camera App purely so that I could use shutter speed and ISO to lock in the exposure that I wanted.

Here’s the ‘out of camera’ result …

Here’s the final retouched image which was done using Lightroom Desktop.

I also added a long exposure effect to the clouds using a technique in Photoshop which works really well however now I want to do the shoot again and capture it all ‘in camera’ using a long exposure app like ReeXpose or EvenLonger 😃

I also tried some panning shots and did get some results, however the ratio of keepers to rejects was very low.

I was trying to do this using the ReeFlex App and a Neutral Density Filter on the front of the iPhone so that I could lock in an exposed photographed at 1/30 second. However, the ReeFlex app at the time I did this did NOT have burst mode. This meant I was having to try to capture a single frame as I panned with the car passing at no more than 30 mph.

Here’s an edited result of what I managed to capture …

Later having shared this image online I spoke with a friend of mine who is a Professional Car Photographer. It was great to hear that he was impressed with the results expecially considering they were from an iPhone but he also gave me some settings that he and other pro car photographers use to capture a moving car.

My friend told me that moving car shots often see the car travelling at no more than 20 mph and that they also use a shutter speed of around 1/15 sec or 1/20 sec … but ALWAYS shoot in burst mode.

So armed with these settings I set about finding a pro camera app that would allow me to manually dial in the shutter speed but that also had Burst Mode; and the app I turned to was MOMENT.

I’ve yet to use the app in a planned car shoot however when in Germany a couple of weeks back I was waiting for a friend to pick me up and whilst waiting near a fuel station forecourt I attached the Variable Neutral Density Filter to my iPhone using the Polar Pro Case and Adaptor, and set the shutter speed using the MOMENT app.

I then simply took a burst of panning shots of passing cars as they negotiated a roundabout and drove away, which from my position would have meant them travelling around 20 mph.

Here’s some of the results …

So, yeah I’ve been very impressed with how the iPhone has dealt with this and the results I’ve managed to get.

Lots more experimenting and fun to be had!

ShiftCam ProGrip: The Best iPhone Photography & Video Grip?

Is the ShiftCam ProGrip the ultimate accessory for iPhone photography and videography? In this video I give you hands-on honest look both positive and negative of this iPhone Traditional Camera Style Grip; its ergonomic design, wireless charging, and enhanced grip to see if it truly transforms your iPhone into a pro camera setup. Whether you're a content creator, mobile filmmaker, or just love taking photos, this grip might be a game-changer!

🔹 What You’ll Learn in This Video:
✔️ Hands-on review of the ShiftCam ProGrip
✔️ Key features & benefits for iPhone photography & videography
✔️ How it enhances stability, ergonomics, and battery life
✔️ Is it worth the price?

📌 Check out the ShiftCam ProGrip and other Mobile Accessories I use here: ( LINK )

Mobile versus Mirrorless: Decisions to be made in 2025

Watch the recording of this LIVE Broadcast as I chat with my friend and Photographer Brian Matiash (Adobe Lightroom Team) and discuss using Mobile devices for Photography.

Should I continue doing so in 2025? Lenses and Filters for Mobile, What I’ll be using my Sony Mirrorless for, What do I make of the OM1 MK2 and a whole lot more ...

links mentioned in the video:

  • Brian Matiash Website: ( LINK )

  • Brian Matiash YouTube Channel ( LINK )

  • Glyn’s Lyme Sunset Picture + Edits in the Lightroom Community: ( LINK )

NOTE
If you’d like any of your images to be considered for one of my ‘LIVE RetouchingBradcasts’ simply create a Collection (Lightroom Classic) or an Album (Lightroom Desktop) and Share it with me at gadewis@mac.com making sure that you set permissions to Edit and not just View.

My First Photography and Print of 2025 : Stormy Sea on New Years Day 2025

There’s no better way to kick off the New Year than doing something you love, and for me, that means grabbing my camera, which in this case was my iPhone, and heading out to take some photographs; and this January 1st did not disappoint with a stormy high tide.. How could I resist?

My wife Anne, who’s as much of a storm lover as I am, joined me to not only keep me company, but she also helped capture some behind-the-scenes footage, which added to the fun of the morning.

We headed down to The Cobb ( Lyme Regis) and straight away it was a WOW moment!

The waves were crashing hard against The Cobb sending water shooting high into the air like fireworks. The sound was thunderous, the kind of deep, powerful roar that makes you feel alive just being near it.

I knew where I wanted to head to … the only issue was getting there; the lower part of The Cobb to the side of the Aquarium. The problem here was that water was crashing and pouring over The Cobb wall into the Harbour like a giant Ice Bucket Challenge ( remember that??? ) , however I’ve learned my lesson and now travel with full wet weather kit in a bag in the boot of my car.

Still, even though I was weather-proofed it meant timing the run to perfection to avoid the weight of the water crashing down on me … which I’m rather proud to say I managed to avoid.

Weather like this always fills me with excitement BUT that said you do still need to have your wits about you. No photogbraph is worth putting yourself and others at risk. I never want to be THAT guy!

Once at the side of the aquarium I was able to photograph the small beach area behind it and still be safe, protected by a wall and railing. I managed to get the composition I wanted, grab some shots but then the wind seemed to pick up a bit more. So, I decided enough was enough and timed a run back to Anne ( who was near the RNLI Station ) without getting hit by any waves breaching The Cobb Walls.

Actually on this, I’d heard some time ago that waves come in 7s and it did see to be the case. Running there and back I initially counted 7 clear waves breaches and then ran and managed to avoid getting soaked so, clearly there’s some truth in it; if not and it was pure fluke, I’m getting an extra Lottery ticket this week 😃

As for my iPhone, I used the native 0.5 ( 14mm ) lens and the native Apple Camera App set to Apple ProRaw. The image was edited using Lightroom Mobile on my iPad Pro.

So now I’m up and running; first photograph and print of 2025 is ‘in the bag’ 😃

After walking around a bit more, grabbing some extra shots and some video footage, it was time for breakfast at our favourite spot … Town Mill Bakery.

So here we are in 2025. I’m now really looking foward to the coming months as I plan to be visiting some other coastal locations across Dorset, Devon, Cornwall and Wales ( West and North ) … and my thoughts are that I’ll be doing this with my iPhone to push it that bit more and see what I can get with such minimal kit.

I’ll keep you posted.

Happy New Year!

Photographing Storms in the UK with my iPhone and Friends

There’s something special about heading out with your camera (or iPhone as it was for me) when a storm is brewing. It’s that mix of excitement, unpredictability, and the chance to capture nature at its wildest and recently, I had the chance to photograph two big storms—Storm Bert and Storm Darragh.

Storm Bert at Lyme Regis

First up was Storm Bert on the seafront at Lyme Regis with my good mate Steve Healy.

Lyme’s one of those places that looks stunning in any weather, but during a storm it really is next level.

The wind and rain was relentless, whipping around us as we walked along the seafront. The waves were smashing into the harbor wall, sending spray high into the air. At one point, I got completely drenched from the knees down (see photo below) by a rogue wave, but hey it’s all part of the fun, right?

I used my iPhone 15 Pro Max with the Lightroom Camera app, and honestly, it was spot on. The light was constantly changing, but using the phone to capture it was a breeze (no pun intended).

We took some time out for a bit of shelter and grabbed a coffee in the seafront Café, SWIM and it just so happened that on ther next table were a couple of people who had a dog, and well …

I couldn’t resist grabbing a photograph with my iPhone

I edited the portrait quickly in Lightroom on my iPhone and then showed the owners, who loved it and asked if I’d send it to them.

This again showed to me how powerful a mobile workflow is; being able to take a photograph and immediately edit it and sent it, I find so bloomin’ exciting!

Storm Darragh at West Bay

A few days later, Storm Darragh rolled in, and this time, it was off to West Bay with my friend Brian Dukes.

If you know West Bay, you’ll know those golden cliffs are absolutely stunning, but throw in a storm and it’s a whole different scene.

Brian and I spent most of the time trying to keep our footing while scouting for the best angles but oddly the sea wasn’t as rough as we’d expected it to be and we actually spent more time on the other side of the harbor.

Why I Love Storm Photography

Here’s the thing about photographing storms: it’s not just about the pictures. It’s the whole experience—being out in the elements, feeling the wind batter you, hearing the roar of the waves, and just soaking it all in (sometimes literally!).

For me, it’s also about the people you share it with. Steve and Brian are brilliant company, and there’s something about laughing at each other while dodging waves that makes the day even better.

If you’re thinking of heading out to photograph a storm, do it. Just make sure you’re prepared (waterproofs are a must … as I have well and truly learned), keep an eye on the tides, and embrace the chaos. The photos are a bonus!

I’m really happy with the keepers from both Storm Bert and Storm Darragh but honestly, the best bit was just being there watching the storm do its thing.

Can’t wait for the next one. Bring it on!