💥 DOING THIS will make your PORTRAITS POP and come to life: My 20/10 Technique
I often get comments about how my portraits seem to come forward of the screen, and even more so forward of the paper when they're printed. That effect is largely down to a particular technique I use in Photoshop, one that I call 20/10. This video shows exactly how I use it, and it also explains the principle behind it and why it works so well, so you understand what's happening rather than just following the steps.

Filming Part of my New Printing Class with the Folks at Permajet

On Wednesday of this week I was up in Stratford Upon Avon to spend time with the great people at Permajet / Imaging Warehouse to film part of my new Printing Class that is due to be available in early April.

I can’t thank the team enough for all the time they gave and the knowledge they shared which was going through Paper, the choices available, how they can affect your image, ICC Profiles and so much more…

Black and white portrait prints of a woman spread on a wooden table

I'm not a wise man but when there and going through the importance of choosing the right paper for a particular image, I came up with this phrase...

"The Art doesn't end at the Edit"

Basically meaning that the ‘art’ of what we do carries all the way through to the final physical product because of how paper choice has such a big impact on how it looks.

Prints of a lighthouse at sunset spread out on a table

Genuinely excited about sharing this 'Paper Choice' part of the course when it's finally edited.

Two people examining prints at a PermaJet counter in a shop

MASSIVE thanks yet again to Robin, Charlie, Louise, Colin, Brian :) and all for making we feel so incredibly welcome and pulling out ALL the stops to ensure that what was filmed was the best it could be!

TRY THIS if you struggle SELECTING HAIR in Photoshop: Use the CLONE STAMP TOOL instead!

When it comes to Photoshop, selecting hair is without doubt the area people struggle with more than any other. Adobe has put an incredible amount of work into making selections quicker and easier, but even Photoshop has its limits; try selecting dark, frizzy hair on a dark or busy background and you'll know what I mean. Here I show how I use the Clone Stamp Tool together with a selection instead. It saves time, gets great results, and it's saved me more times than I can remember, because sometimes we just have to cheat.

DOING THIS made a BETTER PHOTOGRAPHER: Tethering HOW and WHY

If there's one thing that has made me a better photographer more than anything else, it's tethering. This video explains why, and then goes through how to do it, including how to tether into Lightroom using a Sony camera. There's also an extra tip at the end about how to help people become more confident in front of the camera, which is something I think about on every shoot where I'm photographing people.

In addition to the software and a cable, there’s lots of additional kit made by TetherTools that is designed to make tethering, either indoors or outdoors, as simple and as convenient as possible.

Over on my GEAR PAGE I’ve listed the kit that I use on a very regular basis; you can check that out using this LINK or just clicking on the GEAR link at the top of this page.

Cheers,
Glyn

WORTH THE RISK? Taking Photographs over the SEA with my Drone

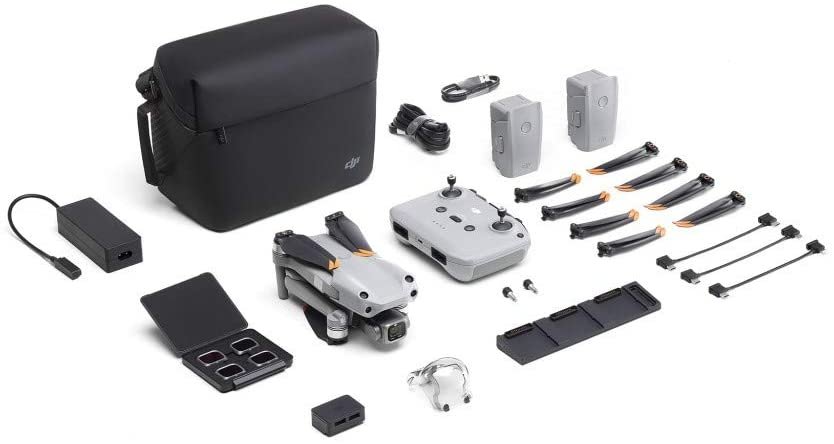
On the first day with my new drone, the DJI Air 2S, I dared to fly it out over the Atlantic Ocean in Cornwall to photograph a lighthouse, a photograph that simply wouldn't have been possible without it. It was scary, but the results were incredible. This video takes you behind the scenes on the photo shoot, and then through the retouching steps in Lightroom for some of the coastal images I came away with.

DJI Air 2S ... VERY HAPPY that I Upgraded

Over the past few weeks I’ve been experimenting, doing more and more photography with my drone, which up until recently was the DJI Air 2.

I’ve had this drone for little while now but mainly used it for video footage that I use in my YouTube videos, but lately I’d been trying out for its stills capability.

Overall I was kind of happy.

Sure the quality wasn’t up there with my Sony A7RIV (especially in low light conditions) but the stills were pretty good. I was however curious about the upgrade to the Air 2S with its 1” sensor; could it really be that much better than my Air 2?

In short … YES!

Drone view of the sun rising over misty farmland

I asked on YouTube if anyone had any thoughts and experience of the difference between the Air 2 and the Air 2S, and ALL comments were that the upgrade is definitely worth it … so I went for it.

The very first morning I had with the new drone, we had the most stunning light and conditions and the Air 2S worked an absolute treat.

Flying was definitely more responsive, but it was when looking at the Raw files back on the computer that the benefits of the upgrade was so obvious.

Drone view of the sun rising over misty fields and hedgerows

Later the same day I headed over to Cornwall, and one of my favourite locations, Trevose Head, to see what the drone could do over the sea.

I’ll admit to being a little nervous but despite the stronger than I would have wanted winds, and the more then inquisitive seagulls, the Air 2S handled the conditions with ease.

Drone view of a white lighthouse on a rocky headland with waves breaking below

The ability to get compositions that just wouldn’t ordinarily be possible, excites the heck out of me; the creative possibilities are endless.

Top-down drone view of turquoise waves crashing against dark rocks

I ended up going for the “Fly More” combo which includes extra batteries, rotor blades, ND filters and a carry case, but what’s great is that the batteries from my Air 2 are compatible, so I now have 6 batteries giving plenty of flying time before I even think about recharging on the go.

Today I also got a Circular Polariser so I’m curious how that actually works on a drone as you have to manually rotate it to get the desired effect depending on where the lens is pointed.

So, lots of testing to be done and lots of photography to enjoy ahead that ordinarily wouldn’t be possible, but to say I’m happy with the quality of the images this thing produces, would be an understatement!

Man in a red jacket standing on a grassy clifftop with a white lighthouse behind

Oh and this weeks video on my YouTube Channel will be showing some Behind the Scenes from the first outings.

Cheers,
Glyn

Look Up Tables (LUTs): THIS is what you're doing WRONG! How to MAKE, SAVE, EXPORT and EDIT

A few weeks ago I shared a video on my YouTube Channel showing how to install and use Look Up Tables (LUTs) in all versions of Lightroom, per it Lightroom Classic, Lightroom, Lightroom Mobile and Lightroom on the Web.

Following on from that I did get a few questions asking about problems using LUTs in Photoshop with error messages being thrown back and images being made to look, well, awful.

So, here’s a video I’ve put together to show how to Make, Save, Export and Edit LUTs without any errors.

Enjoy

I'd previously shared a video showing how to install and use Look Up Tables (LUTs) in every version of Lightroom: Lightroom Classic, Lightroom, Lightroom Mobile and Lightroom on the web. Following on from that, I had a few questions about problems using LUTs in Photoshop, with error messages being thrown up and images being made to look, well, awful. Here I show how to make your own LUTs by saving and exporting them correctly, how to make them editable, and what to do if it all goes wrong.

Photographing Whiteford Lighthouse in South Wales with my Drone

Whiteford lighthouse
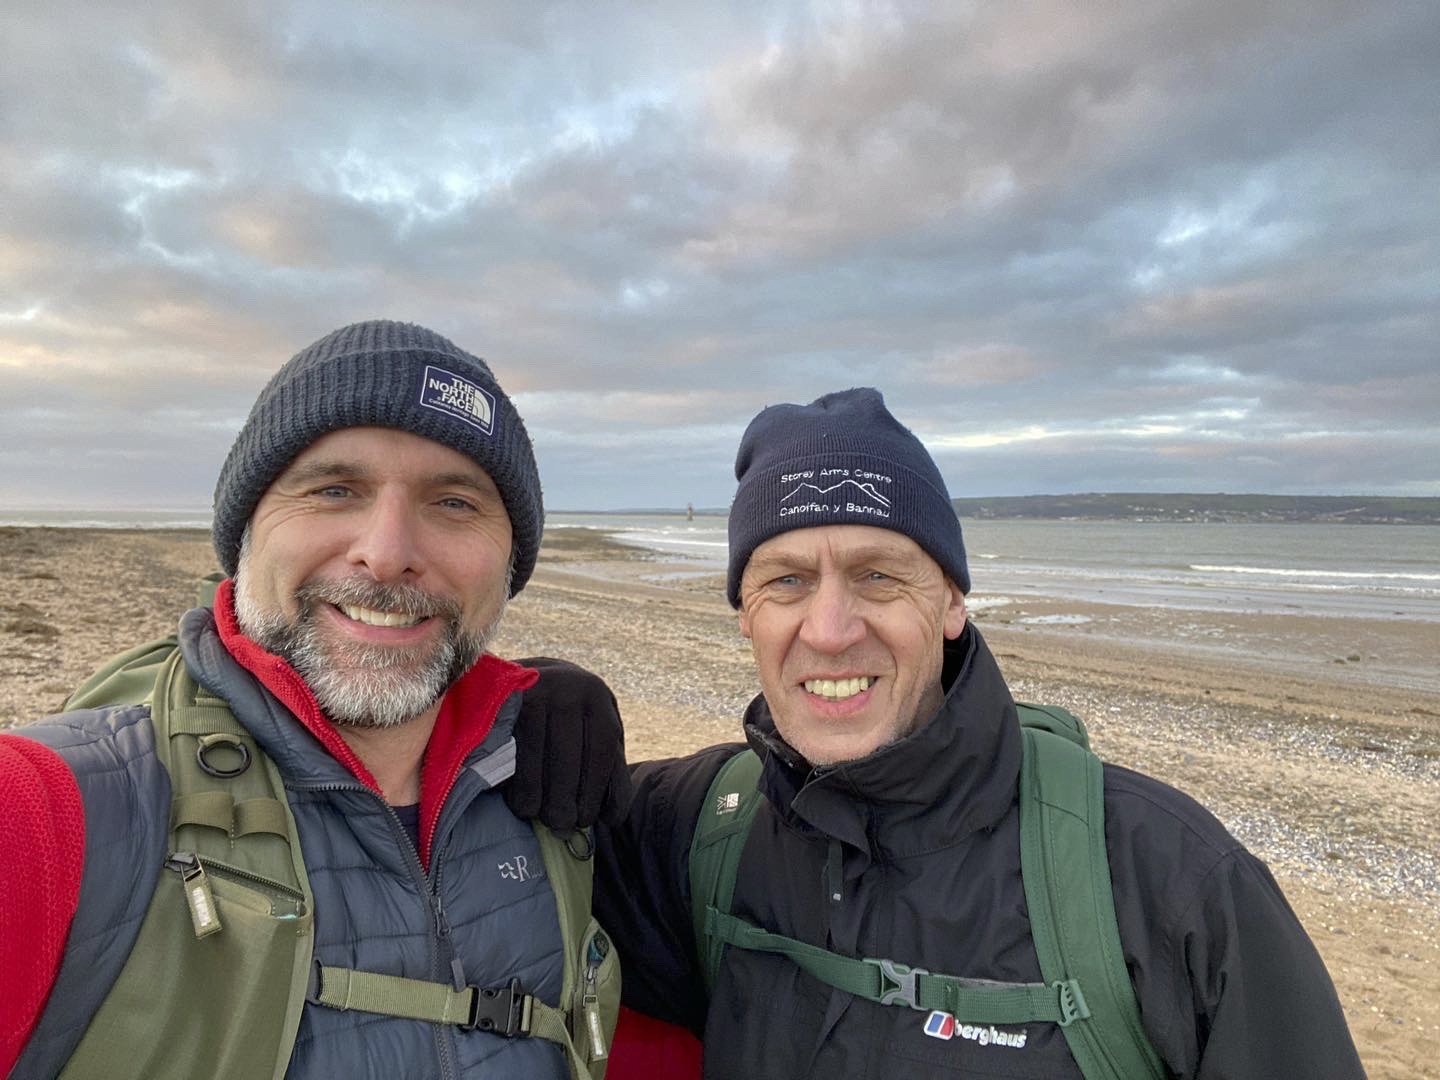
Two men in beanie hats and rucksacks taking a selfie on a sandy beach

A couple of weeks after very nearly smashing my camera, lens and a filter at Whiteford Lighthouse in South Wales, I headed back with a completely different game plan: leave the main camera at home and take only my DJI Air 2 drone. Ordinarily, to photograph the lighthouse at the right angle you have to be near it, and because it stands such a long way offshore, that means waiting for the tide to go out. I didn't want it stood on a flat, dry, rocky sea bed with no water around it, so the drone was the answer. The question was whether the quality would be good enough, and I'm very happy to say it was; I was blown away with the results. The video takes you on the photo shoot and then through the retouching steps in Lightroom and Photoshop for the final image.

Photoshop Layers and Selections Webinar with Rocky Nook Publishers

Thursday of last week I presented in a webinar hosted by my publishers, Rocky Nook all about my latest book, The Photoshop Layers and Selections Workshop.

It was so good to see so many people tune in LIVE and also to see the numbers of folks that had signed up to be sent the recording.

If you missy it and fancy checking it out, Rocky Nook have also now posted the webinar on their YouTube Channel that I’ve now added below…

At the end of the presnetation we went through a Q&A and one of the questions posted asked about the new selections and masking function in Camera Raw and Lightroom, and in particular about using the Color Range option…

Susan asked…

“Can you only subtract one colour point at a time or can you click multiple times on slight variations in the color in the same subtract operation?”

Originally I answered that I ‘thought’ you could only do one at a time however a friend of mine Trevor Ager messaged me to say that you can actually add more by holding down the Option (Mac) / Alt (Windows) keys and clicking.

Hope you enjoy the video.

Cheers,
Glyn

CROP your images BIGGER: 3 Right Ways and 1 Wrong Way

Composition is so important; it can make or break a photograph. Here I go through three ways to alter the composition and make an image bigger using the Crop Tool in Photoshop, so your pictures look their very best on screen, in print or on social media. The three are cropping combined with Content-Aware Fill, cropping combined with Content-Aware Scale, and Merge to Panorama, and at the end I show how I made the fake skirting board you'll see in one of the pictures.