Spirit of Normandy 80th Anniversary D-Day Landings Commemorative Journal

With the 80th Anniversary of the D-Day Landings fast approaching, I’m incredibly honoured and proud that portraits from my 39-45 World War2 Veterans Portraits Project were chosen to appear in the Spirit of Normandy 80th Anniversary D-Day Landings Official Commemorative Journal …

Spirit of Normandy commemorative programme with a spread headed Legends of the Longest Day

Top Row: Laurie Weeden, Allan Scott, Stan Swansborough
Bottom Row: Bob Stoodley, Ted Owens, Gordon Drabble, Victor Urch

The purpose of the project was primarily my way of giving back to the Veterans but also to Honour, Remember and to Educate and so seeing the portraits in such a publication, a personal copy of which will be given to King Charles, is wonderful and serves again to keep the memory of these incredible people alive as their names will be seen and read by those who look through the pages.

Spirit of Normandy programme page with a portrait of a veteran in a beret and medals

Cyril Stanley Ford

Should anyone wish to have a copy of the journal, drop me a message using my CONTACT PAGE and I can then put you in touch with the Editor in Chief who will be able to help you out.

Talking Lightroom and Photography with Adobe Lightroom Product Manager Katrin Eismann

This is the recording of a live broadcast where I'm joined by Adobe Lightroom Product Manager and photographer Katrin Eismann. We talk about her process for capturing stunning travel photographs, her personal projects and her kit, and we also take a look at what was Lightroom's latest technology for photographers at the time, along with some hints and tips for getting the best results. It's a great mix of photography and practical Lightroom advice from someone who knows the software inside out.

links mentioned during the broadcast

Katrin on Instagram: https://www.instagram.com/katrineismann/ ( @katrin_eismann )

Lightroom Academy: lightroom.adobe.com/academy

Adobe Community Forums: https://community.adobe.com/

Marc Muench Photography Workshops: muenchworkshops.com/workshops/

Iceberg floating in deep blue water under a dark cloudy sky
Silhouetted bare branches against a soft blurred golden background
Fashion model in a fringed green outfit posing against a concrete wall
Hand pouring a glass of golden liquid into blue water that glows in the light
Blurred figure of a woman in a dark dress walking through misty water

Generative AI Remove, Sony Tethering and more ... Lightroom UPDATE May 2024

So today (Tuesday 21st May 2024) Adobe made available some fantastic updates and enhancements to both Lightroom v 7.3 (including Mobile) and Lightroom Classic v 13.3 which amongst other things sees the integration of Adobe’s AI, Adobe Firefly and (finally) tethering support for Sony amongt others things.

So, here’s a run through of the changes from today in this recording of a LIVE Broadcast I did on the day of release, and also below I’ve written down all the detailsincluding useful links…

PERFORMANCE UPDATES

In addition to some bug fixes and stability improvements across all platforms, you’ll also notice a speed increase when using Denoise.

Also in addition to the updates and additions detailed below Adobe also mention …

  • HDR Optimisation

  • Instant Access to Photo Libraries in Lightroom Mobile and Desktop apps

  • Lightroom’s all new mobile editing experience streamlines the mobile toolbar to prioritise the most popular features, whilst making it faster and more intuitive to edit.


SLIDESHOW IN DESKTOP

It’s now possible to show images in a slideshow from within Lightroom Desktop.

To start a slideshow you access it via the View > Start Slideshow

Lightroom library grid of landscape and portrait photos with a menu open on the left

On release, the controls and the look of the slideshow are very limited with the images playing at full screen and being able to adjust whether the slideshow loops and adjust the speed of the slideshow to be Extra Slow, Slow, Medium and Fast.

Lightroom slideshow speed menu with Medium selected from Fast, Medium, Slow and Extra slow

CLOUD TO LOCAL STORAGE (DESKTOP)

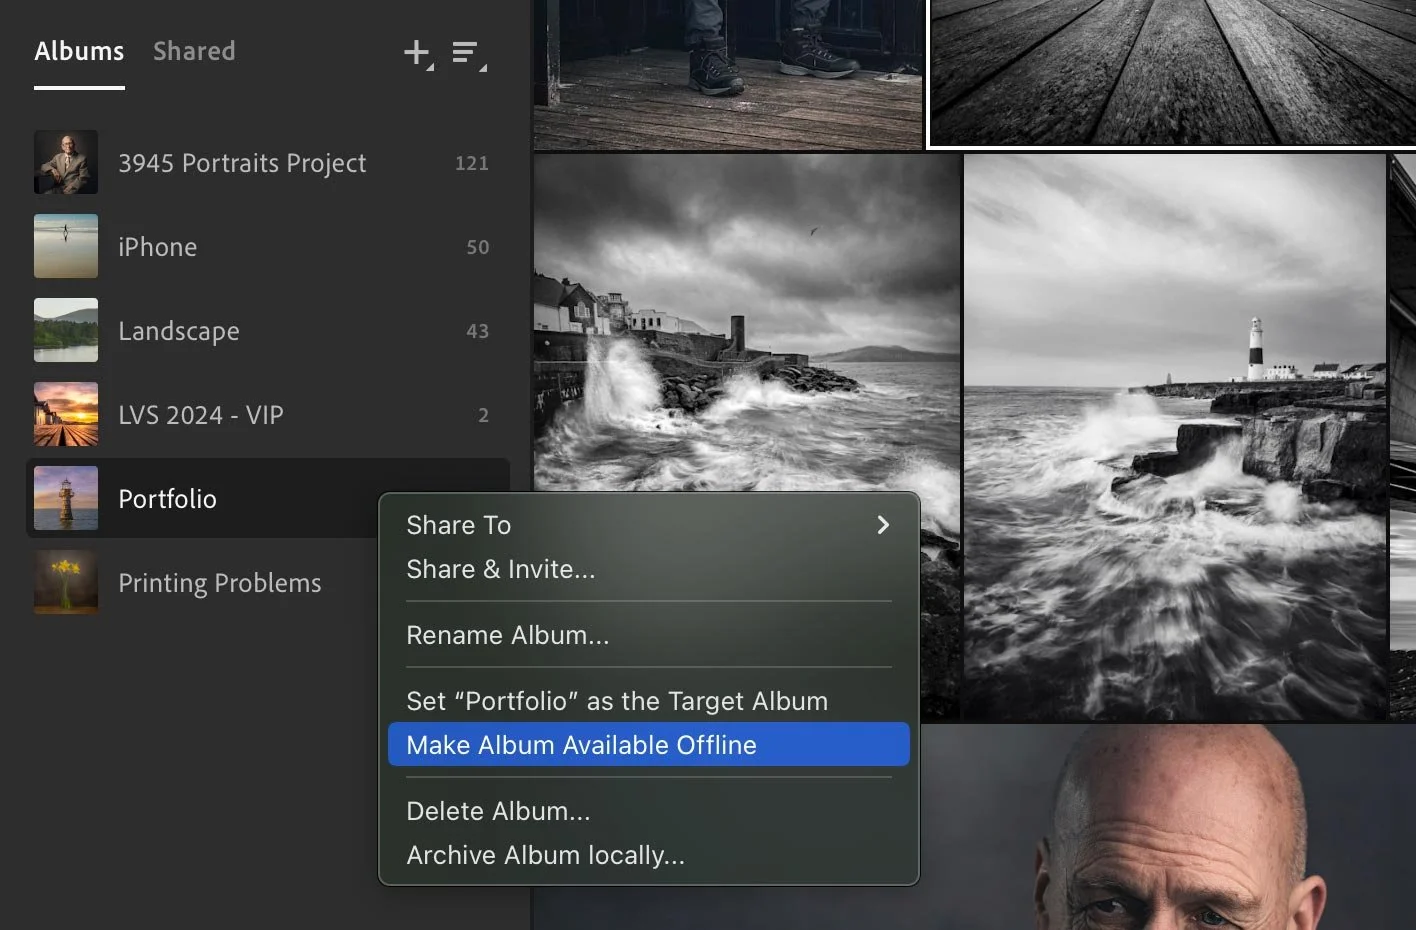
Until now it was only possible to have cloud based albums in Lightroom Desktop, but with this update that all changes because from now, we can make Albums available and viewable offline just like Collections in Classic where we could sync them to the cloud or not.

To do this simply right-click on an Album and choose Make Album Available Offline …

Lightroom album context menu with Make Album Available Offline highlighted

SONY TETHERING SUPPORT (CLASSIC)

It’s taken some time but finally Adobe have worked closely with Sony and as a consequence, Lightroom Classic now supports Sony Tethering.

Sony logo in black on a white background
Lightroom tethered capture bar showing camera settings

Sony Tethering in Lightroom Classic offers full control over main camera settings, capture and LIVE view

CURRENTLY SUPPORTED SONY CAMERAS …

Table of Sony Alpha camera models requiring Lightroom Classic 13.3 for tethering

The process for tethering to Lightroom Classic with a compatible Sony camera is a very simple process, working exactly the same as it does for other compatible brands.

• Note: Camera needs to be in Remote Shooting or PC Remote mode via USB Connection settings.

A full list of ALL cameras that are supported (not just Sony) can be found here: LINK


TONE CURVE IN VIDEO (DESKTOP)

I’m not someone that edits video within Lightroom but I know that there are many that do, so the addition of Tone Curve in Video for Lightroom Desktop is going to be a very welcome update.

Adobe state that …

  • You can now edit the Tone Curve when editing video in Lightroom Desktop

  • These edits are viewable across Mobile and Web

  • Videos now supports Presets with Tone Curve information


LENS BLUR ENHANCEMENTS

The Lens Blur Effect is finally out of Early Access and available to all, and Adobe states that its release also brings with it …

  • Copy and Paste Support

  • Added focus slider in Mobile

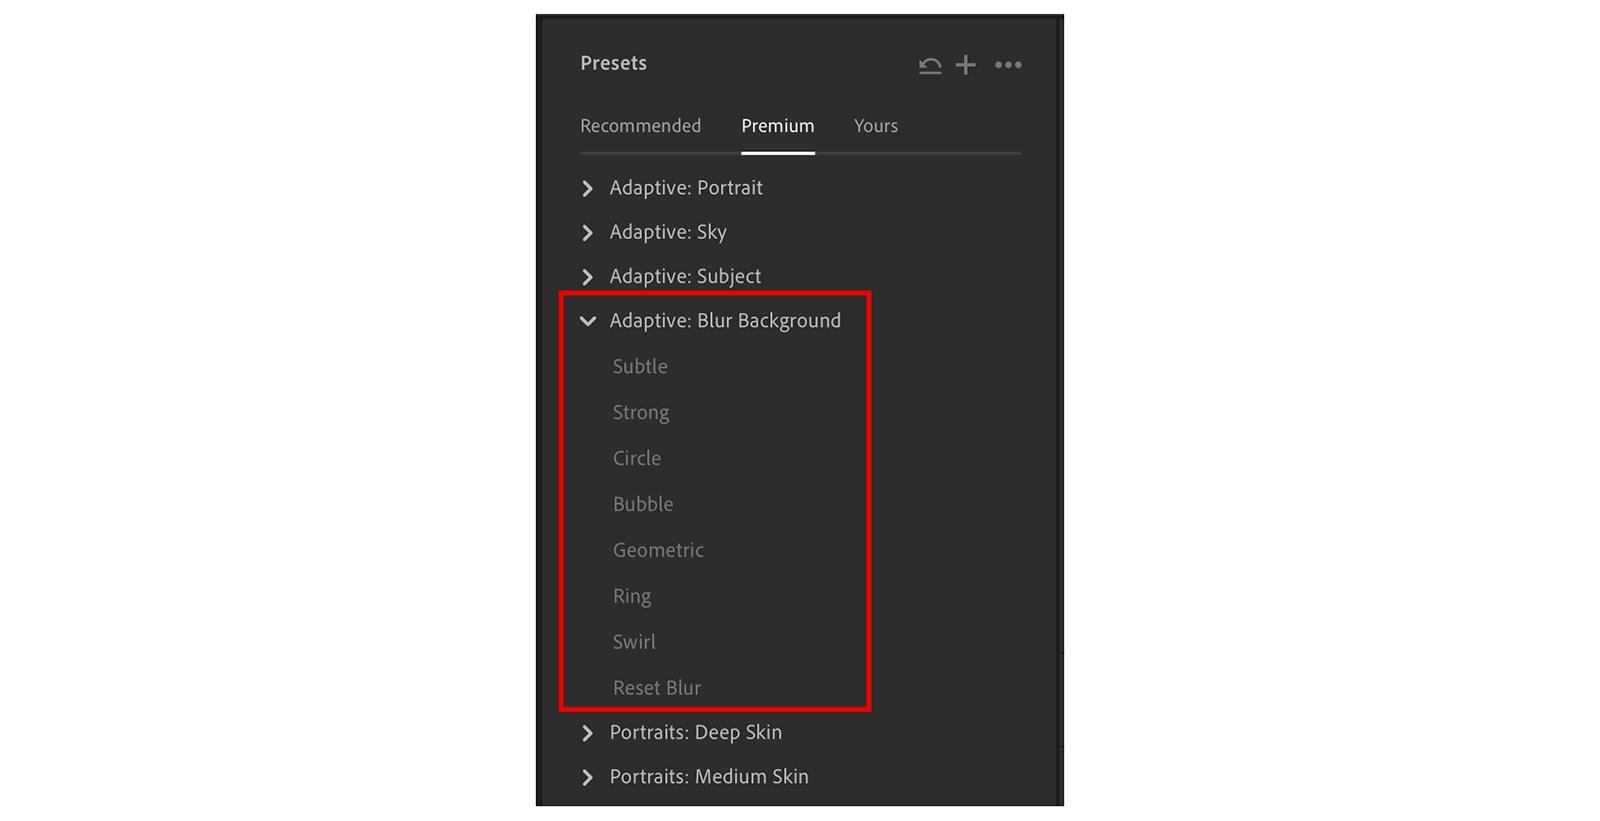
  • Support for Presets and New Adaptive Presets

  • Improvements to the subject detection and complex edges

Man in a checked shirt sitting on a black motorbike on a winding mountain road

Lens Blur

Man in a checked shirt on a black motorbike on a winding road in hilly countryside

NO Lens BLur

Lightroom mask overlay in orange and purple over a photo of a man on a motorbike

With Visualise Range turned on to show which areas of the image are in and out of focus

Lightroom Presets panel with the Adaptive: Blur Background presets highlighted in red

Lens Blur Adaptive Presets


GENERATIVE AI REMOVE

Adobe have now integrated their Adobe Firely AI as Early Access into Lightroom Desktop, Mobile, Web and Lightroom Classic for the purpose of … Removing distractions and unwanted objects from your photos

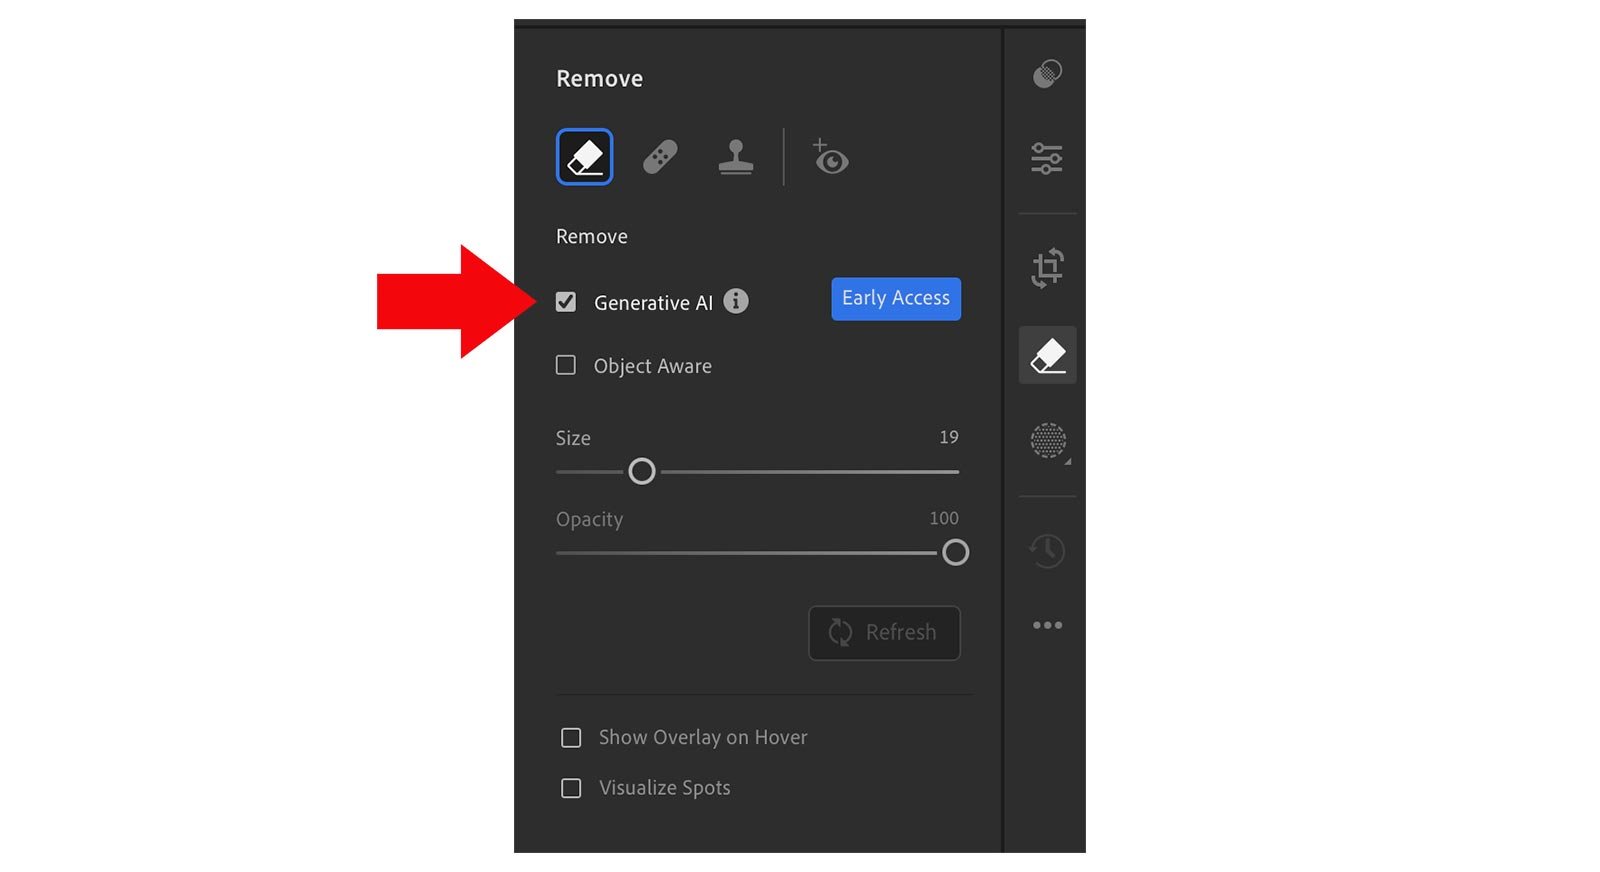
Found in the Remove section amongst the exisiting Remove Tool, Heal Tool and Clone Stamp Tool (and Red Eye Removal) you use it in conjunction with the Remove Tool by simply ticking the Generative AI checkbox …

Lightroom Remove panel with a red arrow pointing to the Generative AI option

Maximum Resolution of the ‘Removed’ area is currently 2K, so a very generous starting point considering this is to be used purely for removing unwanted distractions and objects …

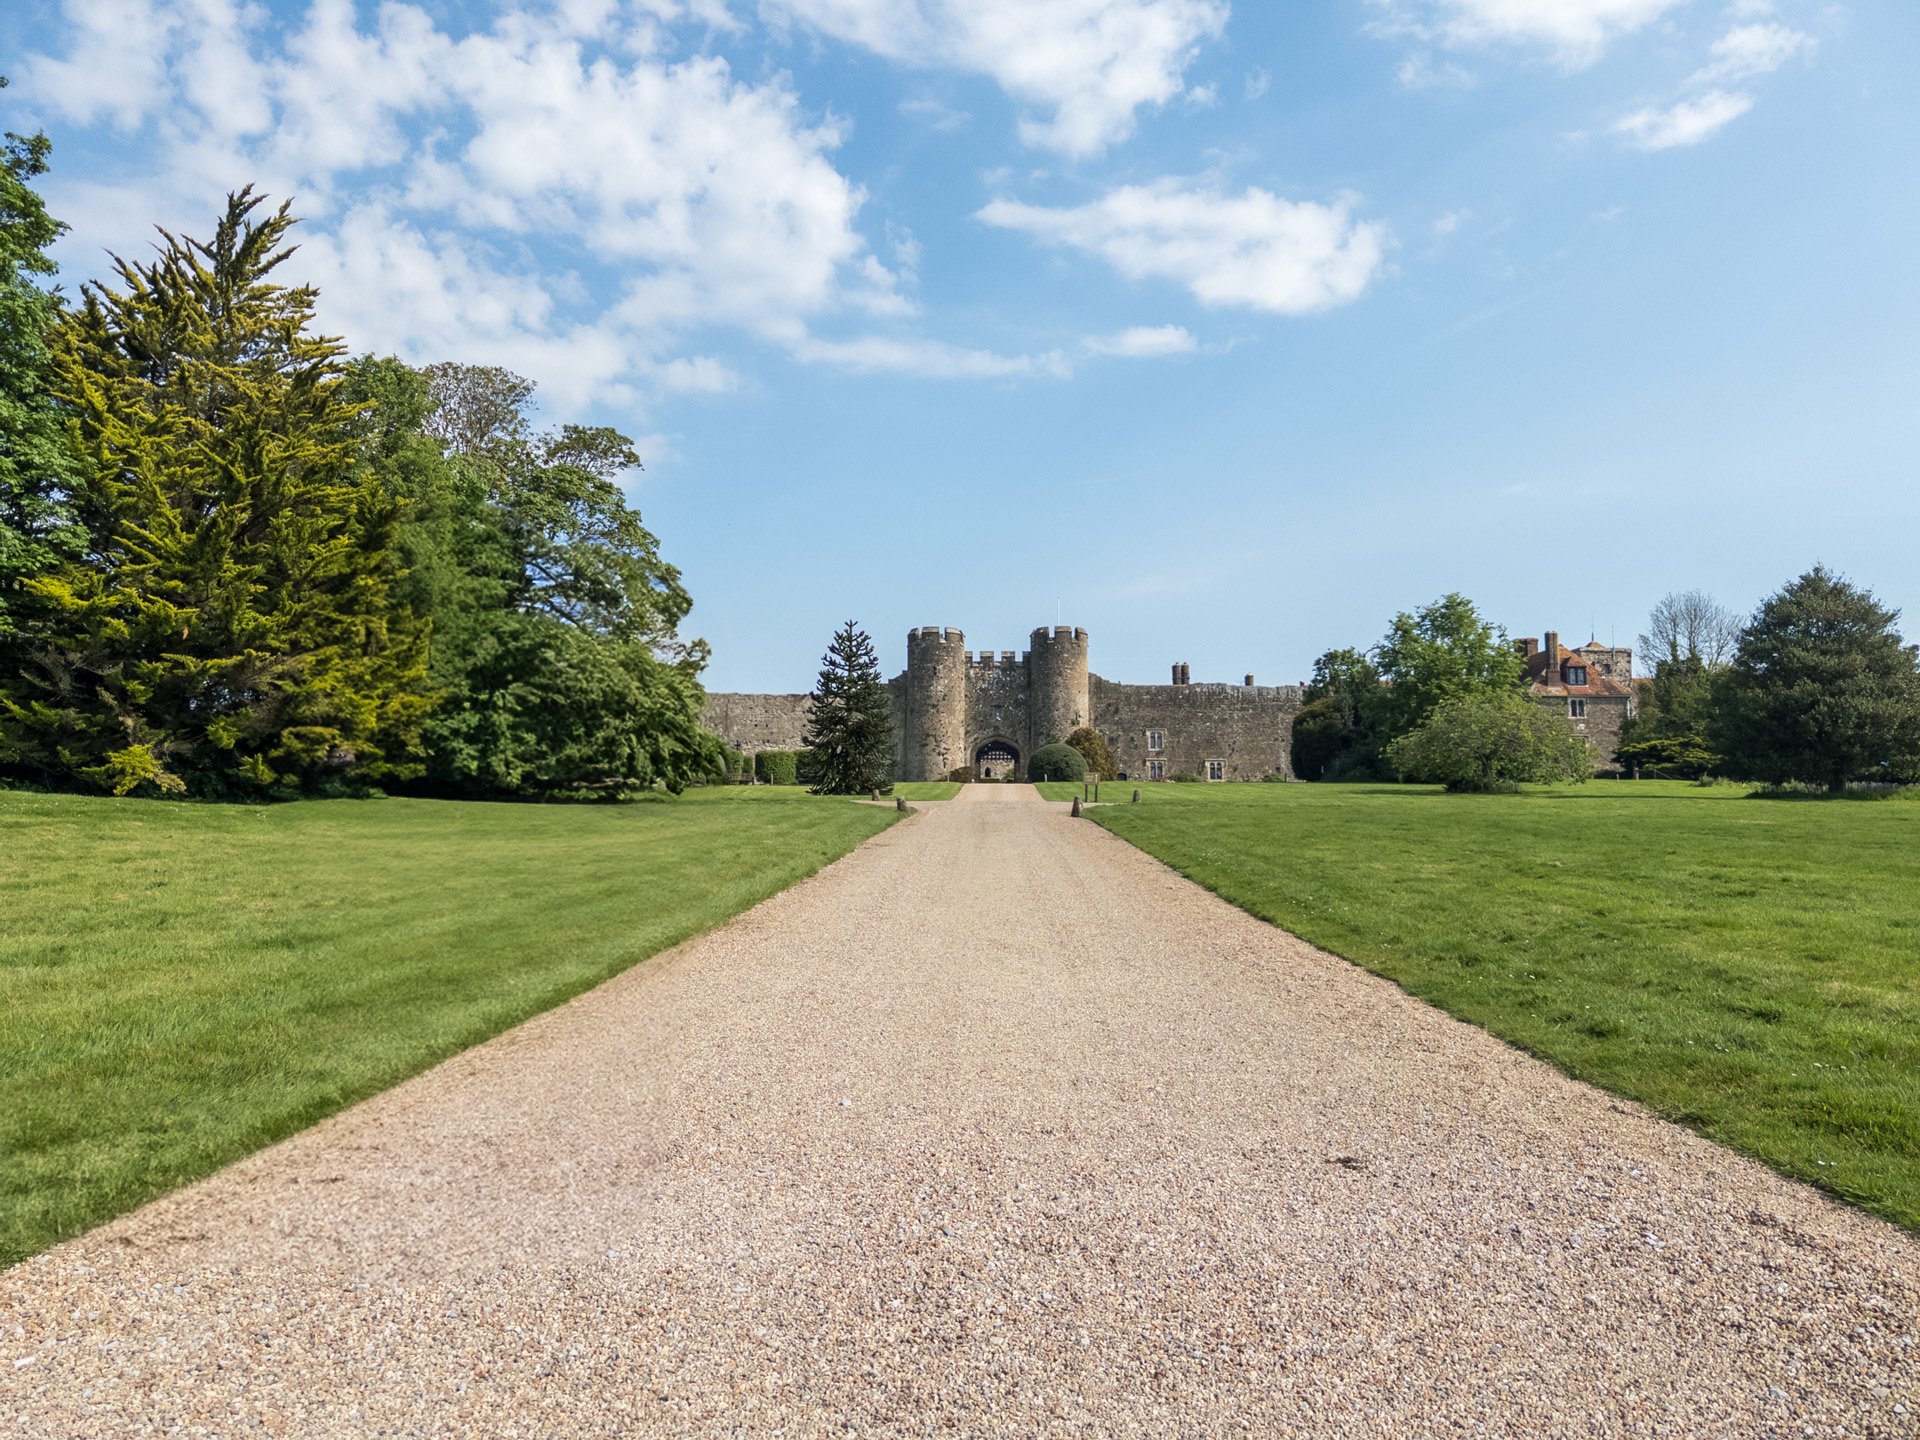
Couple standing on a gravel drive leading to a castle under a blue sky

To use Remove with Generative AI simply brush generously over whatever it is that you want to remove.

You can then Add or Subtract from this area to refine it …

Gravel drive leading to a castle with the couple painted over in red for removal

3 variations are then given and you can click through to see which you prefer OR simply Refresh to try again until you get a result that you’re happy with …

Gravel drive leading to a castle with the couple removed using Generative AI

There is also an Object Aware checkbox which Adobe state is to to be used to Preserve Background Details whereby the AI will analyse the initial selection you made and identify what it is you want to remove without having to fill in the entire selection, meaning you could just brush around the outside.

Lightroom Remove panel with a red arrow pointing to the Object Aware option

So for example in the picture below, let’s say that I want to remove the cardboard box and string that the little boy has over his shoulder …

Boy in a flat cap and tweed sitting on wooden steps with his chin in his hands beside a small case

I’ll use Generative AI Remove but also use Object Aware, so then rather brush to select the entire box I’ll just quickly brush around the outside including the string …

Same photo of a boy on steps with the case beside him outlined in white for removal

The AI then looks at what I’ve drawn around to ee if it can identify the main object, and looking at the selection it made below it did a pretty good job …

Same photo of a boy on steps with the case painted over in red for removal

I then use the Add option in the Refine section to brush over the string that was missed, so that it’s included in the remove …

Same photo of a boy on steps with the case and its shadow painted over in red

… and this is the result

Boy in a flat cap sitting on wooden steps with the case removed using Generative AI

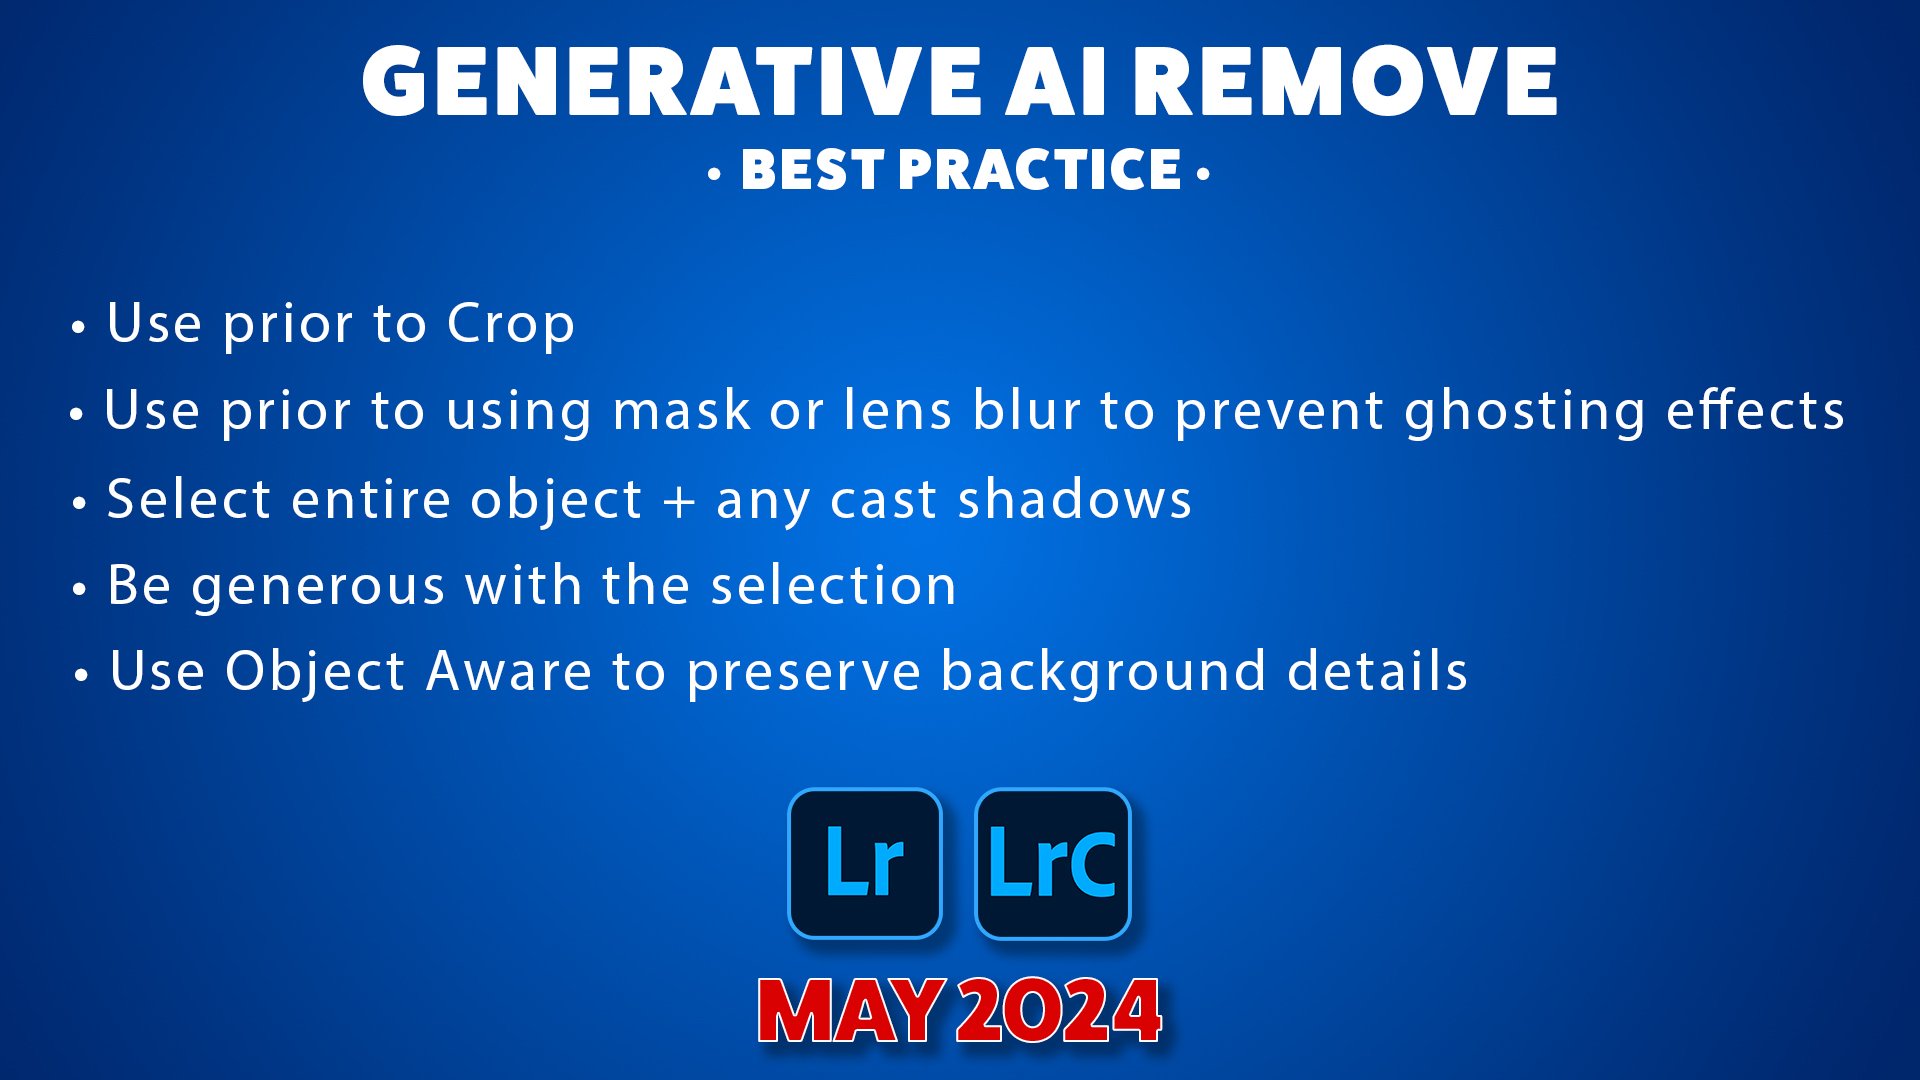
As with all features and tools there are ways to use them to produce more pleasing results, so here’s just a few for Generative AI Remove …

Generative AI Remove best practice list for Lightroom and Lightroom Classic, May 2024

There a couple of differences when using Generative AI Remove in Lightroom Desktop and Lightroom Classic and I show those in the LIVE Broadcast recording at the top of this page

Finally (for now) keep a look out for some more videos coming soon where I take a deeper dive into some of the new features, but in the mean time here’s a link to the official news release from Adobe ( LINK )

Cheers,
Glyn

Mastering the Art of Landscape Photography with Ian Asprey ( Landscape Photographer of the Year 2021 )

This is the recording of a live broadcast where I chat about landscape photography with Ian Asprey, Landscape Photographer of the Year 2021. From breathtaking vistas to the intricate details of composition, Ian shares his insights, his techniques and tales from behind the lens. If you've ever wondered what goes into an award-winning landscape photograph, this is a great chance to hear about it from a master of the craft and be inspired along the way.

Links mentioned during the LIVE Broadcast

Ian Asprey Website: www.ianaspreyphotography.co.uk

Facebook: facebook.com/ian.asprey

Instagram: @landscapes_ianasprey

Mark Andreas Jones: www.markandreasjones.com/

Lightroom Virtual Summit 2024: bit.ly/lvs-2024

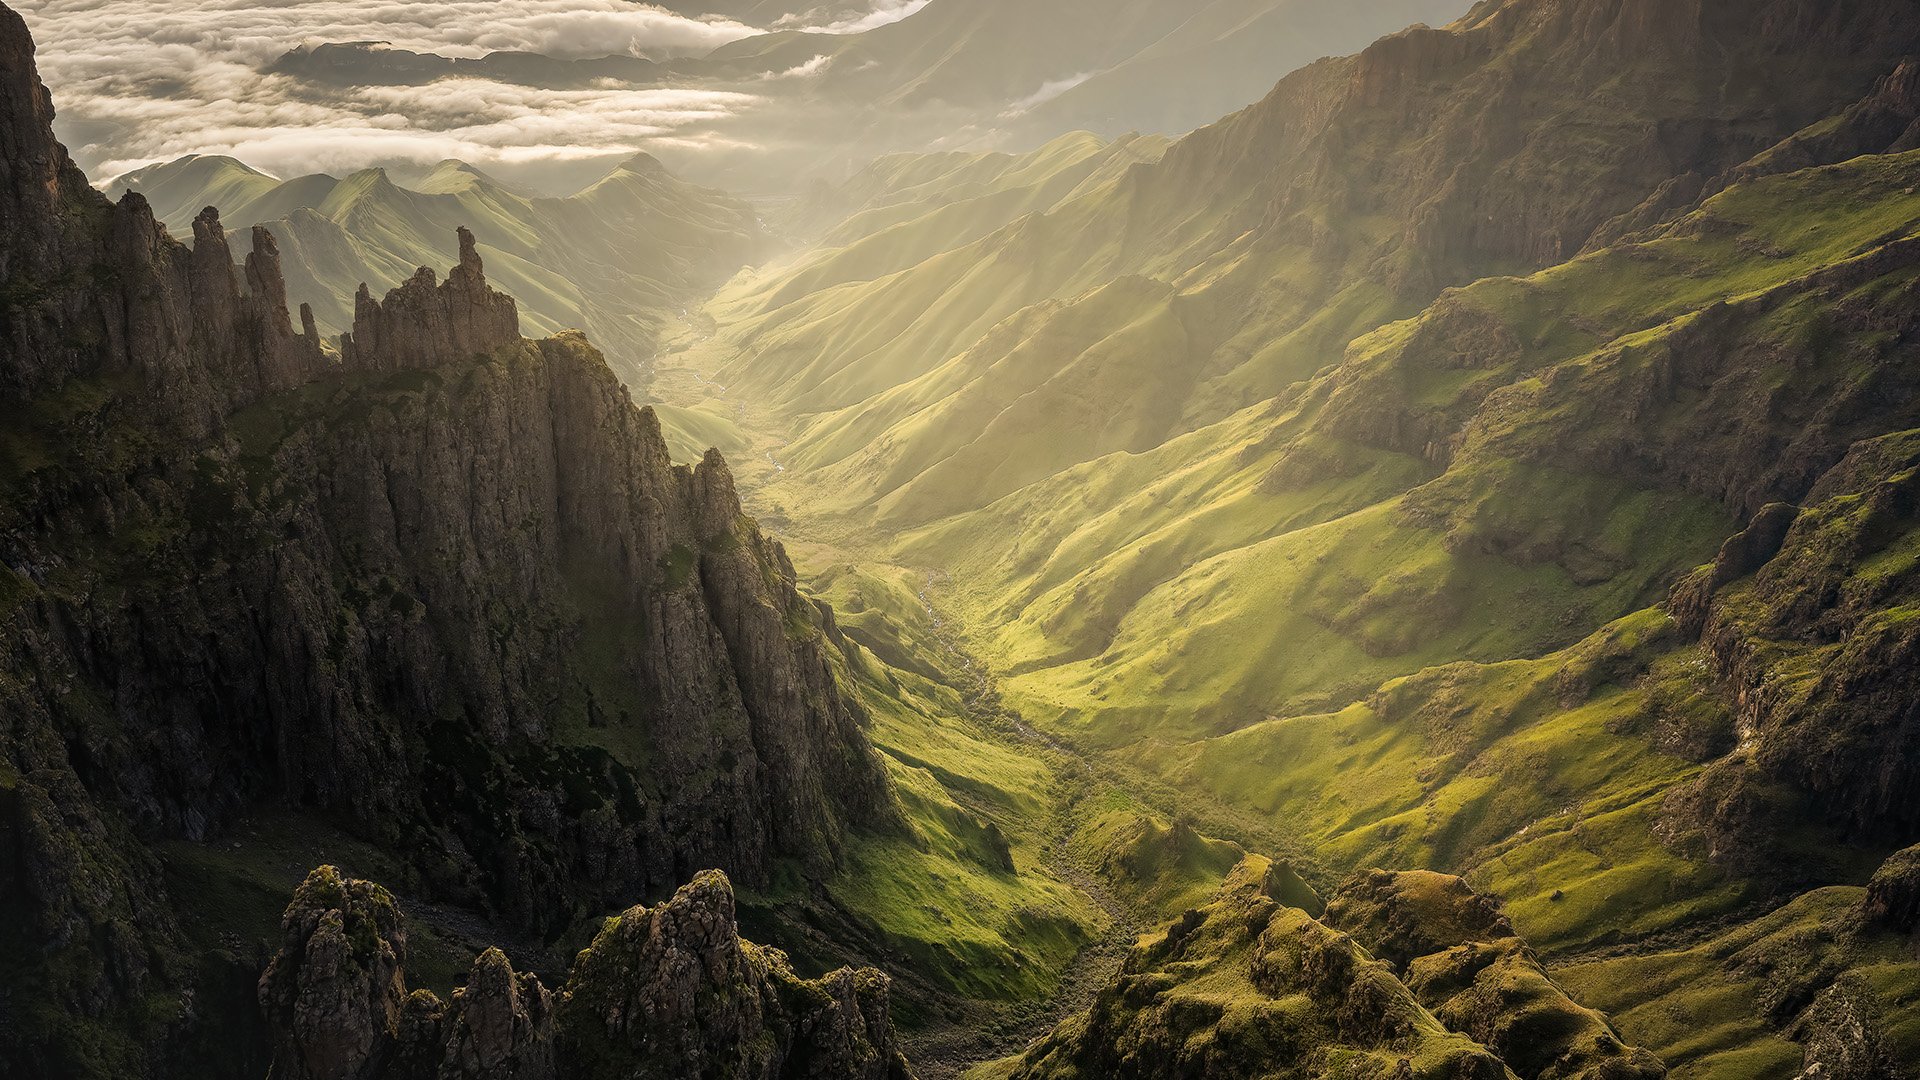
Sunlit green valley winding between jagged mountain ridges
Milky Way arching over silhouetted rock formations at night
Snowy jagged mountains above a black sand beach under a pink and purple sky
Person in red standing on a reflective salt flat mirroring white clouds and blue sky
Lighthouse on rocks at dusk with a comet in the sky and its reflection on wet sand

Beyond the Flash: Unlocking the. Potential of Constant Lighting in Photography

I was invited to be part of Westcott Wednesday, hosted by B&H Photo Video in their Event Space, and this is the recording of that live broadcast. As I'd been using constant light more and more when taking portraits, I was asked to talk about my experience of moving away from traditional flash, and how and why I feel it's made such a positive impact on my portraits, not just for me but also for the person being photographed. I go through the constant light I'm using and how I'm using it, along with tips on how I take portraits, and hopefully you'll see how well constant light works alongside them. It had become the cornerstone of my portrait work, and it brought a new level of creativity and enthusiasm to my photography.

Spending time with Photography Students at Cardiff and Vale College

On Wednesday this week I was at Cardiff and Vale College in South Wales, having been invited to speak to a group of Photography Students for a couple of hours.

Large group of students and tutors posing together in a classroom

It was so good to be amongst people who were clearly excited about their Photography but also in particular about the possibilities with their retouching using Lightroom .

During my time with them I first of all went through some tips and techniques for Portrait Photography, focusing (no pun intended) on the ‘people’ side of things as opposed to the technicals, and all with the intention of helping the person in front of the camera to relax.

After a short break I then went through retouching a portrait using ONLY Lightroom and going through my new workflow which shows how I am now doing tasks such as Dodging and Burning, my 2010 Technique and Lighting Effects, which up until very recently I would have only ever done by using Photoshop.

“Had a great time at Glyn’s lecture yesterday. I had been researching about how to take good portraits. What Glyn shared about techniques (with just one light!) was really encouraging. I was still using Photoshop for my editing, but the techniques demonstrated in Lightroom were amazing. I must sign up to his channel!”
— Norman Allen
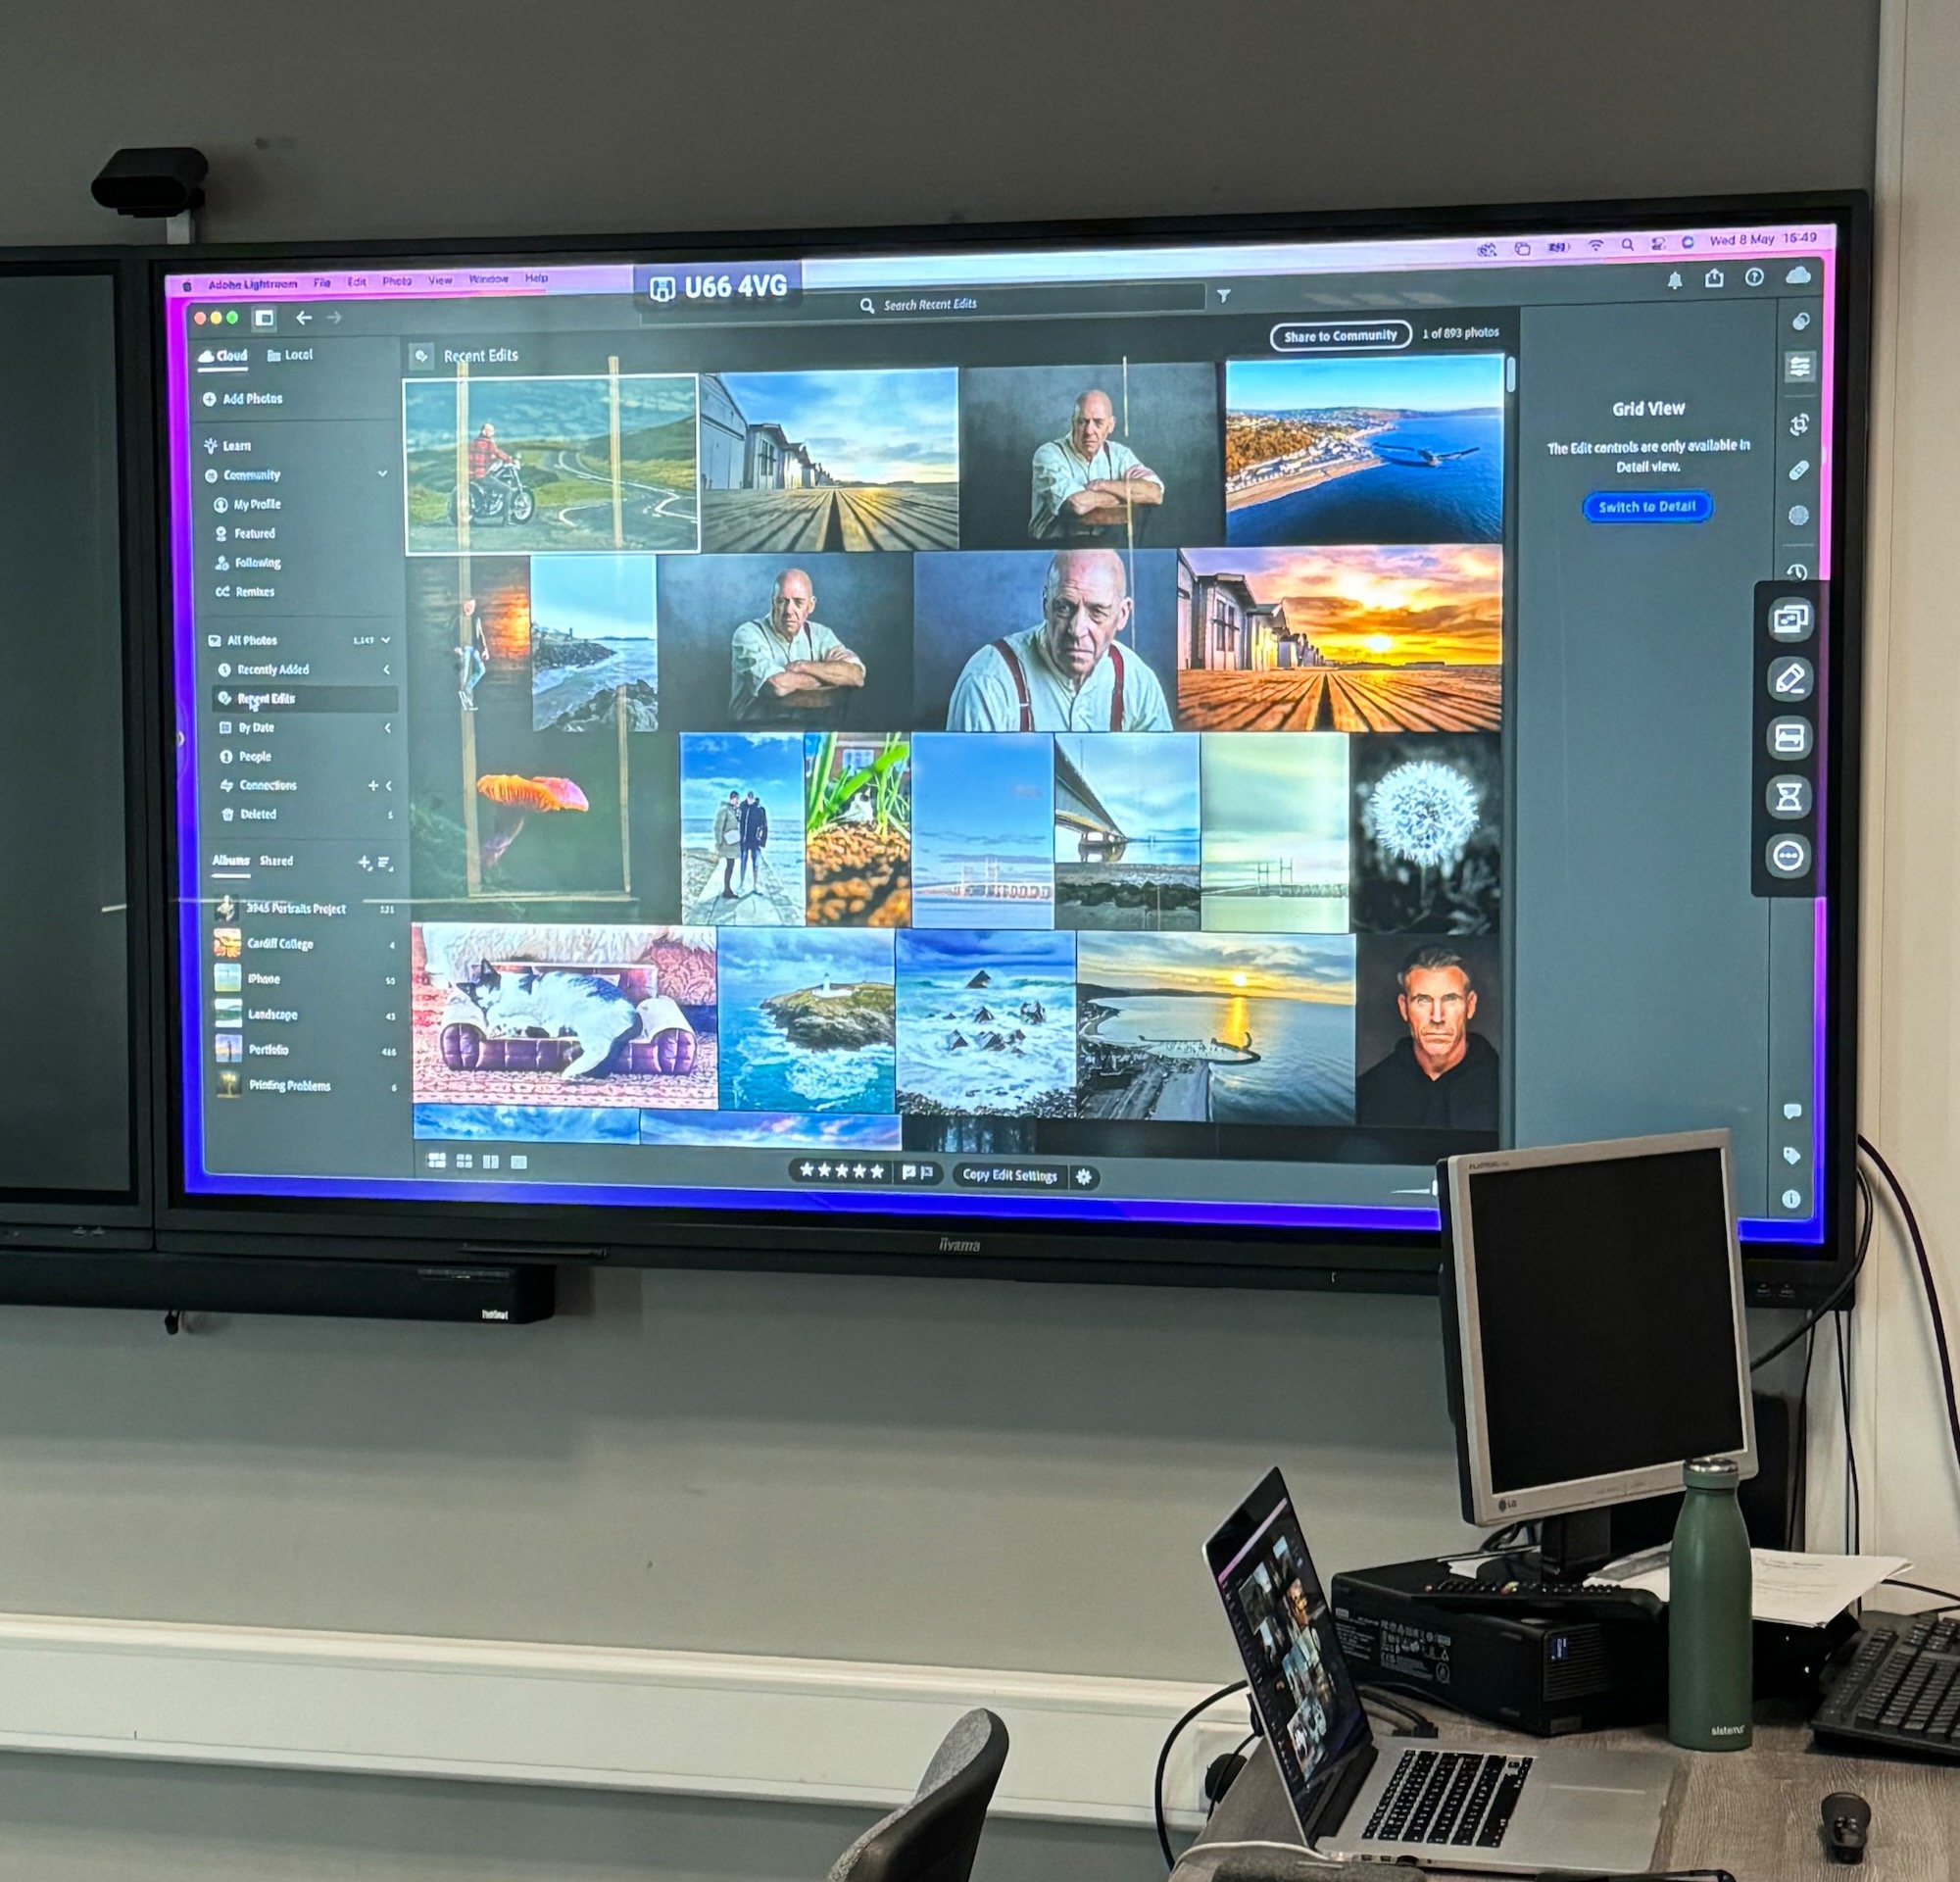
Large wall screen showing Lightroom with a grid of photos in a classroom
“Thank you Glyn for yesterdays photography workshop. Your expertise and passion made it a truly enriching experience. Looking forward to applying the new skills I’ve learned. Many thanks for your valuable time.”
— Chathuranga Gamage
“Yesterday I attended a talk/presentation hosted by Glyn Dewis. This presentation was not only hugely informative but presented me with a number of questions to ask of myself. If I were to make comment on one thing from the presenter/presentation it would be the unswerving passion for the subject and inspiring others to achieve of their best. ”
— Steve Riggs
Three photos of a bald man in glasses posing with different students in a classroom

HUGE thanks to everyone for making me feel so incredibly welcome and for my great friend Anthony Crothers (College Staff / Tutor) for inviting me in.

From Movie Magic to Photographic Mastery | Lisa Carney

This is the recording of a live broadcast where I chat with Hollywood movie poster and artwork retoucher Lisa Carney and uncover the how, what and why of her personal work. We talk about her photography, her process and retouching, her travel and her personal projects, including Grief, which is about art as therapy. The recording starts with a slideshow of her images, and then you get to learn how she captures and edits them; I guarantee that, like me, you'll be blown away.

Links mentioned in the video

Website: lisacarney.com (Portfolios, Photoshop Tutorials, Courses and more … )

Grief ( Art as Therapy - Personal Project ) LINK

Instagram: @lisacarney

The Lightroom Virtual Summit 2024: bit.ly/lvs-2024

Glyn’s Adobe Lightroom Community Page: LINK

Unsurprisingly, Lisa was a HUGE hit judging by some of the comments posted already from folks watching the recording …

Screenshot of viewer comments praising a video interview
Red Notice film poster with two men in suits and a woman in a red dress
Black and white portrait of two smiling older women seated together
Misty lake shore at golden hour with rocks in the foreground and trees fading into haze
Older woman in a patterned sari seated on a chair in front of a colourful shop
Split level view of a turquoise sea below the surface and clouds above

Editing my Photographs in Lightroom on my iPad Pro

Now that I’ve been able to calibrate the screen on my iPad Pro, I’m really enjoying it when from time to time I retouch some of my pictures on it; reason being that the results on my calibrated iPad Pro are extremely close to how they look on my calibrated BenQ SW 272U Display.

I always struggled taking it seriously before now because it wasn’t calibrated and thought …

“What’s the point when I’d then have to go and make corrections
in Lightroom on my desktop afterwards?”
— Me (Before)

But now this is definitely not the case …

Desk with a BenQ SW272U monitor and an iPad Pro both showing a sunset photo in Lightroom

I actually had the technical folks at Calibrite reach out to me after having seen the iPad Pro calibration video I shared on my YouTube channel, asking if I’d be able to do a 2nd calibration to check whether the one I did was indeed accurate; and it most definitely was …

  • Target Luminance = 100cd/m2

  • Achieved Luminance = 99.355cd/m2

  • Target X = 0.3127

  • Achieved X = 0.313

  • Target Y = 0.3290

  • Achieved Y = 0.331

So yeah … the calibration of the iPad Pro screen worked a treat!

If you didn’t see the video I put together showing how to calibrate the iPad Pro and whaich also makes sense of what all this Luminance, X and Y stuff is all about, here it is …

So now, knowing that my iPad Pro screen calibration is good, I’m definitely making more use of it; not for every edit but just for those times when I just fancy sitting with my feet up in front of the TV and tinkering and when out and about on a phot shoot and then grabbing a coffee.

Also on those occasions if I haven’t finished the editing, when I get back home in front of my main computer I can just pick up in Lghtroom on my desktop from where I got to in Lightroom on my iPad Pro; such is the way that Lightroom syncs across all devices.

Clever stuff!

Actually on the subject of getting home and diving back on to my main computer, I’ve some new kit coming that is going to improve my workflow, set up and backing up, so I’ll make sure to share about that here and in a video 👍🏻

💥 Solving a LIGHTROOM Preset Headache ( Lightroom and Classic )

The Adobe Lightroom Community is a great resource for Lightroom presets, but how do you actually get them? How do you install them, and how do you get them into Lightroom and Lightroom Classic? It can be a bit of a headache if you've not done it before, so in this short video I show exactly what you need to do, step by step, for both versions of Lightroom.

Here’s the link to the Adobe Community PAge where you’ll find the Preset that I’ve made available:

https://lightroom.app.link/B4mq80BlSIb

FIXED 💥 BenQ Display CALIBRATION SETTINGS + Hot Key Puk

If you've a BenQ display with a Hot Key Puck, when you calibrate it using either Palette Master Ultimate or Palette Master Element you can assign different calibrations to three presets: Calibration 1, Calibration 2 and Calibration 3. Each of these can then be quickly and easily jumped between using the corresponding 1, 2 and 3 keys on the Hot Key Puck. However, if pressing 1, 2 or 3 doesn't change the display to the corresponding calibration setting, this video shows the very simple fix.

Note:

As a BenQ Ambassador I am able to help out with a discount on anty of the SW and PD range of displays.

If you’d like to know more, just drop me a message using the CONTACT page