Portrait

No Studio, No Problem: Teaching Portraiture at the Wex Summer Roadshow

Over the last few days, I've had the absolute pleasure of being out on the road with Wex for their summer roadshow, and what a brilliant experience its been. Thursday saw me arrive in Leeds, and Friday was the day it all came together at the Wex store, and I have to say, it was a fantastic from start to finish.

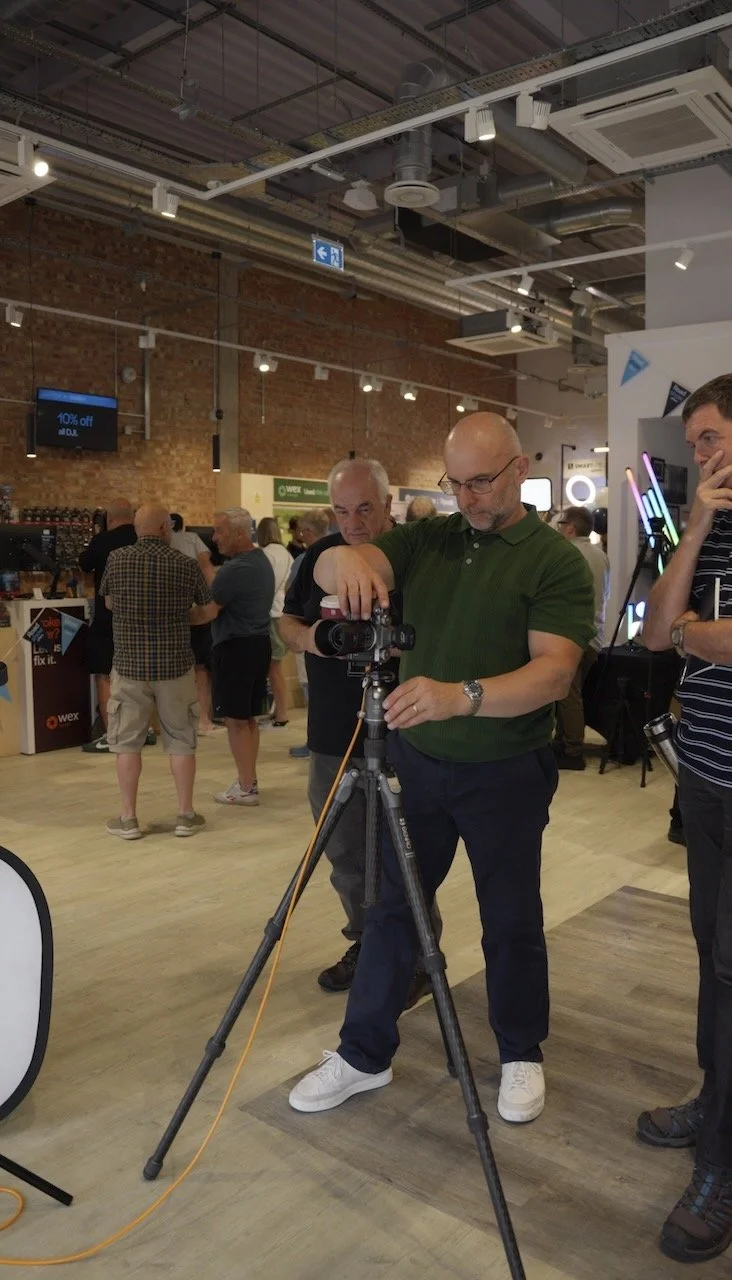
The team at the Leeds store, led by manager Levy, made me feel incredibly welcome, as did every member of staff, and what struck me most was the constant flow of people coming through - getting hands on with new kit, attending free seminars, and crucially, wanting to see how I work in practice. That's where the "no studio, no problem" practical demonstrations came in.

The concept is simple but powerful: I wanted to show people how I create portraits using minimal kit in tight, compact spaces. Rather than being locked away in a studio, I was demonstrating this right there on the shop floor, so people could watch the process unfold, step in front of the camera themselves, and see the results happen in real time.

The Setup

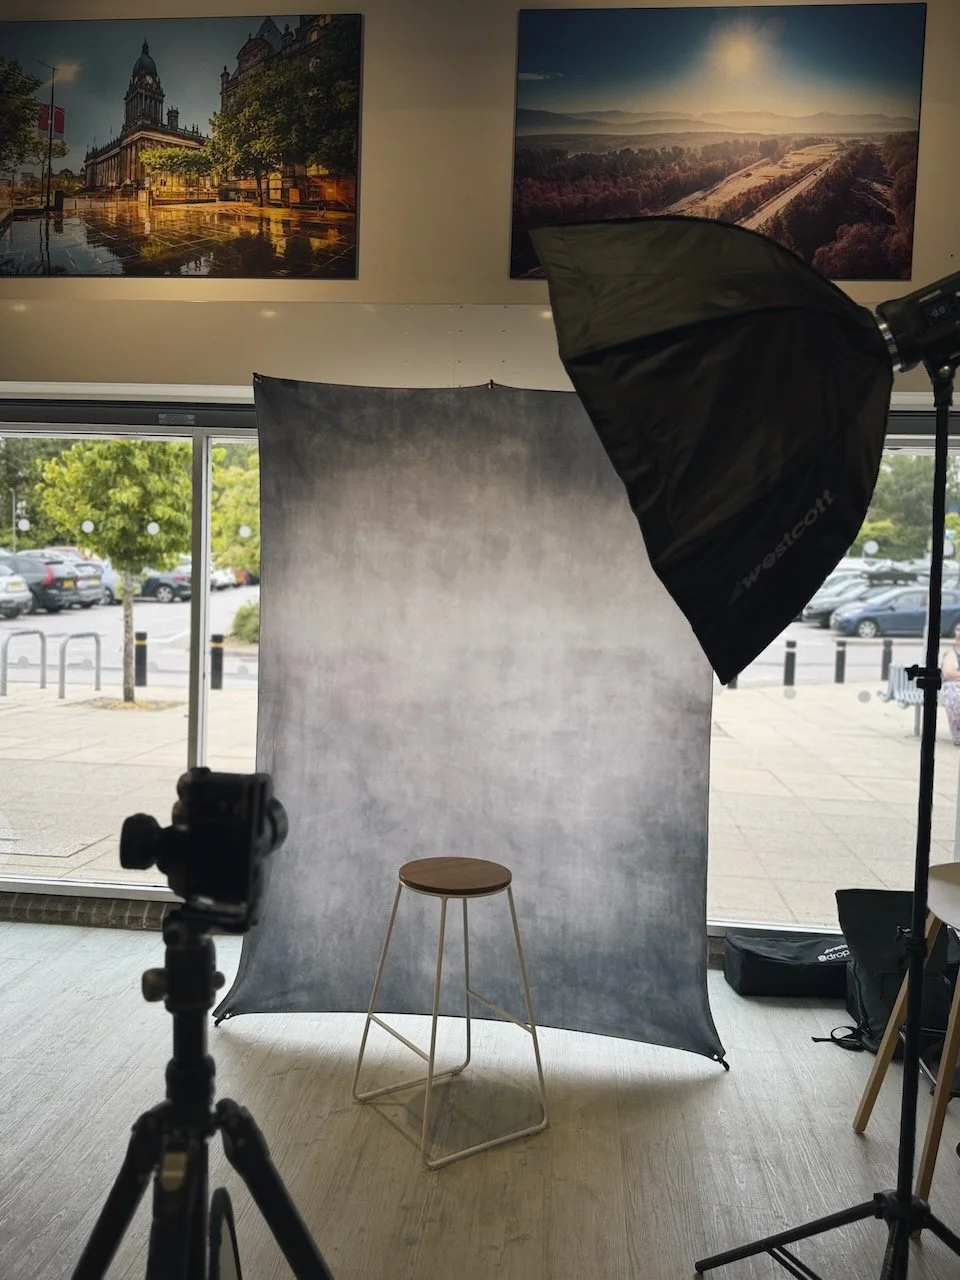
I kept my kit intentionally lean. I brought my X-drop pro background support and Vintage Gray backdrop, and for lighting, I was using the Westcott FJ250.

My camera was the Fuji X-T5 paired with the Westcott XT-1M remote trigger, and I was shooting in manual mode to set my scene, then letting the flash work in TTL - and honestly, it's a dream combination for portraiture like this.

The Moments That Mattered

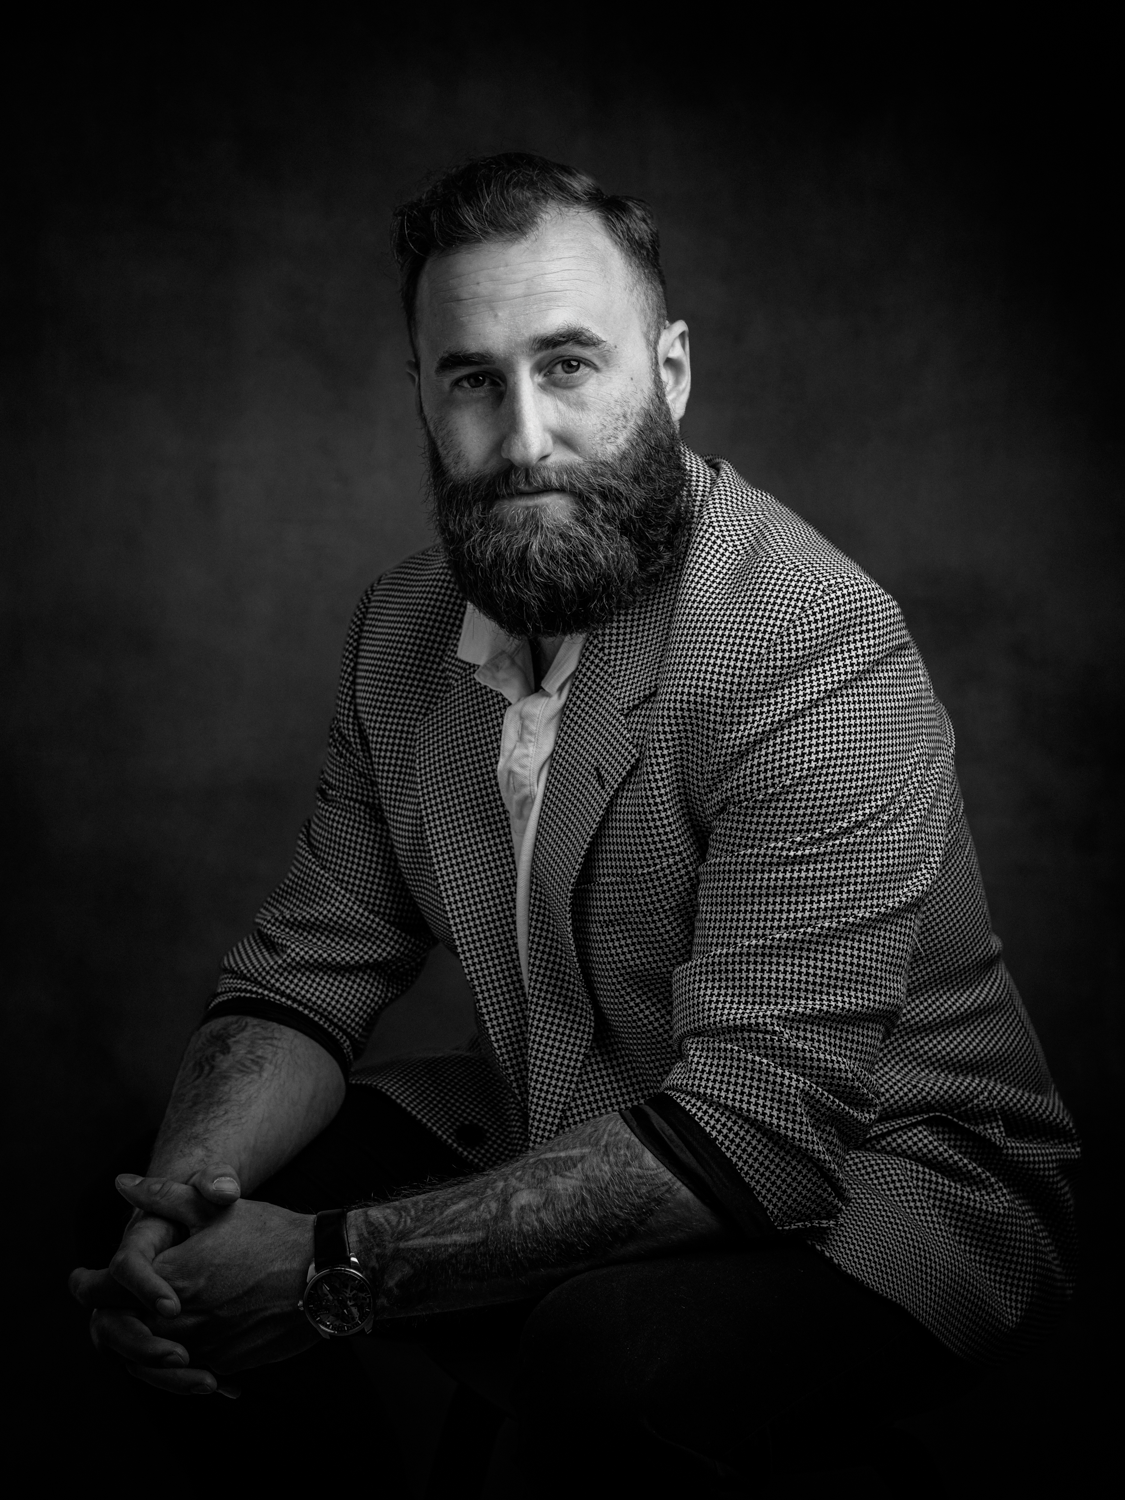
One thing that really stood out was a fella who couldn't quite believe how quickly the whole thing came together. I showed him how I position the lighting to achieve the kind of Rembrandt lighting I'm after, and from start to finish, we were ready to shoot in about sixty seconds. He was genuinely shocked at how simple and efficient it could be.

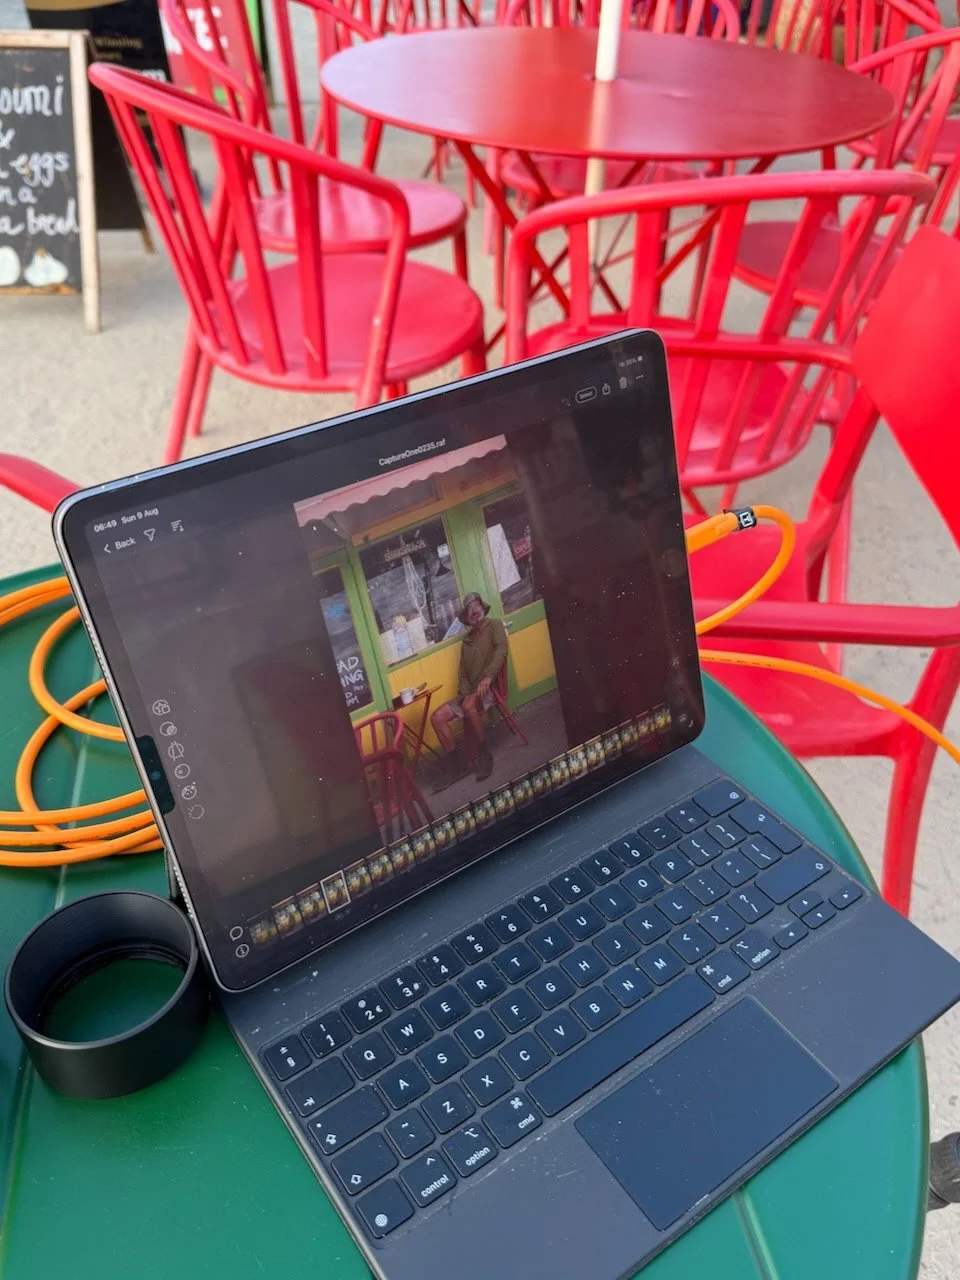
People were really impressed too seeing my Fuji X-T5 tethered to my iPad Pro via Capture One Mobile. Nearly everyone who watched the workflow commented on how instantaneously the Raw files appeared on screen after I'd taken the shot. That instant feedback - being able to review a Raw file moments after capture, really drove home how modern tools can streamline the entire process.

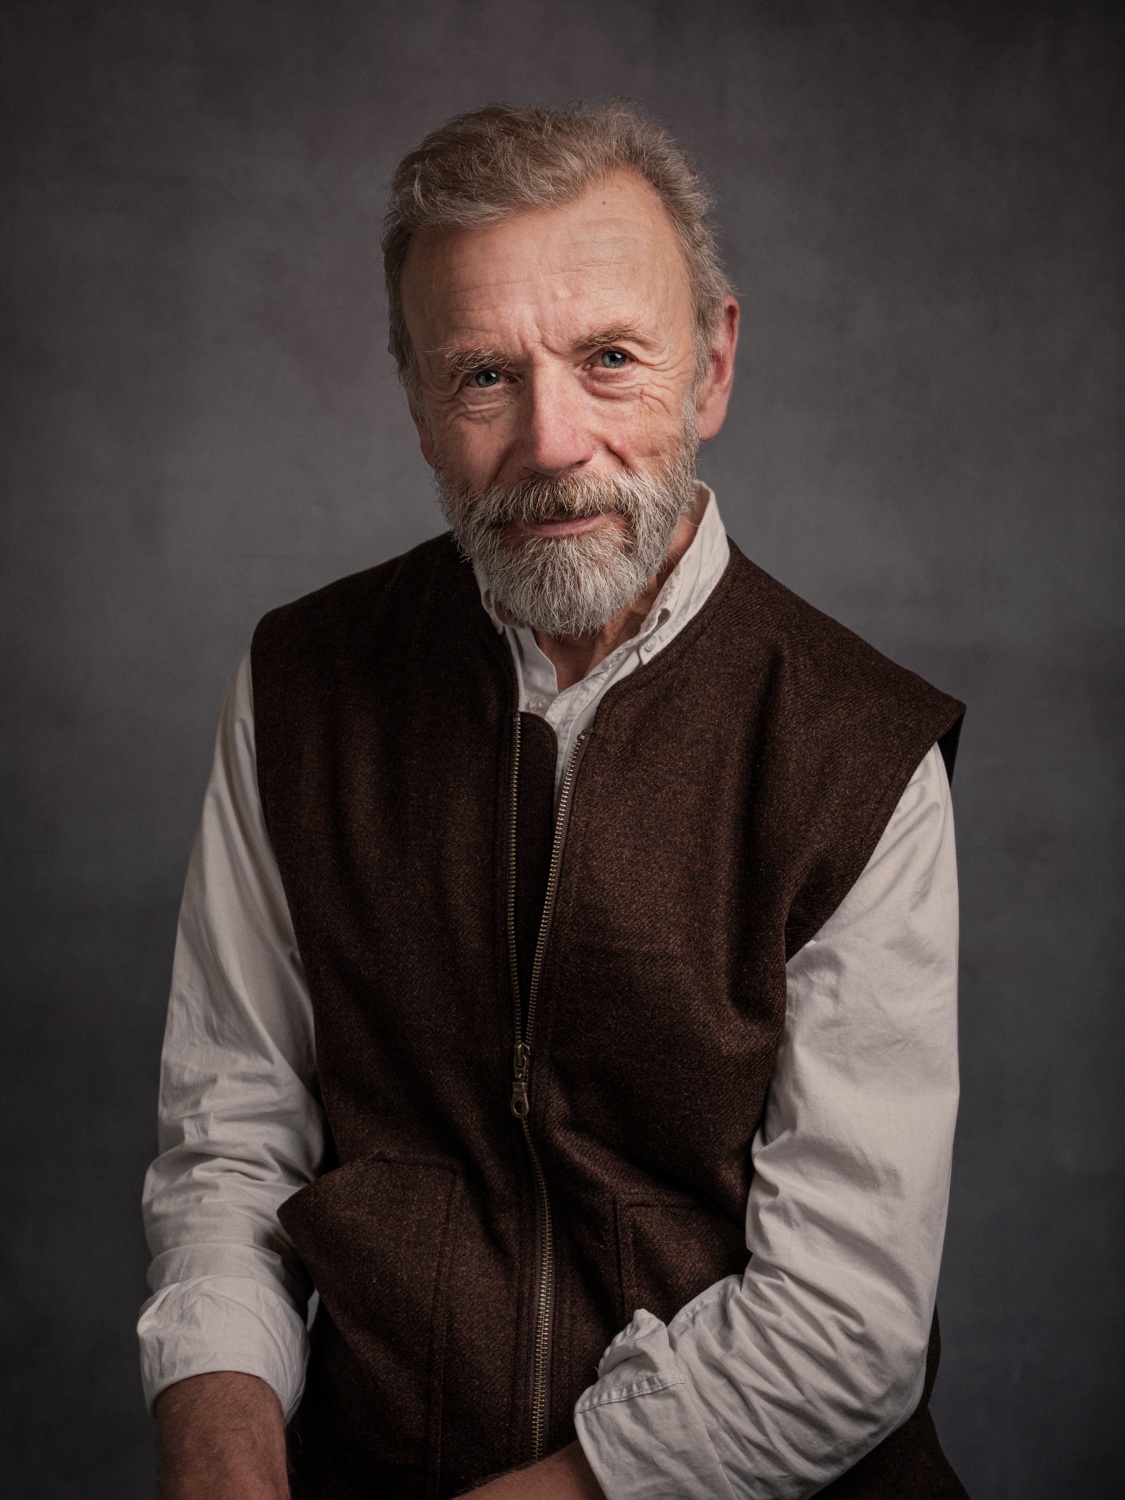
I also had the privilege of getting Joe Cornish, a renowned landscape photographer here in the UK and one of the other speakers at the event, in front of the camera for a portrait. He's got such a distinctive face for portraiture … I couldn’t resist convincing him 😃

What the Community Showed Me

What genuinely touched me was how many people came along specifically to meet me. That means more than I can express. The local photography community turned out in force too, and there was this palpable sense of genuine excitement about photography and a real hunger to learn. Questions kept coming back to TTL and how to use flash effectively, and I was delighted to show people just how powerful and reliable that technique can be when you understand it.

In Closing

It’s so good seeing people's faces light up when they understood something new, watching them realise that you don't need a fancy studio to create beautiful portraits, and knowing that I'd been able to share something that genuinely mattered to them.

That, for me, is what it's all about.

Photographing a Lyme Regis Legend - Harry May

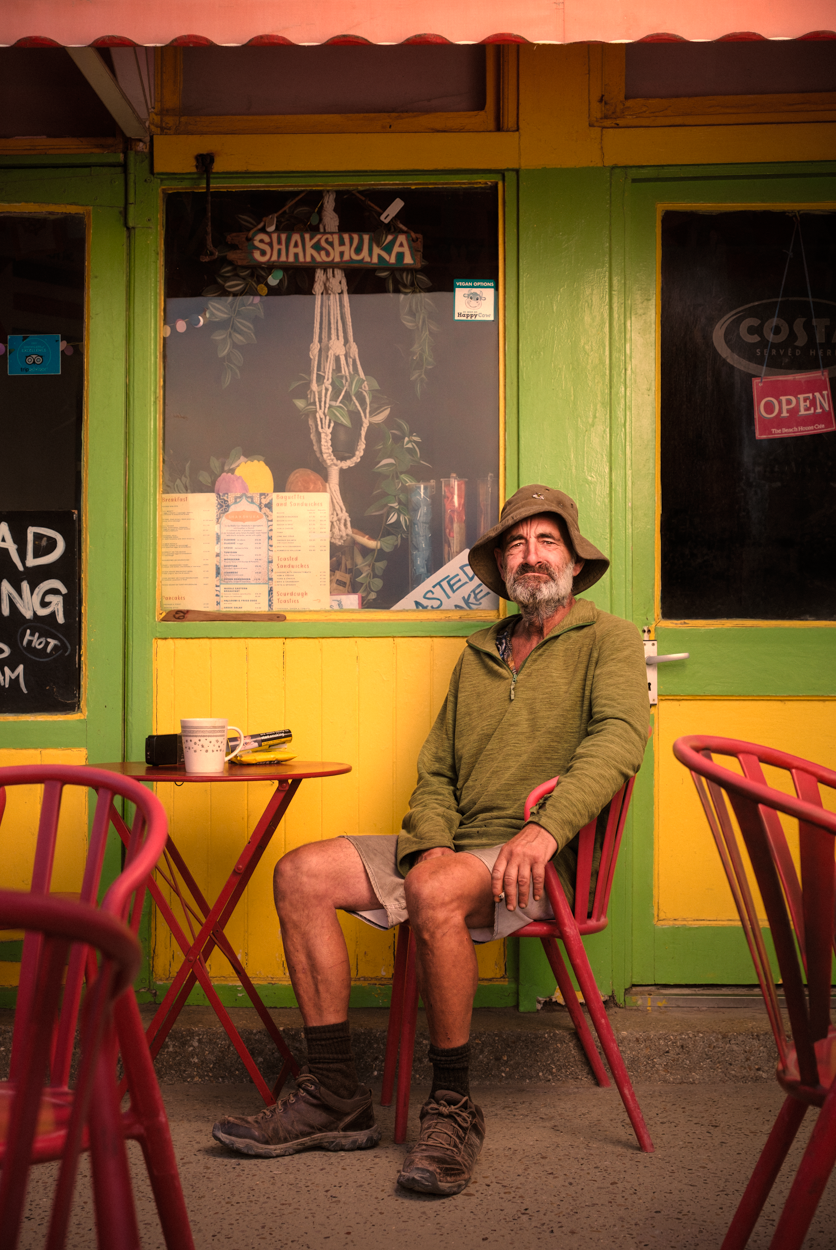
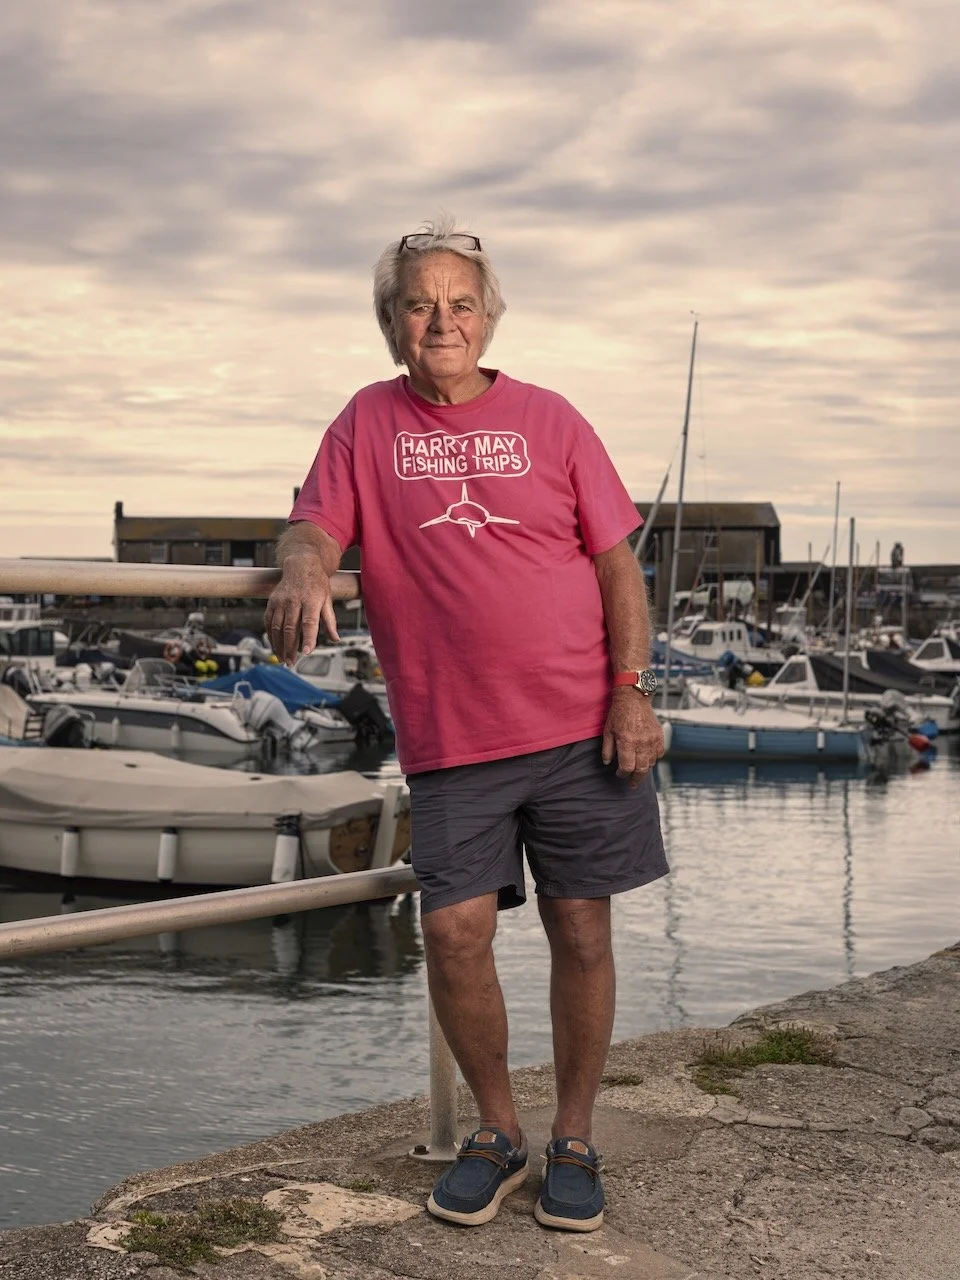
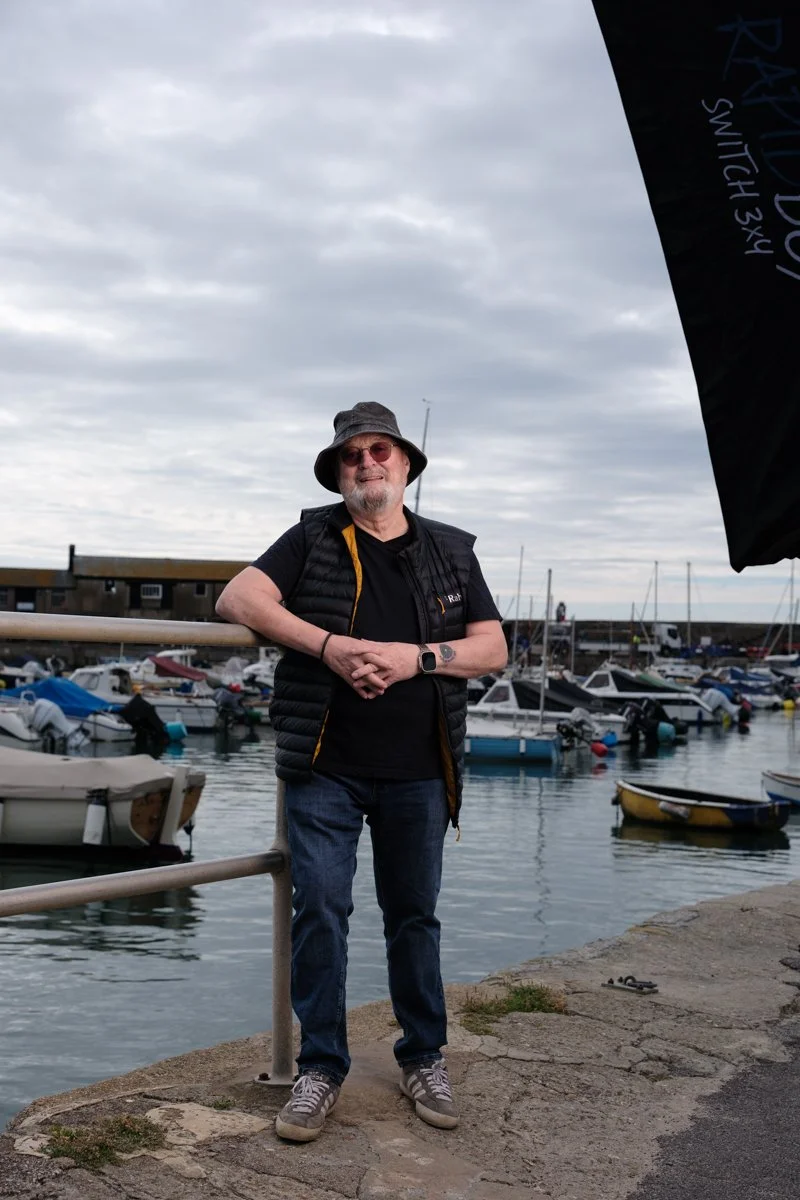
Tuesday morning I was out early to meet up with someone that can only be described as a Legend when it comes to Lyme Regis ... Harry May.

Just as with the Scallop Divers, for one reason or another, including Harry having knee replacement surgery, it had taken almost 2 years to get him in front of my camera, but it was so worth the wait.

What a super nice guy!

Honestly ... despite it being the first time we'd met and spoken in person, it felt like I'd known him for years. In fact, when Harry arrived, it was easily a good 20 minutes if not more that we chatted, before I started taking photographs. Sorry for keeping you waiting, Steve 😃

Keeping It Simple, Keeping It Classic

The brief for this one, set by me, for me, was simple: keep it classic.

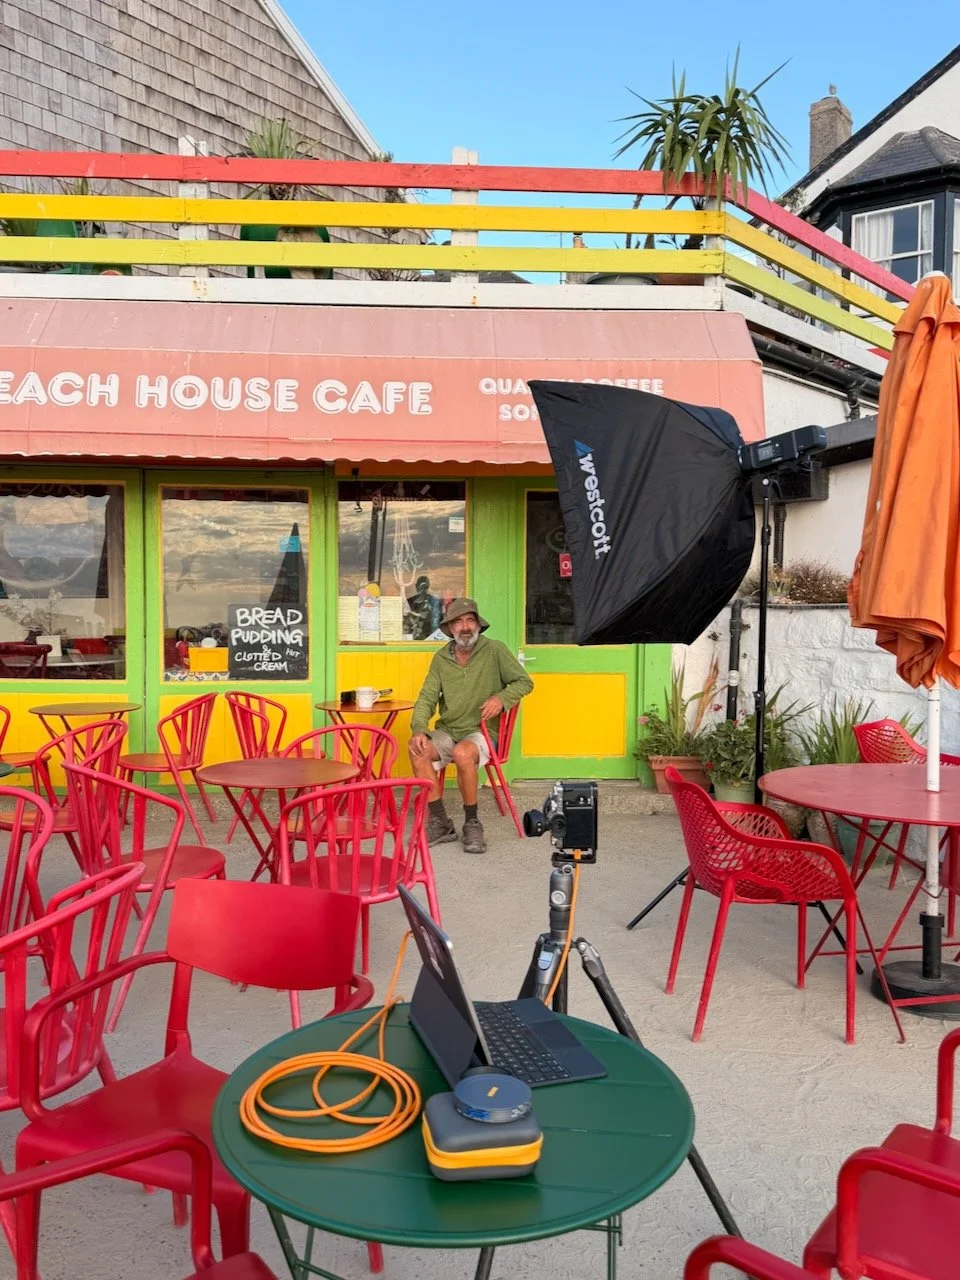
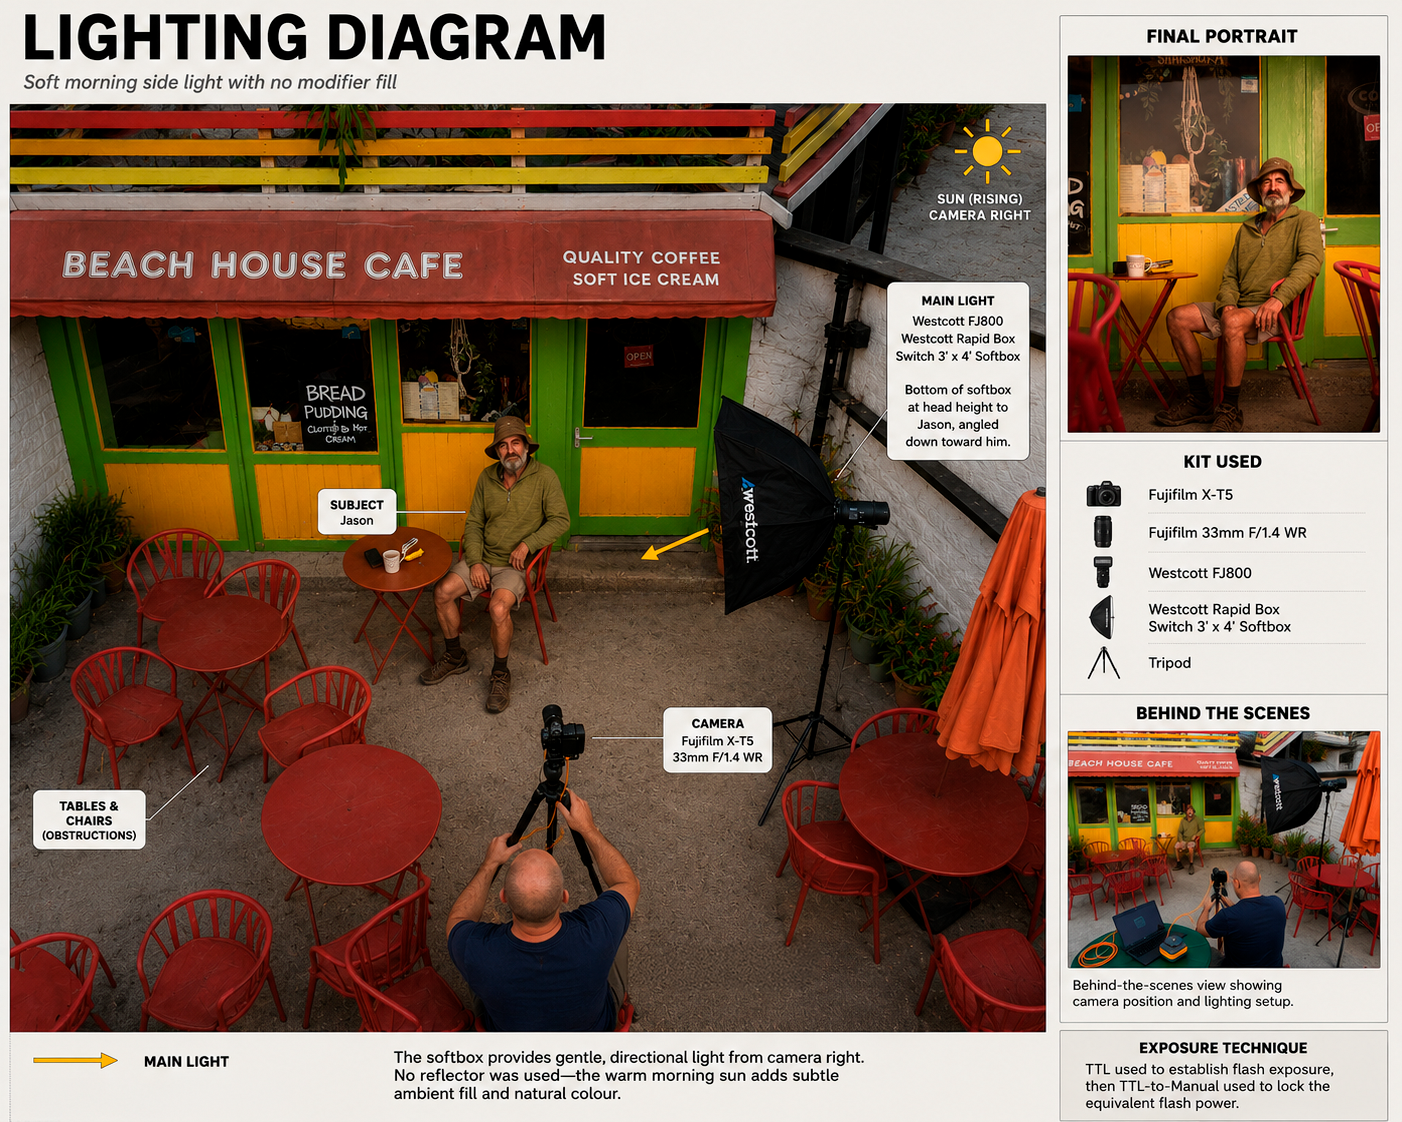
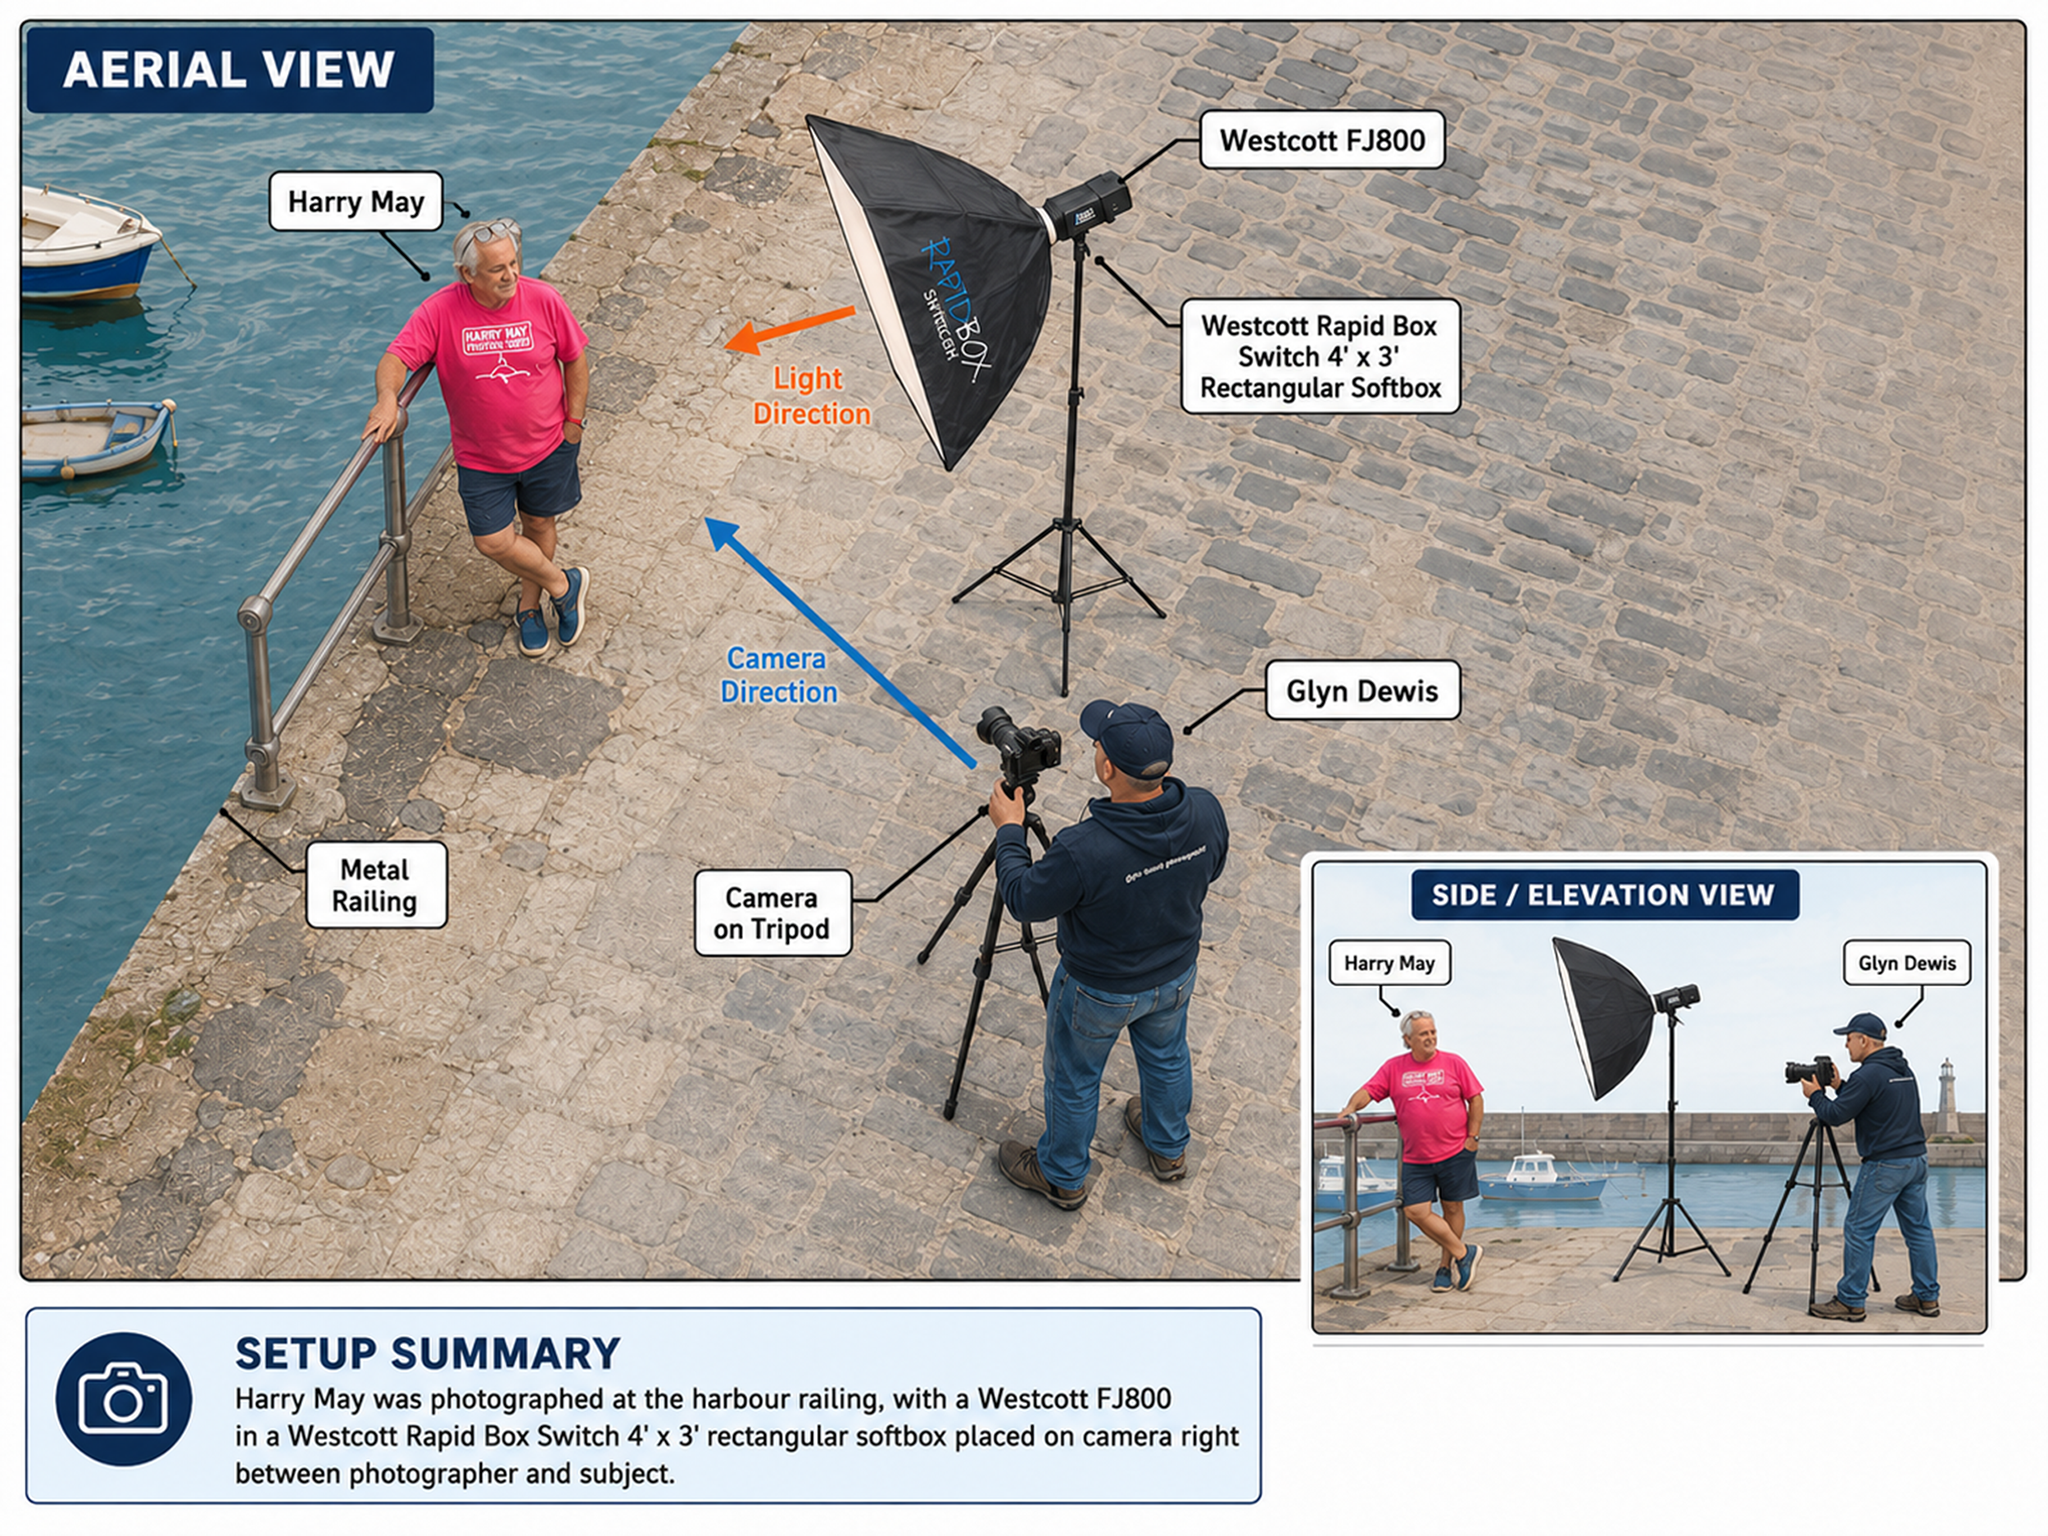
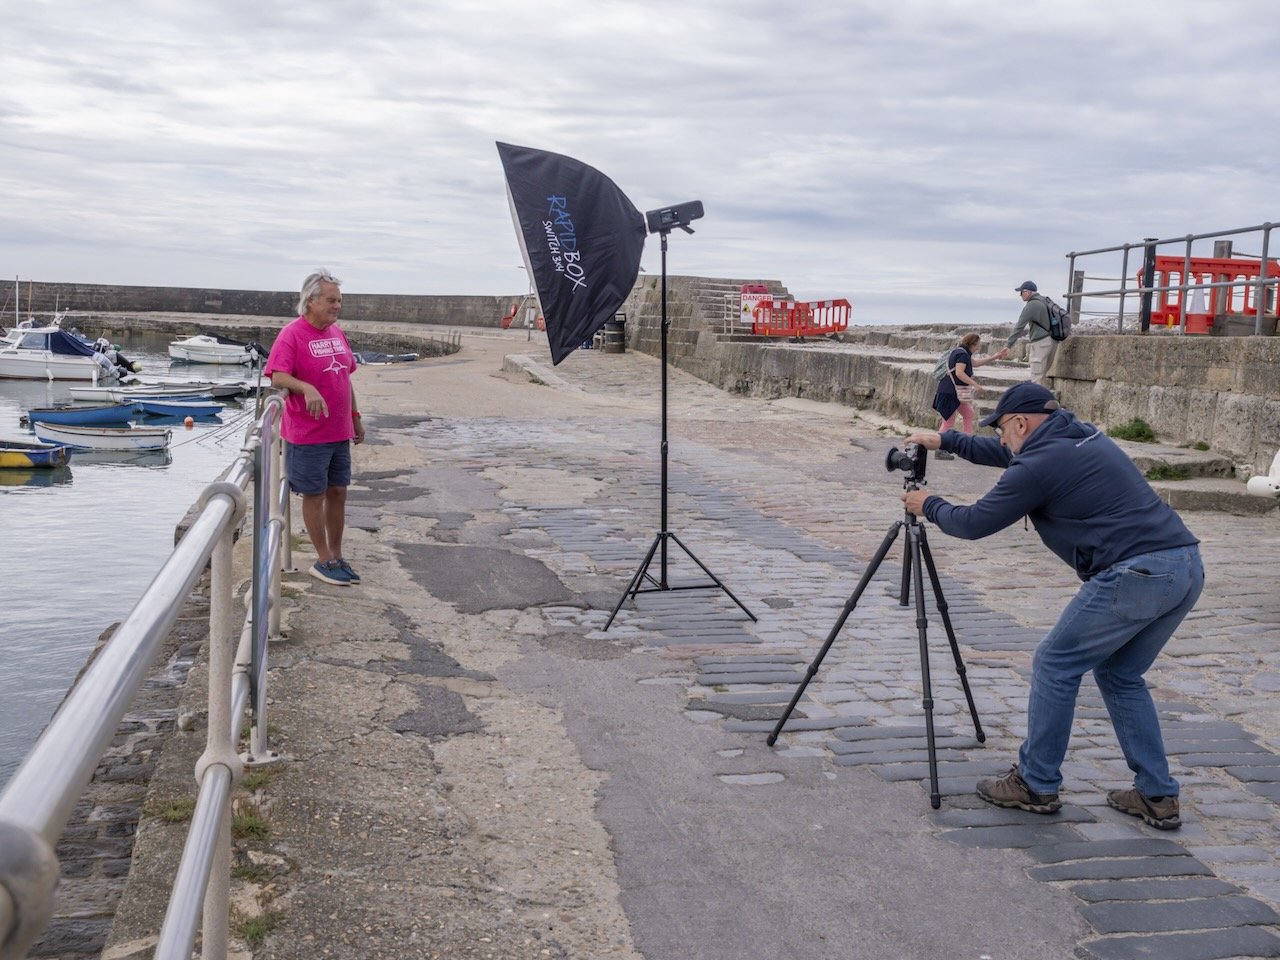
It was a glorious sunny morning with just enough cloud cover to give beautifully soft natural light. To match that softness, I used my 4x3ft Westcott Softbox, positioned about one and a half arm's lengths from Harry.

I shot at f/4.0 to soften the background slightly. Rather than using High Speed Sync (HSS) to let me shoot at a wide aperture in bright light, I opted for a 4-stop Neutral Density filter instead. The light was consistent and I'd had everything dialled in well before Harry arrived, so there was no rush and no need for the extra flexibility HSS gives you; it's simply a different way of solving the same problem: too much ambient light for the aperture you want.

• Did you see my High Speed Sync versus Neutral Density Filters Infographic ? ( LINK )

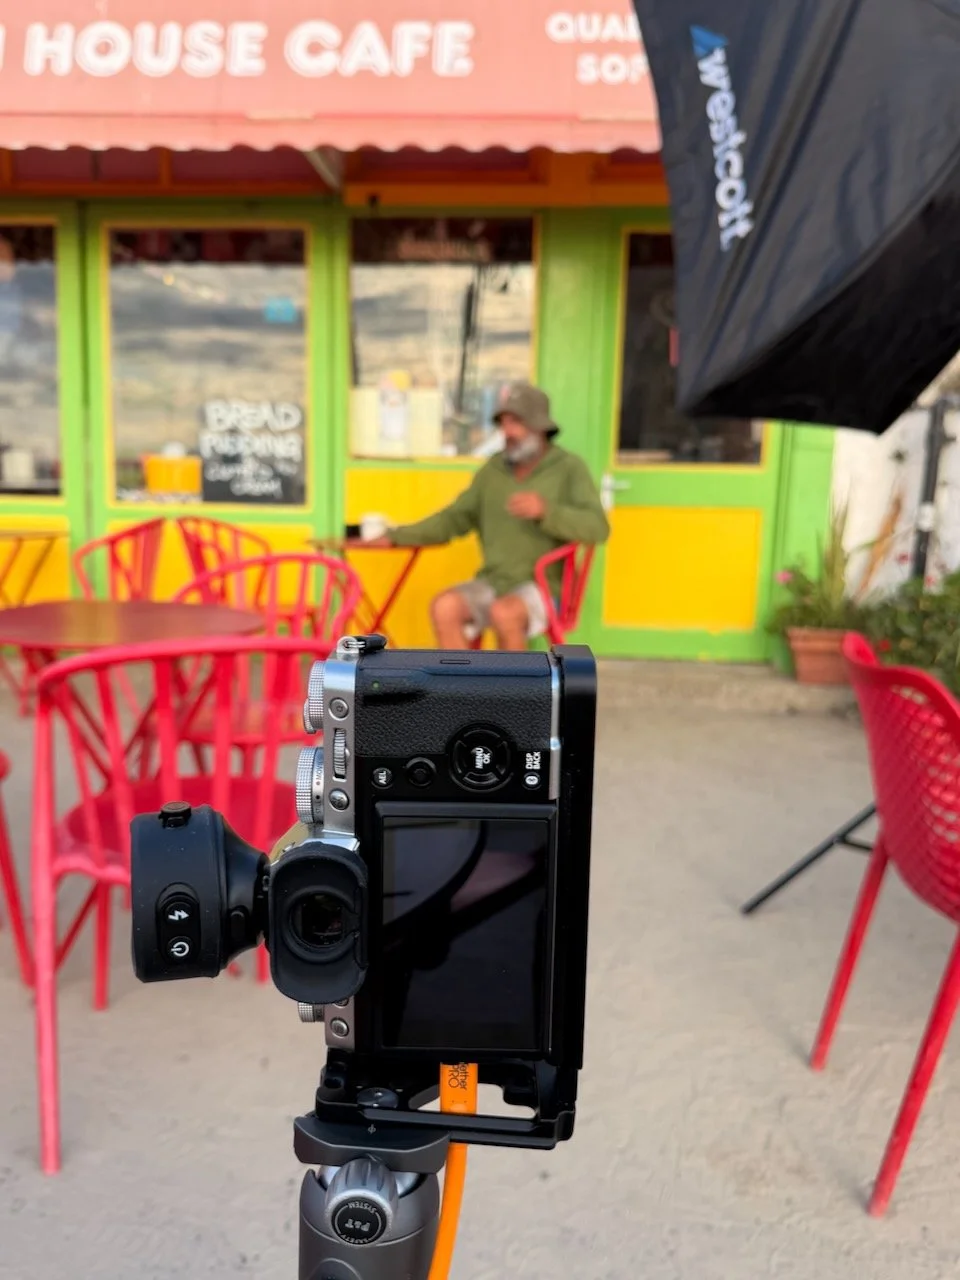
My Westcott FJ800 strobe handled it perfectly, run in TTL with +1 stop of compensation added.

Natural Direction

If you've ever been to Lyme Regis, there's a good chance you've spotted Harry leaning on the railing further down by his Fishing Trips board. So, having him lean the same way where we were shooting felt completely natural to him. Direction was barely needed, just "lean yourself on there and get comfy."

That's really the whole trick with portraits like this: find the pose someone already does in real life, and let them do it.

The Stunt Double

Before Harry arrived, my mate Steve Healy stepped in as stunt double, so I could get the lighting and exposure dialled in properly. That meant when Harry turned up, we were ready to go straight away rather than running test shots on the actual subject.

Three Shoots, Five Days

I'm on a high right now. This was my third shoot for my "I am Lyme" project in the last five days, and the best part is word is starting to spread. More people are hearing about the project and wanting to be part of it.

About "I am Lyme"

"I am Lyme" is a community-focused portrait series centred on the coastal town of Lyme Regis. The idea is simple: capture and celebrate the local faces that give the town its character, from fishermen and restaurateurs to B&B hosts, cafe owners and more…

HOW I Edit THIS Portrait in 2025 – Full Lightroom Workflow (No Photoshop!)

In this video I show how I now retouch a stylised portrait in Lightroom, that up until recently was only possible using Photoshop by making BIG use of Lightroom Masks …

*Newsletter Subscribers can download the same file I use in this tutorial to follow along step by step.

Back in the Saddle working on my 3945 WW2 Portraits Project

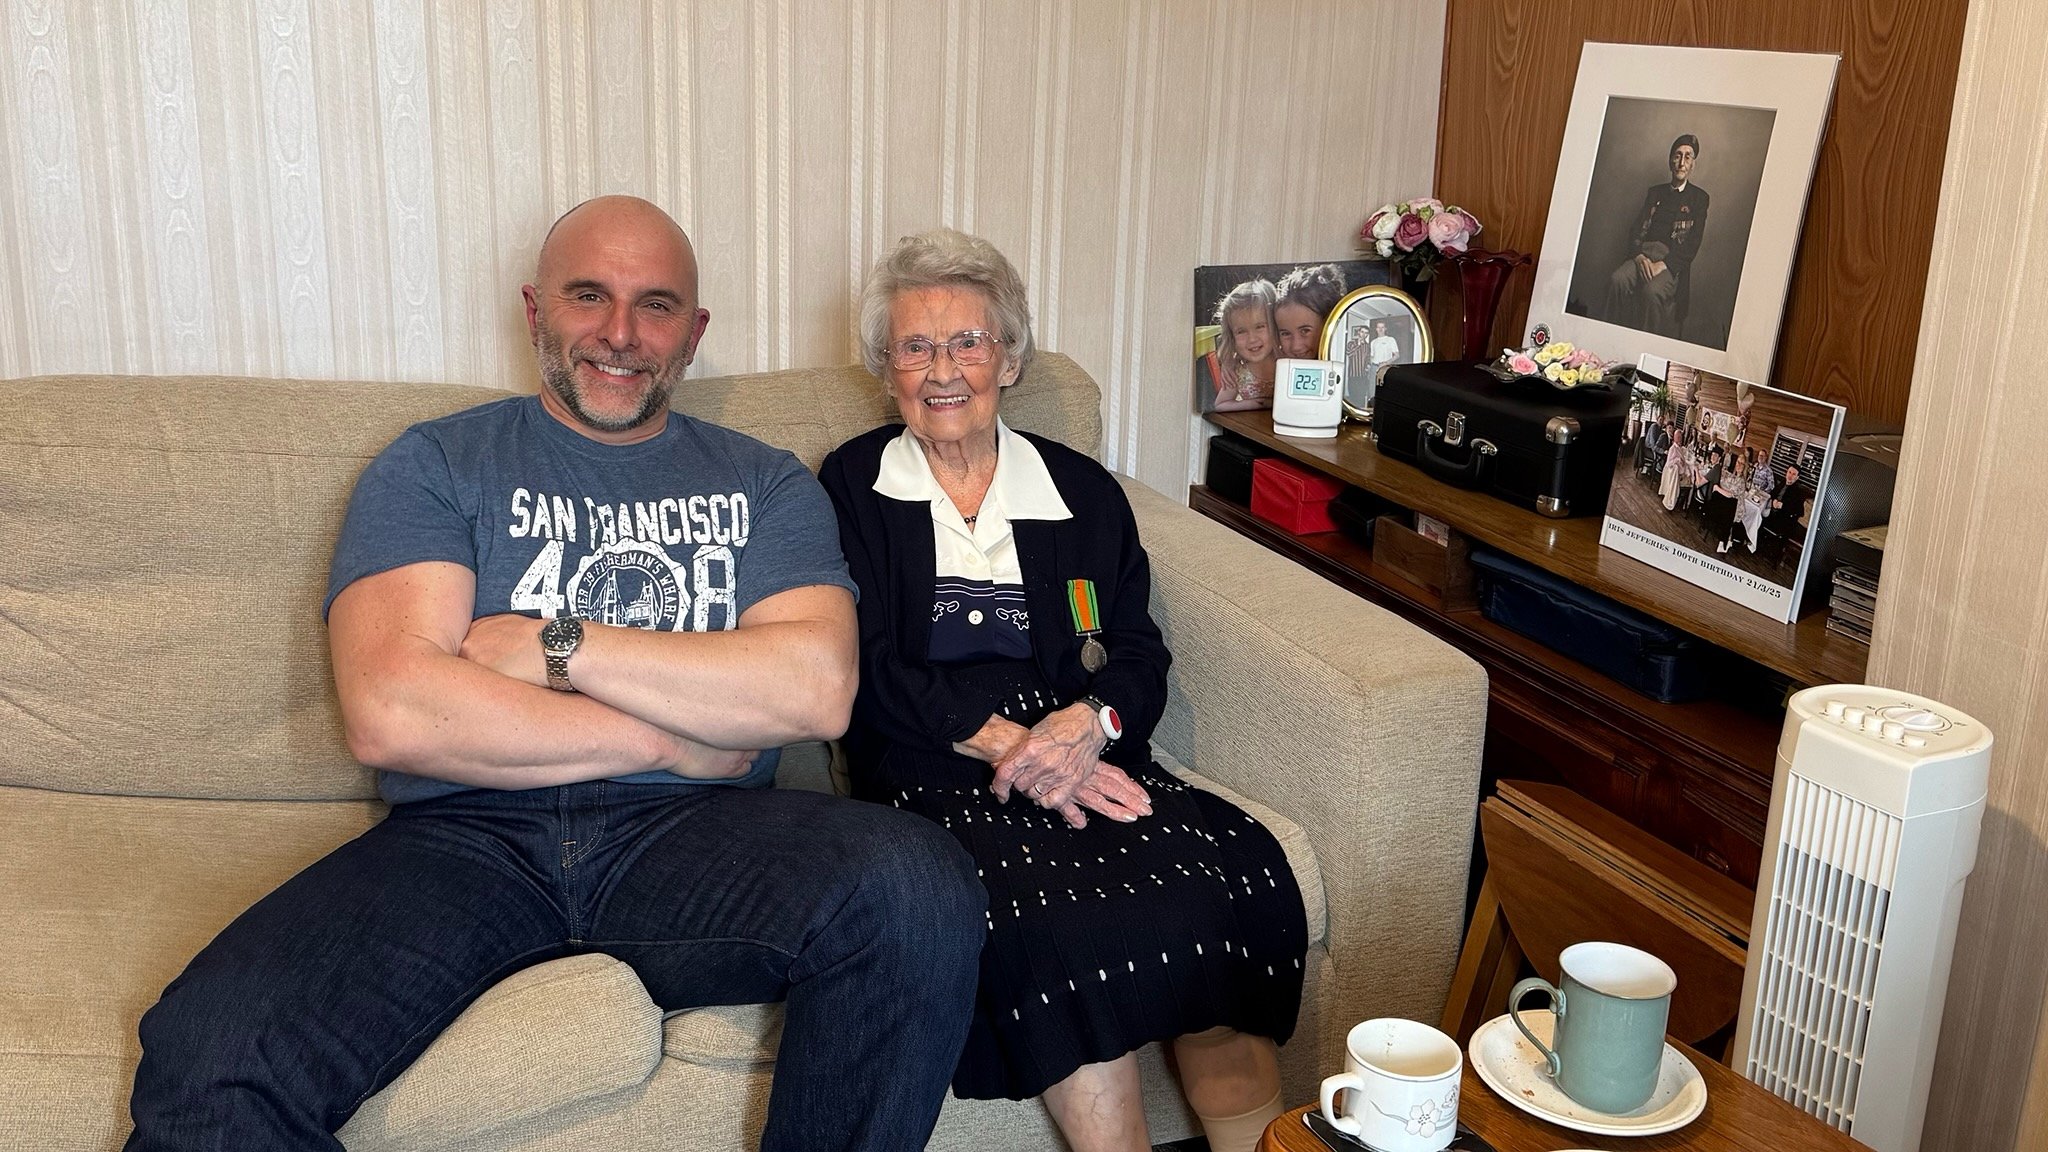
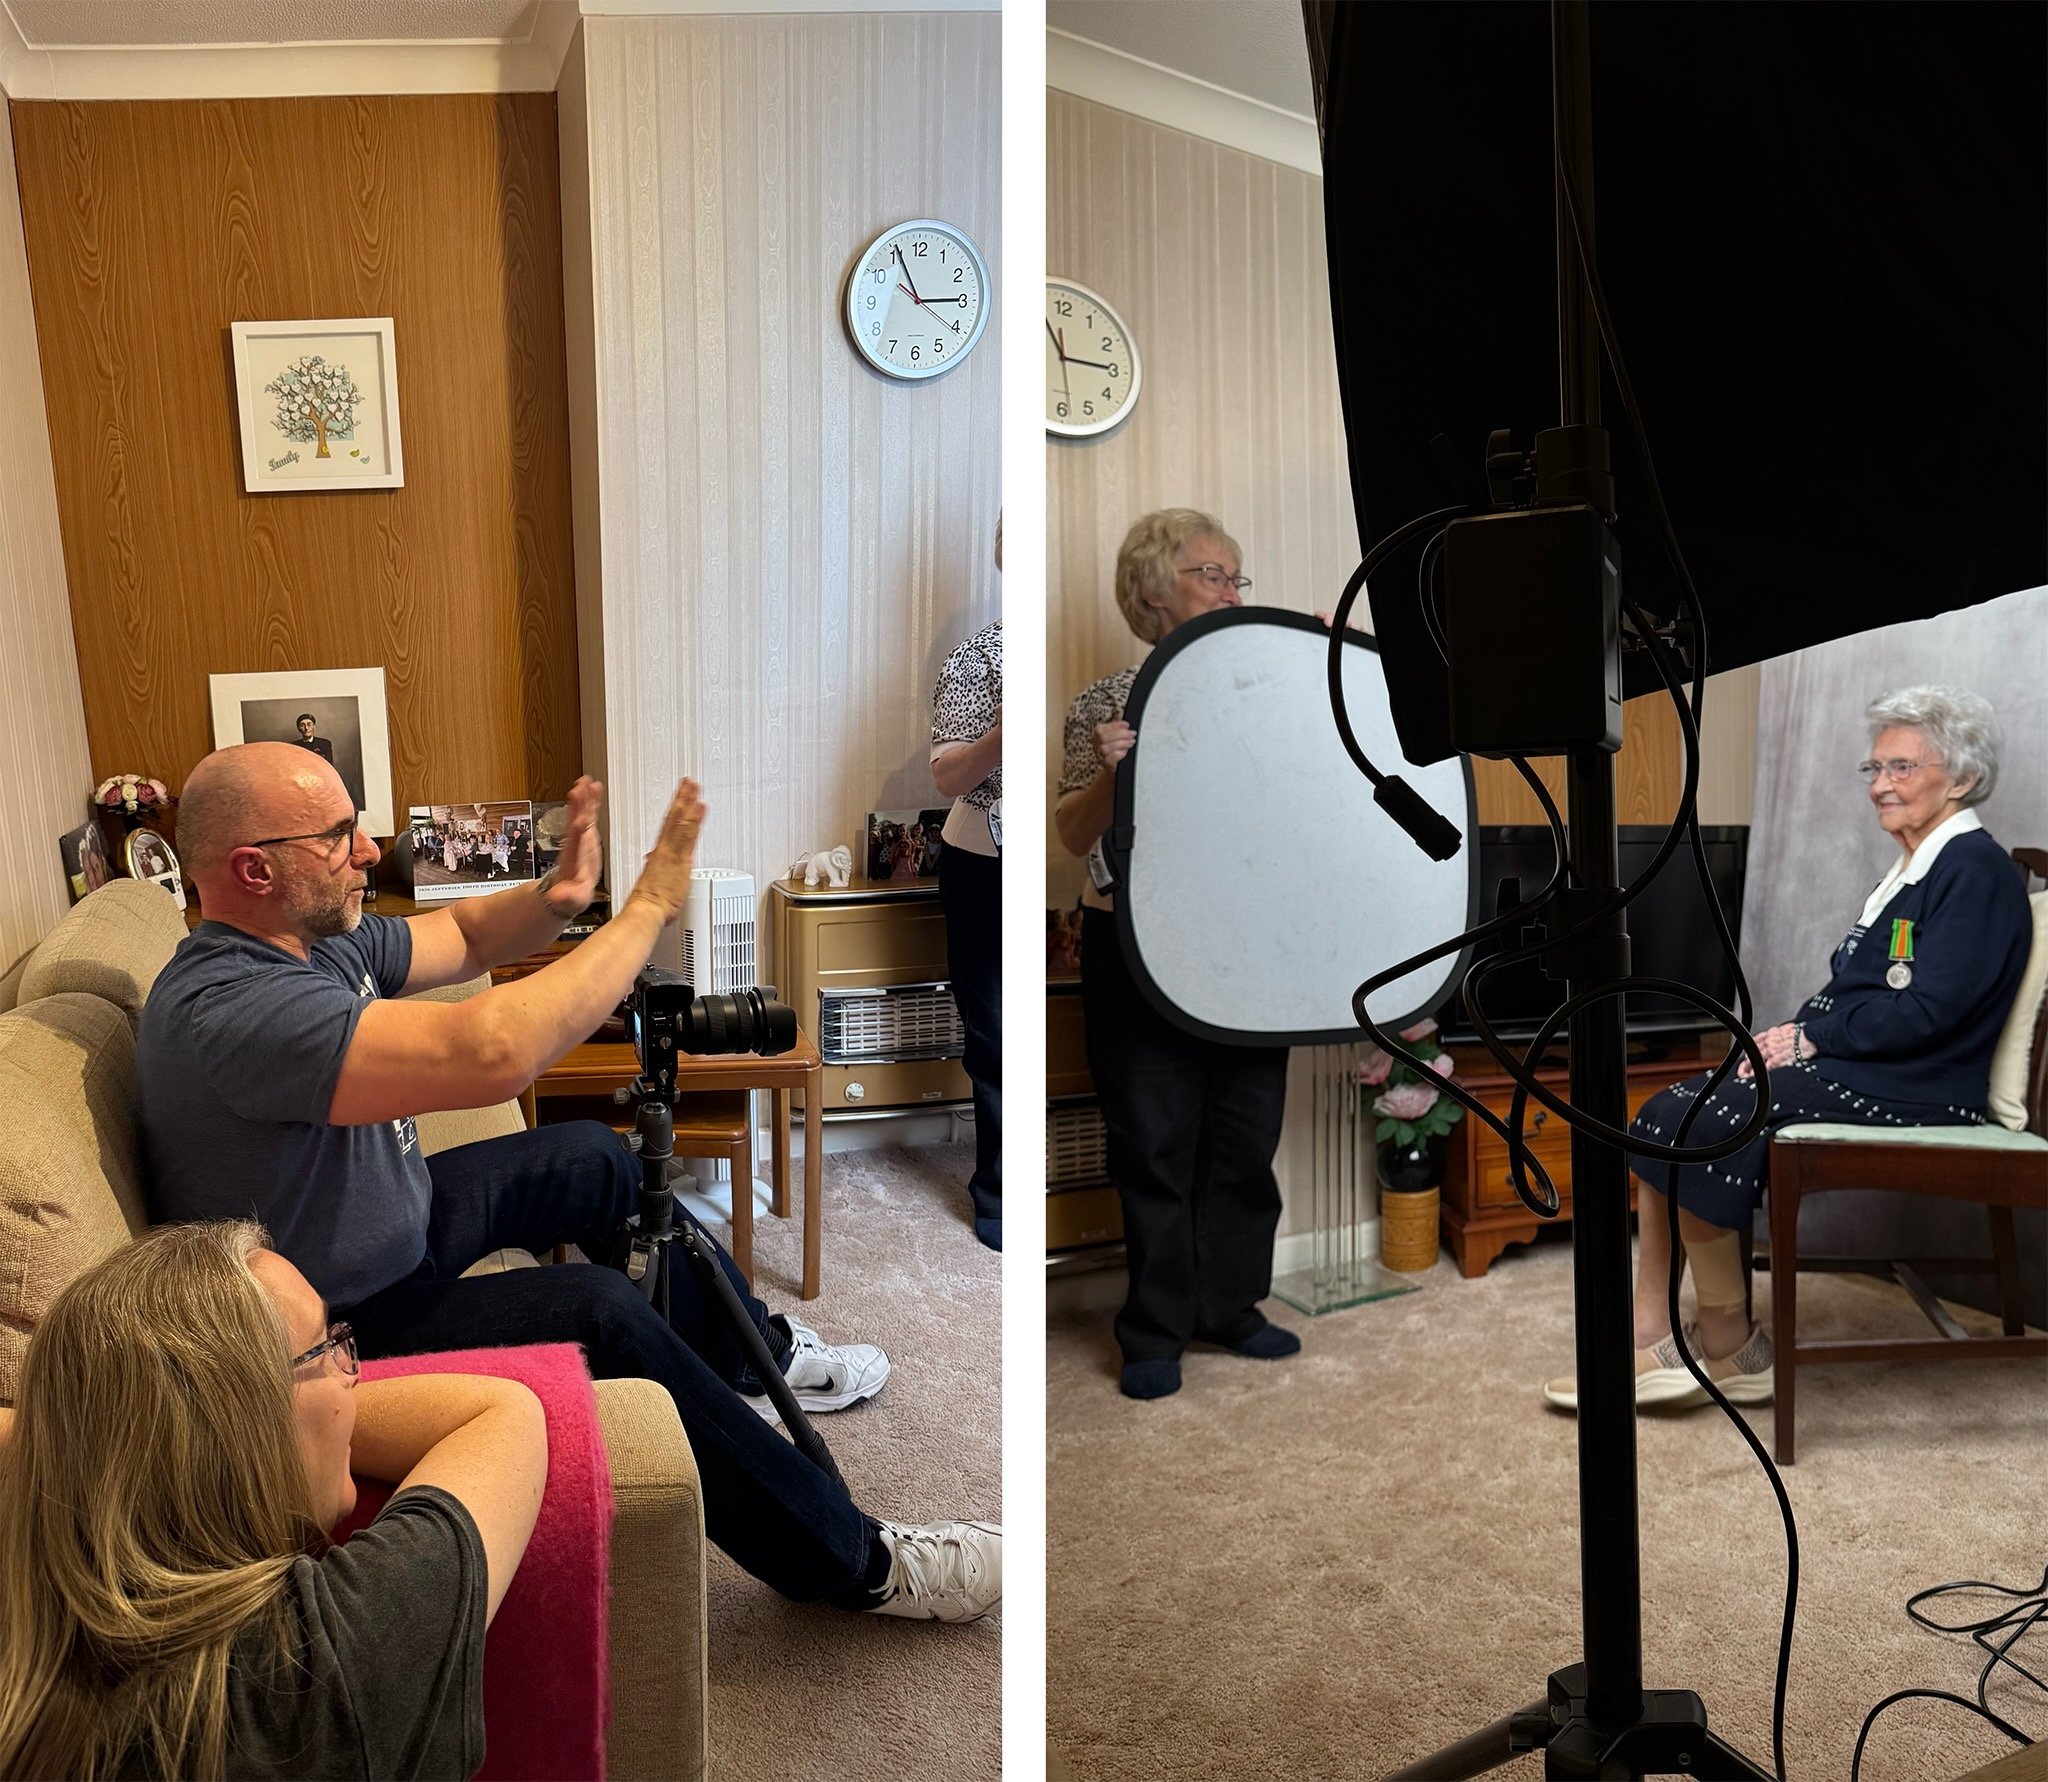
Felt so good being ‘back in the saddle’ yesterday taking another portrait for my 3945 Portraits Project with this one of 100 years young, Iris Jefferies who was seconded to the Admiralty during World War 2 involved in Top Secret planning of the D Day Landings.

Such a wonderful afternoon with an incredible woman and her daughter, Granddaughter and Great Granddaughter 😃

In the picture above you can also see the portrait I took of Iris’ late husband David, whom I photographed at the Bristol Normandy Veterans back in November 2019.

kit used

The Essential Skills and Attitude for a Successful Photography Business with Pye Jirsa

Watch the recording of this LIVE Broadcast as I chat with Photographer, Director, Educator and Founder of SLR Lounge, Pye Jirsa.

Widely known for his Captivating Wedding Photography, I’ll be chatting with Pye to discover more about his Business Advice and Mentoring; advice for Photographers on building a solid business foundation, how to deal with clients, Self-Worth, dealing with Negativity and a whole lot more ...

links mentioned in the video:

The ART and INSIGHTS of PROFESSIONAL PORTRAIT RETOUCHING | Pratik Naik

Watch the recording of this LIVE Broadcast as I chat with Professional High End Portrait Retoucher Pratik Naik about his process, tips and techniques, the future of retouching, getting hired and a whole lot more …

links mentioned during the video:

Slideshow of Pratik’s work for his Guest Appearance:

Ragnar - Viking Composite using Photoshop

Following on from the earlier article I wrote ( LINK ) showing the Behind the Scenes of a recent Viking Photo Shoot, I’ve now finished the 2nd image so thought I’d share it here for you to see …

This is a composite made using Photoshop and is a combination of several images comprising the original studio photograph of my friend Simon ‘Foxy’ Fowler dressed as the Viking, the Location Shot and several Sea Bird Photographs.

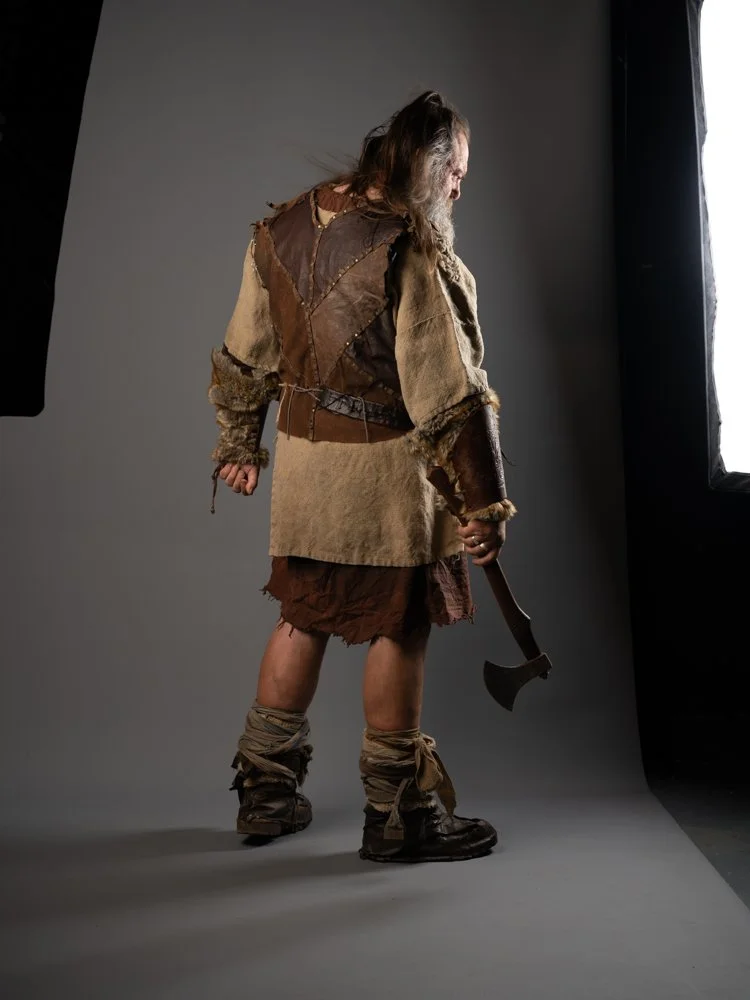
Here’s the studio photograph of Simon …

Here’s the location shot which is a part of the coastline at Three Cliffs Bay, The Gower, South Wales …

To make sure that I got the angle and height correct, when at Three Cliffs Bay, my great friend Anthony Crothers stood in the spot where I would eventually place Simon …

In the studio when photographing Foxy, my camera was on a tripod and at a height where the lens was in line with the top portion of his nearest thigh.

When on location photographing the background / scene, Anthony was stood on a rasied area of ground …

(Note: it looks precarious but actually isn’t … to the front of Anthony on the other side is a flat area that you can comfortably walk on)

so to get the angle / height to look as though Simon was photographed higher than he actually was, the camera lens was level and aimed just below Anthony’s nearest knee.

My new compositing workflow

Returning to some compositing has seen me now approach them in a different way especially when it comes to potentially time consuming cutouts such as hair anf fur.

My new workflow sees me leaving this part to the very end and getting great results in literally a fraction of the time …

This is something that I’ll definitely be going through in my Combining Old and New : Mastering Selections and Cut Outs in 2024 class in the upcoming ( FREE ) Photoshop Virtual Summit 6 …

If you’d like to see a larger version of both images created from this photo shoot, I’ve now added them into my PORTRAITS PORTFOLIO ( LINK )

Thanks for looking in,
Glyn

Constant LED Light Portraits with Sony and iPhone

The more I use the LED Constant Light for Portraits, the more I fall in love with it.

I know I said it before in an earlier post but when you use it, the whole WYSIWYG (What You See Is What You Get) not only makes setting up so much easier and quicker but also every time I use it, the people I photograph say how much more relaxing it is not having a flash go off in their face.

Just over a week ago I was recording some content for the iPhone Photography Conference and thought it would be an interesting comparison just to see how close I could get a photograph I took with my main camera, my Sony A7RIV Mirrorless and my iPhone 15 Pro Max.

Of course I went into this knowing that the iPhone image wouldn’t equal or surpass the quality of my Sony, but just thought it would be interesting to see how far the quality has moved on and do this with a lit Portrait using the constant light … the Westcott L60-B Bi-Colour LED.

THE SET UP

For the lighting. I had originally planned to use just one light, the L60-B, however I couldn’t resist the warm light emitting from the heater that Ian had turned on in the studio. I loved the way it cast a warm glow onto the wood panelling so this was carefully raised off the ground and then became the main light and the L60-B was positioned on the opposite side of Ian further forward and higher up.

The L60-B was given a warmer temperature using the iPhone app which works incredibly well.

As soon as I opened the app it connected to the light and I was able to dial in the power settings, change the temperature and I could even make it perform lighting special effects like lightning, TV and a faulty bulb … but these are obviously for use when doing video.

CAMERA SET UP 

So with my Sony A7RIV on my tripod I used my 55mm Zeiss f/4.0 lens and tethered this into CaptureOne on my iPad, which works an absolute treat!

It’s incredibly easy to set up; you literally plug one end of a USB-C cable into the camera, the other end into the iPad, and with the app open i’st connected and ready to go.

I’m using this all the time now when tethering and what I also love about it is that you can stop and start the monthly subscription whenever you want. The subscription is only £4.49 / month so I tend to look at what I have planned and just restart it for that period, then cancel it again.

The only thing I don’t like which might (I hope) be just down to a setting I’ve missed turning on, but the photographs you take are only stored on the iPad. I only discovered this after the first shoot I did using it. I disconnected the camera and went to check the images on the camera and nothing was there. Only once my heart re-started and I looked on my iPad did I realise where they were 😳


CAMERA SETTINGS

The settings dialled into my camera were …

  • f/4.0

  • 1/60 sec

  • 2000 ISO … which for modern day cameras is nothing

using the iphone

Having taken the portrait with my Sony I then swapped over to my iPhone which was placed on the tripod using the ULANZI ST-27 Phone Mount.

I also attached the 2x Telephoto lens from ReeFlex to the 1x lens on my iPhone using one of their cases that has threads in each of the lens apertures.

The 1x lens is the equivalent of 24mm and is the only lens on the iPhone capable of shooting in ApplePro Raw at 48MP … the highest resolution and largest file my iPhone 15 Pro Max can produce.

With the 2x Telephoto lens attached this made the 1x lens the equivalent of 48mm and did this optically rather than digitally, and so doing everything possible to create the best possible file; not quite 55mm but the closest I could get oto it optically.

iPHONE PRO CAMER APP

To take the photograph with my iPhone I used a Pro Camera App from ReeFlex and called ReeFlex.

This app like most other pro camera apps gives you control over extra settings like Shutter Speed and ISO but it also makes it very clear to see not only what file format you are in but also the resolution.

ReeFlex Pro Camera App usinfg 1x lens in Apple ProRaw at 48MP

However here’s the catch …

If when you’re using the 1x lens in Apple ProRaw at 48MP you make changes to the shutter speed and / or ISO then the file size immediately drops from 48MP to 12MP.

ReeFlex Pro Camera App using 1x lens with Shutter Speed Adjusted

So because of this I opted to leave the iPhone in the AUTO settings which kept the 1x lens in Apple ProRaw at 48MP, and these are the out of camera and out of phone results, with the Sony image on the left and the iPhone image on the right …

Now at this 100% magnification the iPhone file, although different to the Sony file, certainly looks to be holding up.

However, it’s when you zoom in on that iPhone file that things look VERY different …

Look how the file looks soft and slightly out of focus. Look how the file lacks texture and detail in Ian’s skin, his hair and the wood panelling.

Apple ProRaw

This softening appearance to the image is all because of shooting in the supposed highest resolution settings, AppleProRaw at 48MP and that’s because Apple ProRaw isn’t like a traditional Raw file as we know and understand them.

You see Apple ProRaw files do actually receive some processing such as Noise Reduction ( quite al lot ) and Smart HDR, so the file we end up with is also a blend of a number of images at different exposures taken and processed increibly quickly.

So not REALLY a Raw file as you would expect 🤷‍♂️

topaz sharpen ai

Running the file thorugh Topaz Sharpen AI does recover alot of that lost detail as you can see here …

However knowing what Apple ProRaw does to your files does arm you with a bit of knowledge so that you can make the decision to use it or not.

Depending on how serious you are about your iPhone photography you might want to consider shooting in 12MP Raw which Pro Camera apps like Moment and ReeFlex allow you to do …

Naturally we always want the highest resolution file possible but the noise reduction that Apple ProRaw does, might make you reconsider.

12MP Bayer raw files

Currently ALL Raw Long Exposure apps produce 12MP Bayer Raw files and that’s what all of my seascape images are and I’m more than happy with them.

Sure more resolution would be good but until that time, these 12MP Bayer Raw files are very acceptable …

So acceptable in fact that Digitalab even printed one of my iPhone seascapes at 72” on the longest side and it looked incredible …

final retouched portraits

Here though are the final retouched portraits with the Sony file on the left and the iPhone file on the right, and yeah the Sony file is definitely better and that’s to be expected, but looking at the iPhone file the future is going to be VERY interesting indeed!

wrapping up

So more testing to be done which will be interesting as new iOS updates come along and the iPhone 16 later this year.

In the mean time I’m going to carry on taking seascapes with my iPhone because I really enjoy doing them BUT I’ll also be taking them with my Sony too.

As for Portraits I’ll keep taking them with my iPhone but only as an extra bit of fun and experimentation when taking them with my Sony.

Catch you next time
Glyn