Documenting Life - The Evolution of a Wedding & Street Photographer | Kevin Mullins

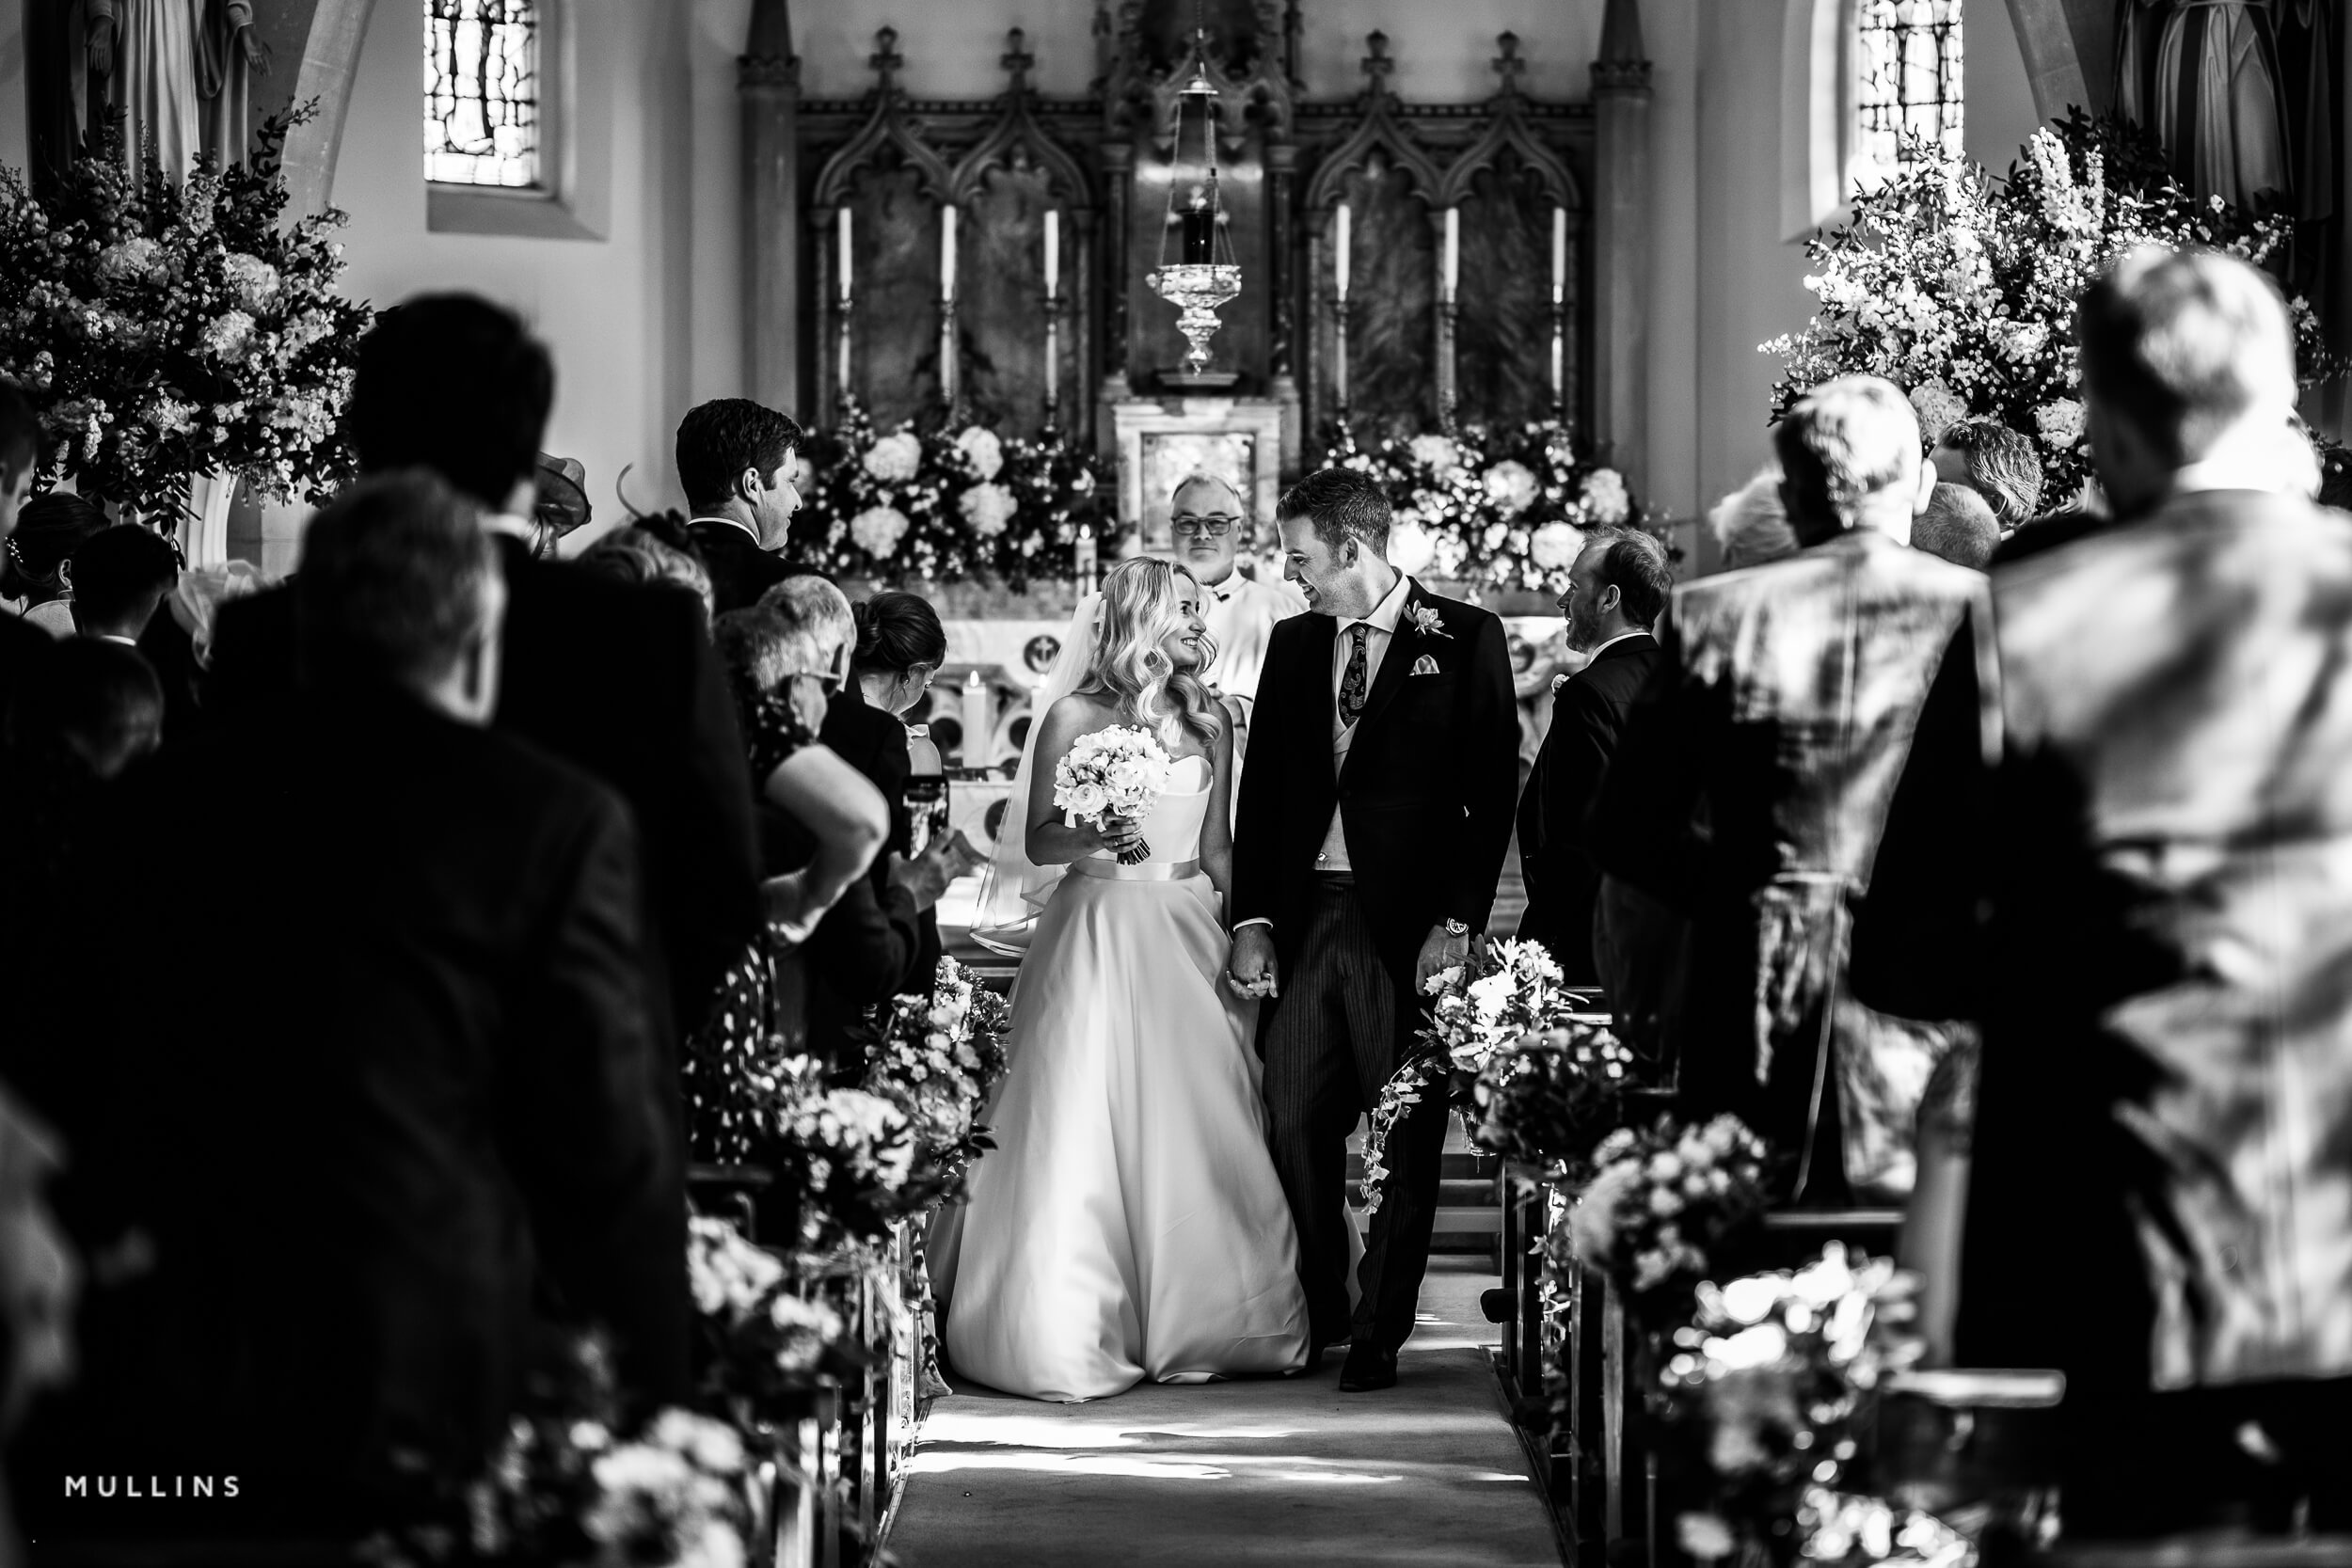
Join me for the recording of this LIVE Broadcast as I chat with UK based Documentary Wedding and Street Photographer Kevin Mullins and discuss his process, his approach when photographing a wedding to capture those special moments, his kit, his style and everything else that goes into turning a passion into a successful business …

Links mentioned in the video

Kevin Mullins website: www.kevinmullinsphotography.co.uk

Kevin’s Lightroom Presets: LINK

Royal Photographic Society Retouching Workshop: LINK


Kevin Mullins Colour Presets

kevin mullins monochrome presets


ADAPT - A Short Film

Today I'm reminded not to underestimate how what we do can positively impact others ...

I recevied an email from someone who subscribes to my twice monthly newsletter telling me that due to battling cancer over the past 3 years, and still doing so, how they've struggled to get out with their camera as they're unable to drive.

Photography for them, as it is for so many of us, provides escapism as we become completely engrossed in our own creative world … but not being able to get out has taken its toll.

Today through my newsletter they got to see my ADAPT video which prompted them to email to tell me how it's lifted them and given them the drive to plan to go out this coming weekend with their camera but to do so locally as there is ALWAYS something to photograph.

I originally made the video as a form of Self-Medication during a very testing and uncertain time in all our lives during the Covid Pandemic.

It helped me then but to hear that in some way it's helping others to this day feels ... yeah ... feels bloody brilliant!

DISPLAY 123 - Screen Calibration SIMPLIFIED but IT'S NOT FOR EVERYONE

The Display 123 from Calibrite removes the technicals from Screen Calibration making it possible for everyone with a simple 3 step process ... BUT it's not aimed at the Professional!

NOTE

The Display 123 is NOT suitable for the new LED technology Displays such as in the New Apple Macbook Pro M3 and Apple Pro Display XDR; for these a device like the Display Pro HL from Calibrite would be needed. The display 123 COULD prolfile these displays however only in sRGB. For all other displays using Backlit technology (which is currently the majority of displays on the market, the Display 123 will Calibrate the screen albeit without the additional parameters that more expensive / high end devices can. The display 123 is more aimed at the Consumer as opposed to the Professional.

For more information check out the Calbrite website ( LINK )

Calibrating my iPad Pro for Photography

One thing I always do when taking portraits is shoot tethered and that always used to be with my camera connected to my MacBook Pro or laptop BUT that has now changed to being my iPad because its way more portable and convenient.

I use the CaptureOne app for the tethering which works so incredibly well .. literally just open the app, plug in your camera (you can also use it wirelessly) and you’re up and running. You can even use it to tether to your iPhone … if you have one.

The only problem i find is that the screen on the iPad out of the box is too contrasty … its set up so that it gives the richest colours and the deepest blacks for when using apps, watching movies, playing games, looking at pictures which is great but not ideal for when using it when tethering.

However I have the 6th generation 12.9” iPad Pro running iOS 17.3.1 and this has Reference mode and this we can use to kind of calibrate the screen to something more suitable for photography.

NOTE:
Reference mode is actually available on 12” iPad Pro 5th generation or later and requires iOS 16 or later.

Mastering Concert Photography: Insider Tips & Techniques from a Pro | Scott Diussa

Watch the recording of this recent LIVE Broadcast from a I chat with Concert Photographer Scott Diussa and discover his process, kit, tips and tricks for photographing LIVE Music and Events and some of the biggest names in the industry … and all with limited time and space! PLUS Scott will share some of his Lightroom Editing Techniques for bringing out the best in your images taken in challenging lighting conditions …

links mentioned in the video

Scott Diussa’s Link Tree: imagesrock.com

KelbyOne Lightroom Conference: bit.ly/lrconf2024

Royal Photographic Society Workshop: bit.ly/rps-editing

The Art of CINEMATIC TOY PHOTOGRAPHY | Jesse Feyereisen

Watch the recording of this LIVE Broadcast as I chat with the wonderful talent that is Jesse Feyereisen and go Behind the Scenes to discover how he lights, photographs and edits to create such incredible imagery of Toys and Action Figures …

Links mentioned in the video

Jesse Feyereisen Website: https://www.jessefphotography.com/

Instagram: @jessefeyereisen

Facebook: @jessefeyereisen

KelbyOne Lightroom Conference Coming in April 2024

Very excited to be part of the KelbyOne Lightroom Conference 2024 this coming April 16th and 17th …

I’ll be presenting 2 classes, both of which are connected in that the first class I show all the preparation, planning, lighting and photogtraphy for a photo shoot. So, I’ll be covering the researching the concept, visiting a clothing and props provider to the TV and Movie Industry, working with the model, stylist, the set and finally the shoot.

In the 2nd class I’ll then go through the entire retouching process from importing the cpatured images into Lightroom and then step by step working through the retouching making use of Lightroom and Photoshop, and then finally a print.

VERY excited to show this becuase it means working on something completely new; a portrait that doesn’t form part of a series but a portrait I’ve wanted to work on for a while, so to be able to show the entire process will be great!

To find out more about the Lightroom Conference and to take advantage of Early Bird pricing, click / tap on the button link below.

Updating my TIMELESS Photography & Retouching Course

Since I first released my TIMELESS Photography & Retouching Course there’s been the inevitable updates in both Lightroom and Photoshop PLUS I’ve now fallen in love with using Constant Light when taking portraits.

So taking all of this into account, I thought it was only right that I should record some new content to add into what is already, by far, my most popular course.

LIFE TIME UPDATES

If you have already enrolled in TIMELESS, then you have LIFETIME UPDATES at no extra cost, so the new content will automatically appear in the Course Curriculum and you’ll see it and be able to watch it when you login from Monday 25th March 2024.

PRICE CHANGE

After the 25th March 2024 update has been added in, the price to enroll will be increasing for new students due to the course now containing even more content …

  • Current Price (up to 25th March 2024): $32.40 / £27.60 / €32.35

  • New Price (from 25th March 2024): $40 / £35.40 / €41.50

To enroll in TIMELESS at the pre-update price before the new price is introduced, check it out using the button below …

Cinematic Portrait using Constant LED Light

Last weekend I was back with friends Ian Munro and Anthony Crothers in South Wales filming more content for the update to my TIMELESS Photography and Retouching Course, but in addition to this managed to grab some extra portraits too.

The vintage clothing Anthony was wearing was for the TIMELESS Update and was provided by a great ccompany called Marigold Costumes who provide clothing and props to the TV and Movie Industry and whilst he was there collecting it, also picked up a ‘Grandad Shirt’ and a set of braces.

The set up above was what I was using for the TIMELESS Update and that consisted of …

  • Westcott X-Drop Pro Background Support System

  • Westcott 8’ x 8’ X-Drop Vintage Grey by Glyn Dewis (Material)

  • L60-B 60W Bi Colour LED

  • Westcott Rapid Box Switch 4’ x 3’ Softbox

  • Westcott Silver Reflector

The constant light I am absolutely loving! So much so infact I’ve now added a 2nd light to my kit with a 3rd on the way to give me more options for a new portrait series I’m going to be working on.

The portrait above is one that I took of anthony in-between filming segments for Timeless, and for this the set up was pretty much the same other than one addition.

Here’s what the ‘Out of Camera’ shot looks like when just using the L60-B LED and Softbox coming in from camera right …

At the time of this photo shoot I didn’t have a 2nd L60-B so instead I used the modelling light from my Westcott FJ200 strobe, and this worked a treat when fitted with the included reflector and honeycomb grid.

This was aimed behind Anthony from camera left so that just the soft outer portion of the light brushed past the side of his head.

Aiming the light past Anthony so that only the outer portion of the light hit him, meant the light will be soft unlike the portion of light nearer the centre. Also, doing this meant the softness of the light from the 4’ x 3’ softbox and the FJ200 matched.

A silver reflector was also positioned camera left just out of shot to bounce a bit of light onto Anthony’s shoulder and upper back nearest the camera because without it, there was very little detail.

As for the light you can see coming into the portrait from the top left, this was added very simply in Photoshop using a soft white brush and this I did so that the highlight on the side of Anthony’s head (camera left) made sense … if you know what I mean.

Below is a lighting diagram to give you an idea how the set up looked …

My favourite image from this quick portrait shoot is defintely the one above, but I did also grab this one with a wider field of view and slightly different pose and feel due to the chair having been turned around …

Using the exact same set up I also took a portrait of Ian, but with him standing instead of sitting …

I’m so looking forward to pushing on with a new portrait series using the L60-B LEDs ; there’s lots more to come so I’ll make sure to share what I get up to and grab plenty of Behind the Scenes.

I hope this breakdown is in some way useful and if you have any questions please don’t hesitate to drop them in the comment section and I’ll make sure to reply.

Cheers,
Glyn

• Note
As part of the retouching on these portraits I made use of my Dark & Moody Lightroom / Camera Raw preset at 20% strength, and this you can download for FREE when you subscribe to my twice-monthly newsletter