If you’re anything like me, you’re probably pretty particular about your workspace. Between two monitors, a keyboard, a mouse, and all the usual accessories, desk space disappears almost immediately.
Because of that, having a traditional desktop lamp has always been completely out of the question.
There’s simply nowhere to put one.
So when I was asked to have a look at the BenQ ScreenBar Halo 2, I’ll be honest, I was massively sceptical.

I half expected to dislike it entirely.
My main concern was screen calibration, which is something I’m constantly talking to people about, making sure your screen is set to the right brightness and that your colours are spot on.
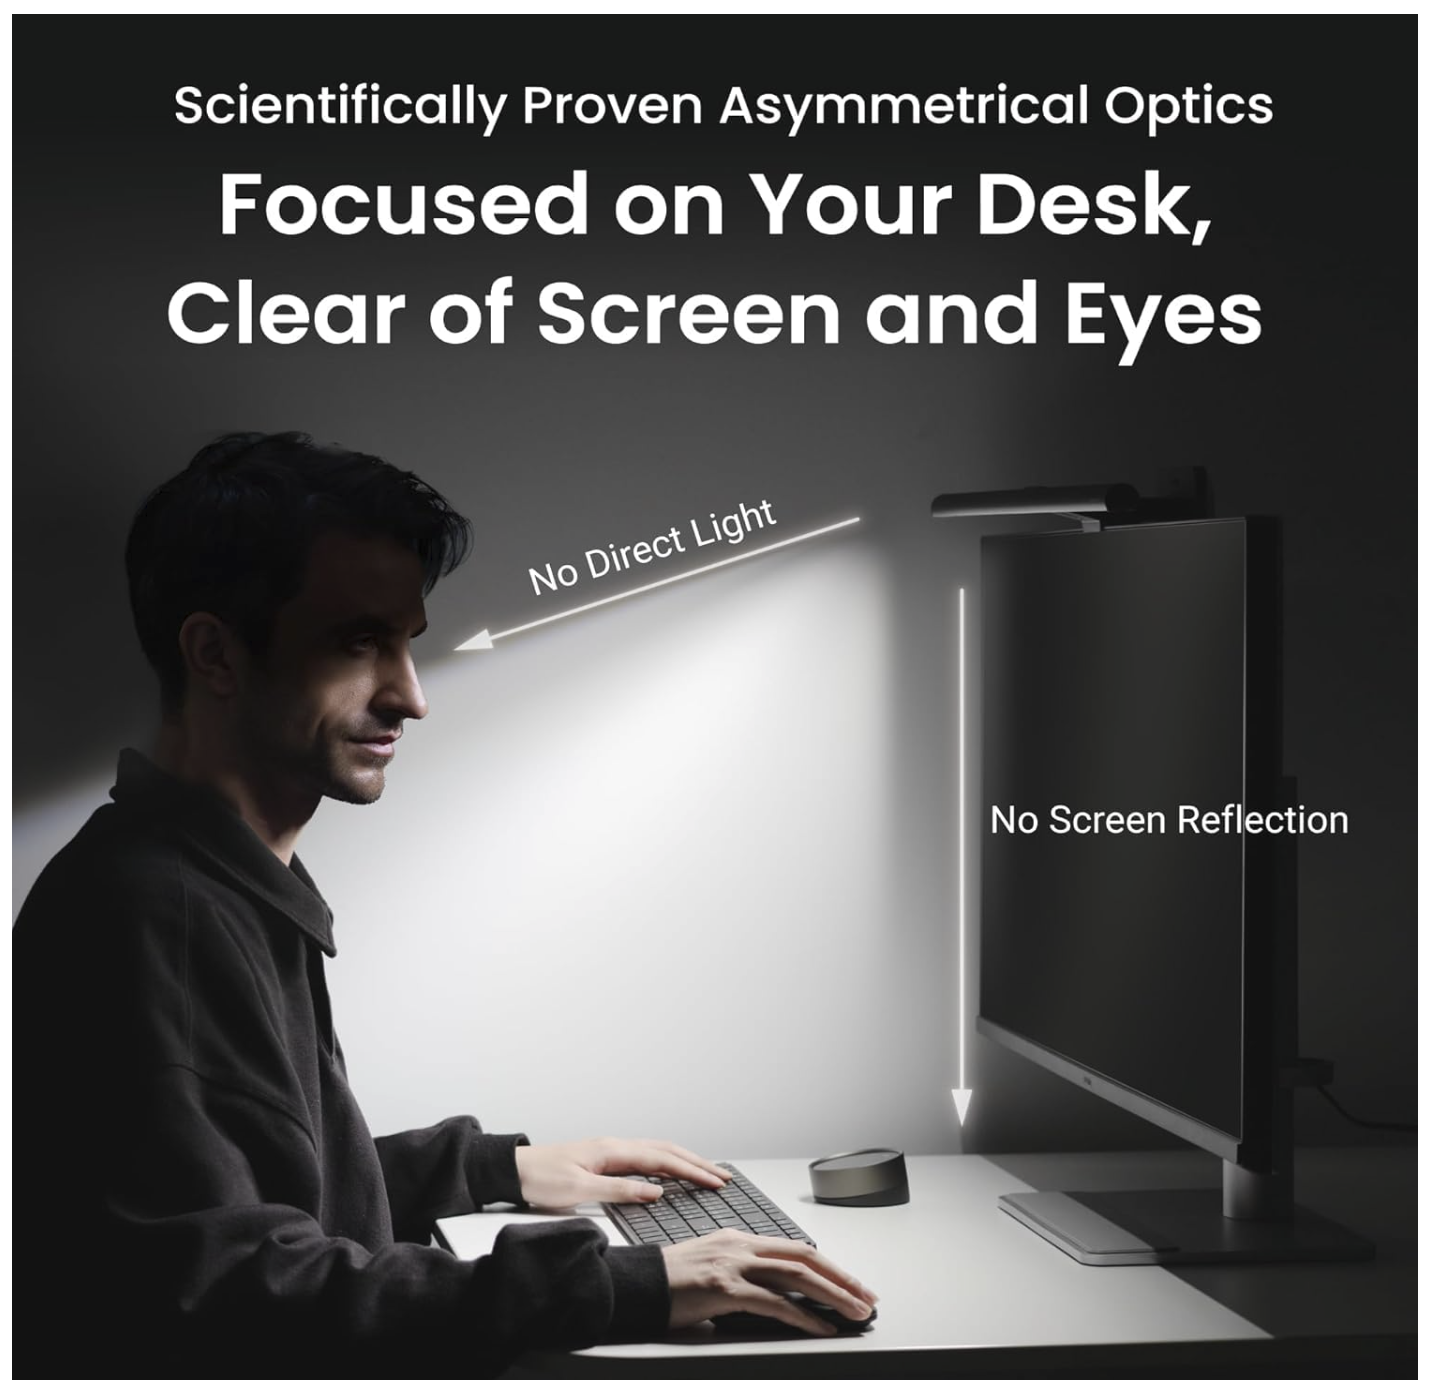
Surely, sticking a light bar right on top of the screen is going to throw light directly onto the panel, wash out the colours, create loads of glare, and completely undo all that careful calibration? It just didn’t seem like a good idea.
But … I was / I am, genuinely and unexpectedly surprised.
It turns out the way this thing is designed is actually really clever; the light it produces doesn’t touch the screen at all, it projects forward, illuminating the desk area right in front of the monitor without a hint of screen reflection or glare.
It’s like having a proper desktop lamp built directly into your monitor, completely out of the way, without actually affecting your calibrated display.
Genuinely, the biggest change has been how much more comfortable my eyes feel. Normally, I’d have to keep the ceiling lights on in my office just to take the edge off, but there are times I’d rather not have the whole room lit up … first thing in the morning and late in the evening.
The ScreenBar Halo 2 has a backlight built into the rear, which throws a soft glow onto the wall and the area behind the screen, balancing out the contrast so you’re not just staring at a bright rectangle in an otherwise pitch-black room.
Because of that backlighting, I can now comfortably work in a dimly lit office with just the screen bar on. My eyes feel relaxed, and I never get that sensation of straining or tiredness creeping in.
As a real bonus, it means I can leave my office door open when I’m working very early in the morning or late at night, without worrying about bright ceiling lights spilling out into the hallway and waking everyone else up i.e. Anne and our cat, Mabel; the light stays very contained to your immediate space.
[IMAGE SUGGESTION 2: A shot from behind or the side of the monitor, highlighting the rear backlight casting a soft, balanced glow onto the wall behind the screen.]
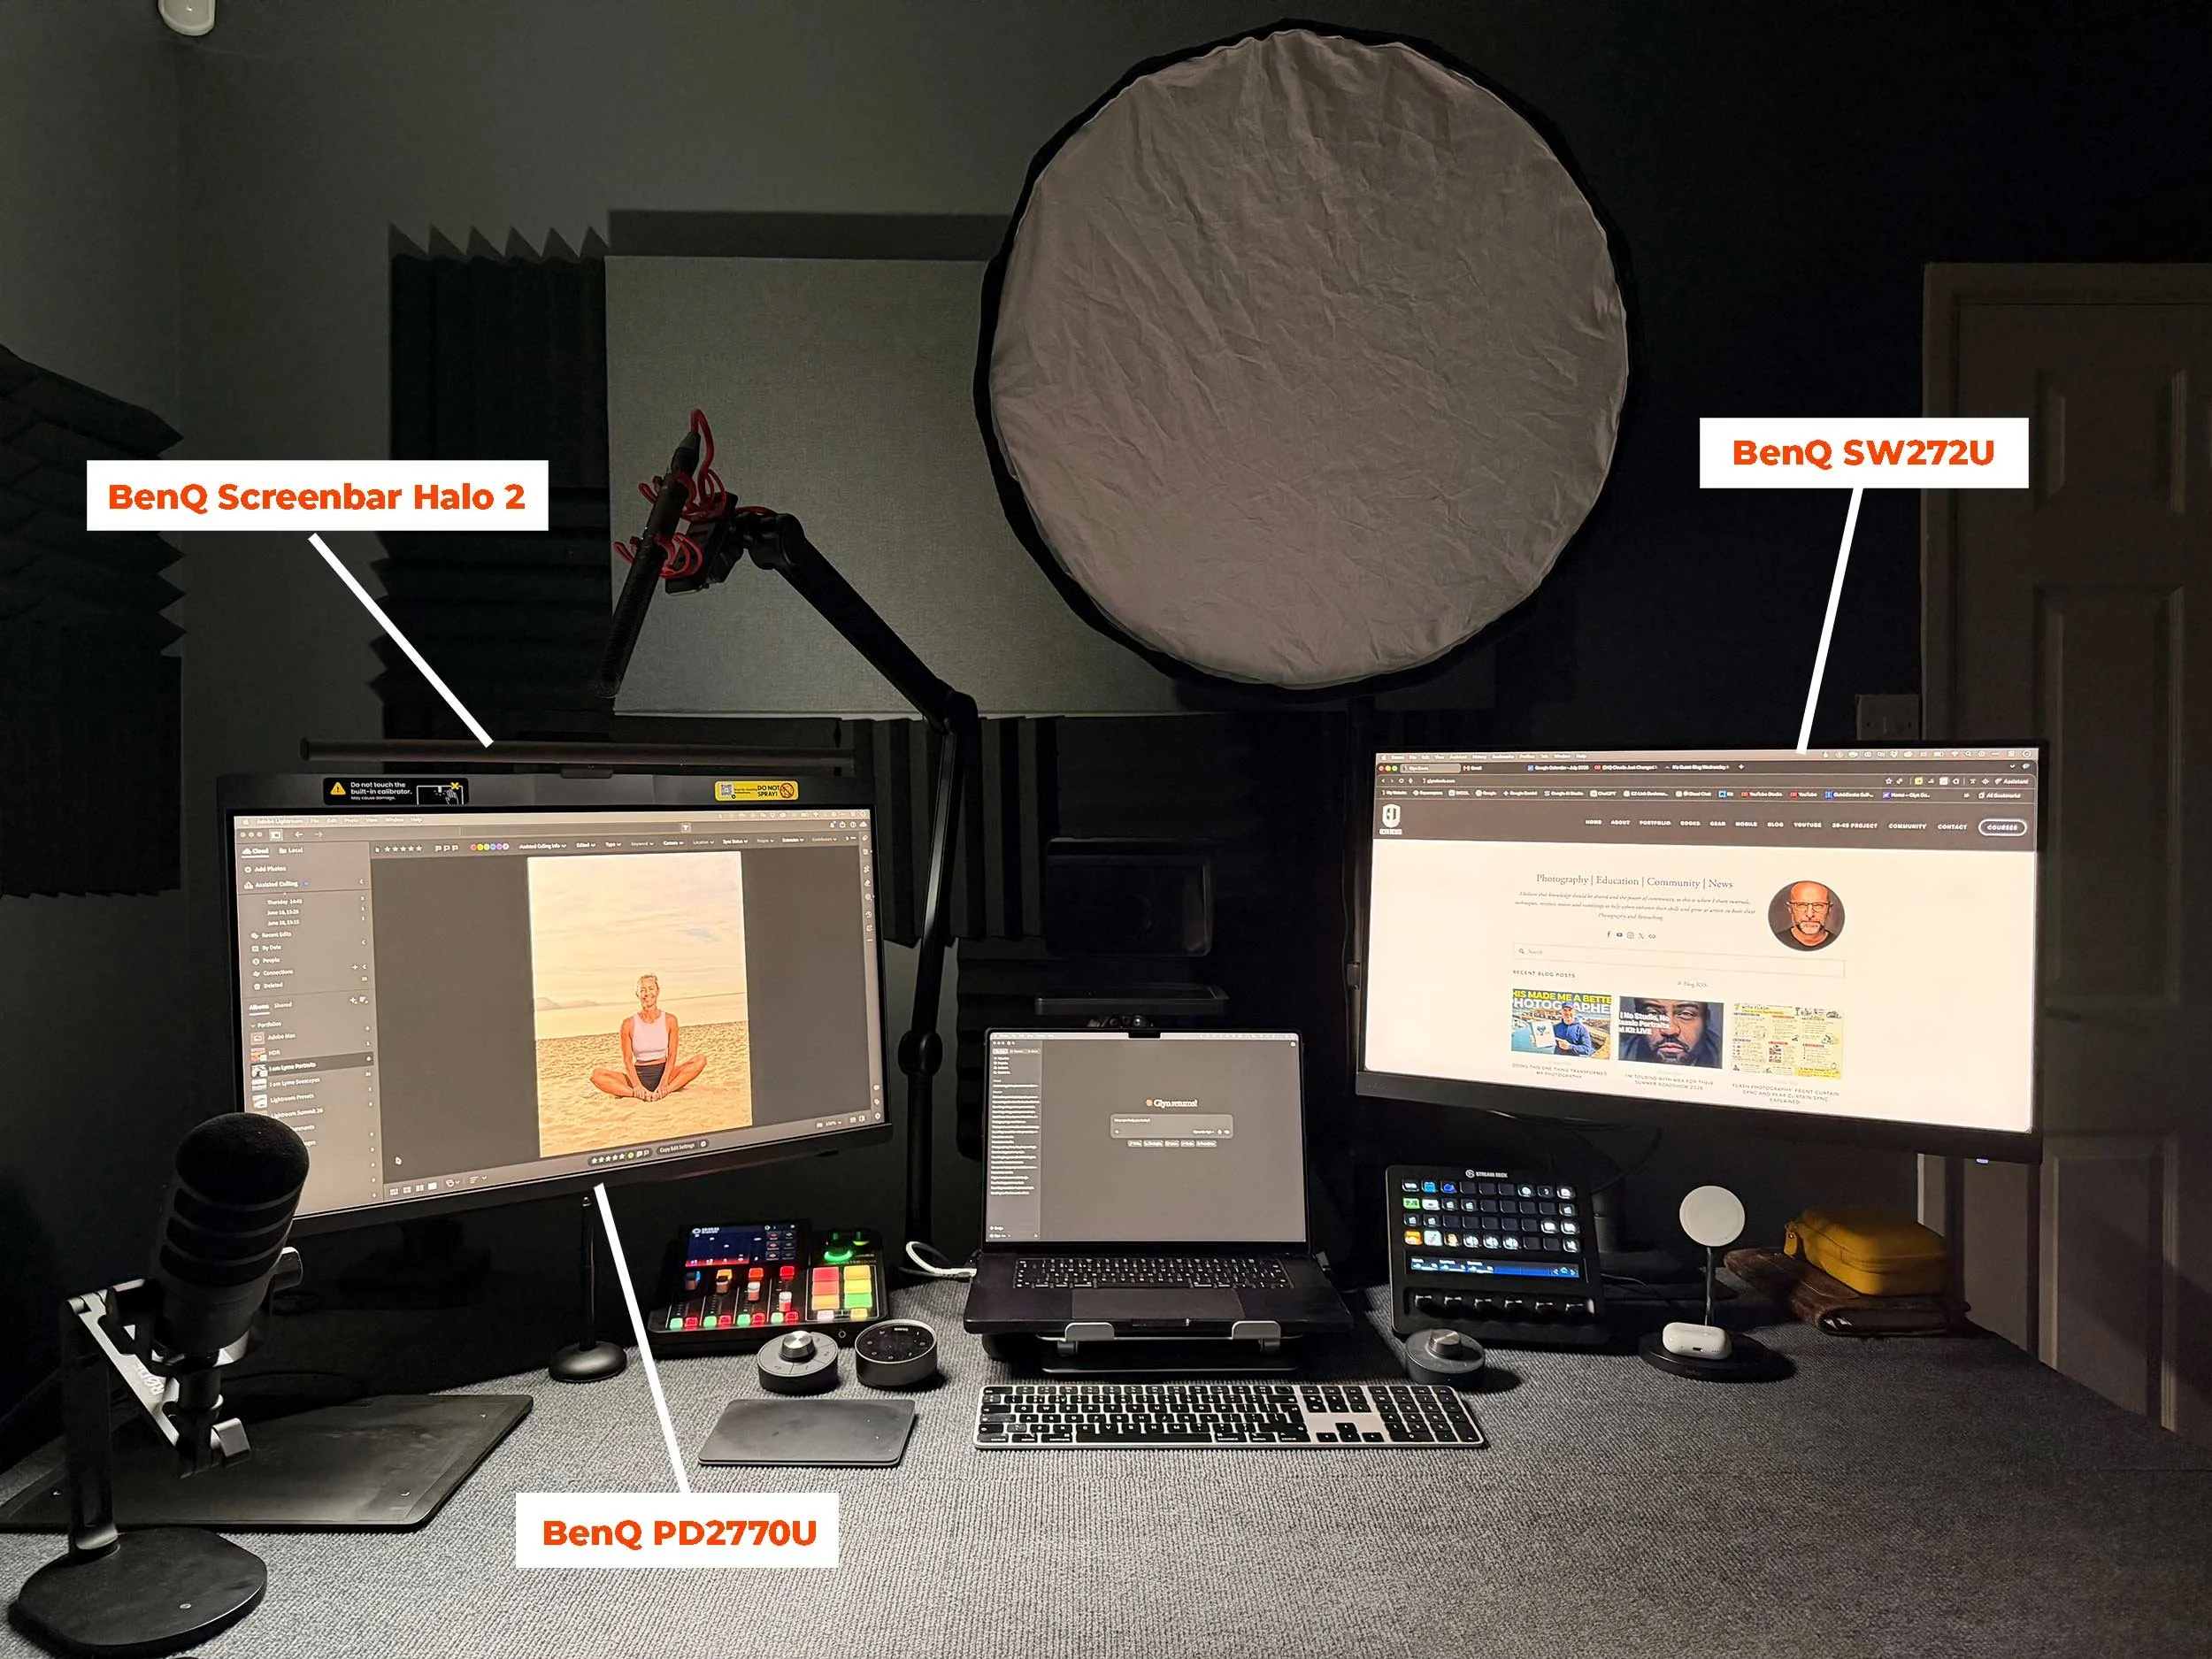
At the moment, I’ve got it sitting on the monitor I do most of my retouching on. I’ve settled on a fairly simple setup, with the colour temperature dialled in at around 6,000 Kelvin, which matches the daylight temperature I use for my screen and the ceiling lights I used to rely on.
What’s great is that there’s no fiddly attachment or screws involved. It balances on top of the screen using a counterweight and takes about five seconds to position. If I ever want to move it across to my second monitor, I can do it instantly.

It also has a really neat ultrasonic motion sensor, so it knows when you’re sitting in front of it and when you’ve left the room. You can set it to switch off after a short while when you walk away, then the moment you come back, it detects you and pops back on.
It’s one of those features that sounds like a minor detail but ends up being really satisfying to use.
Technical Details and Features
For those who like to dig into the specifics, here’s a full breakdown of what the BenQ ScreenBar Halo 2 offers:
Asymmetrical Optical Technology: Designed with an 18° cut-off angle, an 8-section reflector, and 12 precision lenses. This ensures the desk area gets a consistent 500 lux of light (covering a wide 85cm x 50cm area) while maintaining zero glare on the screen.
Tri-Zone Backlight: The rear ambient light features an upgraded tri-zone design, offering 423% wider coverage than the previous generation to perfectly balance wall contrast and ease eye fatigue.
Colour Temperature Control: Both the front and rear lights are fully tuneable from a warm 2700K up to a crisp 6500K, adjustable in precise 25K increments.
Colour Accuracy (CRI): Uses full-spectrum LED chips with a Colour Rendering Index of Ra≥95 and a Colour Fidelity Index of Rf≥96 for the front light, ensuring colours in your space look highly accurate.
Smart Automation and Motion Sensors: Equipped with real-time auto-dimming that senses ambient conditions and supplements the room to the recommended 500 lux standard. The built-in ultrasonic motion sensors handle presence detection to turn the light on and off automatically.
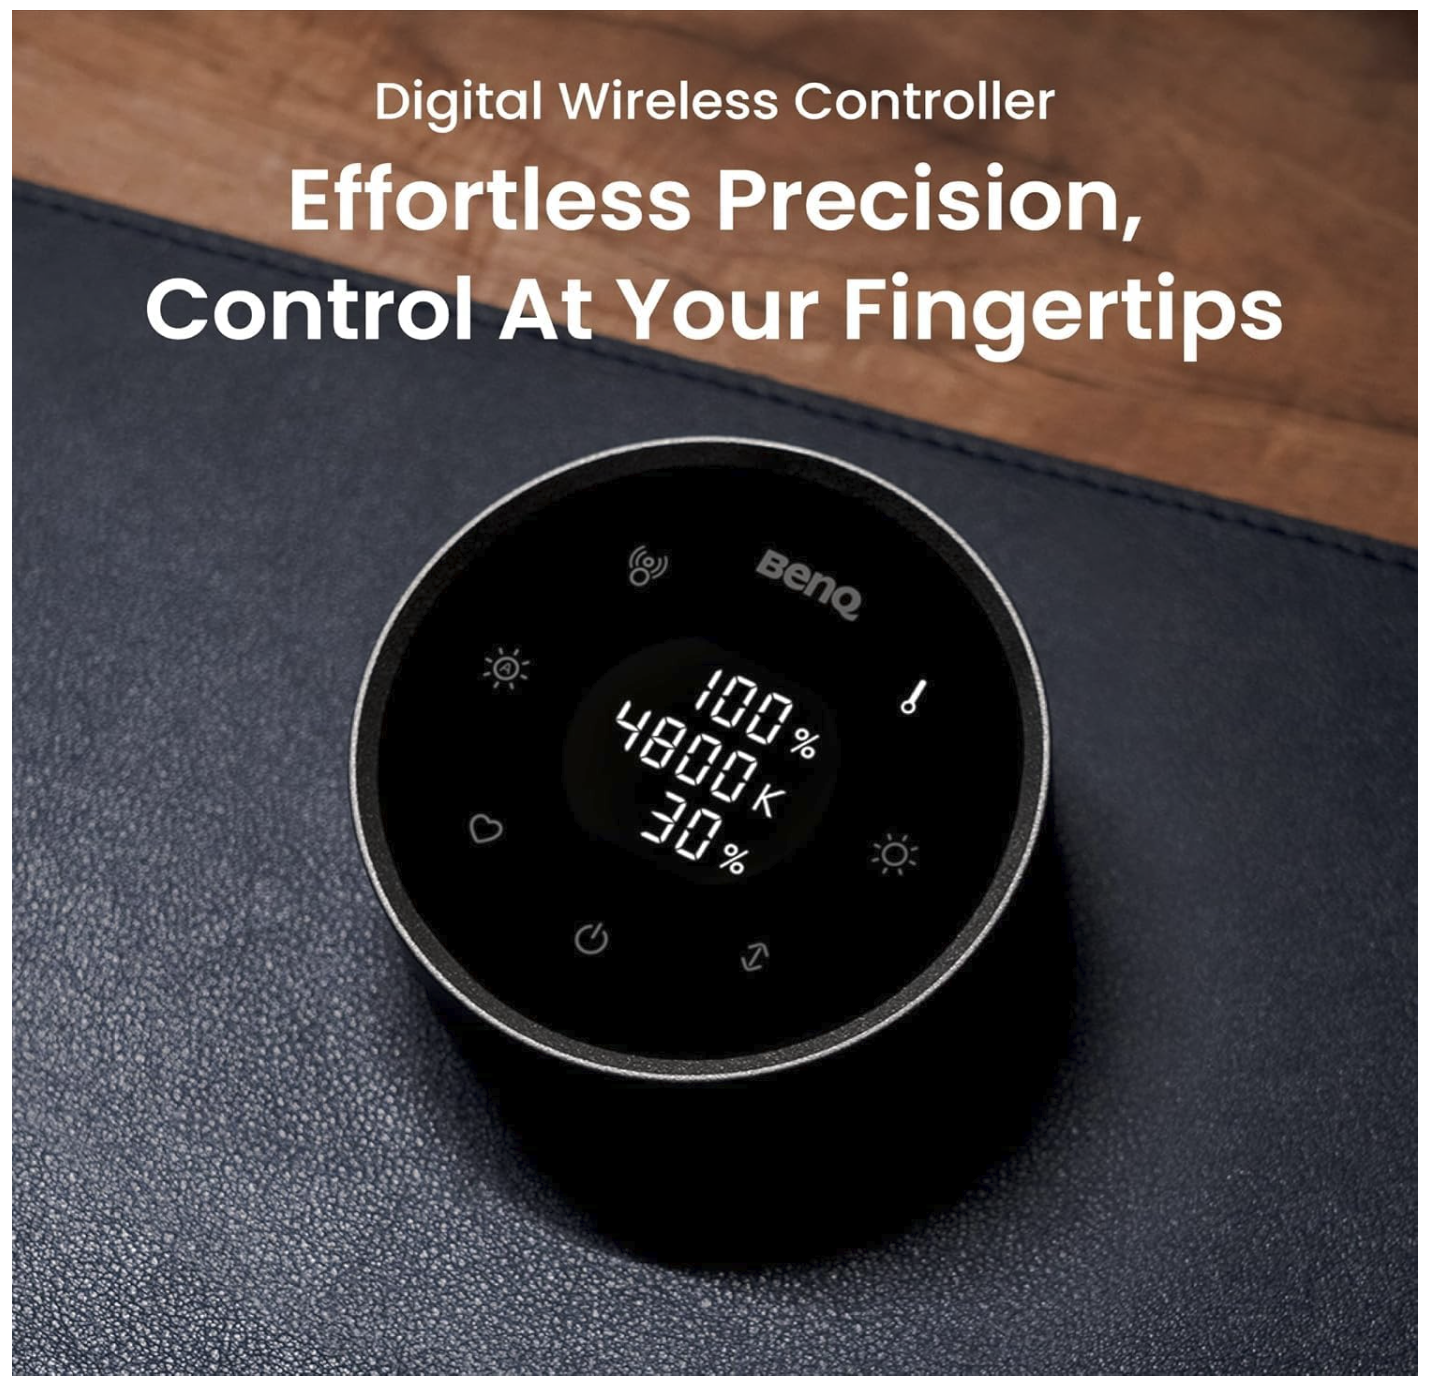
Wireless Controller: A digital touch puck that lets you control power, brightness, colour temperature, and light zones independently or together. It includes a “Favourite Mode” memory button and runs on a rechargeable lithium battery via a Type-C cable, lasting around three months per charge.
Universal Zinc-Alloy Clamp: Designed to rest on top of the screen using a gravity counterweight rather than a clipping mechanism. Works with ultra-narrow bezels, avoids blocking webcam lenses, and fits flat or curved monitors (1000R to 1800R) with thicknesses ranging from 0.43 to 6 cm.
Power Input: Powered via a non-removable 150cm USB-C cable (5V, max 3A, max 15W).
Safety Certifications: Certified flicker-free (IEEE PAR 1789 standard) and carries dual EU certification for zero blue light hazard (IEC/TR 62778, IEC/EN 62471).
I didn’t even know I needed it
If you’ve ever thought about adding a desk lamp to your setup but ruled it out because you just don’t have the room, or you’ve tried regular lamps and found the harsh contrast leaves your eyes feeling tired, I’d genuinely recommend giving this one a look.
I didn’t know I needed it, but I’m really happy to have it as part of my set up, meaning I can leave my office lights off and still having exactly the right environment for editing.
Brilliant!