Printing

Why your Prints are Too Dark (and How to Fix It)

Of everything I get asked about with printing, why do my prints come out dark is the one that comes up more than anything else, and if it's happening to you then you haven't done anything daft. You've more than likely just taken the same advice that I did before I figured this out.

Why it happens

Your screen is backlit. It's basically a light source, the same as a lamp is, and a print isn't. All a print can do is bounce back whatever light is already in the room, so you've got one thing making light and one thing borrowing it, and those two are never going to look exactly the same.

However, here's the bit that catches everybody out. If your screen is throwing out more light than a sheet of paper could ever hand back to you, something happens while you're editing that you won't notice at the time. The picture looks bright because everything on the screen looks bright, so you bring it down a little, and what you've actually done is make that adjustment based on the screen rather than the picture. Then you send it to the printer and the paper has got no way of lifting it back up again, so you get the version you darkened on a surface that can't do anything about it.

The number

What you'll normally hear is to set the brightness in your calibration software to somewhere between 80 and 120 candela, and more often than not you'll hear 120. Sure, 120 looks great. It's bright and everything on it has a bit of life to it, but that is exactly what's wrong with it. It looks great because it's throwing out far more light than a sheet of paper is ever going to give back to you, and all the time it's sat there looking great you're quietly pulling down pictures that were never too bright to begin with.

I'm not saying everybody else has got it wrong. I'm saying I took that recommendation and my prints were always too dark.

The histogram is the only thing telling the truth

When your screen is calibrated too bright it's kind of lying to you, and the histogram is the only thing you can really trust. Change your screen brightness and to your eye the picture completely changes, but the histogram doesn't move, not one bit, because nothing has changed in the actual file. It's the one thing in this whole process that doesn't care how bright your monitor is.

The settings I use

After a lot of trial and error, and I do mean a lot, along with a fair bit of wasted paper, ink and money, I settled at 60 candela for my screen in my workspace, and I've not had a print come out too dark since. The software you calibrate with may well look different to mine, but the numbers transfer straight across:

  • luminance 60 cd/m2

  • white point D65

  • gamut Adobe RGB

  • gamma 2.2

  • black point 0.5 cd/m2

Most calibration software will offer you presets, and the photography one will typically drop the luminance in at 120, which is the whole problem, so I ignore the presets and put the numbers into the custom target instead. The black point is worth a word too. By default it'll be sat at absolute zero, and I lift mine just a touch to 0.5, because even in the darkest parts of a picture I still want a bit of detail; at absolute zero it's just completely black.

I'm not saying 60 is the right number for everybody either, because the room you're working in comes into it.

The room your screen is sat in

Your eyes don't judge a screen on its own, they judge it against everything else around it, so a bright screen in a dark room appears brighter than it actually is, you darken more, and it's the same problem again only now the room is making it worse.

Two things matter. Enough light in the room, and light that's fairly neutral rather than a warm domestic bulb, because a warm bulb will have you making decisions about colour and that's a whole different problem. In my office the main light stays off and I use a Screen Bar Halo 2 from BenQ instead, which throws light down onto the desk without any of it hitting the screen and puts a glow on the wall behind the monitor. That glow on the wall is the bit that does the work, because it cuts out the extreme contrast of sitting in a dark room with just a screen on.

If you haven't got a calibrator

You can still get most of the way there for nothing. Take a print you've already made, hold it up next to your screen, and bring the screen's brightness down until the two of them look pretty much the same. That's it. It won't fix your colour and it isn't calibration, but it's a down and dirty way to stop your prints coming out too dark.

Whichever way you go at it, going from 100 down to 60 or thereabouts will look far too dark at first, and it is quite a jump, but just let your eyes adjust and they will after a few minutes, and very quickly it'll seem normal.

Your Mac is Changing your Prints

You set the file up, soft proof it in Photoshop, load your favourite paper, hit print, and what comes out looks nothing like what you were looking at on screen. The colours are off, the skin tones have picked up a heavy magenta cast, and you're stood there wondering what on earth just happened.

Same printer, same paper, same profile, two completely different results.

Nine times out of ten it isn't your editing and it isn't your paper profile. It's your Mac, quietly making a decision on your behalf without ever telling you about it.

When you plug a printer into macOS, the system will very often set it up using AirPrint rather than the manufacturer's full driver. It does it silently, there's no warning, and it takes away your control over the settings that actually matter for a fine art print.

Why AirPrint gets in the way

AirPrint is fine for knocking out a boarding pass or an email, but for printing work you care about it causes real problems.

The big one is colour management. The option to turn off the printer's own colour handling disappears, so Photoshop and macOS both end up trying to manage the colour at the same time, and they don't agree.

Then there's the media types. Instead of picking the fine art paper you've actually loaded, you're left with basic options like plain paper or photo paper, which means the printer can't set the right head height or the correct ink limits for what's going through it.

Put those two together and you get the colour shifts, and it's the skin tones where you'll notice it first.

Checking and fixing it

However, there's a good reason it happens, and there's a simple way round it. This takes about a minute, and it'll save you a fair bit of ink and paper.

Start by going to your printer manufacturer's website, Canon, Epson or whoever it might be, and download the full driver software for your model, then install it.

Next, on your Mac, head to System Settings, then Printers and Scanners, click the info icon next to your printer and have a look at the driver details. If it mentions AirPrint anywhere, remove the printer.

Then add it back properly. Click Add Printer, select your device from the list, and this is the bit people miss, look at the Use dropdown at the bottom. Don't leave it on the default AirPrint option. Choose Select Software, pick your manufacturer's driver from the list, and click Add.

That's it.

Once the full driver is in place, all your print settings come back, the custom media types are there, and the colour management options are exactly where they should be, which is the bit that makes the whole difference.

There's a full walkthrough in the video above with the side by side print comparison, so you can see the setup on screen as you go.

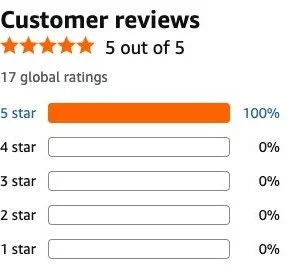
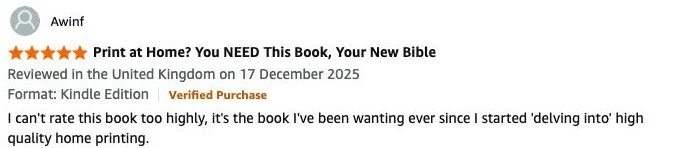
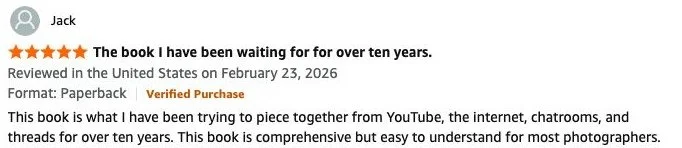
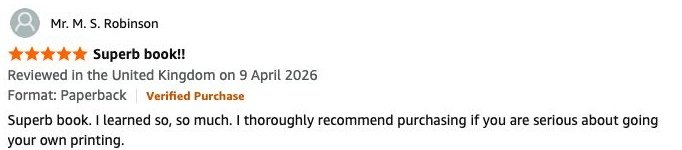
My Latest (and 5th) Book "How to Print" is now available to Pre-Order on Amazon

It's getting real now ...

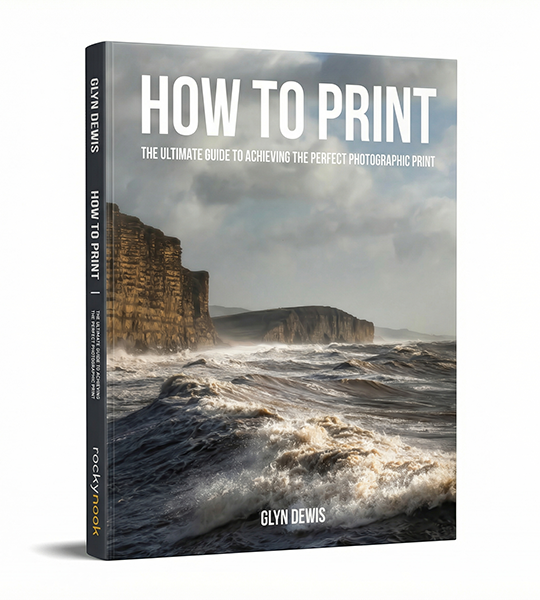
My latest (and 5th) book How to Print - The Ultimate Guide to Achieving the Perfect Photographic Print published by Rocky Nook is now available for Pre-Order on Amazon

The art of printing photographs has become a forgotten final step for many photographers. Yet nothing compares to holding a beautifully printed photograph in your hands--the culmination of your creative vision from capture to final output. In How to Print, photographer and educator Glyn Dewis demystifies the often intimidating world of photographic printing with a comprehensive guide that offers clear, accessible instruction.

Dewis guides you through every aspect of the printing workflow, from monitor calibration to paper selection, and from color management to final presentation. Whether you're printing at home on an inkjet printer or preparing files for a professional lab, How to Print eliminates the frustration and disappointment of mismatched colors and poor output quality.

Written in Dewis's approachable style and featuring practical, real-world solutions to common printing challenges, this essential resource belongs on every serious photographer's bookshelf. You'll learn:

  • How to select the right printer, monitor, and calibration tools for your needs and budget
    Essential color management techniques, including understanding color spaces and ICC profiles

  • The critical differences between OEM and third-party inks and when to use each
    How to properly evaluate printer health and output quality with test prints
    Techniques for preparing both black and white and color images for optimal printing

  • The secrets of effective sharpening for print output

  • How to choose the perfect paper for your specific image and artistic vision

  • Step-by-step workflows for both DIY printing and professional lab preparation
    Professional mounting and display techniques to showcase your work

Perfect for both beginners struggling with their first prints and experienced photographers looking to refine their output, How to Print is the most up-to-date and complete resource available today. With it by your side, you'll be creating beautiful prints in no time.

How to Print Course Zoom / LIVE Broadcasts

I’ve recently set up a Facebook Group for folks that have enroled in my HOW TO PRINT course and am really happy to see how quickly it is growing.

It’s so good to see folks sharing images, members jumping in and answering questions and also reading some incredible feedback from folks finally getting great results with their printing.

For this group I have now started running Zoom / LIVE Broadcasts and will be doing so each month, and adding extras in if there is some important new / updates to pass on.

However I do appreciate that not everyone chooses to use Facebook, and so to ensure thst no-one misses out and is able to watch the sessions, I have now created a section within the HOW TO PRINT course titled HTP Facebook Group Zoom / LIVE Broadcast Recordings. This is where I will upload the recordiongs each time into the course so that folks can stream / weatch them. I also include a document that outlines what topics were covered during that particular Zoom / LIVE Broadcast.

HOW TO PRINT - The ULTIMATE Guide to Achieving the PERFECT PRINT

Watch this recording of a LIVE Broadcast following the launch of my long awaited HOW TO PRINT course for a Behind the Scenes look at what went into making the course content, tips, additonal learning and Q&A

Well my HOW TO PRINT course has officially launched, and I don't care whether it's right or wrong to say this but ... "I'm Bloomin Proud of myself"

As of today the course has over 7 hours of content which, I hasten to add, is the least amount of content that there will ever be as I'm looking forward to keeping this well and truly up to date for everyone that has and does enroll.

The support I've had has been incredible from close friends and people across the industry being willing, sometimes at short notice, to open their company doors and allow me in to do some filming and also them jumping on to a video conference to record an interview covering a certain topic relating to printing.

SPECIAL THANKS goes to Dominic Gurney from Epson UK who as well as freely sharing his vast knowledge has driven considerable mileage (more than once) to pass on some kit for me to use.

Everyone at Permajet for their constant support from Day 1 when I was planning this course. Inviting me into their offices, filming, lunch, paper, interviews and so much more. Outstanding!

Dr Chris Bai from BenQ whom I'm proud to call a friend and everyone at BenQ; always there and always willing to help and provide support. When I first met Dr Bai he said that his purpose was to educate me about colour and display technology and he sure has!

The BRILLIANT people at Digitalab who invited up to their offices for 2 days when I first started working on the course. Nothing was and is too much trouble for them and for that and all they do I am so incrediby grateful.

The great folks at Calibrite for helping out in so many ways providing kit, promotion, technical advice and information and always reaching out to see if I need any support.

Trevor Williams of West Street Picture Framing who opened his shop on a day it was ordinarily closed just so that I could do some filming of him showing how to correctly add a print onto backing board and add them into a mount for display.

MASSIVE thank you to everyone that has Pre Ordered the Course so far. I'm genuinely blown away at the response but also at the trust placed in me to provide a course that you're willing to hand over some of your hard earned money for. It is VERY much appreciated. (your course content will be available from 6pm UK today)

... and finally my wife Anne who does everything she can to make it easier for me to get on with getting on. Because of her support I don't have to think about anything other than getting this done and hand on heart I wouldn't have been able to get it finished and produced what I have without her.

This might sound a bit dramatic ... I mean it's 'only' a course that I've put together but heck, I've worked hard on this. I wanted to make this THE go-to course for printing so that others can get their share of the pleasure I get when seeing an image that you took the time and effort to get out and capture, retouch and finally hold in your hands.

"The ART doesn't end at the EDIT"

LIVE Broadcast: PRINTING PROBLEMS | Epson + Canon VERSUS Lightroom + Photoshop

In this recording of a LIVE Broadcast hosted on both YouTube and Facebook on Sunday 10th December 2023, I show how to correctly Calibrate your Display for YOUR workspace and go through printing images on both Canon and Epson printers showing how your choice of printing software can make a BIG difference to your results with side by side comparisons.

If you’ve ever struggled with printing this will both surprise you and help you …

Links and products mentioned in this video …

My YouTube Channel: https://www.youtube.com/glyndewis

  • BenQ SW272U Display ( Link )

  • Canon Pro 300 A3+ Printer ( Link )

  • Epson SC P900 A2 Printer ( Link )

  • Calibrite Display Pro HL ( Link )

    *𝐂𝐥𝐚𝐢𝐦 𝐚 𝐅𝐑𝐄𝐄 𝟏𝐓𝐁 𝐇𝐚𝐫𝐝𝐫𝐢𝐯𝐞 𝐟𝐫𝐨𝐦 𝐂𝐚𝐥𝐢𝐛𝐫𝐢𝐭𝐞 𝐰𝐡𝐞𝐧 𝐨𝐫𝐝𝐞𝐫𝐢𝐧𝐠 𝐚𝐧𝐲 𝐇𝐋 𝐂𝐚𝐥𝐢𝐛𝐫𝐚𝐭𝐢𝐨𝐧 𝐃𝐞𝐯𝐢𝐜𝐞 (𝐯𝐚𝐥𝐢𝐝 𝐮𝐧𝐭𝐢𝐥 𝐞𝐧𝐝 𝐨𝐟 𝟐𝟎𝟐𝟑): https://calibrite.com/hd-promo/

  • BenQ Palette Master Ultimate Software ( Link )

  • BenQ Palette Master Ultimate Software ( Link )

  • Qimage One ( Mac ) ( Link )

  • Qimage Ultimate ( Windows ) ( Link )

PRINTING PROBLEMS? 🖨️ IT'S NOT YOU!

Here’s the recording of a LIVE Stream I did on both YouTube and Facebook recently.

If you’ve ever struggled with printing your images, in this LIVE Broadcast I show the simple settings no matter what software you use BUT how different software can produce VERY different results …

BIG thanks goes to my friend Stewart Wood for sending over the image used in the LIVE Broadcast.

My GO-TO Screen Settings for PERFECT PRINTS

My GO-TO screen calibration settings for PERFECT PRINTS!

I always have 2 different screen calibrations stored in my BenQ display … one for day to day use , video editing etc and the other purely for photography.

Both have different settings but the ones I show here for Photography ensure a near perfect Screen to Print match 👍🏻

This video is just 60 secinds long and I show the settings for Photography / Print …

PHOTOGRAPHERS ... STOP USING HDMI to connect your Monitor / Display 😳

Photographers ... who knew that connecting your computer to your display with a HDMI cable actually be the reason you're colours look bad and your prints look nothing like they do on the screen?

This video explains all why

IMPORTANT NOTE:
This video is NOT refering to the HDMI cable but the HDMI settings. In some systems for example with an NVIDIA Graphics Card it is possible to dive in and alter the setting so give the Full Range (0 - 255) however this isn’t possible on some other systems including Mac. In this case, amn alternative connection between computer and display is advised e.g. USB-C

THANK YOU Carmarthen Cameras, BenQ and Permajet

Last Friday I was in Carmarthen, Wales at Carmarthen Cameras for my Pro Printing Seminar …

… a 2 hour evening going through the complete printing process covering how to correctly calibrate your display / monitor for printing , printing software , paper choice and of course making some prints.

HUGE thank you goes to the great folks at Carmarthen Cameras who always pull out all the stops to make events run smoothly, and also to the incredible support from both BenQ and Permajet.

Kicking off going through the display calibration , I was using a BenQ SW240; a 24” hardware calibrated display using the BenQ Palette Master Software

To calibrate the display I used my X-Rite i1 Display Plus Calibration device (which is now the Calibrite Colour Checker Display Plus) …

So often we’re advised that for the best possible results you only need to use these (generic) settings but I never seemed to get the results I expected , so it was great to get the opportunity to go through explaining the settings and how to fit them to ‘your’ enviroment; when you know what each setting is , it makes this process so much easier and understandable.

I then covered printing software mainly looking at using Lightroom and also the Canon Pro Print Layout Software ; both work great although I do prefer the no frills interface of the Canon Software …

First of all showing how to print on Canon Paper using the Canon Pro 300 and then using a range of papers, from Permajet including their NEW Heritage Range , and showing how to use their Generic Paper Profiles … which never fail to produce fantastic results !

Again , a HUGE thank you to everyone involved and who came along on Friday making it such an enjoyable evening; It was great to run though ‘in person’ just some of the content I have recorded for inclusion in my Printing Class that will be available this April.