Lightroom

Improved SKY MASKS in LIGHTROOM Mobile using INVERT not INTERSECT

Making accurate sky masks in Lightroom Classic and Lightroom Desktop is so much easier with the Intersect command, but when I made this video it wasn't available in Lightroom Mobile, and neither was Invert from the Sky selection, so what can we do? In this video I show the workaround I use on mobile, using Invert rather than Intersect, alongside how Intersect works in the desktop versions, so you can get cleaner sky masks whichever version of Lightroom you're editing in.

COMPLETE Retouching Workflow in LIGHTROOM on an iPad

This video is a complete retouching workflow for a seascape photograph, done from start to finish using only Lightroom on the iPad. I go through the edit step by step, from the raw file to the finished picture, so you can see how far you can take an image without ever leaving the tablet. If you've been wondering whether the iPad can handle a full edit on its own, this shows exactly what that looks like in practice.

Photographing Storms in the UK with my iPhone and Friends

There’s something special about heading out with your camera (or iPhone as it was for me) when a storm is brewing. It’s that mix of excitement, unpredictability, and the chance to capture nature at its wildest and recently, I had the chance to photograph two big storms—Storm Bert and Storm Darragh.

Storm Bert at Lyme Regis

First up was Storm Bert on the seafront at Lyme Regis with my good mate Steve Healy.

Lyme’s one of those places that looks stunning in any weather, but during a storm it really is next level.

Black and white photo of stormy waves breaking over rocks under dark clouds

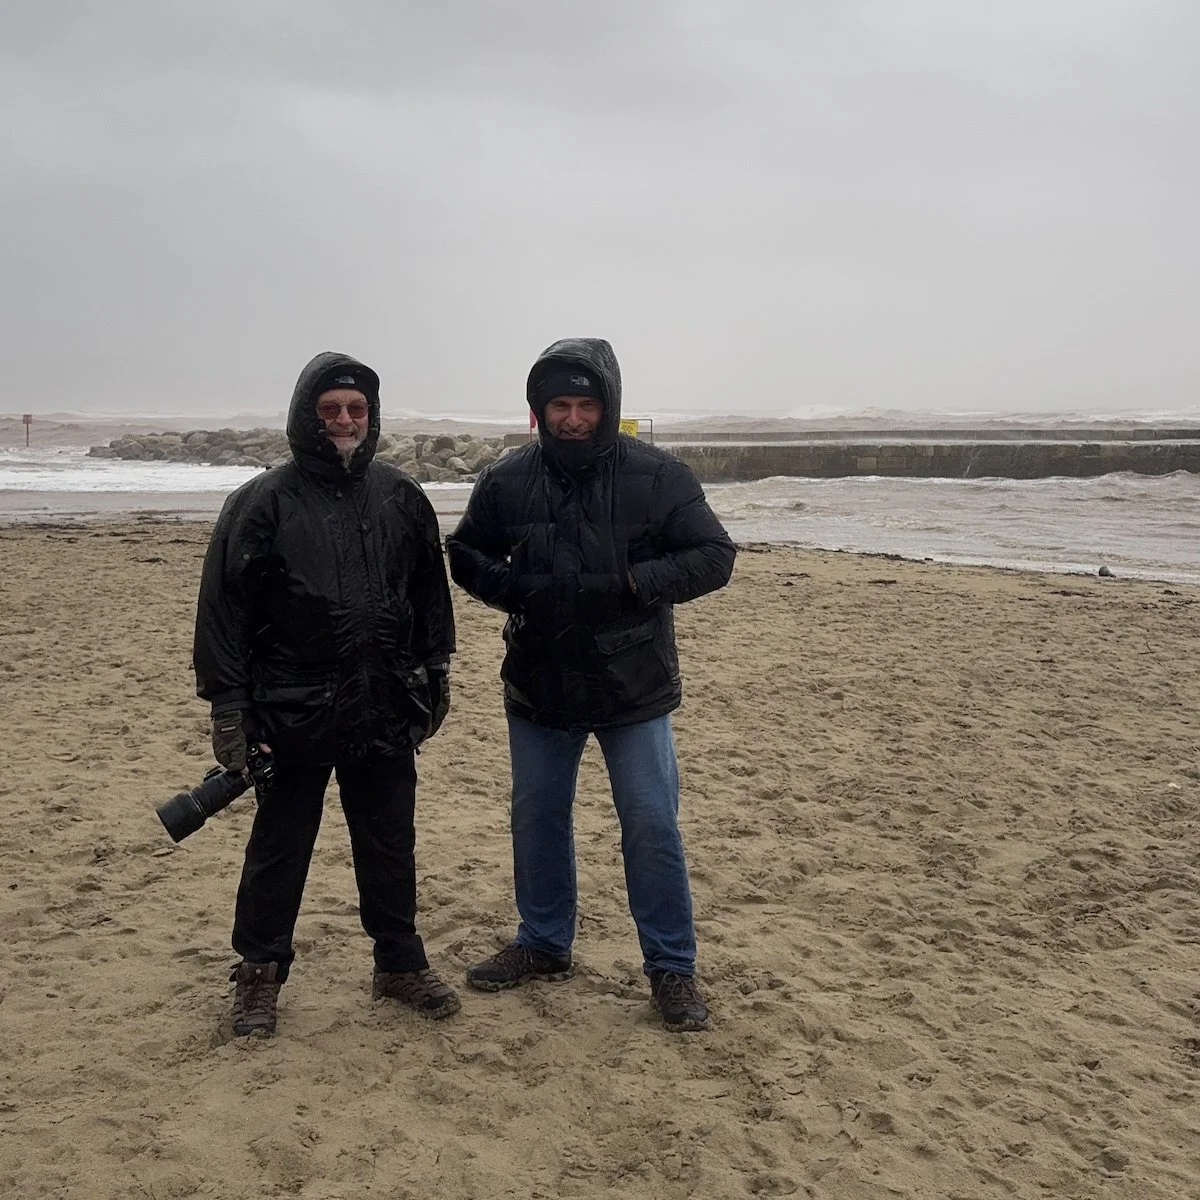
The wind and rain was relentless, whipping around us as we walked along the seafront. The waves were smashing into the harbor wall, sending spray high into the air. At one point, I got completely drenched from the knees down (see photo below) by a rogue wave, but hey it’s all part of the fun, right?

Two men in dark waterproof jackets with hoods up standing on a windswept beach
Black and white photo of waves crashing onto rocks below a stormy sky
Black and white photo of a rough sea surging around rocks by a harbour wall

I used my iPhone 15 Pro Max with the Lightroom Camera app, and honestly, it was spot on. The light was constantly changing, but using the phone to capture it was a breeze (no pun intended).

Black and white photo of waves rolling onto a shingle beach in front of seafront buildings

We took some time out for a bit of shelter and grabbed a coffee in the seafront Café, SWIM and it just so happened that on ther next table were a couple of people who had a dog, and well …

I couldn’t resist grabbing a photograph with my iPhone

Close-up of a scruffy grey dog resting its head beside a tennis ball

I edited the portrait quickly in Lightroom on my iPhone and then showed the owners, who loved it and asked if I’d send it to them.

This again showed to me how powerful a mobile workflow is; being able to take a photograph and immediately edit it and sent it, I find so bloomin’ exciting!

Storm Darragh at West Bay

A few days later, Storm Darragh rolled in, and this time, it was off to West Bay with my friend Brian Dukes.

If you know West Bay, you’ll know those golden cliffs are absolutely stunning, but throw in a storm and it’s a whole different scene.

Black and white photo of a large wave breaking over rocks beside a harbour wall

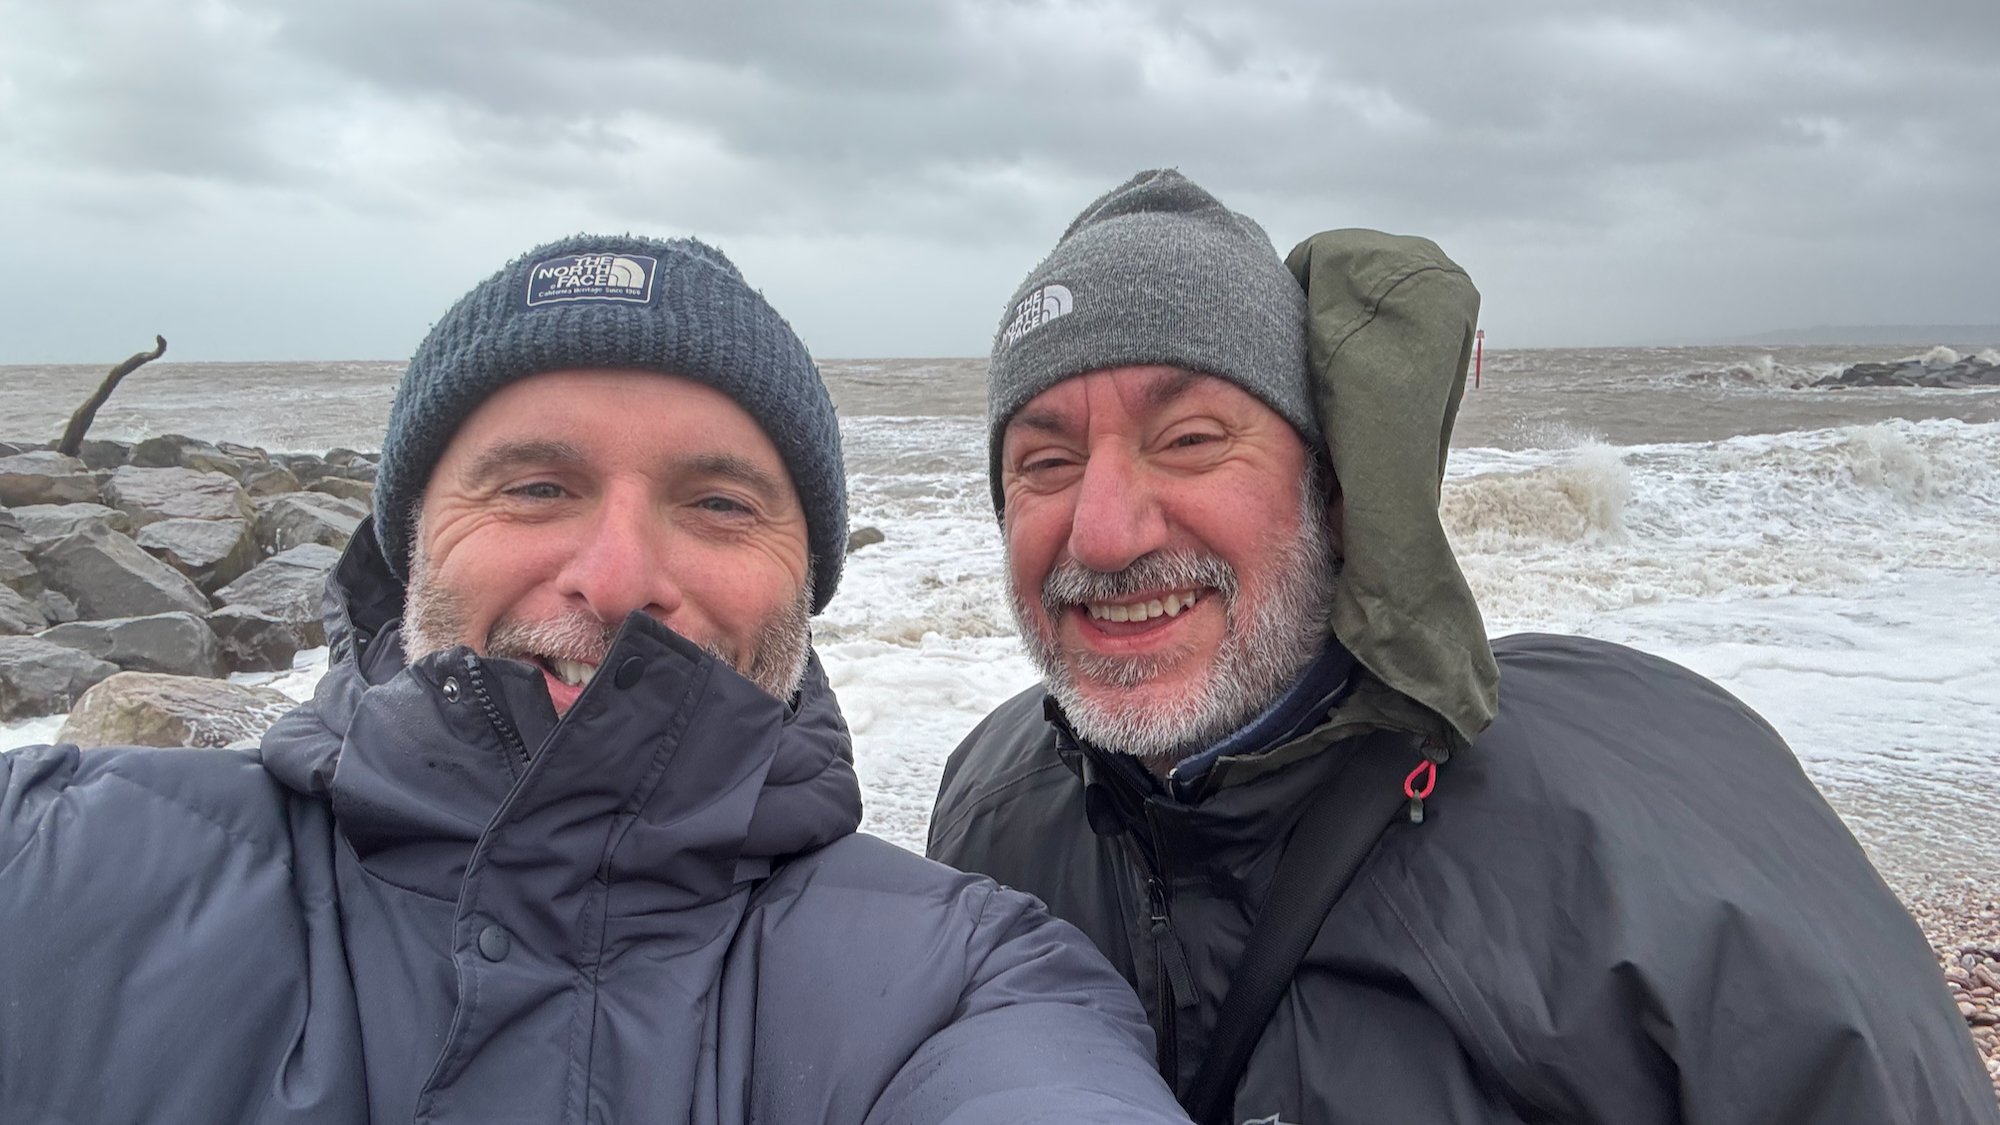
Brian and I spent most of the time trying to keep our footing while scouting for the best angles but oddly the sea wasn’t as rough as we’d expected it to be and we actually spent more time on the other side of the harbor.

Selfie of two smiling men in hats and waterproofs on a stormy beach

Why I Love Storm Photography

Here’s the thing about photographing storms: it’s not just about the pictures. It’s the whole experience—being out in the elements, feeling the wind batter you, hearing the roar of the waves, and just soaking it all in (sometimes literally!).

Black and white photo of spray exploding from a wave hitting dark rocks

For me, it’s also about the people you share it with. Steve and Brian are brilliant company, and there’s something about laughing at each other while dodging waves that makes the day even better.

If you’re thinking of heading out to photograph a storm, do it. Just make sure you’re prepared (waterproofs are a must … as I have well and truly learned), keep an eye on the tides, and embrace the chaos. The photos are a bonus!

I’m really happy with the keepers from both Storm Bert and Storm Darragh but honestly, the best bit was just being there watching the storm do its thing.

Can’t wait for the next one. Bring it on!

Photography Life in the time of LIGHTROOM with Brian Matiash

This is the recording of a live broadcast where I chat with Brian Matiash, software quality engineer on Lightroom Desktop. We talk about his approach to photography, anxiety, his go-to kit and social media, as well as retouching images in Lightroom. Brian also shows some hidden features in Lightroom Desktop and Lightroom Classic, which are well worth knowing about if Lightroom is where you do most of your editing.

links mentioned in the video:

brian’s slideshow / promo video:

Green northern lights over snow-capped mountains and a still lake at night
Tall waterfall cascading into a mossy green gorge with a tiny figure at its base
Small white church on a hillside below snow-capped mountains in warm evening light

Photography Education and the LIGHTROOM HELP-DESK | Rob Sylvan

This is the recording of a live broadcast where I chat with Rob Sylvan, photographer, camera expert, Canon product educator and author. Rob writes for Lightroom Killer Tips and is known as the Lightroom Help-Desk, so we talk about all things photography and Lightroom, including photography education. He also shares his tips for keeping your Lightroom organised and optimised, which is well worth hearing if your catalogue has grown over the years and become harder to manage.

links mentioned in the video:

Rob’s Website: robsylvan.com

Lightroom Killer Tips: lightroomkillertips.com

Rob Sylvan on Instagram: @sylvanworks

How to Print Course: ( LINK )

Omnicharge Portable Power Solutions: ( LINK )


HOW TO PRINT - The ULTIMATE Guide to Achieving the PERFECT PRINT

Watch this recording of a LIVE Broadcast following the launch of my long awaited HOW TO PRINT course for a Behind the Scenes look at what went into making the course content, tips, additonal learning and Q&A

Well my HOW TO PRINT course has officially launched, and I don't care whether it's right or wrong to say this but ... "I'm Bloomin Proud of myself"

As of today the course has over 7 hours of content which, I hasten to add, is the least amount of content that there will ever be as I'm looking forward to keeping this well and truly up to date for everyone that has and does enroll.

The support I've had has been incredible from close friends and people across the industry being willing, sometimes at short notice, to open their company doors and allow me in to do some filming and also them jumping on to a video conference to record an interview covering a certain topic relating to printing.

SPECIAL THANKS goes to Dominic Gurney from Epson UK who as well as freely sharing his vast knowledge has driven considerable mileage (more than once) to pass on some kit for me to use.

Everyone at Permajet for their constant support from Day 1 when I was planning this course. Inviting me into their offices, filming, lunch, paper, interviews and so much more. Outstanding!

Dr Chris Bai from BenQ whom I'm proud to call a friend and everyone at BenQ; always there and always willing to help and provide support. When I first met Dr Bai he said that his purpose was to educate me about colour and display technology and he sure has!

The BRILLIANT people at Digitalab who invited up to their offices for 2 days when I first started working on the course. Nothing was and is too much trouble for them and for that and all they do I am so incrediby grateful.

The great folks at Calibrite for helping out in so many ways providing kit, promotion, technical advice and information and always reaching out to see if I need any support.

Trevor Williams of West Street Picture Framing who opened his shop on a day it was ordinarily closed just so that I could do some filming of him showing how to correctly add a print onto backing board and add them into a mount for display.

MASSIVE thank you to everyone that has Pre Ordered the Course so far. I'm genuinely blown away at the response but also at the trust placed in me to provide a course that you're willing to hand over some of your hard earned money for. It is VERY much appreciated. (your course content will be available from 6pm UK today)

... and finally my wife Anne who does everything she can to make it easier for me to get on with getting on. Because of her support I don't have to think about anything other than getting this done and hand on heart I wouldn't have been able to get it finished and produced what I have without her.

This might sound a bit dramatic ... I mean it's 'only' a course that I've put together but heck, I've worked hard on this. I wanted to make this THE go-to course for printing so that others can get their share of the pleasure I get when seeing an image that you took the time and effort to get out and capture, retouch and finally hold in your hands.

"The ART doesn't end at the EDIT"

Portrait using a 55mm Prime and LED Lighting

I’m currently trying out a new portrait style for me using a different lens focal length than what I’ve used for a while now, and also adding in an additonal light to my usual one-light set up.

For some time I’ve used the Sony 85mm G Master lens with my Sony A7RIV and have and still do love it for the quality and sharpness of the files it produces. However I’m now going to be using a 55mm focal length … my Zeiss f/1.8 Prime Lens.

It’s hard to put into words what I’m really liking about the look the lens gives … it’s just different. Some would say that it gives a much more realistic ‘as the eyes see it’ look but I guess that also depends on how close to the subject you position yourself.

I also like how the focal length means you’re much closer to the subject, making the portraits much more intimate and revealing of the person being photographed ... if that makes sense.

Portrait of an older bald man in a navy polo shirt against a dark blue backdrop

I’m also, like I said, using an additional light with this new look I’m working on; both of which are LED Constant lights.

I’ve been using the 60W Westcott L60-B COB LED for a while now but a few days ago I received the new 120W L120-B COB LED; a slightly bigger unit with the advnatage that no adaptor is needed to fit any of my light modifiers.

So the portrait of my friend Anthony above, I took using one of the grey walls in my office as the background; here’s the set up showing the positon of the lights …

Man seated in a home studio lit by a large softbox with a reflector on his lap

LIGHTING

Westcott L60-B COB LED fitted with a square Westcott Pocket Box Softbox rear and camera right and positioned so that it added both a bit of light onto the background but also a hint of light onto the camera right side of Anthony’s head.

Westcott L120-B COB LED fitted with the 24” Rapid Box Switch Softbox

Westcott 2-in-1 Reflector (silver and White) with silver side uppermost

*NOTE: If you’re looking to invest in Westcott Kit, then give me a shout and I’ll pass on a Discount Code

Westcott L120-B COB LED

Westcott L120 LED light with a reflector and its carry bag on a white background

Westcott 24” Rapid Box Switch Beauty Dish

Westcott Beauty Dish Switch softbox on a white background

Westcott Pocket Box Speedlight Softbox Kit

camera settings

  • Aperture: f/5.6

  • Shutter Speed: 1/60sec

  • ISO: 1250

When taking Anthony’s portrait I was experimenting with different apertures to see hat I prefered for this new look; f/2.0 , f,4.0 , f/5.6 and actually liked the look of f/40 as with the 55m lens it gave a great depth of field with the tip of the nose in foucs and then from the ears losing focus.

However, I mistakenly left the camera in f/5.6 so during the retouching in Lightroom I used the Lens Blur to convincingly fake the depth of the field.

retouching in lightroom

The portrait I retouched using only Lightroom and I’ve added it into my Lightroom Community Profile Page …

When you go to my Lightroom Community Profile Page, click on the portrait and this will then take you to where you can see all of the retouching steps I did to the ‘out of camera’ file. You can also save the settings as a preset to use on your own images and even click on Remix to get access to a Smart Preview of my original file and have a go at retouching it yourself.

TRY THIS 🔥 Create a COLOURED LIGHTING EFFECT in LIGHTROOM

How to QUICKLY and EASILY create the Coloured / Gel Lighting Effect in Lightroom using Masks …

Talking Lightroom and Photography with Adobe Lightroom Product Manager Katrin Eismann

This is the recording of a live broadcast where I'm joined by Adobe Lightroom Product Manager and photographer Katrin Eismann. We talk about her process for capturing stunning travel photographs, her personal projects and her kit, and we also take a look at what was Lightroom's latest technology for photographers at the time, along with some hints and tips for getting the best results. It's a great mix of photography and practical Lightroom advice from someone who knows the software inside out.

links mentioned during the broadcast

Katrin on Instagram: https://www.instagram.com/katrineismann/ ( @katrin_eismann )

Lightroom Academy: lightroom.adobe.com/academy

Adobe Community Forums: https://community.adobe.com/

Marc Muench Photography Workshops: muenchworkshops.com/workshops/

Iceberg floating in deep blue water under a dark cloudy sky
Silhouetted bare branches against a soft blurred golden background
Fashion model in a fringed green outfit posing against a concrete wall
Hand pouring a glass of golden liquid into blue water that glows in the light
Blurred figure of a woman in a dark dress walking through misty water

Generative AI Remove, Sony Tethering and more ... Lightroom UPDATE May 2024

So today (Tuesday 21st May 2024) Adobe made available some fantastic updates and enhancements to both Lightroom v 7.3 (including Mobile) and Lightroom Classic v 13.3 which amongst other things sees the integration of Adobe’s AI, Adobe Firefly and (finally) tethering support for Sony amongt others things.

So, here’s a run through of the changes from today in this recording of a LIVE Broadcast I did on the day of release, and also below I’ve written down all the detailsincluding useful links…

PERFORMANCE UPDATES

In addition to some bug fixes and stability improvements across all platforms, you’ll also notice a speed increase when using Denoise.

Also in addition to the updates and additions detailed below Adobe also mention …

  • HDR Optimisation

  • Instant Access to Photo Libraries in Lightroom Mobile and Desktop apps

  • Lightroom’s all new mobile editing experience streamlines the mobile toolbar to prioritise the most popular features, whilst making it faster and more intuitive to edit.


SLIDESHOW IN DESKTOP

It’s now possible to show images in a slideshow from within Lightroom Desktop.

To start a slideshow you access it via the View > Start Slideshow

Lightroom library grid of landscape and portrait photos with a menu open on the left

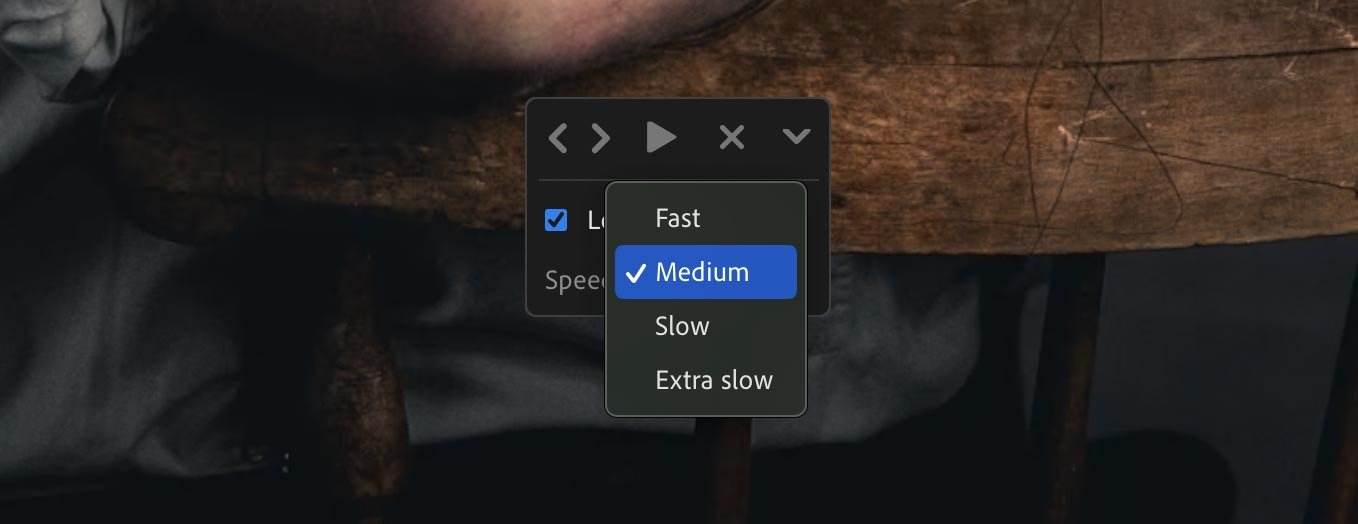
On release, the controls and the look of the slideshow are very limited with the images playing at full screen and being able to adjust whether the slideshow loops and adjust the speed of the slideshow to be Extra Slow, Slow, Medium and Fast.

Lightroom slideshow speed menu with Medium selected from Fast, Medium, Slow and Extra slow

CLOUD TO LOCAL STORAGE (DESKTOP)

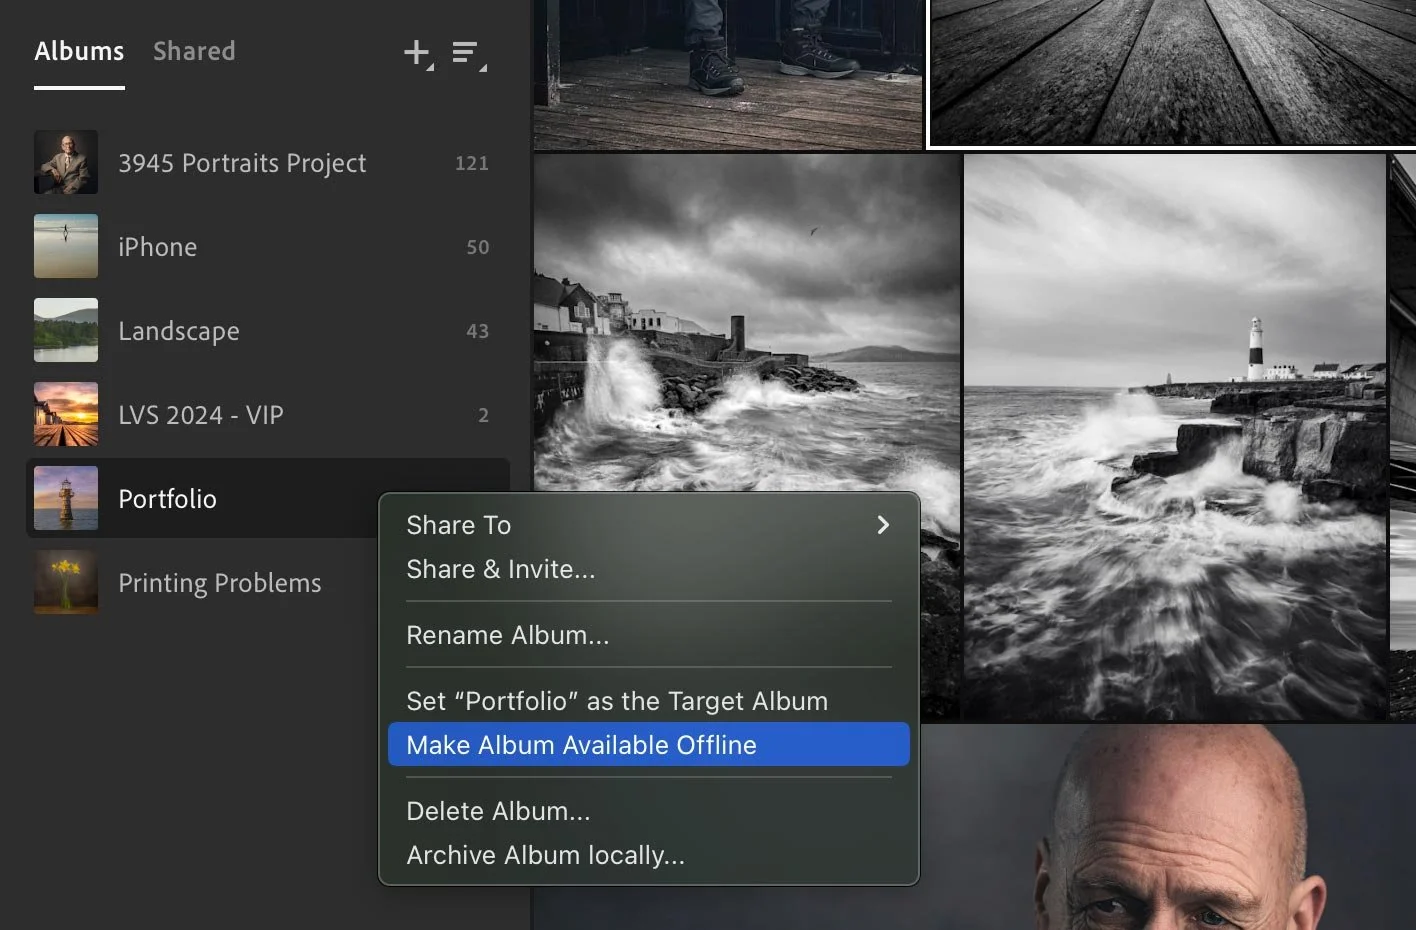
Until now it was only possible to have cloud based albums in Lightroom Desktop, but with this update that all changes because from now, we can make Albums available and viewable offline just like Collections in Classic where we could sync them to the cloud or not.

To do this simply right-click on an Album and choose Make Album Available Offline …

Lightroom album context menu with Make Album Available Offline highlighted

SONY TETHERING SUPPORT (CLASSIC)

It’s taken some time but finally Adobe have worked closely with Sony and as a consequence, Lightroom Classic now supports Sony Tethering.

Sony logo in black on a white background
Lightroom tethered capture bar showing camera settings

Sony Tethering in Lightroom Classic offers full control over main camera settings, capture and LIVE view

CURRENTLY SUPPORTED SONY CAMERAS …

Table of Sony Alpha camera models requiring Lightroom Classic 13.3 for tethering

The process for tethering to Lightroom Classic with a compatible Sony camera is a very simple process, working exactly the same as it does for other compatible brands.

• Note: Camera needs to be in Remote Shooting or PC Remote mode via USB Connection settings.

A full list of ALL cameras that are supported (not just Sony) can be found here: LINK


TONE CURVE IN VIDEO (DESKTOP)

I’m not someone that edits video within Lightroom but I know that there are many that do, so the addition of Tone Curve in Video for Lightroom Desktop is going to be a very welcome update.

Adobe state that …

  • You can now edit the Tone Curve when editing video in Lightroom Desktop

  • These edits are viewable across Mobile and Web

  • Videos now supports Presets with Tone Curve information


LENS BLUR ENHANCEMENTS

The Lens Blur Effect is finally out of Early Access and available to all, and Adobe states that its release also brings with it …

  • Copy and Paste Support

  • Added focus slider in Mobile

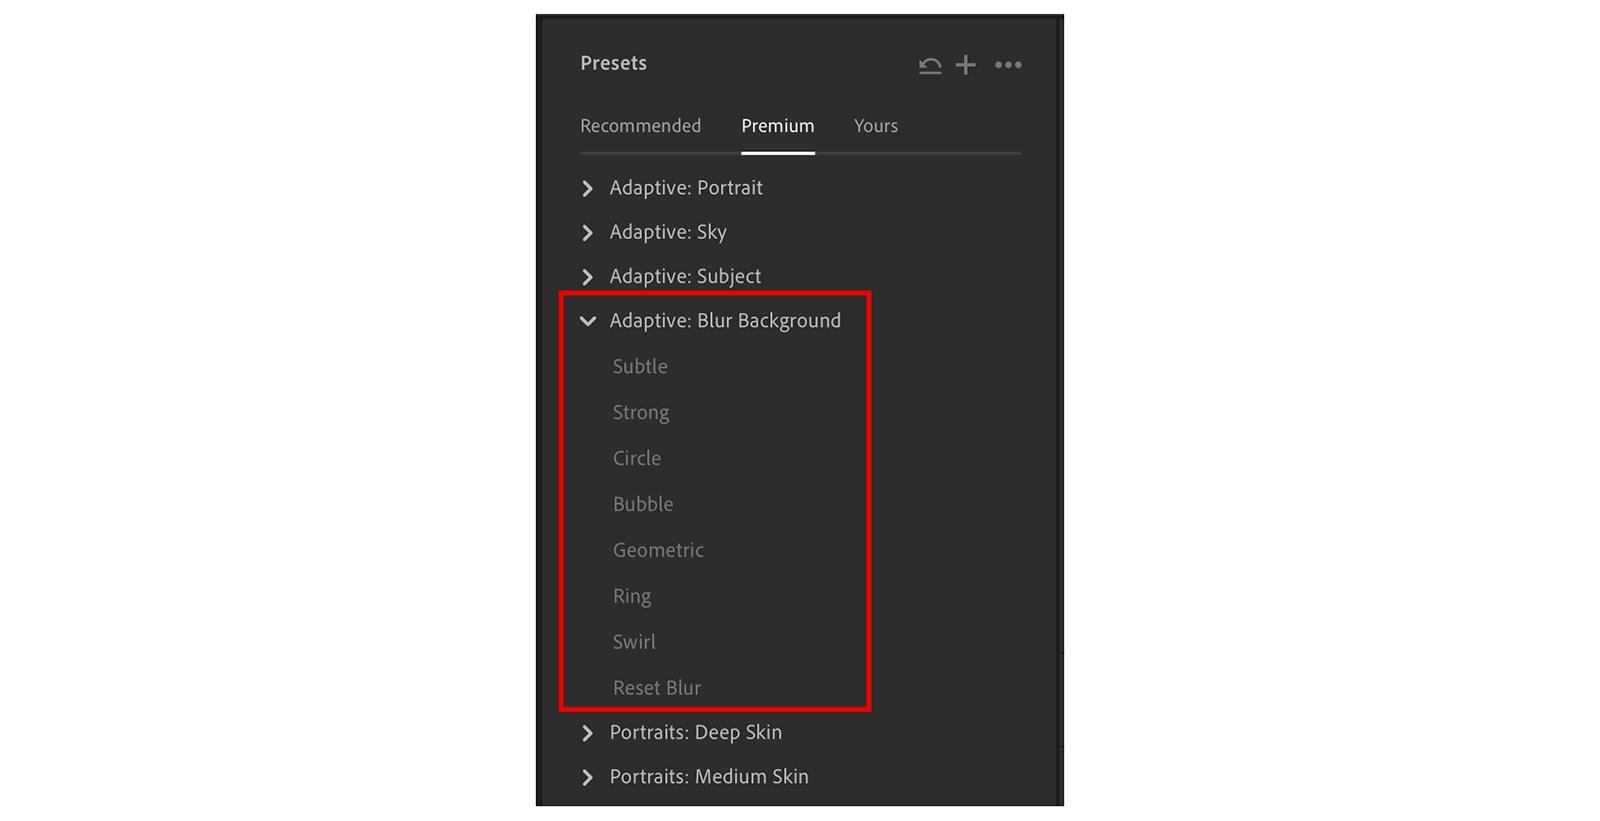
  • Support for Presets and New Adaptive Presets

  • Improvements to the subject detection and complex edges

Man in a checked shirt sitting on a black motorbike on a winding mountain road

Lens Blur

Man in a checked shirt on a black motorbike on a winding road in hilly countryside

NO Lens BLur

Lightroom mask overlay in orange and purple over a photo of a man on a motorbike

With Visualise Range turned on to show which areas of the image are in and out of focus

Lightroom Presets panel with the Adaptive: Blur Background presets highlighted in red

Lens Blur Adaptive Presets


GENERATIVE AI REMOVE

Adobe have now integrated their Adobe Firely AI as Early Access into Lightroom Desktop, Mobile, Web and Lightroom Classic for the purpose of … Removing distractions and unwanted objects from your photos

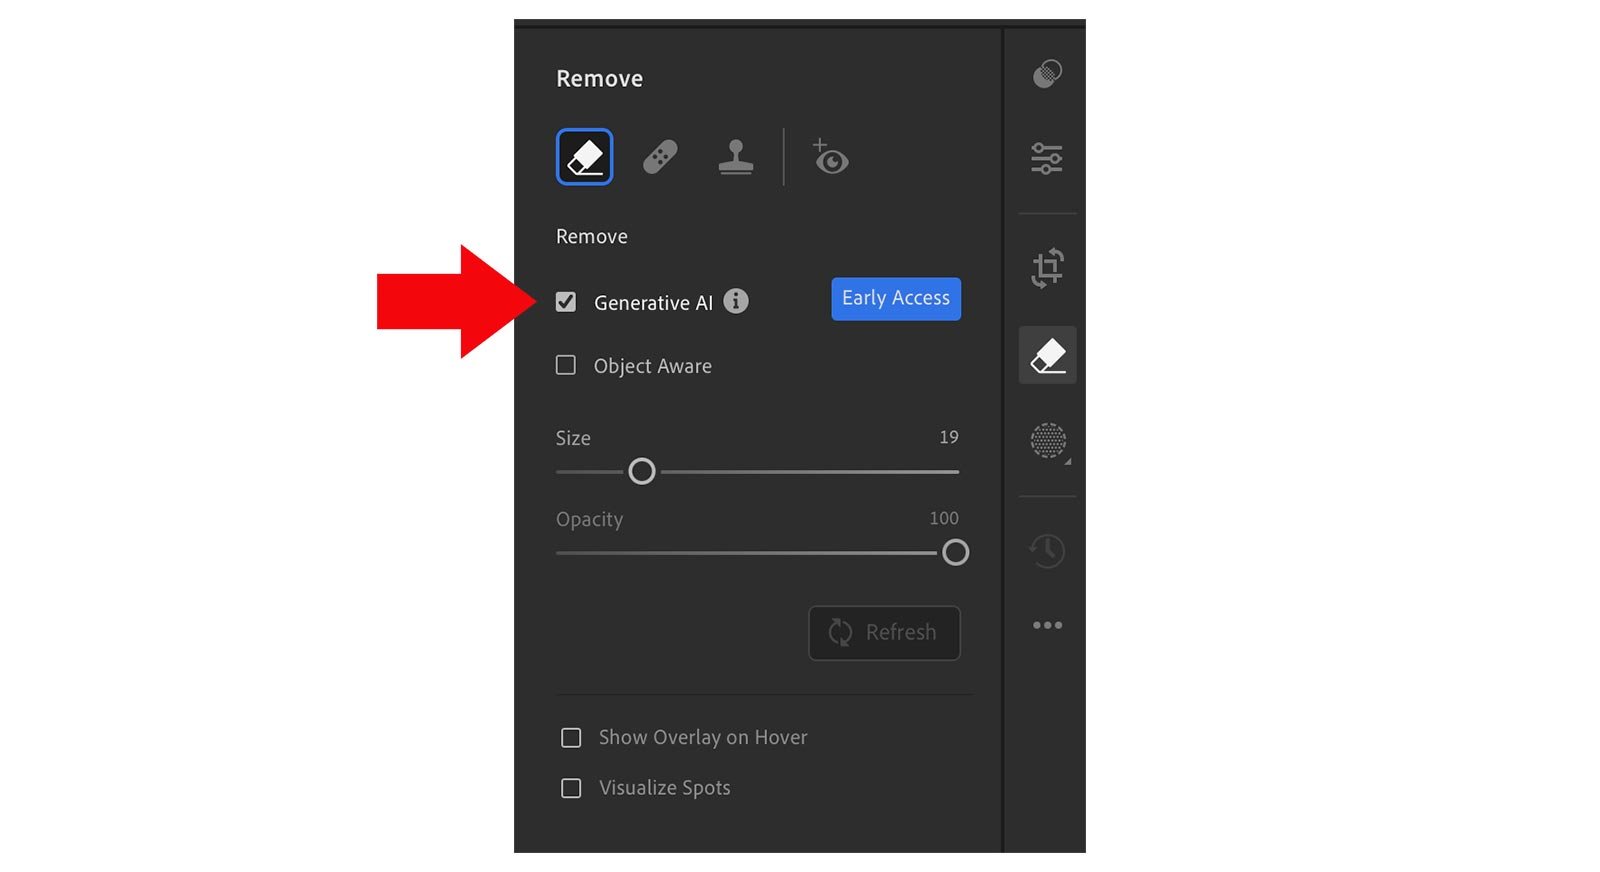
Found in the Remove section amongst the exisiting Remove Tool, Heal Tool and Clone Stamp Tool (and Red Eye Removal) you use it in conjunction with the Remove Tool by simply ticking the Generative AI checkbox …

Lightroom Remove panel with a red arrow pointing to the Generative AI option

Maximum Resolution of the ‘Removed’ area is currently 2K, so a very generous starting point considering this is to be used purely for removing unwanted distractions and objects …

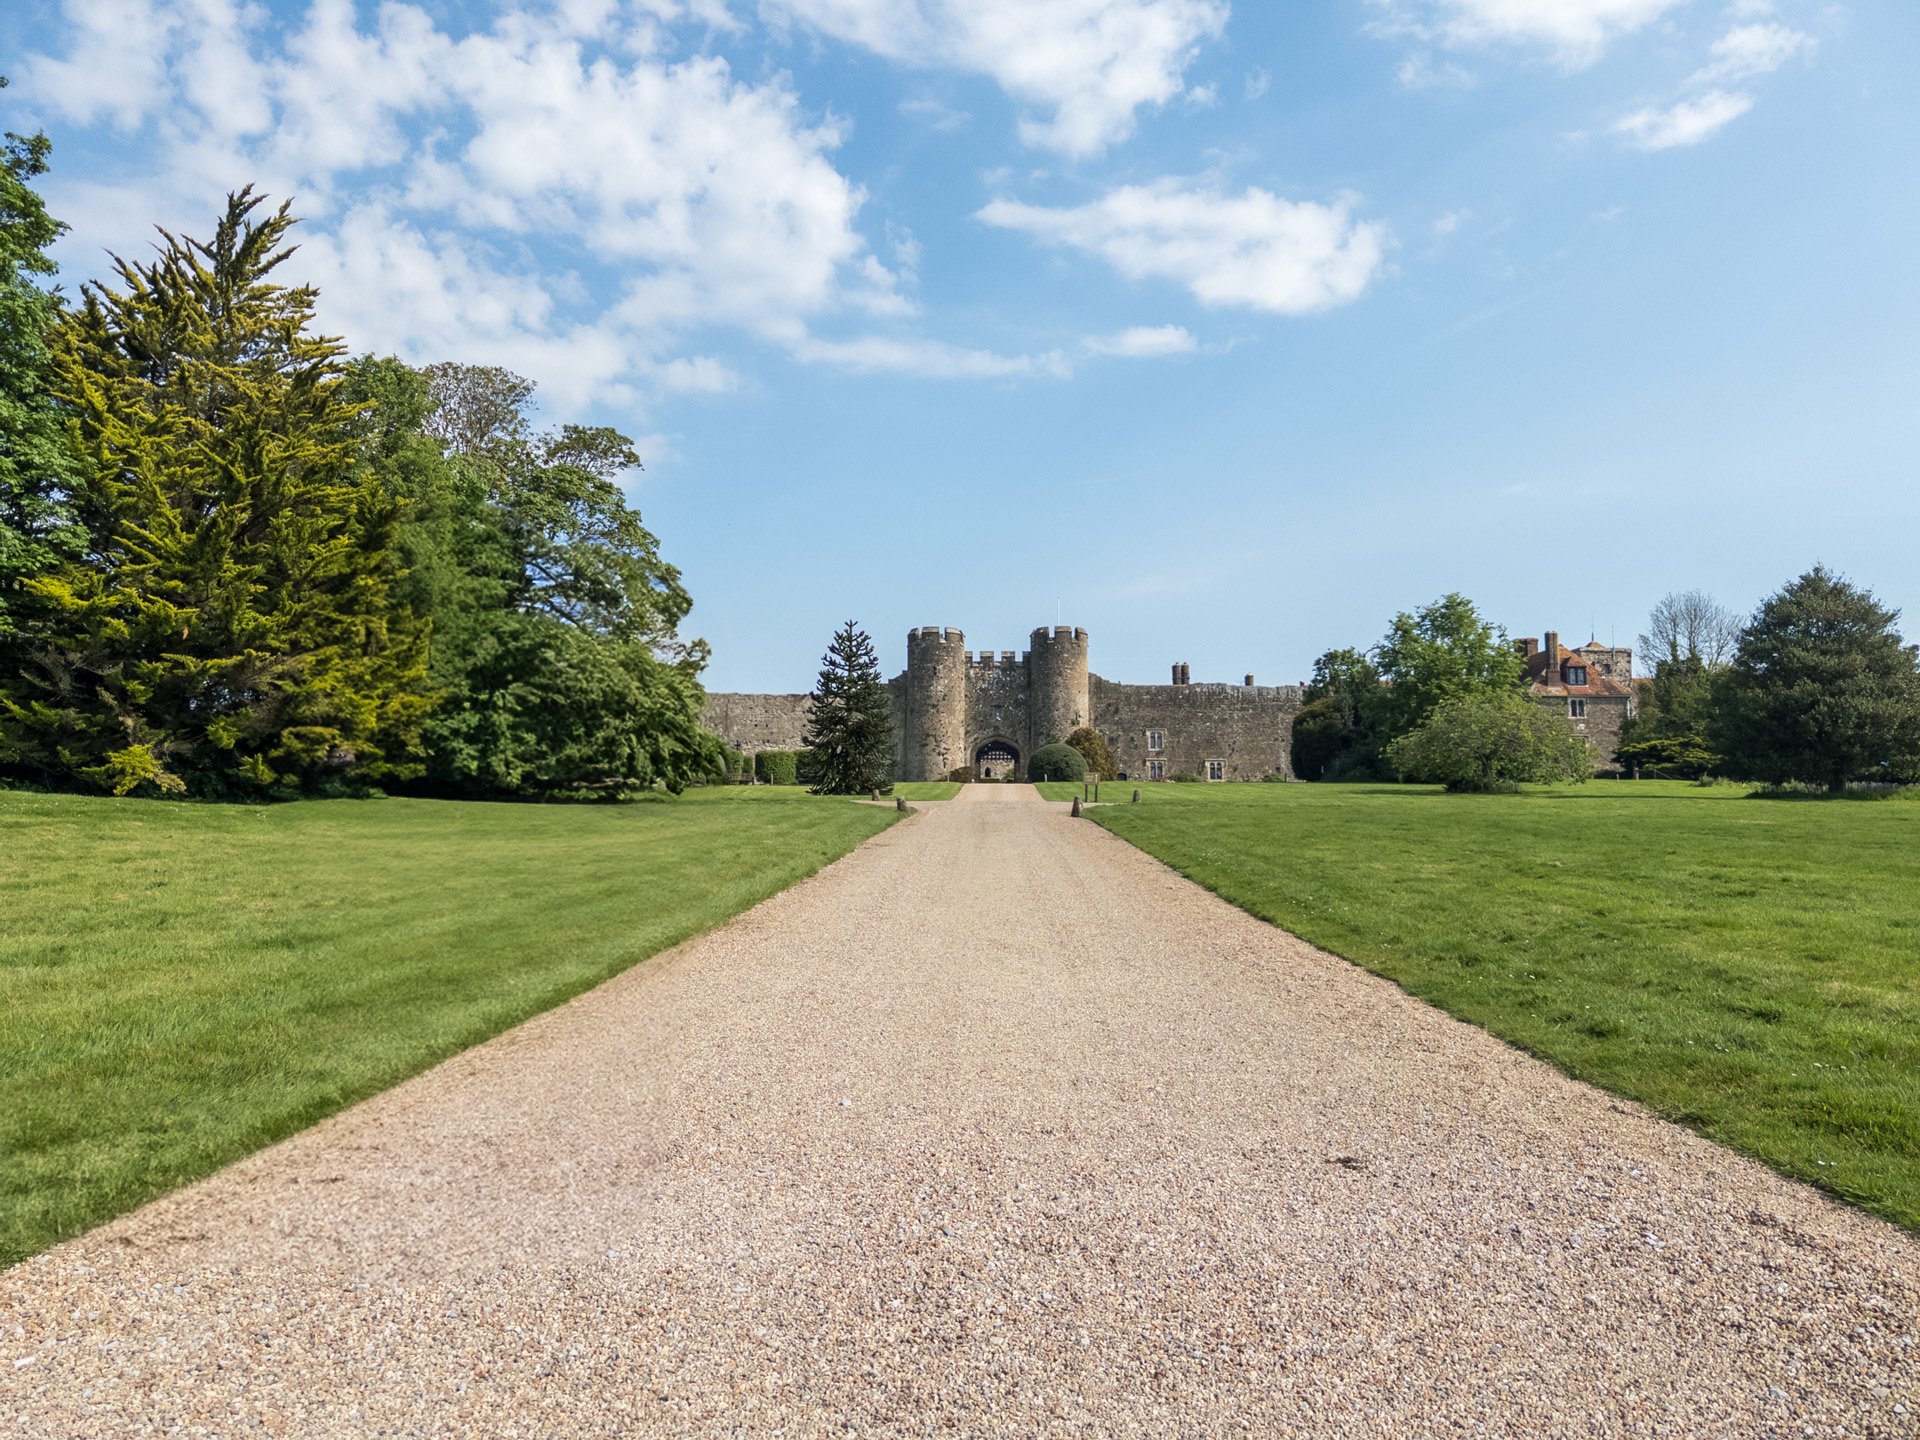
Couple standing on a gravel drive leading to a castle under a blue sky

To use Remove with Generative AI simply brush generously over whatever it is that you want to remove.

You can then Add or Subtract from this area to refine it …

Gravel drive leading to a castle with the couple painted over in red for removal

3 variations are then given and you can click through to see which you prefer OR simply Refresh to try again until you get a result that you’re happy with …

Gravel drive leading to a castle with the couple removed using Generative AI

There is also an Object Aware checkbox which Adobe state is to to be used to Preserve Background Details whereby the AI will analyse the initial selection you made and identify what it is you want to remove without having to fill in the entire selection, meaning you could just brush around the outside.

Lightroom Remove panel with a red arrow pointing to the Object Aware option

So for example in the picture below, let’s say that I want to remove the cardboard box and string that the little boy has over his shoulder …

Boy in a flat cap and tweed sitting on wooden steps with his chin in his hands beside a small case

I’ll use Generative AI Remove but also use Object Aware, so then rather brush to select the entire box I’ll just quickly brush around the outside including the string …

Same photo of a boy on steps with the case beside him outlined in white for removal

The AI then looks at what I’ve drawn around to ee if it can identify the main object, and looking at the selection it made below it did a pretty good job …

Same photo of a boy on steps with the case painted over in red for removal

I then use the Add option in the Refine section to brush over the string that was missed, so that it’s included in the remove …

Same photo of a boy on steps with the case and its shadow painted over in red

… and this is the result

Boy in a flat cap sitting on wooden steps with the case removed using Generative AI

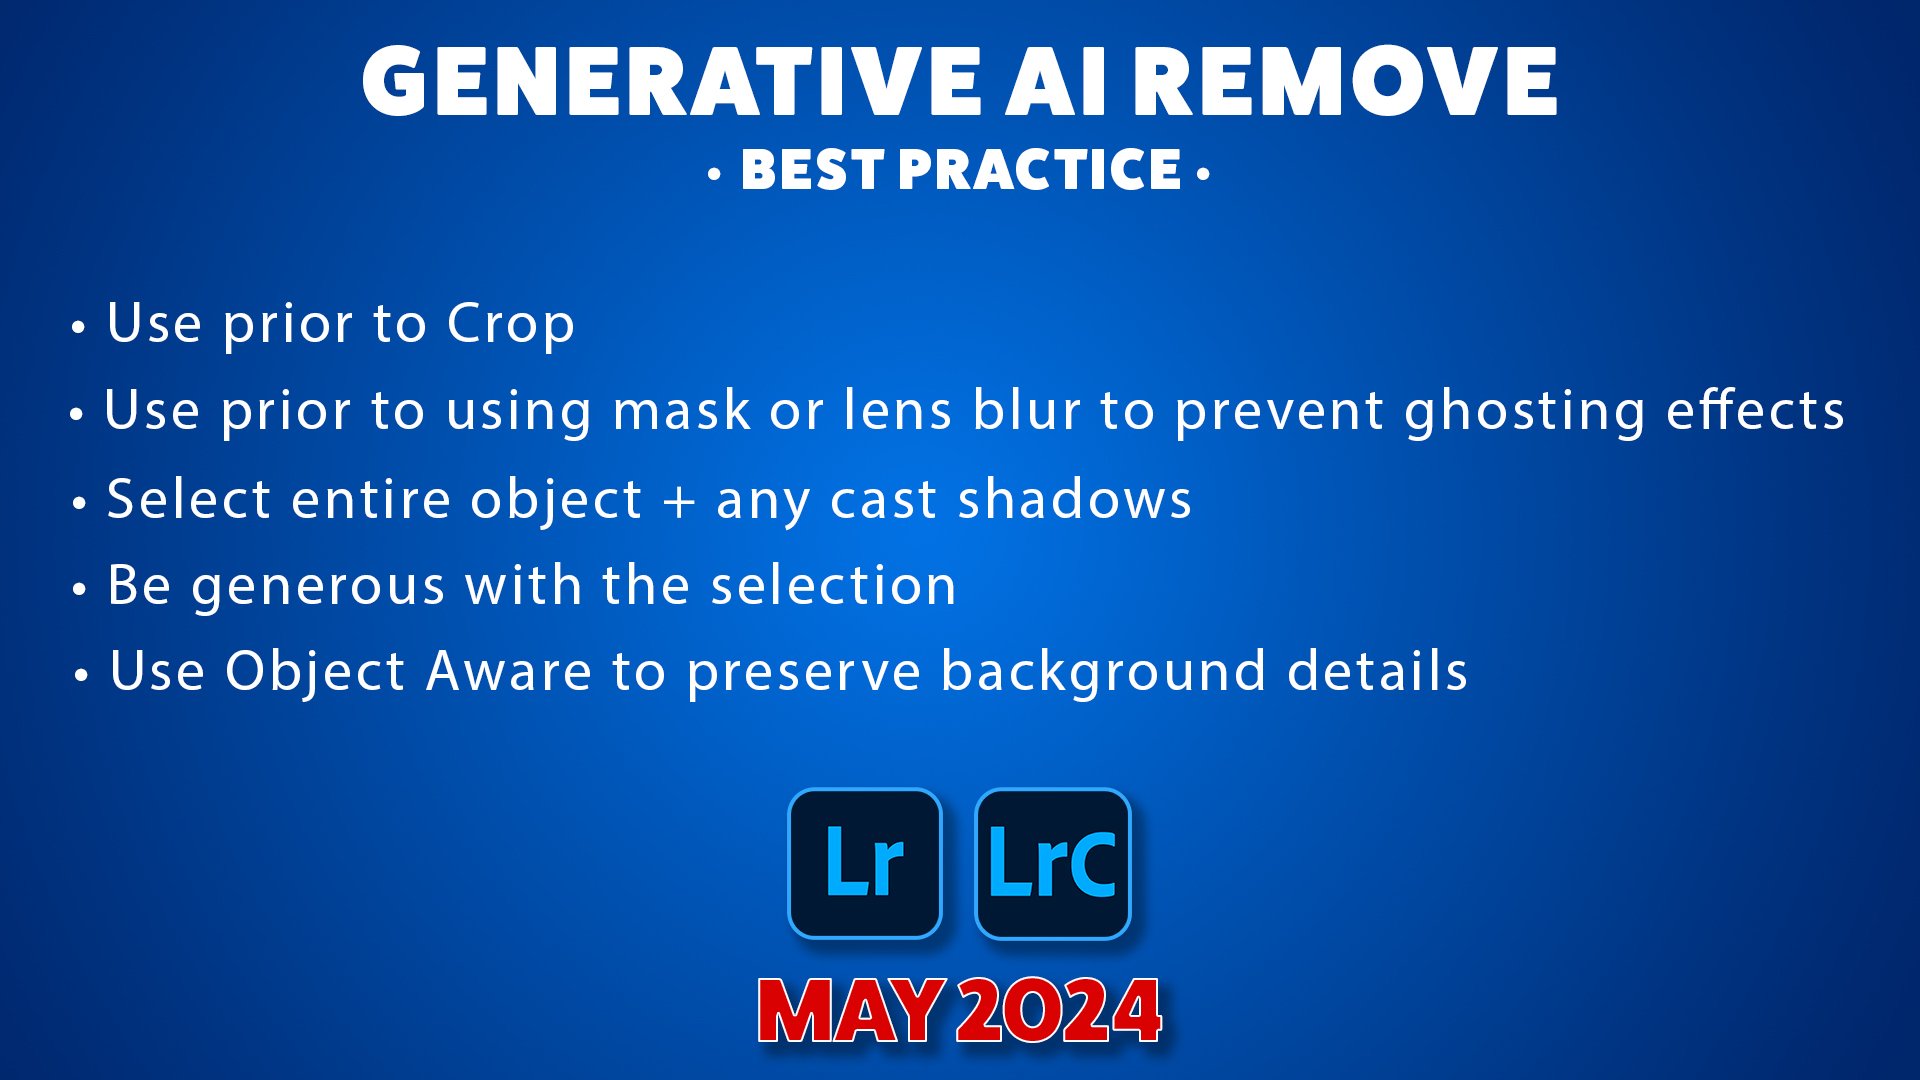
As with all features and tools there are ways to use them to produce more pleasing results, so here’s just a few for Generative AI Remove …

Generative AI Remove best practice list for Lightroom and Lightroom Classic, May 2024

There a couple of differences when using Generative AI Remove in Lightroom Desktop and Lightroom Classic and I show those in the LIVE Broadcast recording at the top of this page

Finally (for now) keep a look out for some more videos coming soon where I take a deeper dive into some of the new features, but in the mean time here’s a link to the official news release from Adobe ( LINK )

Cheers,
Glyn