behind the scenes

Photographing Harry the Potter for I am Lyme

Such a gentleman.

The delightful Harry Anderson (@harrytownmillpottery on instagram) of Town Mill Pottery, Lyme Regis, photographed for the I am Lyme project.
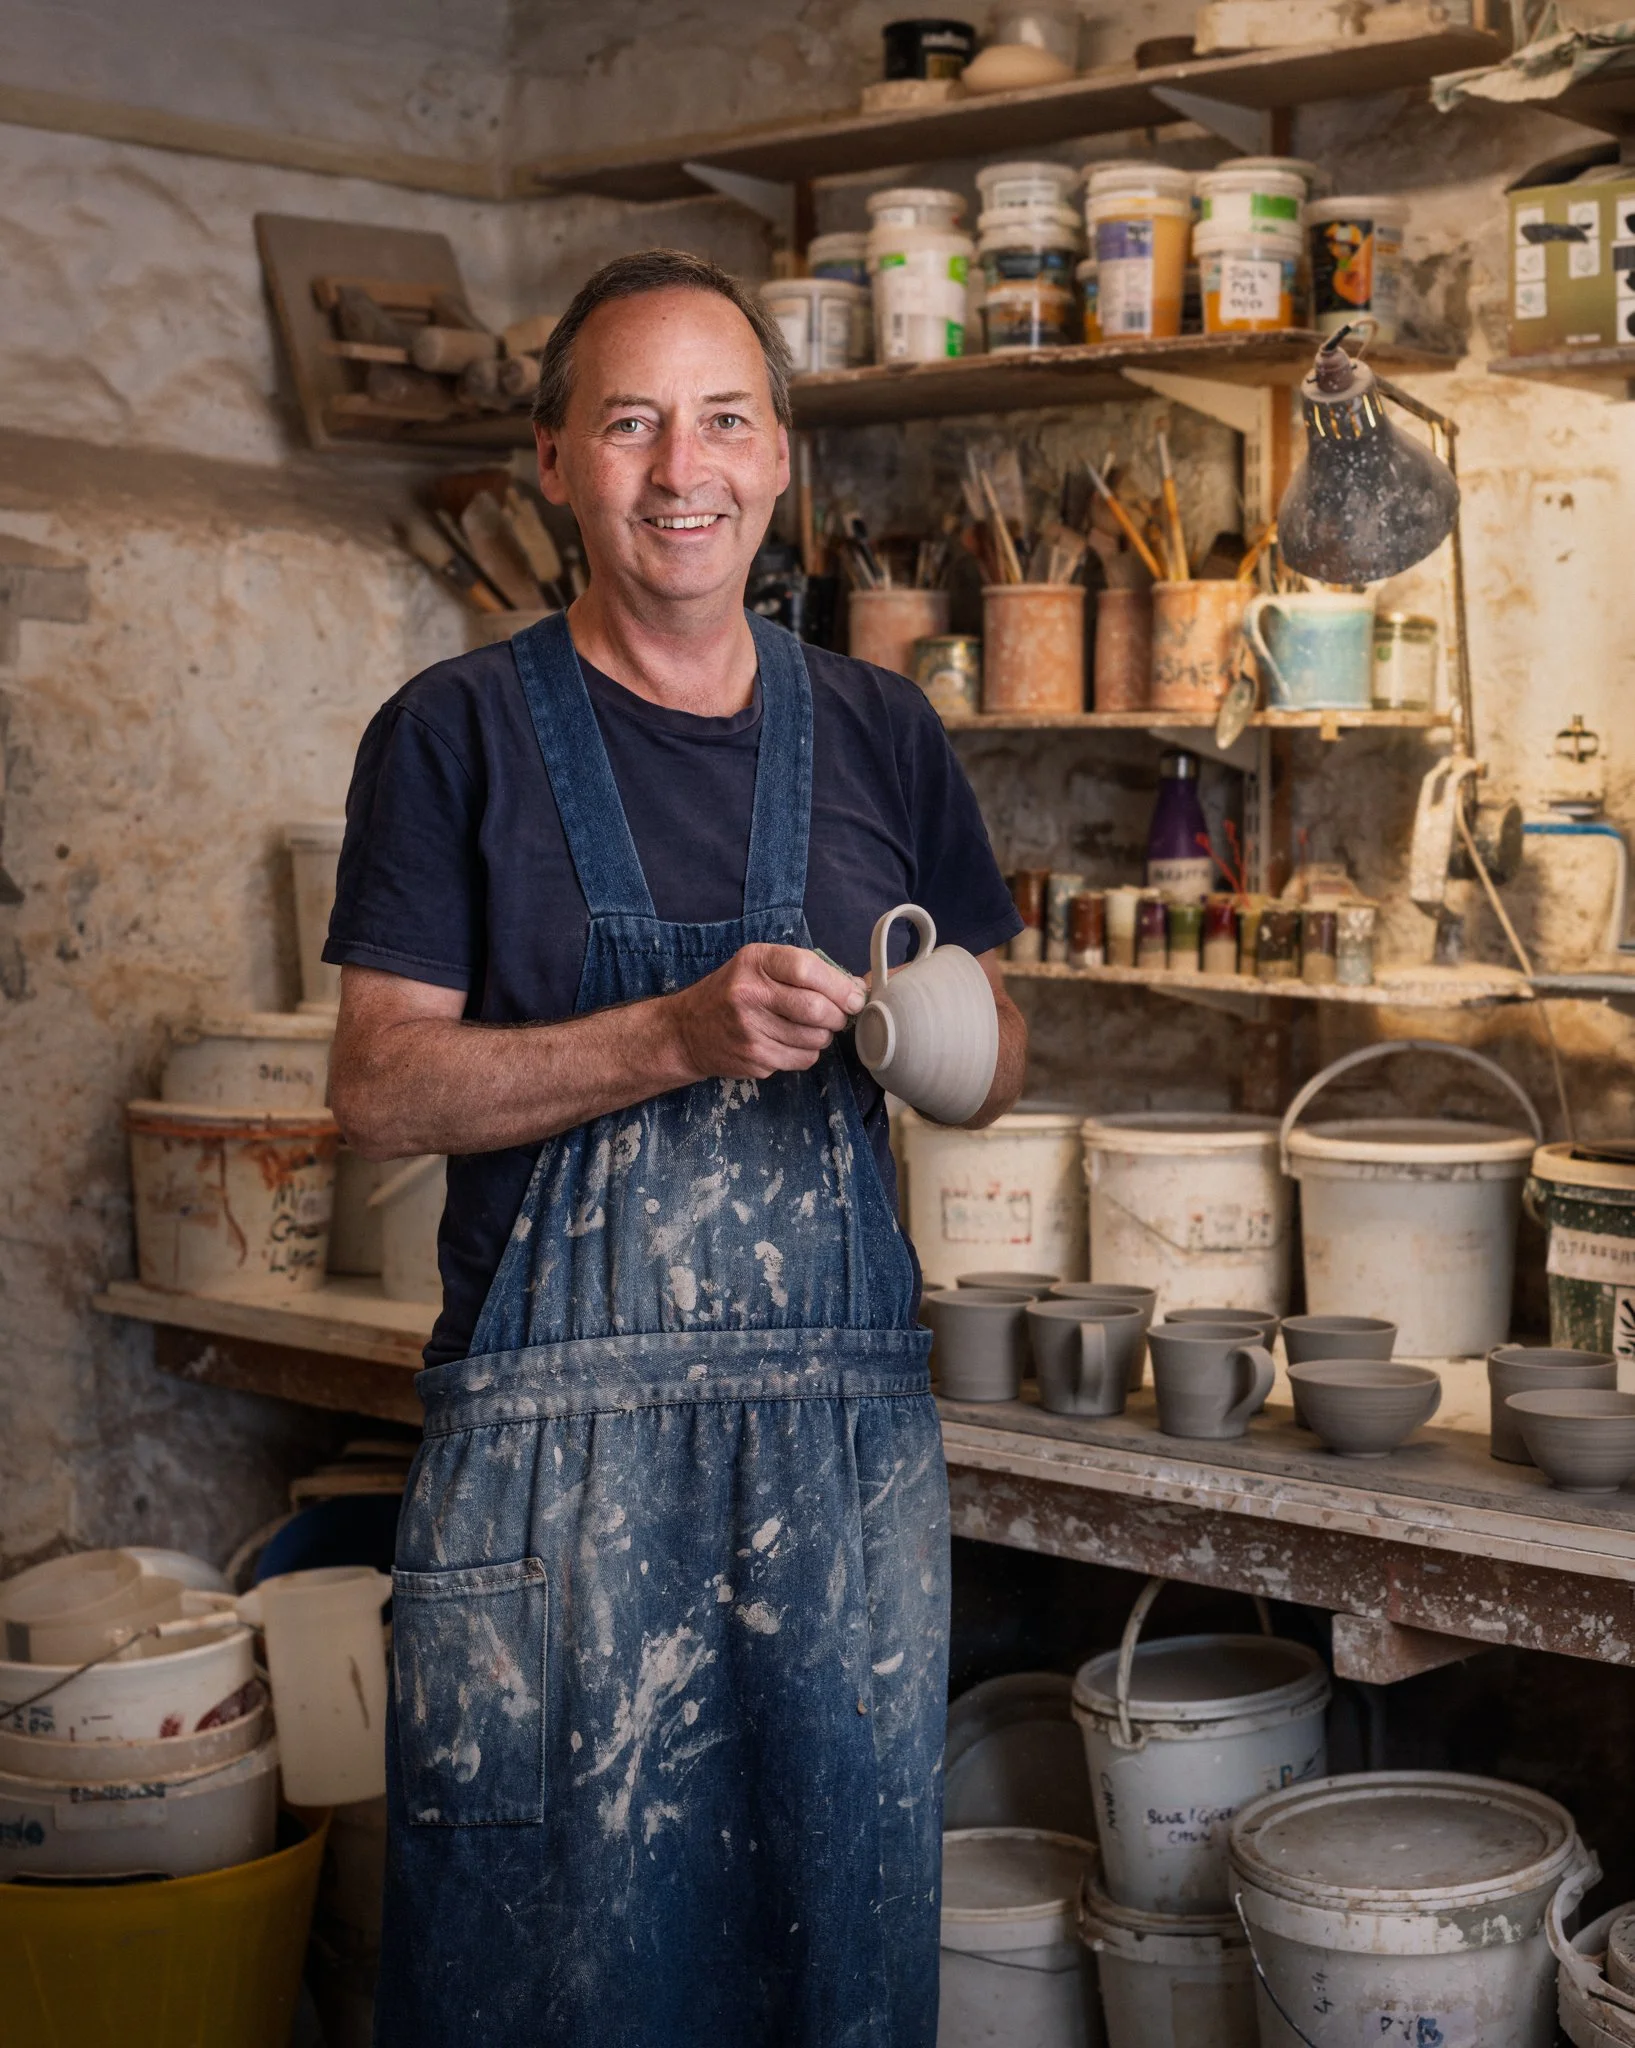
Smiling potter in a striped T-shirt and clay-spattered apron holding a jug in his pottery workshop

Harry Anderson - Town Mill Pottery, Lyme Regis

💡 The lighting

I kept things simple here, one light only.

I positioned it so the feathered edge lit Harry, giving soft light with shape through highlight and shadow.
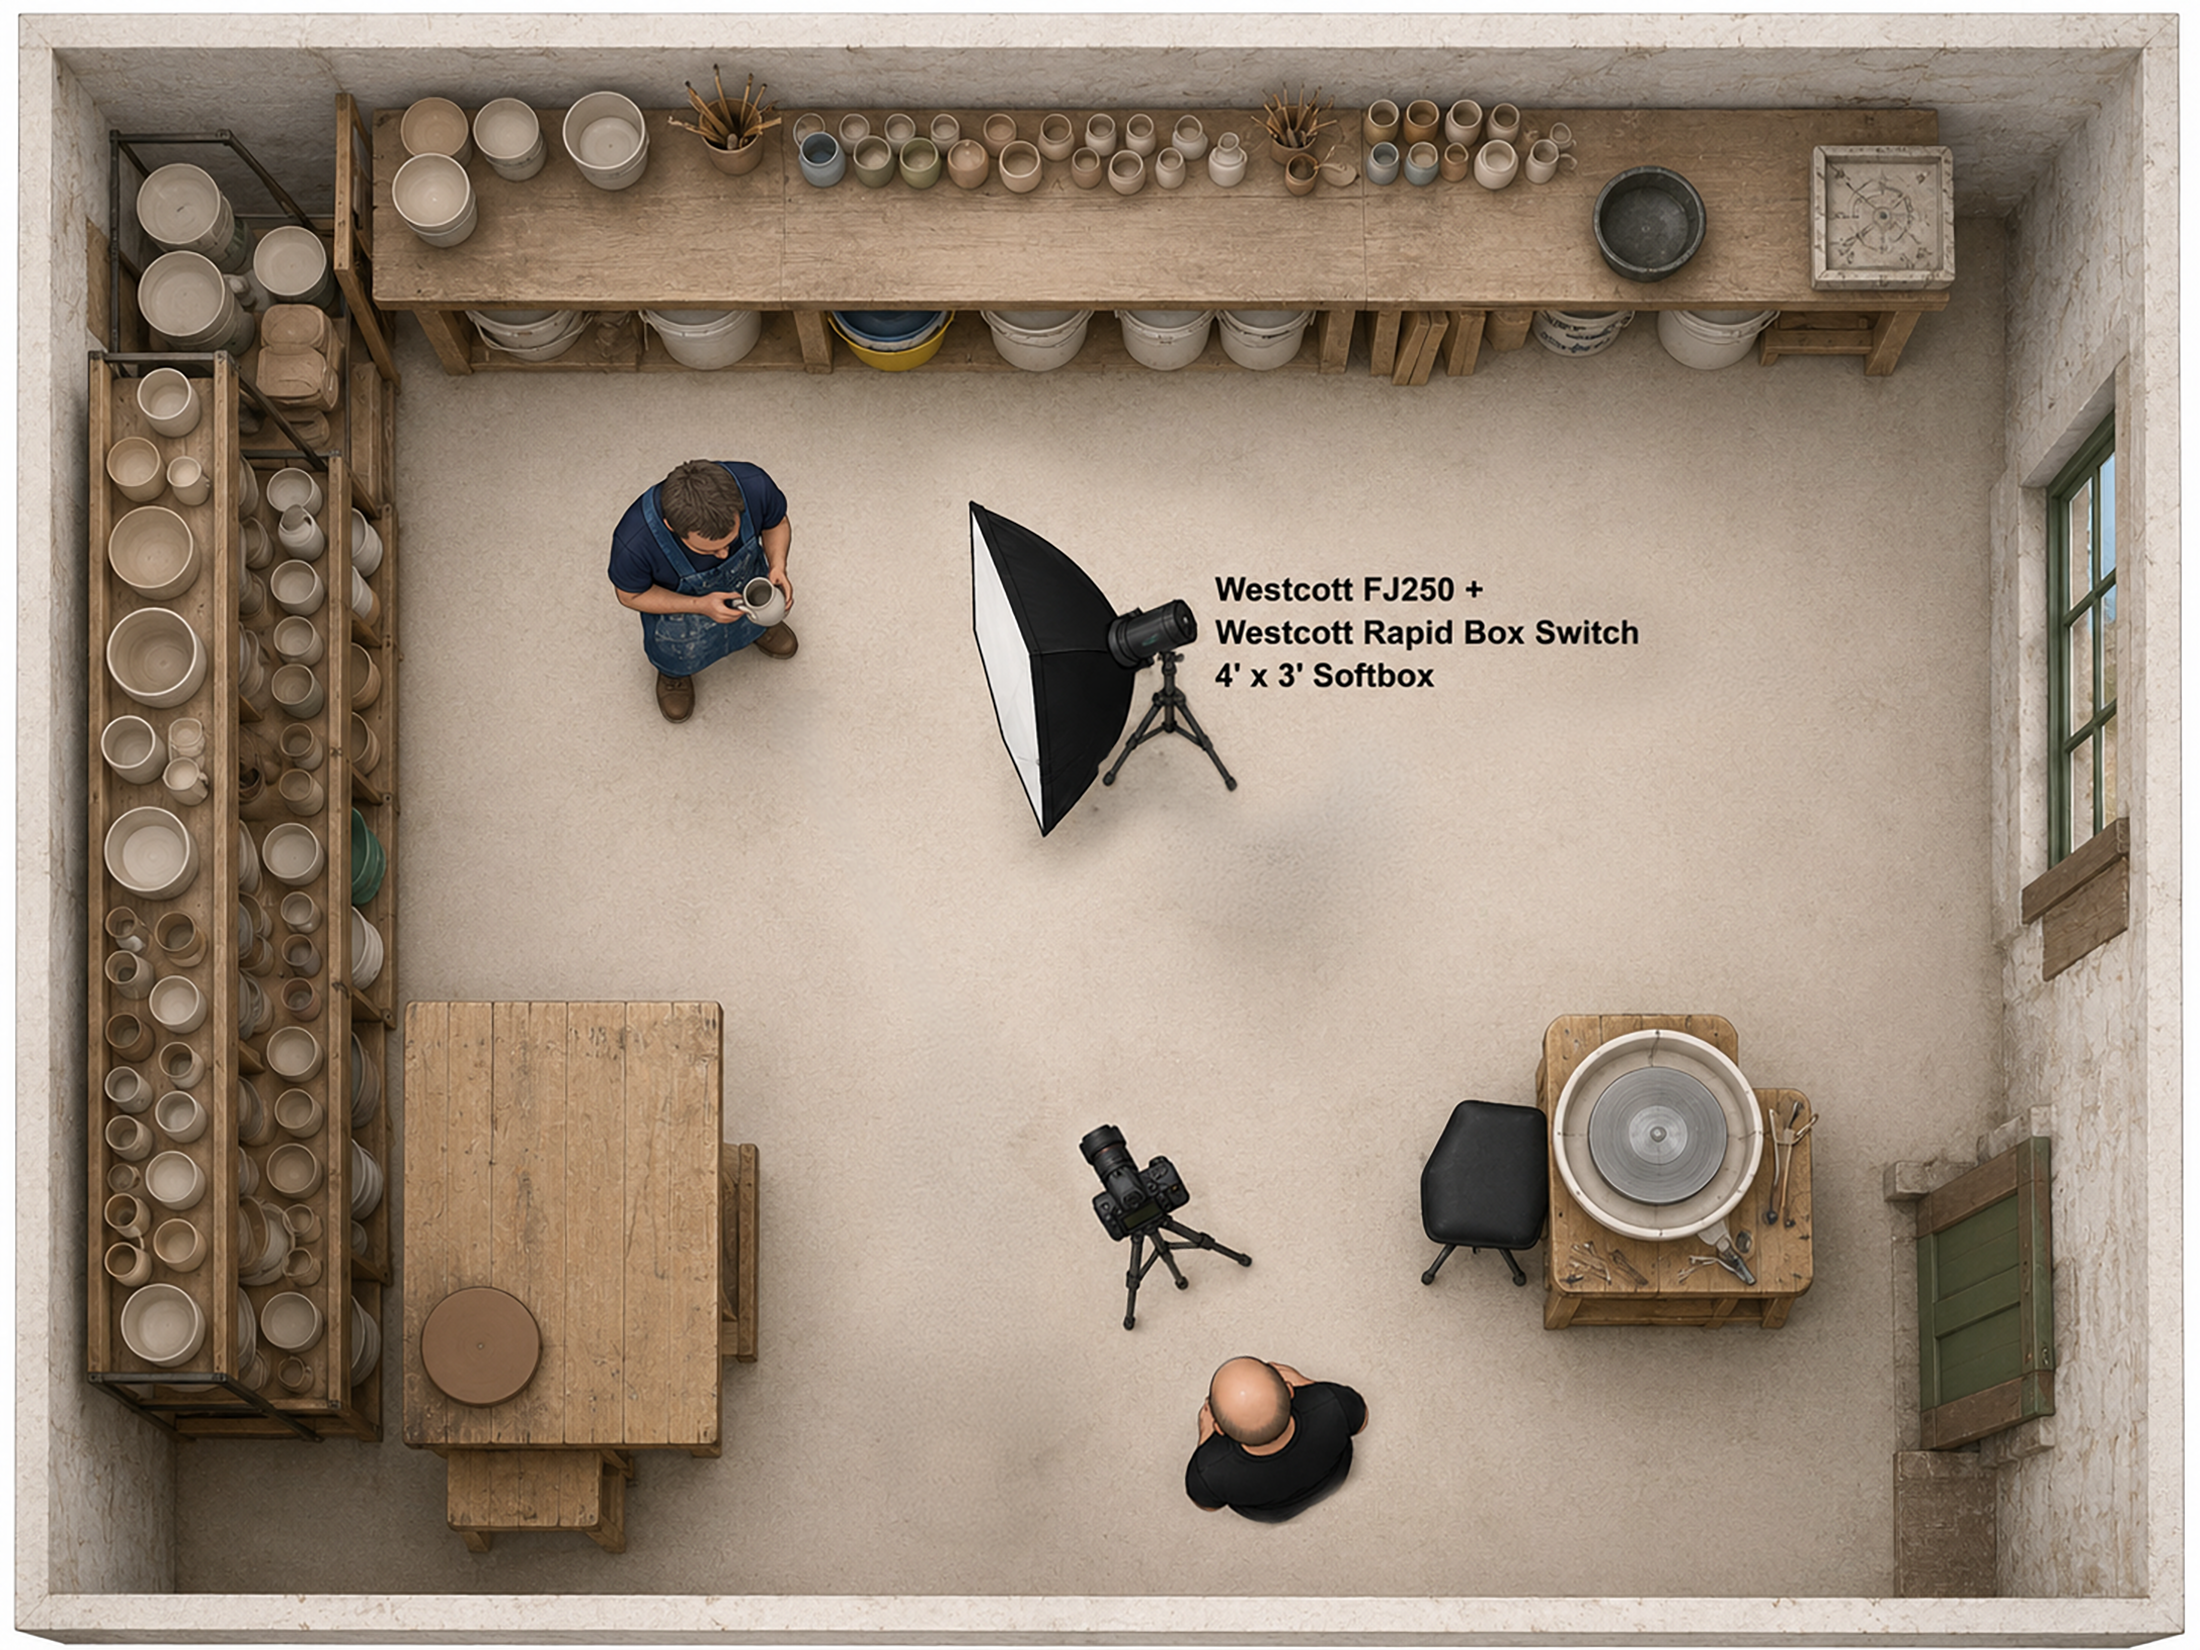
Overhead lighting diagram of a pottery workshop showing a Westcott flash and softbox, camera and wheel

This also avoided flooding the area with light and flattening the picture.

The position also matched the direction of the lamp light bouncing off the wall behind him, visible in the shot.
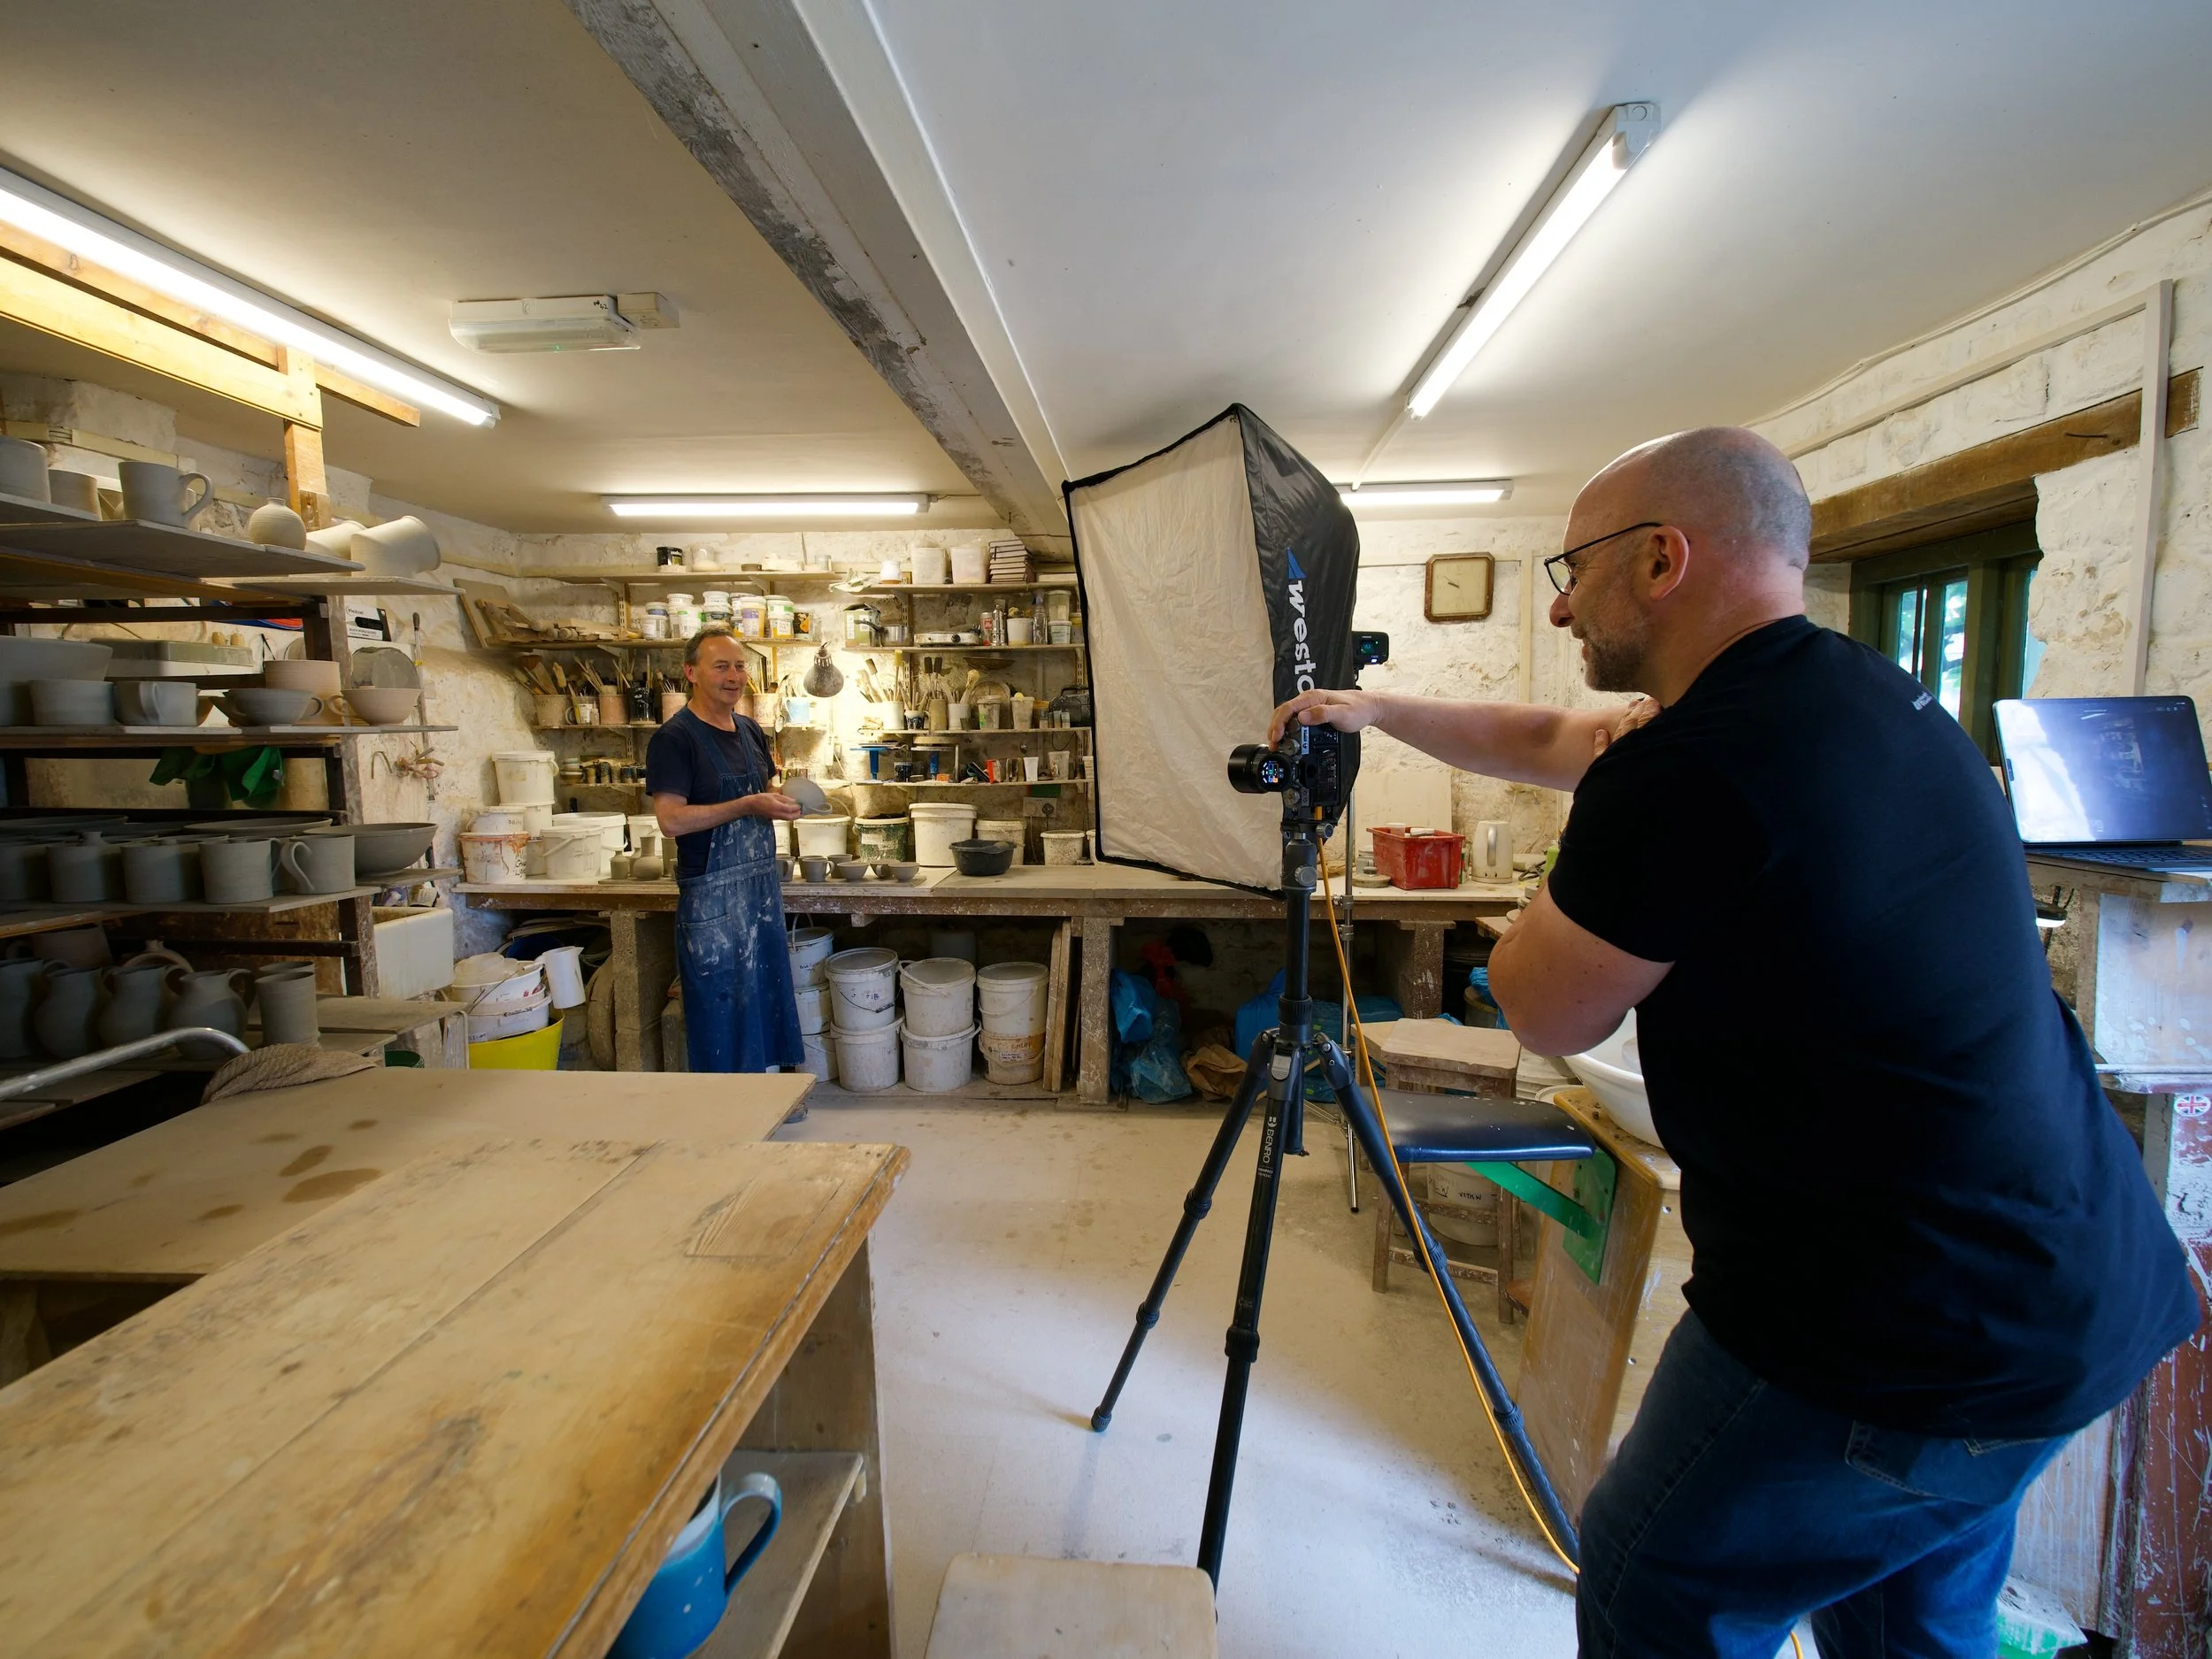
Photographer at a camera on a tripod photographing a potter in his workshop, lit by a softbox

Town Mill Pottery has such a calming feel to it, and talking with Harry is the same. I wanted the lighting to reflect that, soft and subtle, hence the 4' x 3' softbox.

❓Why the tripod

As always, the camera was on a tripod; not for sharpness, but so I could keep eye contact with Harry throughout. Hiding behind the viewfinder would have brought on that "I'm about to be photographed" feeling, and I wanted to avoid that.

I haven't looked through a viewfinder in years. I trust the kit to nail focus, and I can check it on the iPad anyway.

📷 Kit

  • Westcott FJ250 Strobe

  • Westcott 4' x 3' Rapid Box Switch Softbox

  • TTL, -1 flash compensation

  • Fuji X-T5 with 33mm f/2.8 (roughly 50mm equivalent) at f/2.8

  • Tethered into Capture One Mobile on my iPad Pro

Big thanks to my mate Steve Healy for the Behind the Scenes pictures.
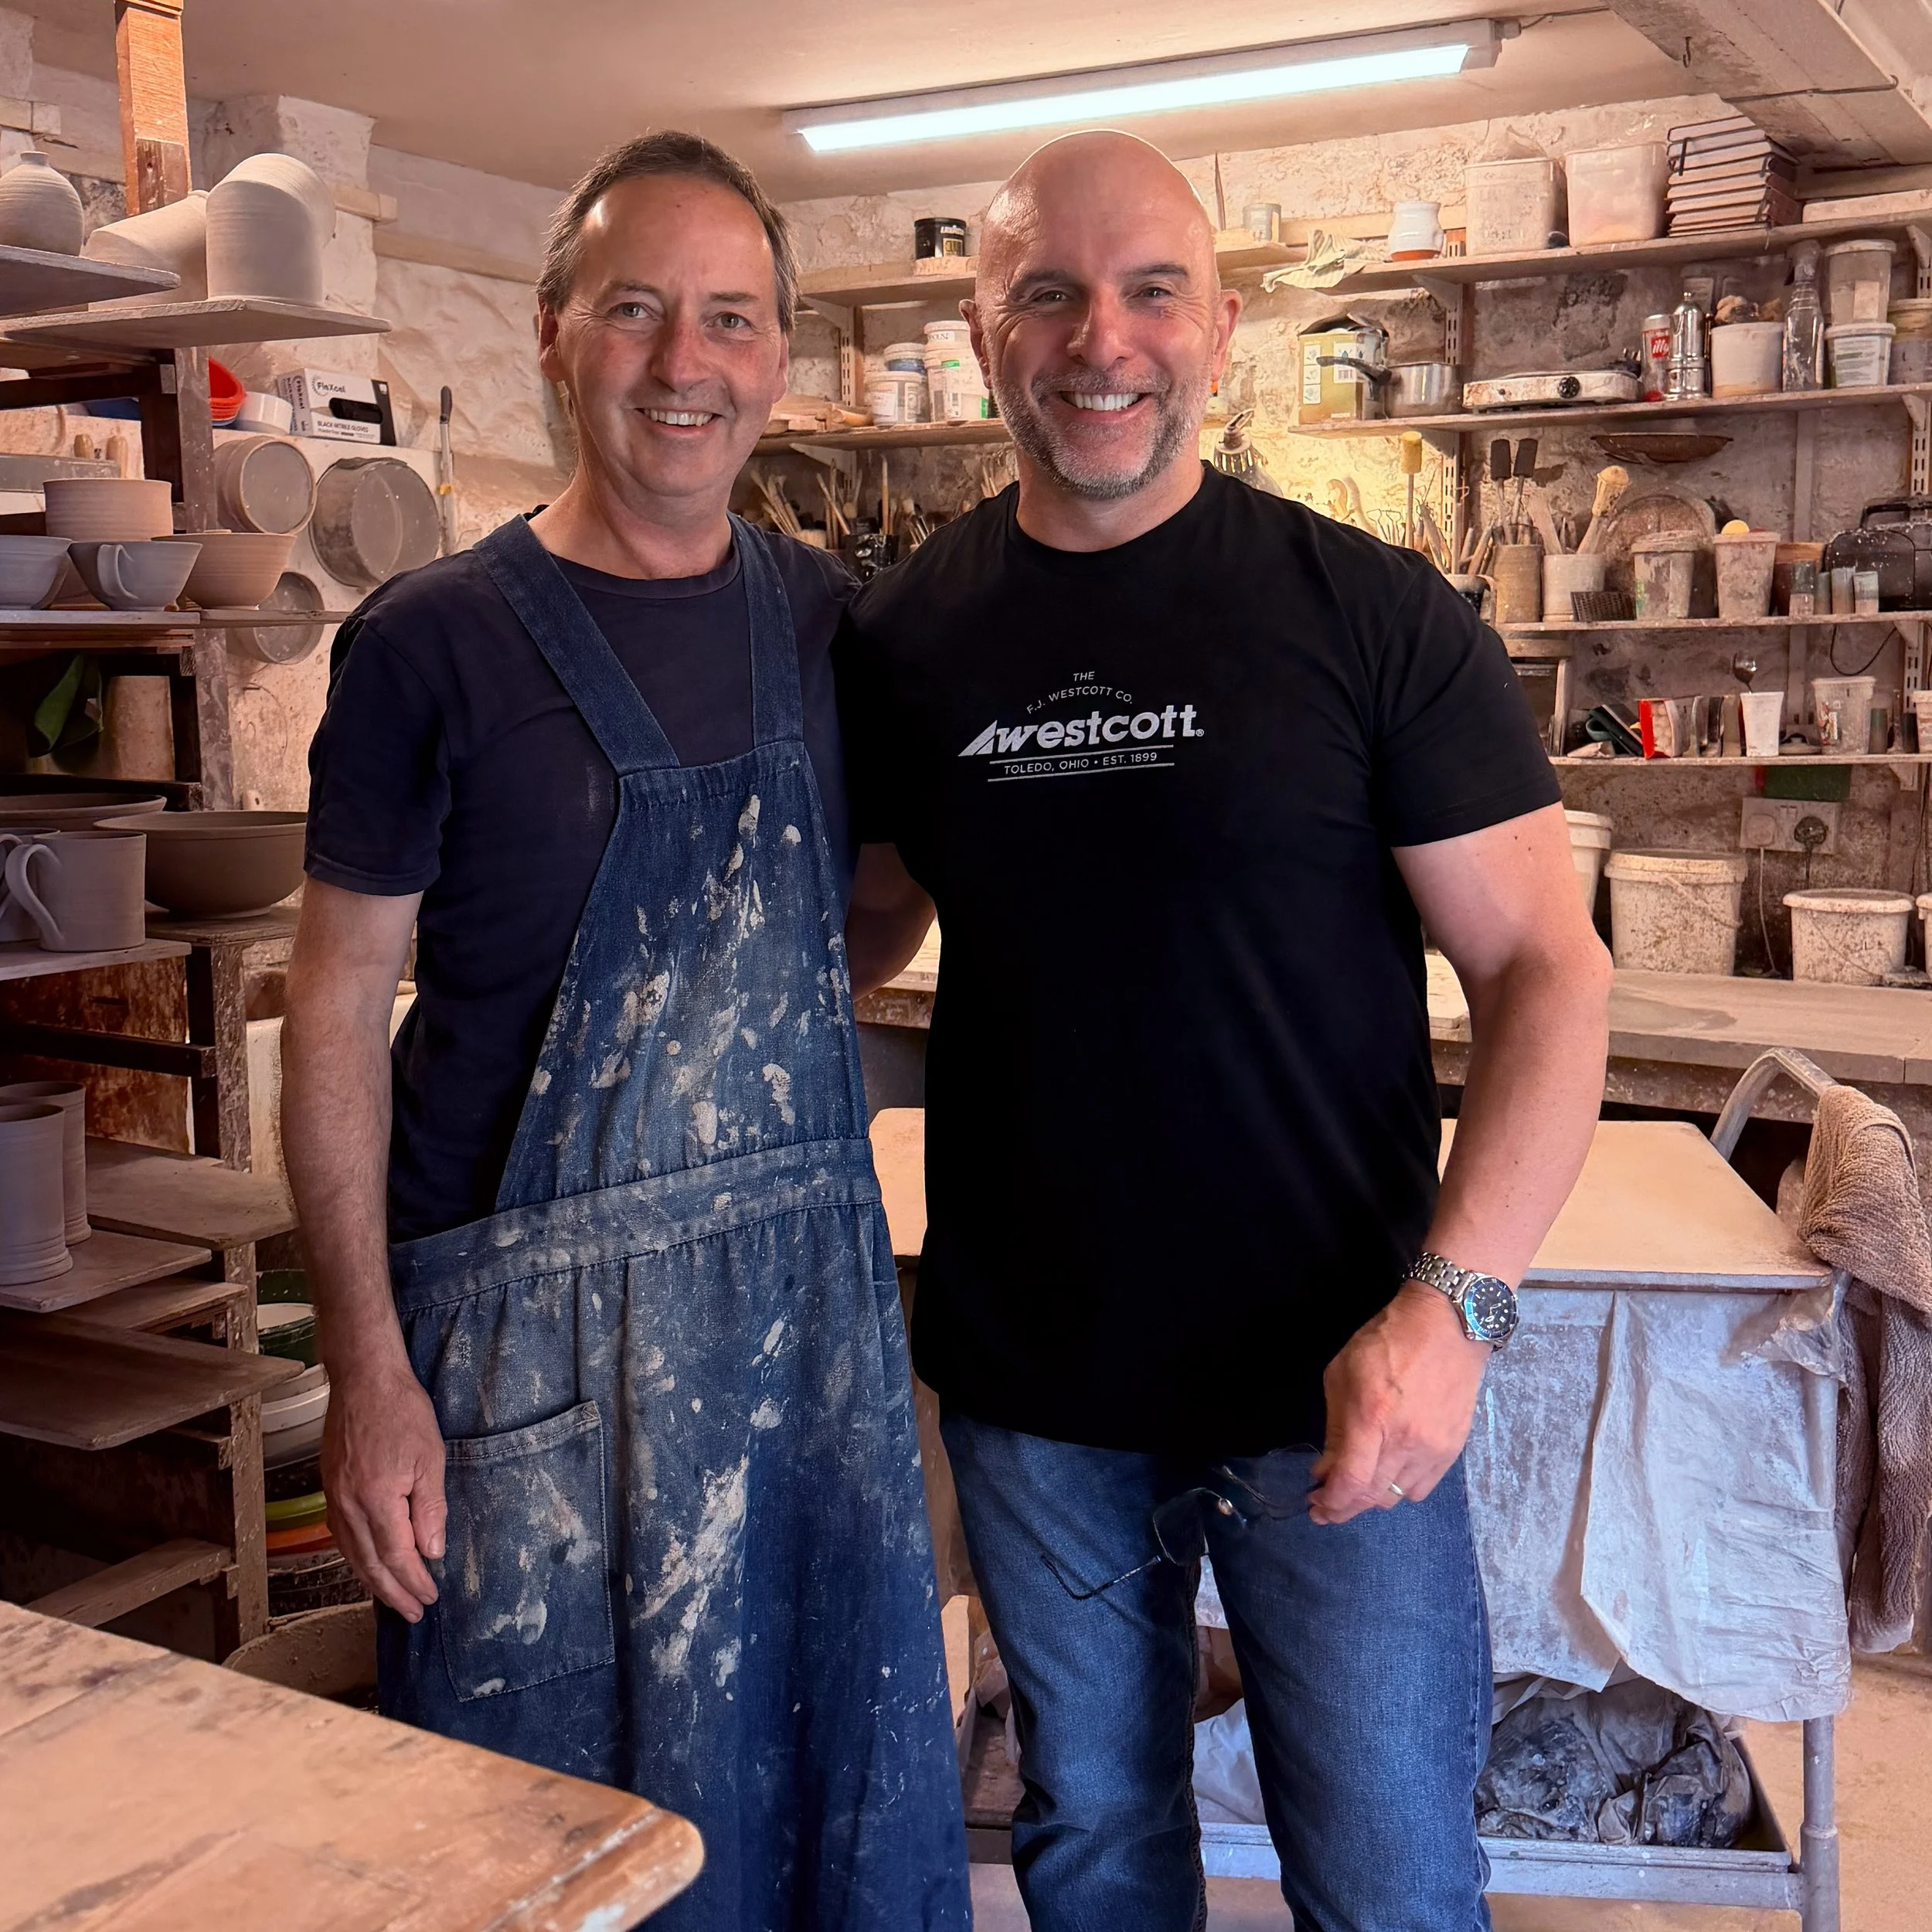
Two smiling men standing side by side in a pottery workshop, one in a clay-spattered apron

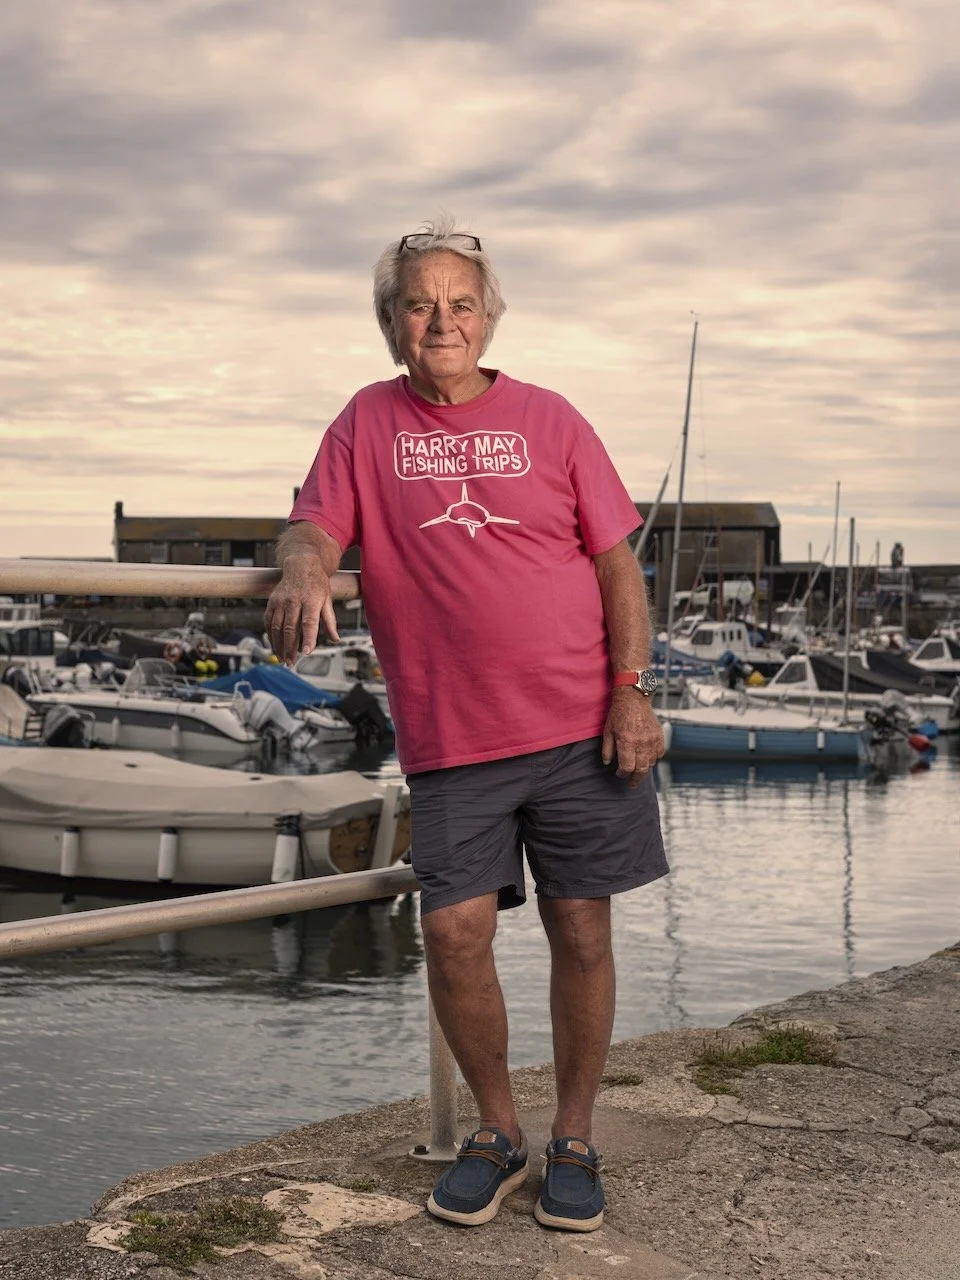
Photographing a Lyme Regis Legend - Harry May

Tuesday morning I was out early to meet up with someone that can only be described as a Legend when it comes to Lyme Regis ... Harry May.

Portrait of an older man in a pink T-shirt and shorts on a harbourside with boats behind

Just as with the Scallop Divers, for one reason or another, including Harry having knee replacement surgery, it had taken almost 2 years to get him in front of my camera, but it was so worth the wait.

What a super nice guy!

Honestly ... despite it being the first time we'd met and spoken in person, it felt like I'd known him for years. In fact, when Harry arrived, it was easily a good 20 minutes if not more that we chatted, before I started taking photographs. Sorry for keeping you waiting, Steve 😃

Keeping It Simple, Keeping It Classic

The brief for this one, set by me, for me, was simple: keep it classic.

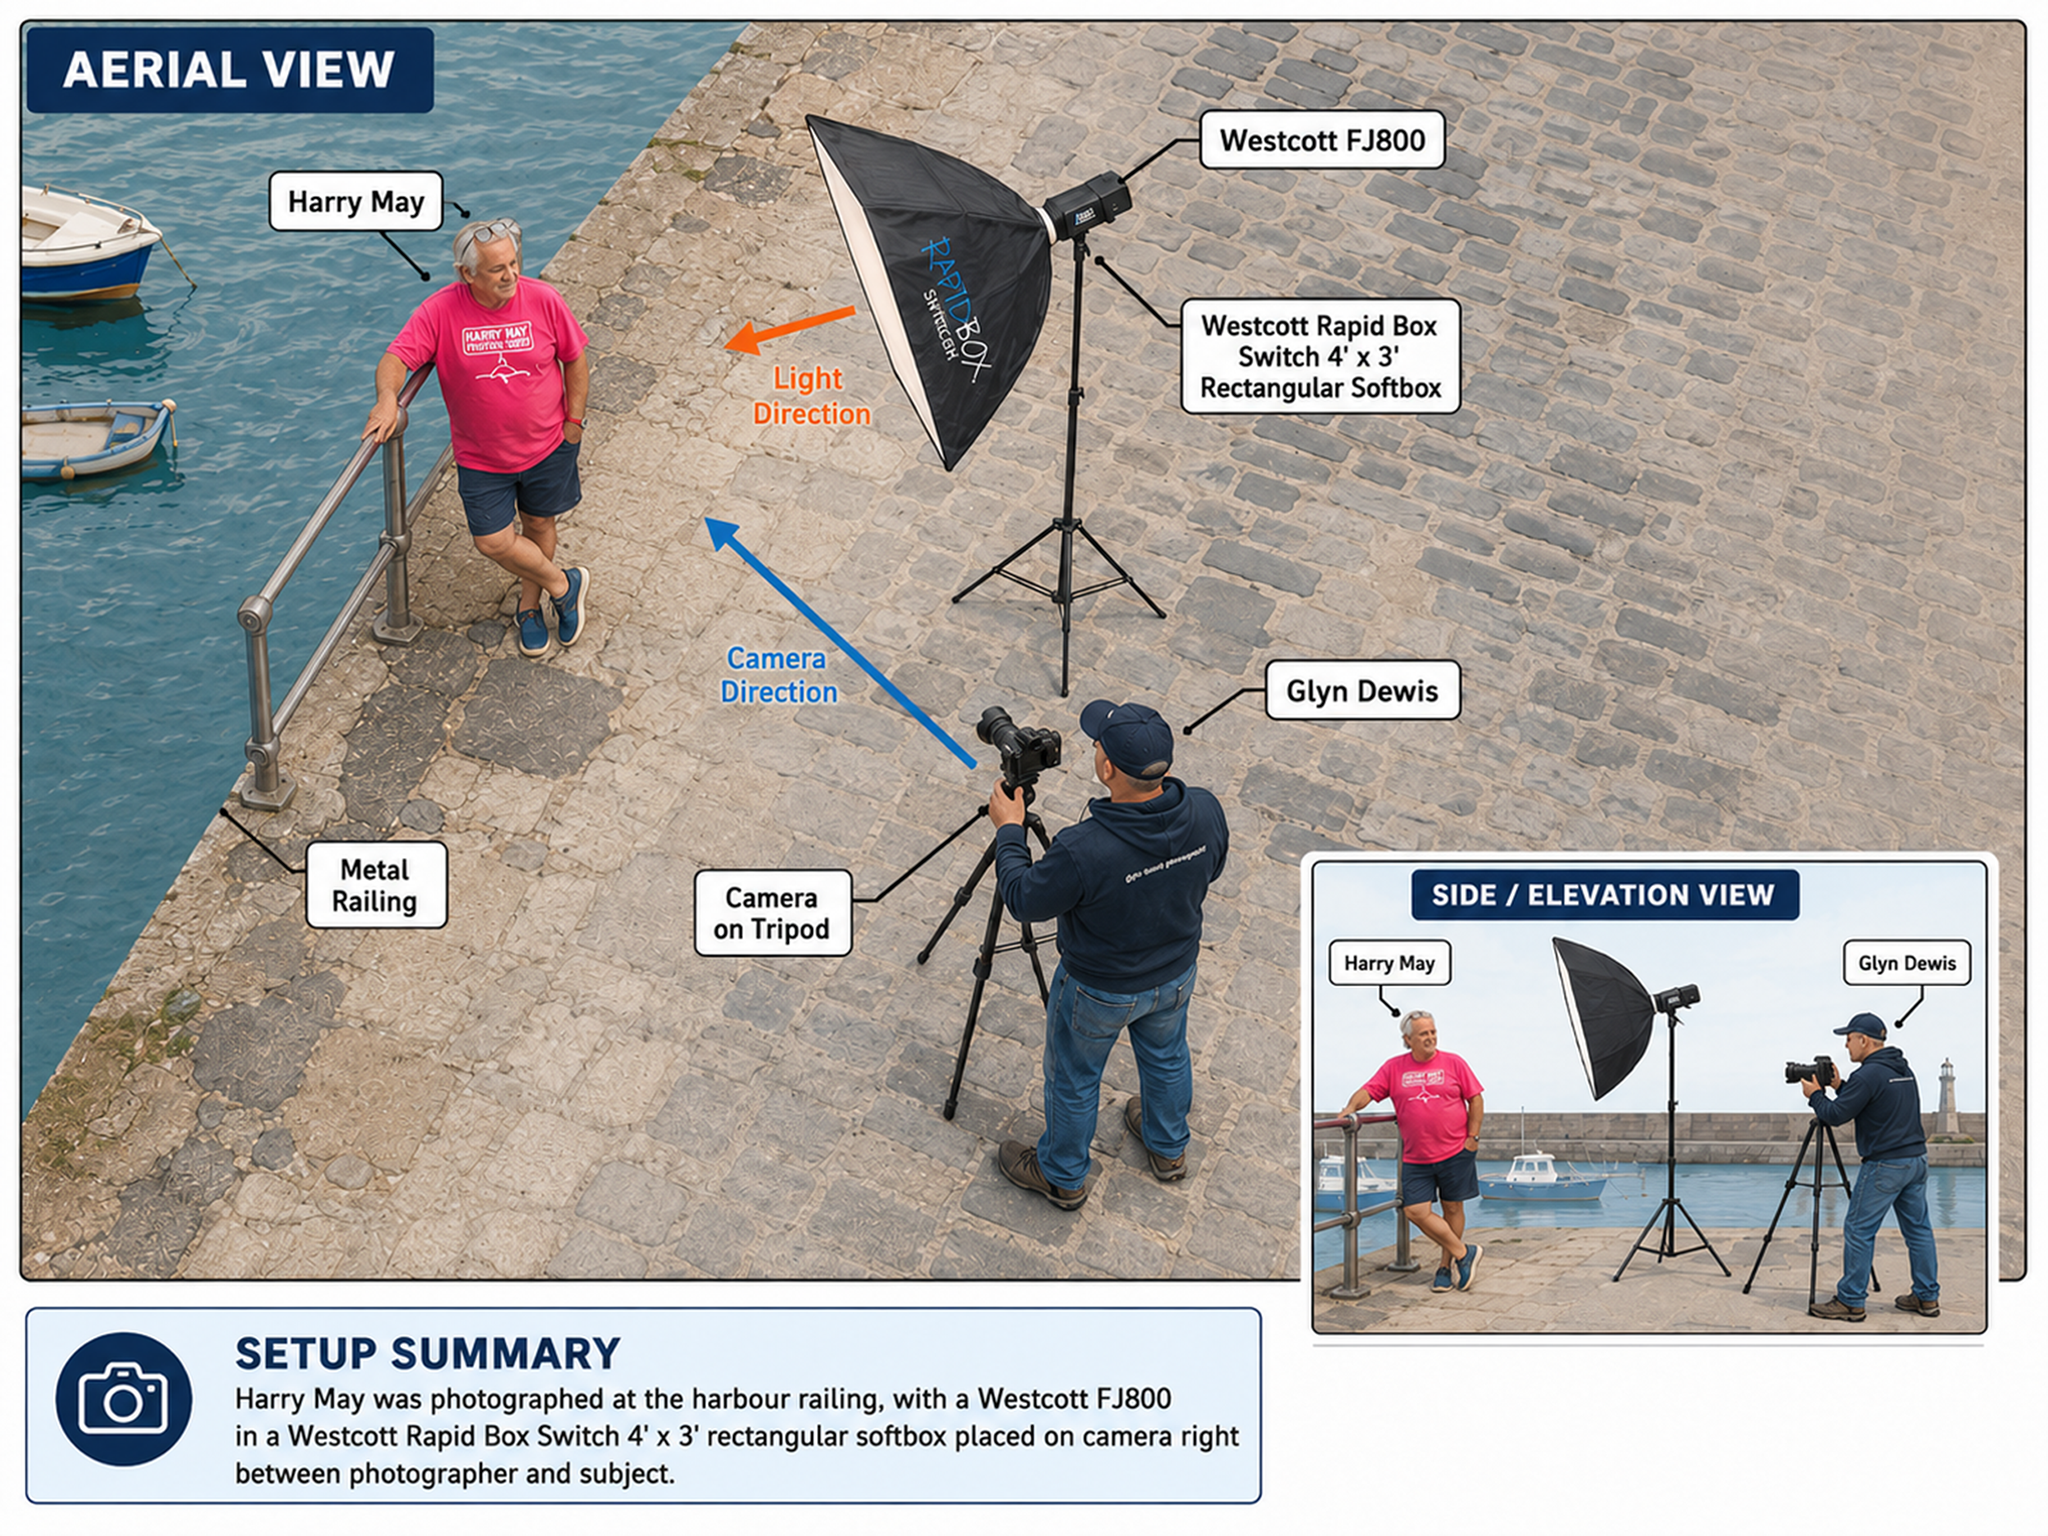
It was a glorious sunny morning with just enough cloud cover to give beautifully soft natural light. To match that softness, I used my 4x3ft Westcott Softbox, positioned about one and a half arm's lengths from Harry.

Annotated aerial view of a harbourside portrait setup showing the subject, Westcott flash, softbox and camera

I shot at f/4.0 to soften the background slightly. Rather than using High Speed Sync (HSS) to let me shoot at a wide aperture in bright light, I opted for a 4-stop Neutral Density filter instead. The light was consistent and I'd had everything dialled in well before Harry arrived, so there was no rush and no need for the extra flexibility HSS gives you; it's simply a different way of solving the same problem: too much ambient light for the aperture you want.

• Did you see my High Speed Sync versus Neutral Density Filters Infographic ? ( LINK )

My Westcott FJ800 strobe handled it perfectly, run in TTL with +1 stop of compensation added.

Natural Direction

If you've ever been to Lyme Regis, there's a good chance you've spotted Harry leaning on the railing further down by his Fishing Trips board. So, having him lean the same way where we were shooting felt completely natural to him. Direction was barely needed, just "lean yourself on there and get comfy."

That's really the whole trick with portraits like this: find the pose someone already does in real life, and let them do it.

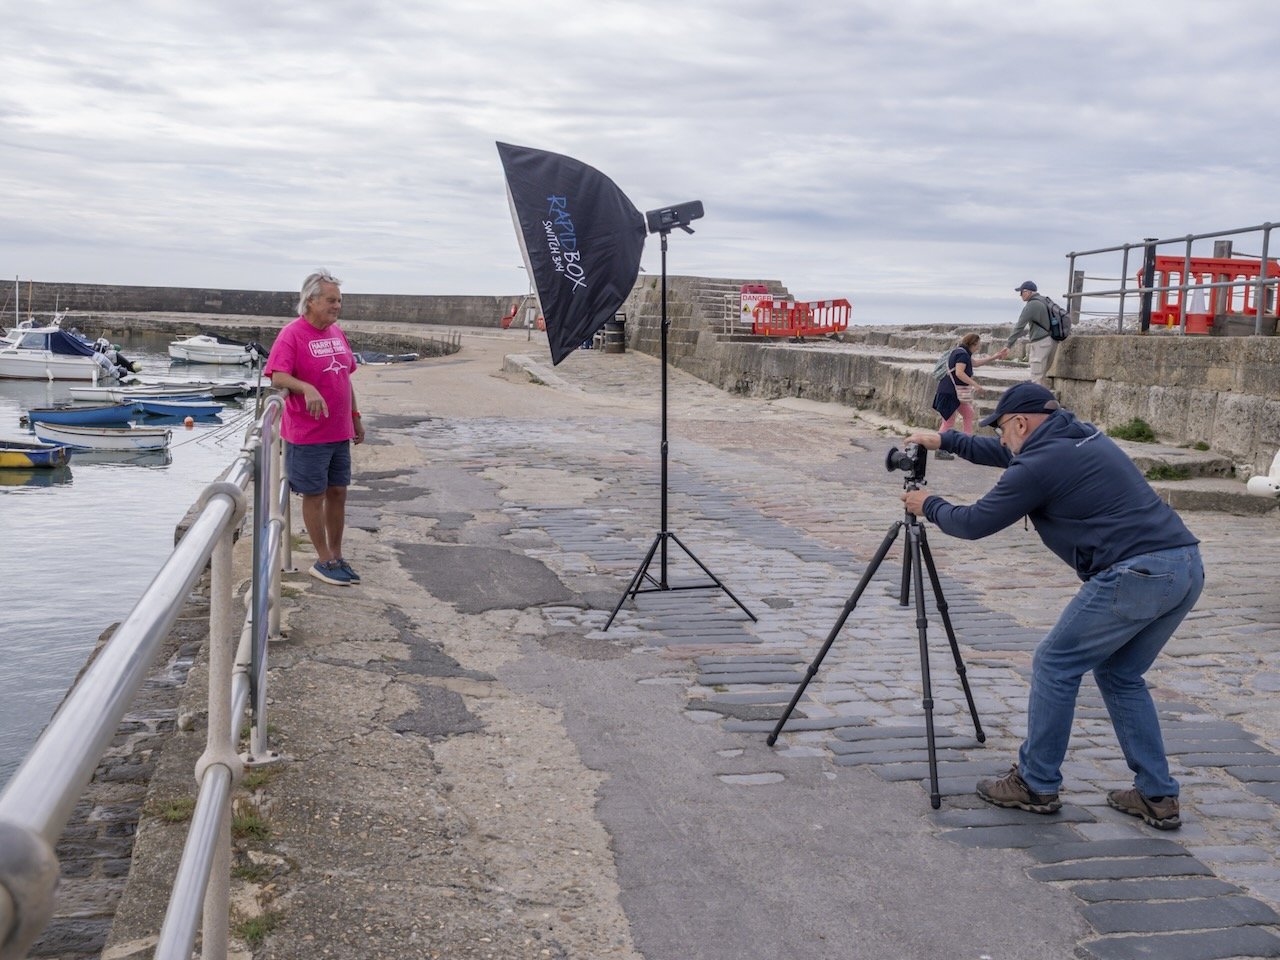
Photographer at a camera on a tripod photographing a man in pink by a harbour railing, lit by a softbox

The Stunt Double

Before Harry arrived, my mate Steve Healy stepped in as stunt double, so I could get the lighting and exposure dialled in properly. That meant when Harry turned up, we were ready to go straight away rather than running test shots on the actual subject.

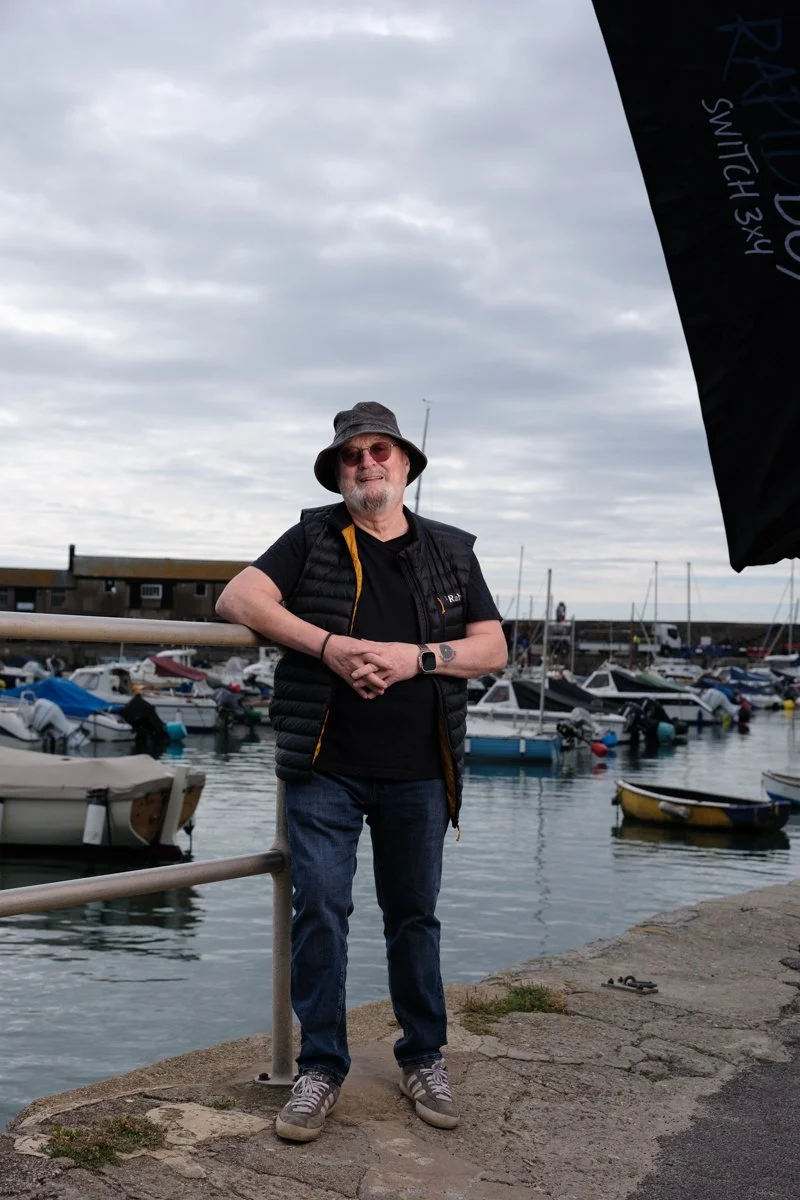
Portrait of a man in a dark hat and black jacket standing by a harbour with a softbox at the edge of frame

Three Shoots, Five Days

I'm on a high right now. This was my third shoot for my "I am Lyme" project in the last five days, and the best part is word is starting to spread. More people are hearing about the project and wanting to be part of it.

About "I am Lyme"

"I am Lyme" is a community-focused portrait series centred on the coastal town of Lyme Regis. The idea is simple: capture and celebrate the local faces that give the town its character, from fishermen and restaurateurs to B&B hosts, cafe owners and more…

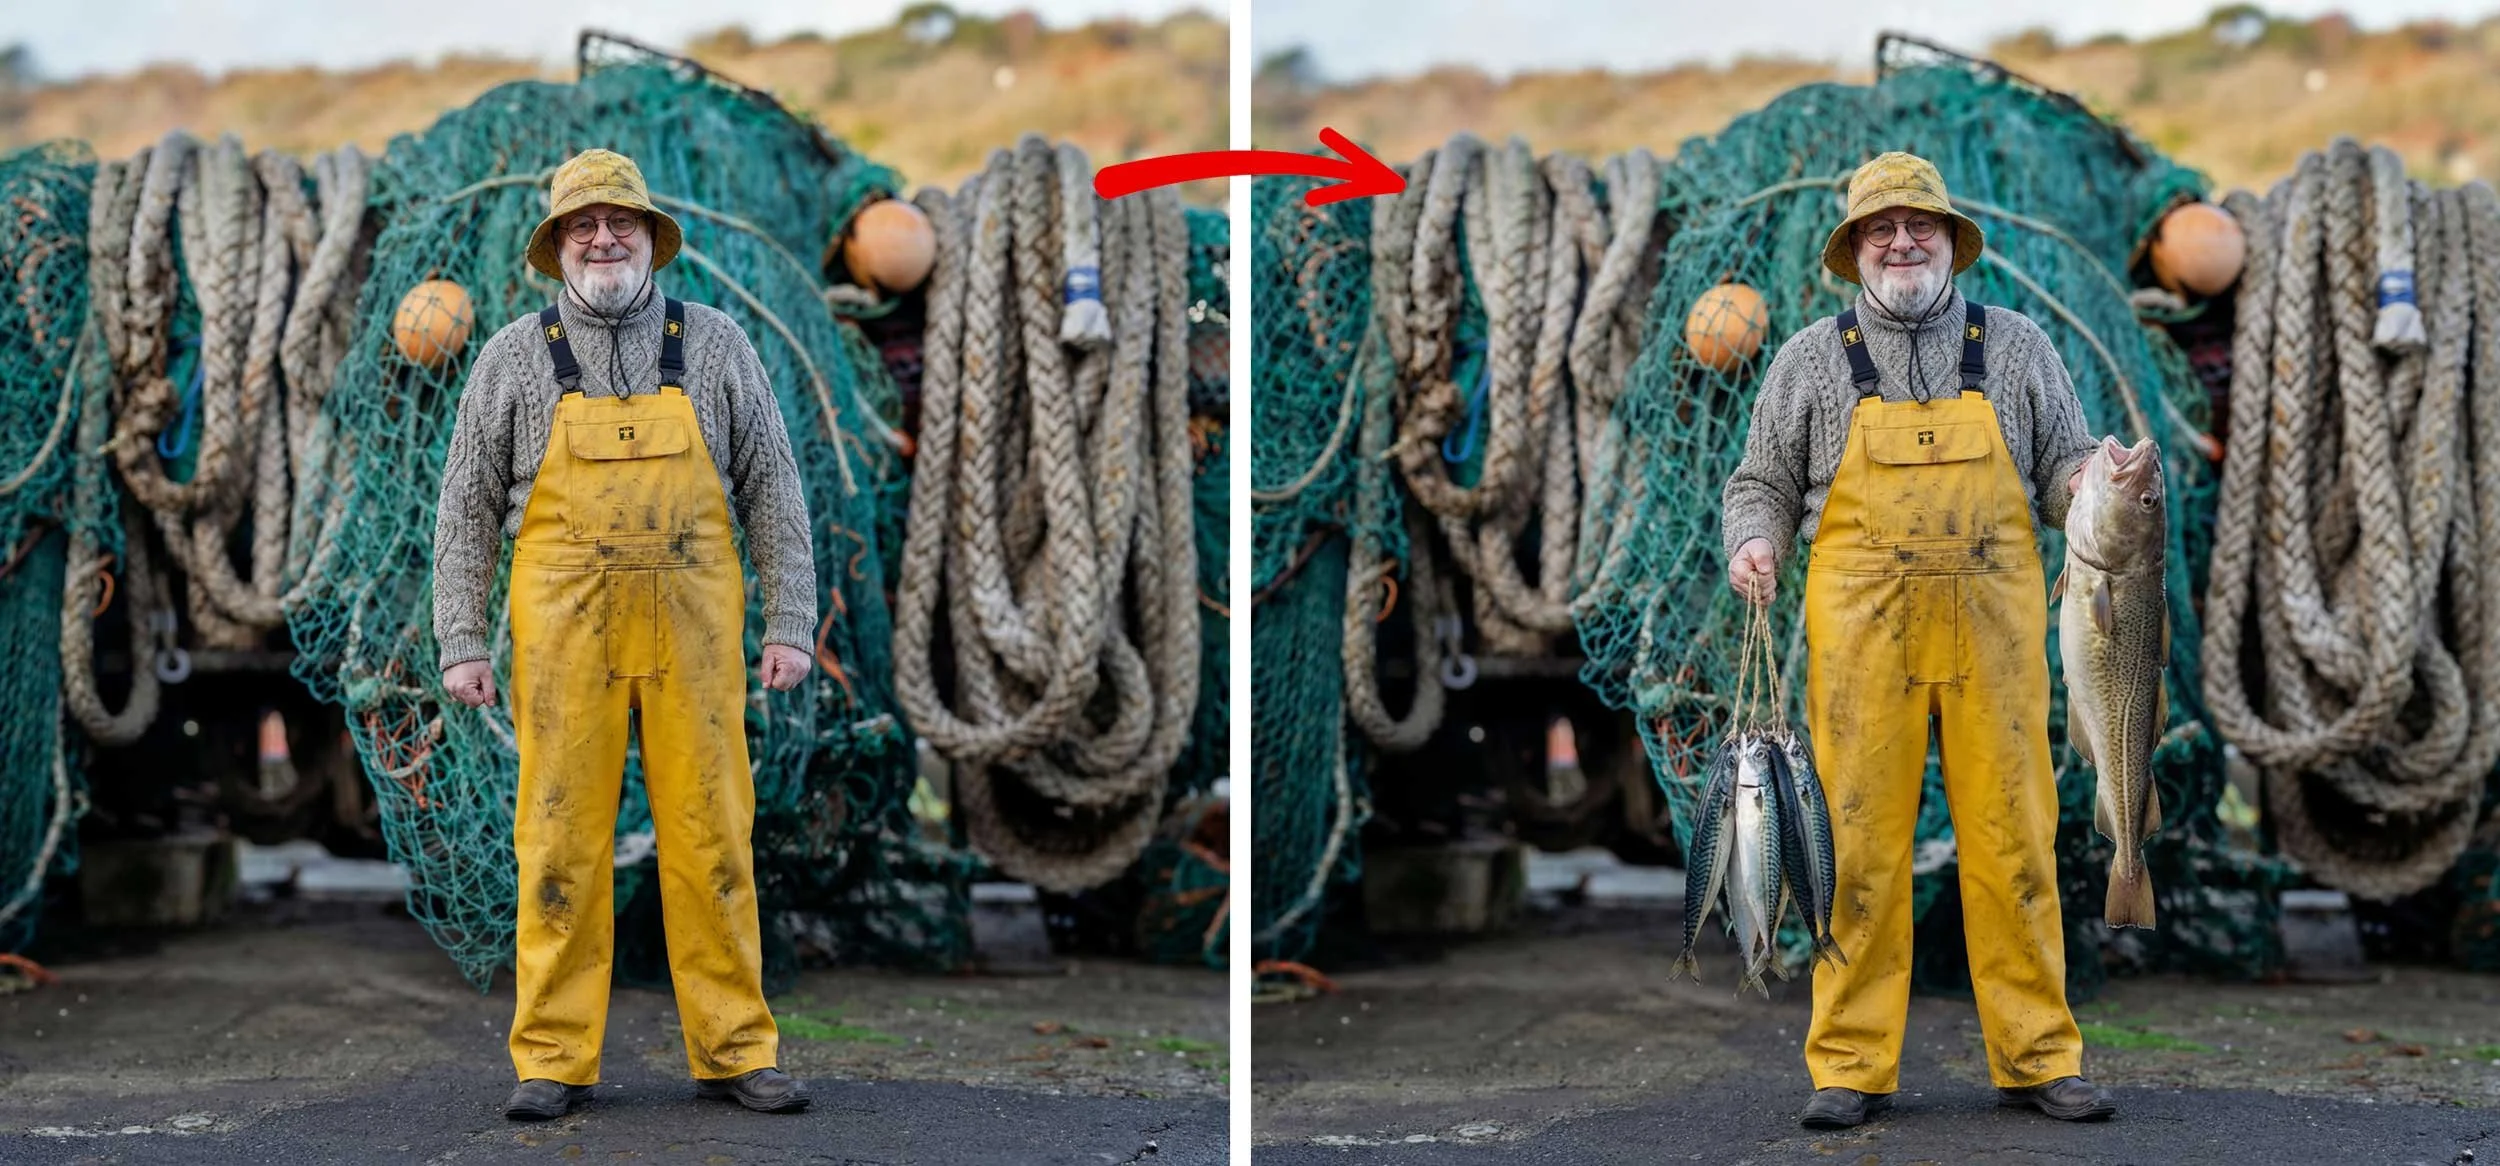
The Fisherman's Tale 🐟 New Compositing Workflow

Yesterday morning I popped out for breakfast and to meet up with a friend, Steve.

After a great bite to eat at one of my favourite haunts, Town Mill Bakery (Lyme Regis) I sprung it on him that I had an idea for a picture I wanted to put together and that I needed him to be the subject.

The idea was to create a portrait of a Fisherman and to do this with a combination of Photography, Lightroom, Photoshop and AI, to test out a new workflow.

So, here’s the resulting image, and below is a breakdown of the steps involved using Lightroom, Photoshop, Google Gemini AI and Magnific (Upscaler)

Bearded fisherman in yellow oilskins holding fish in front of piles of fishing nets

The Process

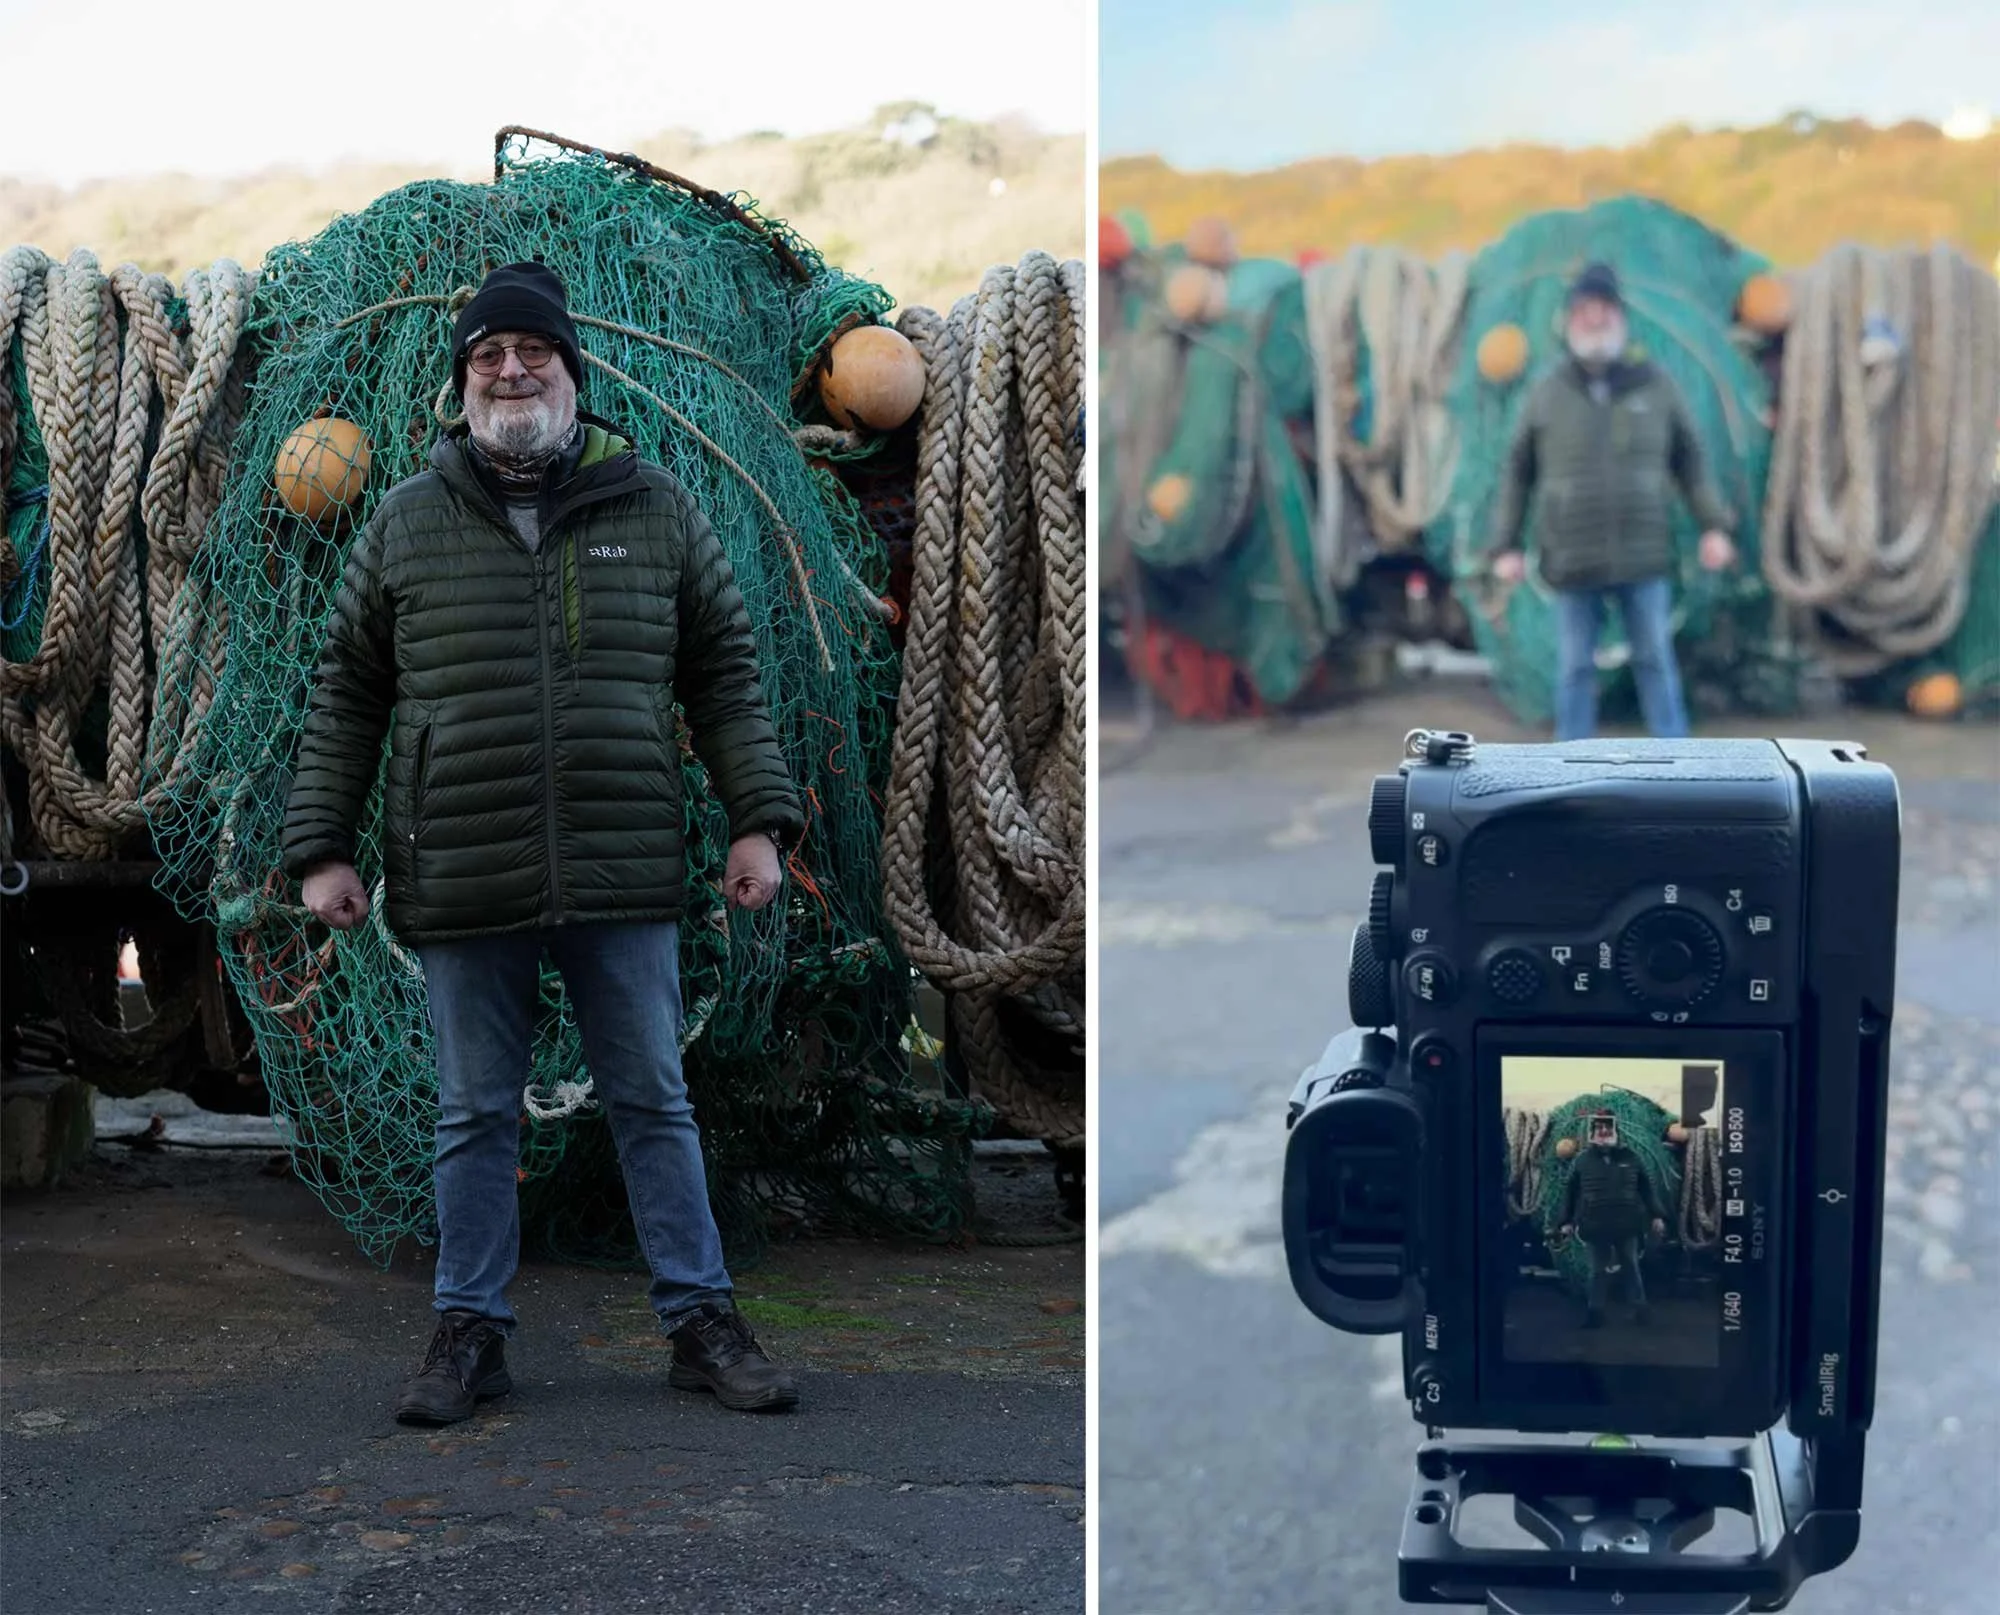
  • Taking the portrait of Steve with the desired background

Behind the scenes of a man in a green jacket photographed against fishing nets, beside the final portrait
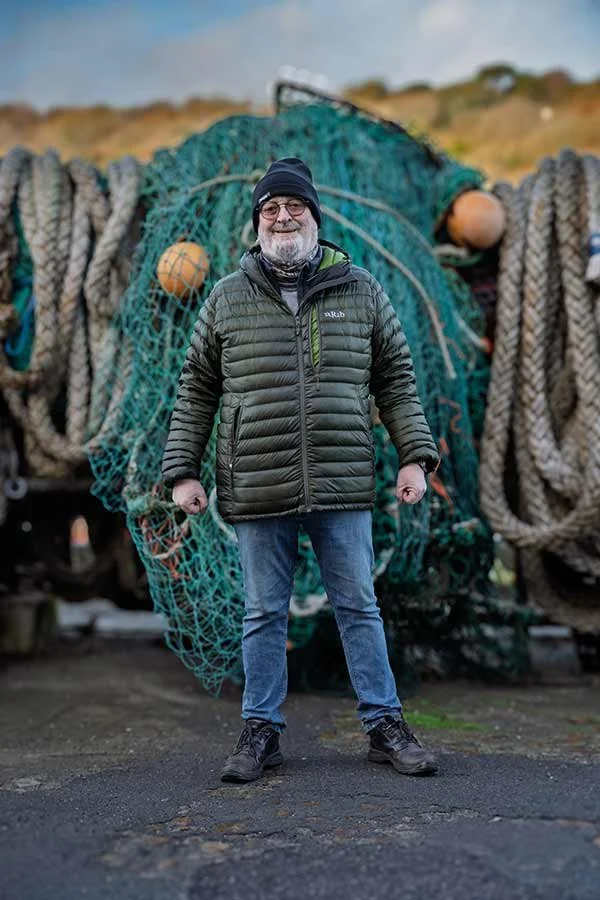
  • Initial Edits in Lightroom

Portrait of a bearded man in a green jacket and jeans standing in front of piled fishing nets
  • Export into Google Gemini AI and add Stock Photographs of Fisherman’s clothing onto Steve. Create image in 4K and then Upscale 2x

Yellow sou'wester, yellow dungarees and a grey jumper with an arrow to the composite of a fisherman wearing them
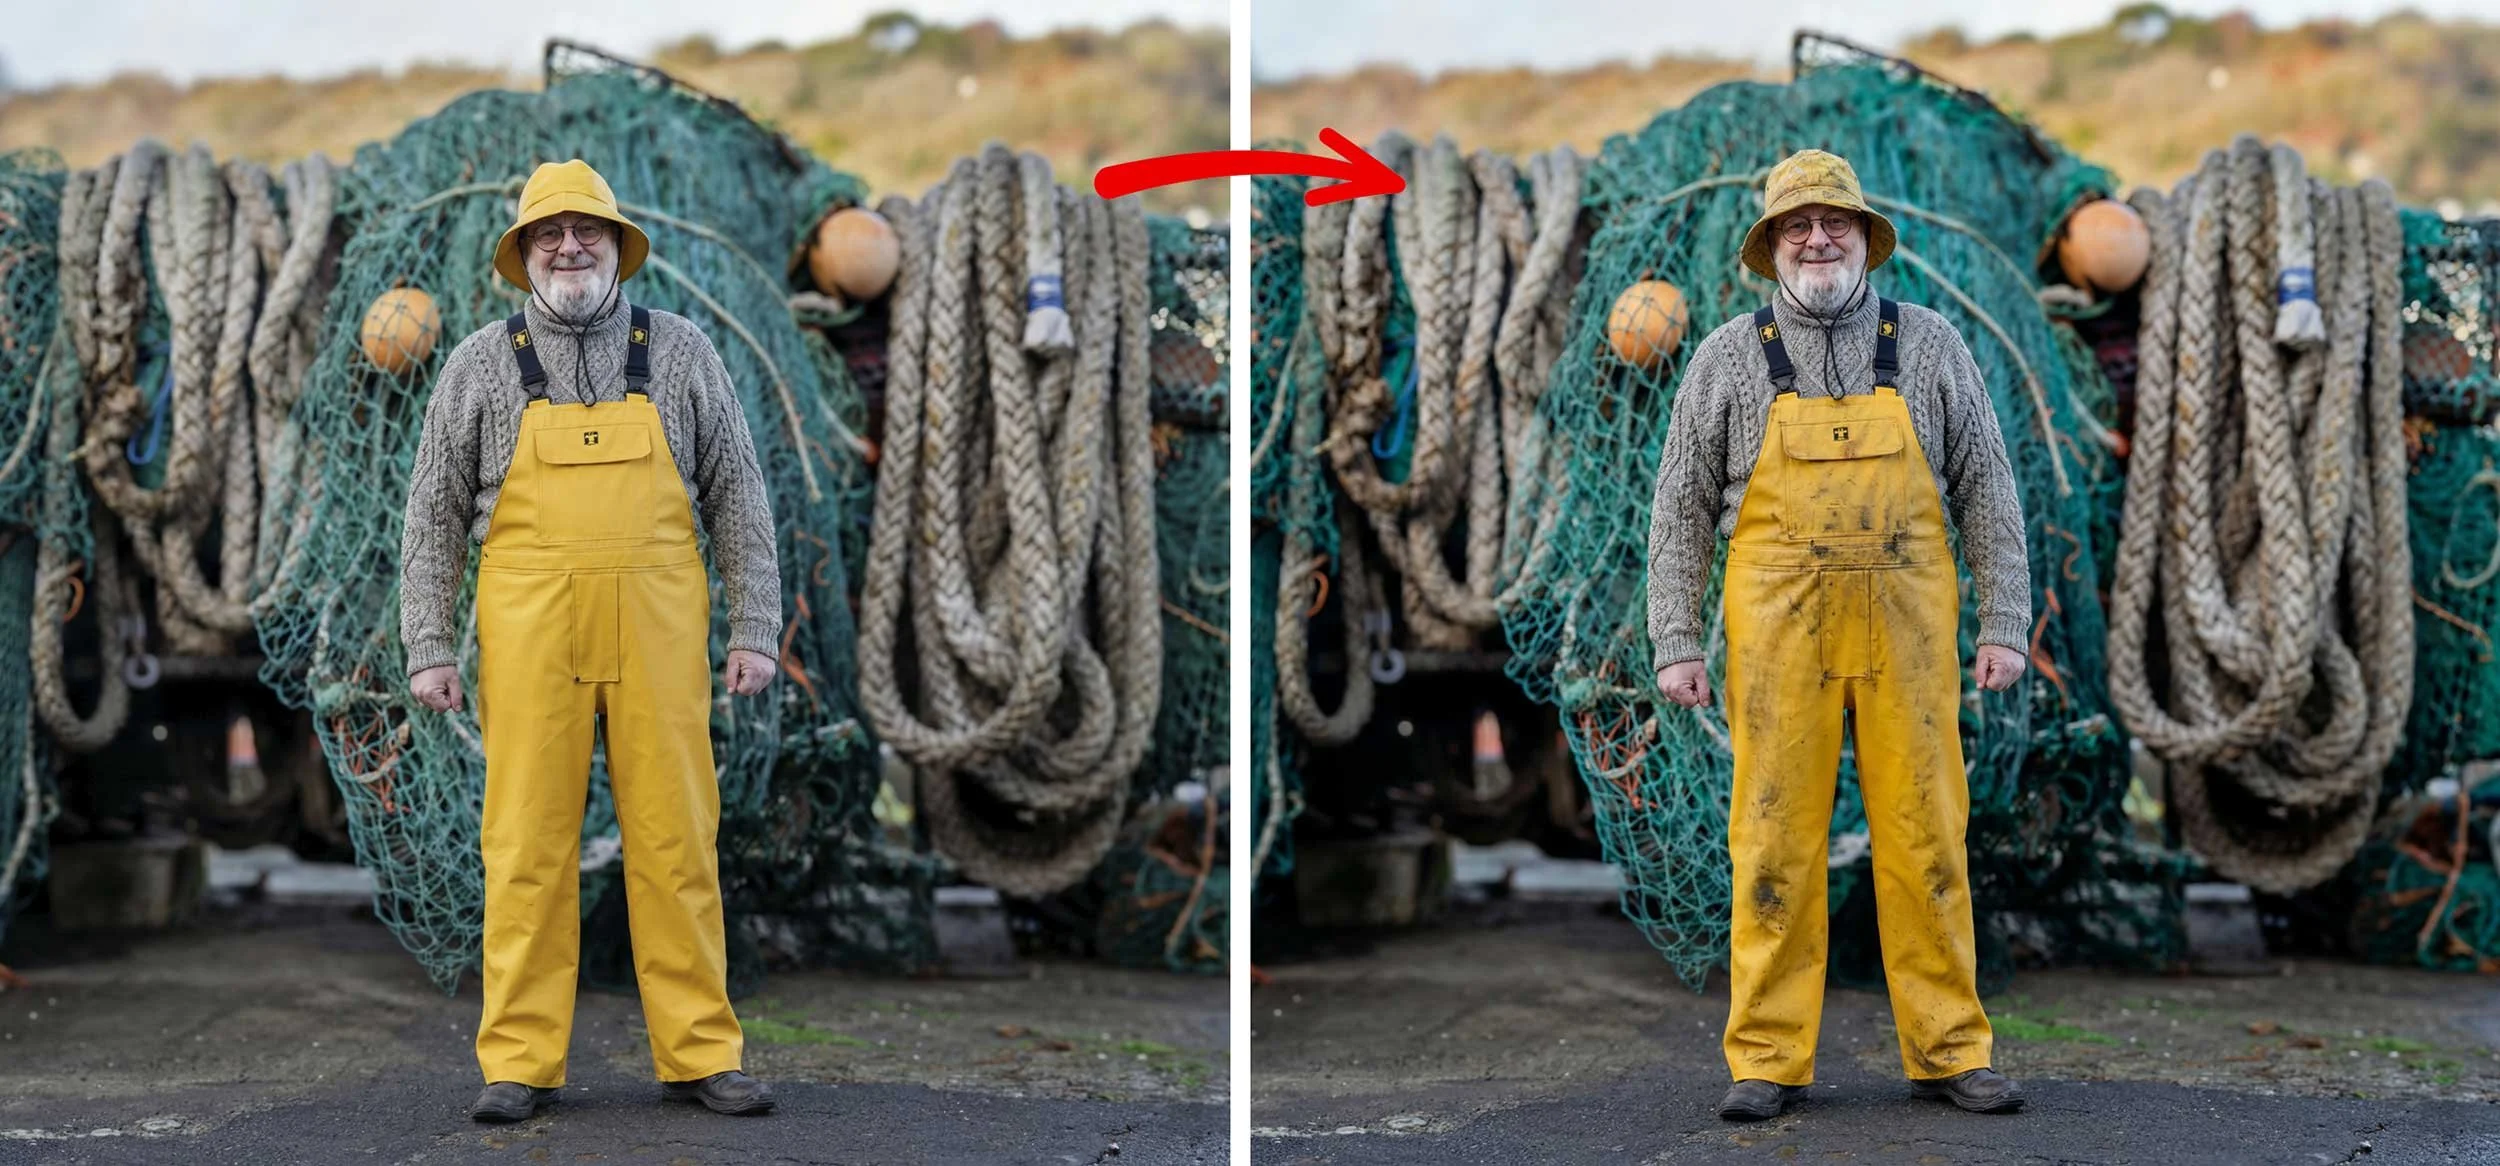
  • Create aging, weathering on the Overalls and Hat using Gemini AI and then selectively paint this onto Steve using Masks in Photoshop

Before and after composite of a fisherman in yellow oilskins in front of fishing nets
  • In Gemini AI generate the fish and Steve’s new arm position, then mask this into the main image in Photoshop

Before and after composite of a fisherman in yellow oilskins, with fish added to his hands

Extend Background in Photoshop and add finishing touches in Lightroom including Colour Grading, Adjusting Lighting, Lens Blur, Adding Grain etc …

Final composite of a bearded fisherman in yellow oilskins holding fish in front of piled nets

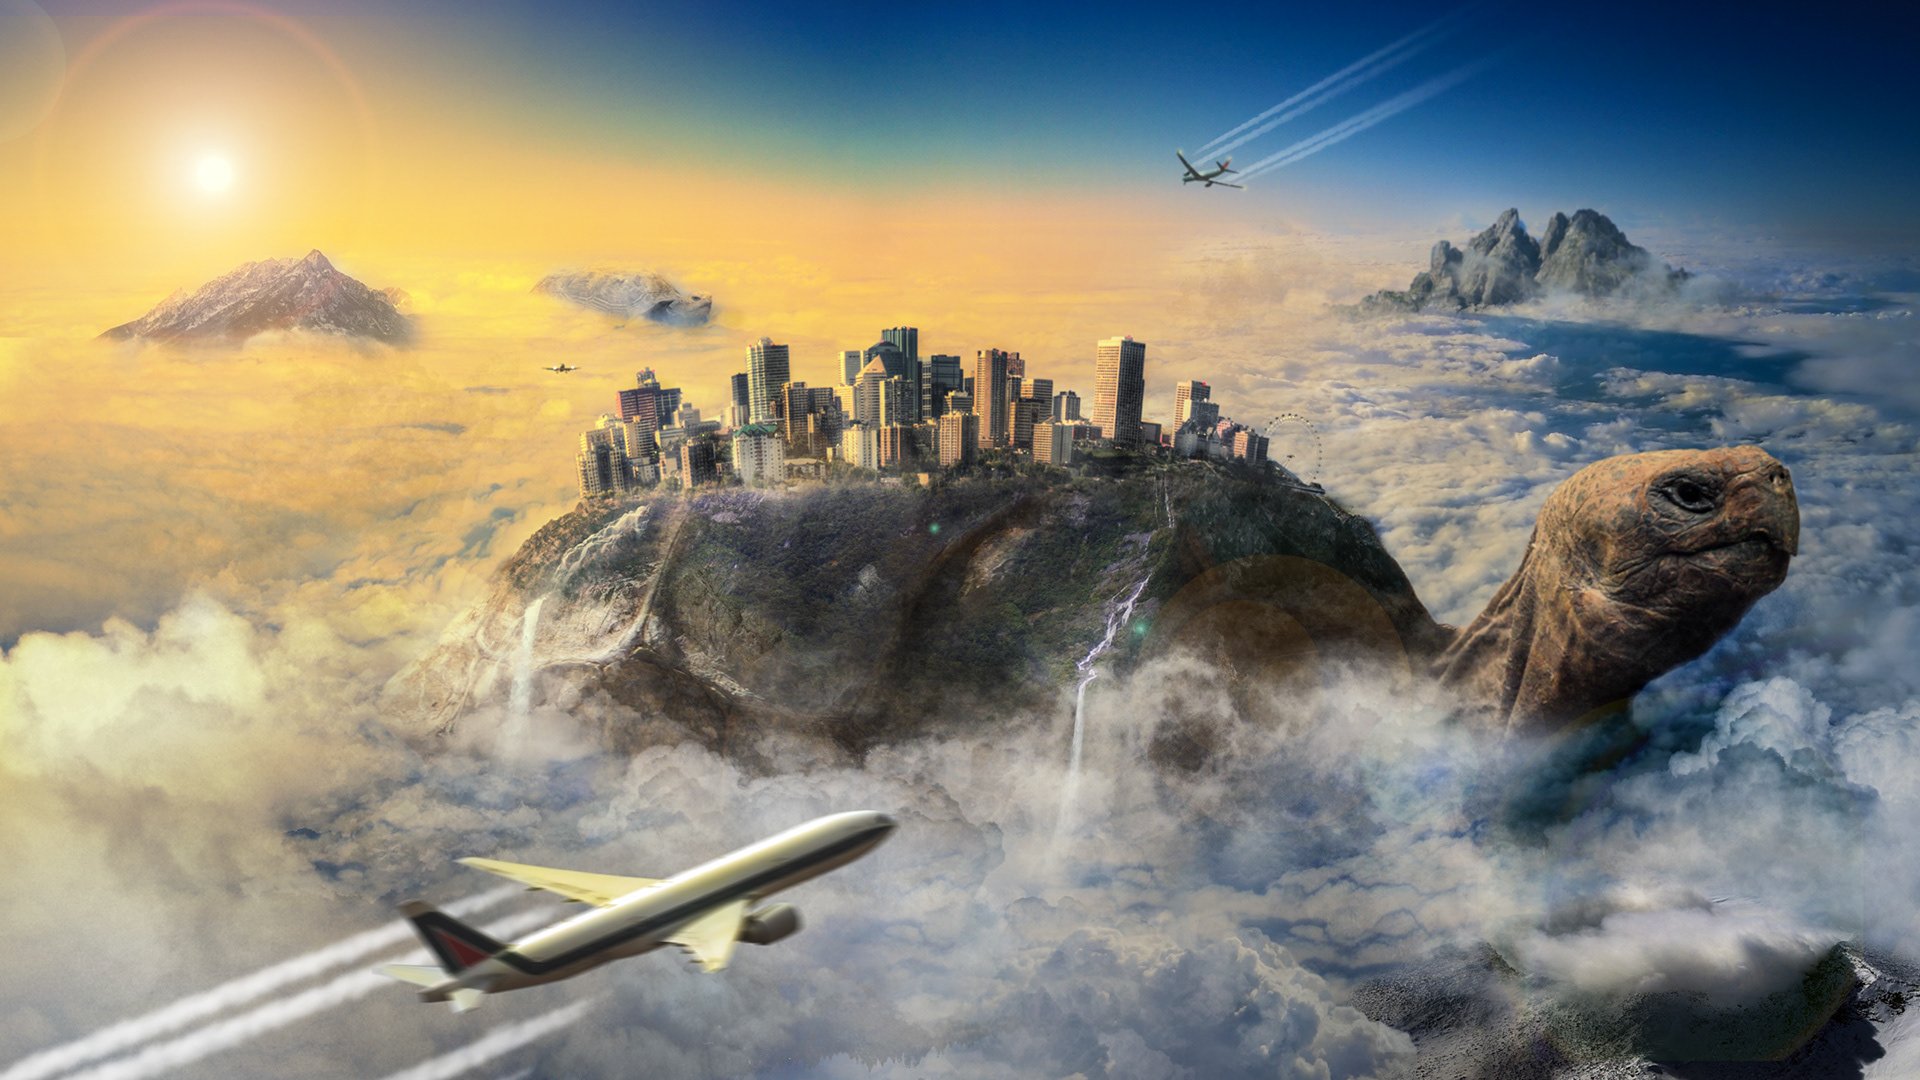
No Limits Creativity and Visual Storytelling with Kirk Nelson aka The Pixel Pro

This is the recording of a live broadcast where I chatted with photographer and Photoshop artist Kirk Nelson, also known as The Pixel Pro. Kirk's work is all about creativity without limits and visual storytelling, and during our conversation he explained how he creates his fantasy art composites and how he produces the special effects in his images, giving a real insight into the thinking behind his work.

links mentioned in the video:

50% OFF Courses, Overlays ans Bruashes in Kirk’s Store using code: friendsofglyn

Kirk’s link for a FREE PASS at the Photoshop Creativity Virtual Summit:
https://bit.ly/pixelpro-creative

Fantasy composite of a giant tortoise carrying a city above the clouds with aircraft flying past
Light painting of a figure with glowing rainbow wings standing in water before mountains
Young baseball player in a pinstripe number 7 uniform holding a bat behind his head under stadium lights
Light painting of a woman in armour with glowing golden wings standing in water at night
Silhouette of a figure inside a glowing orange light painted orb by a river at twilight

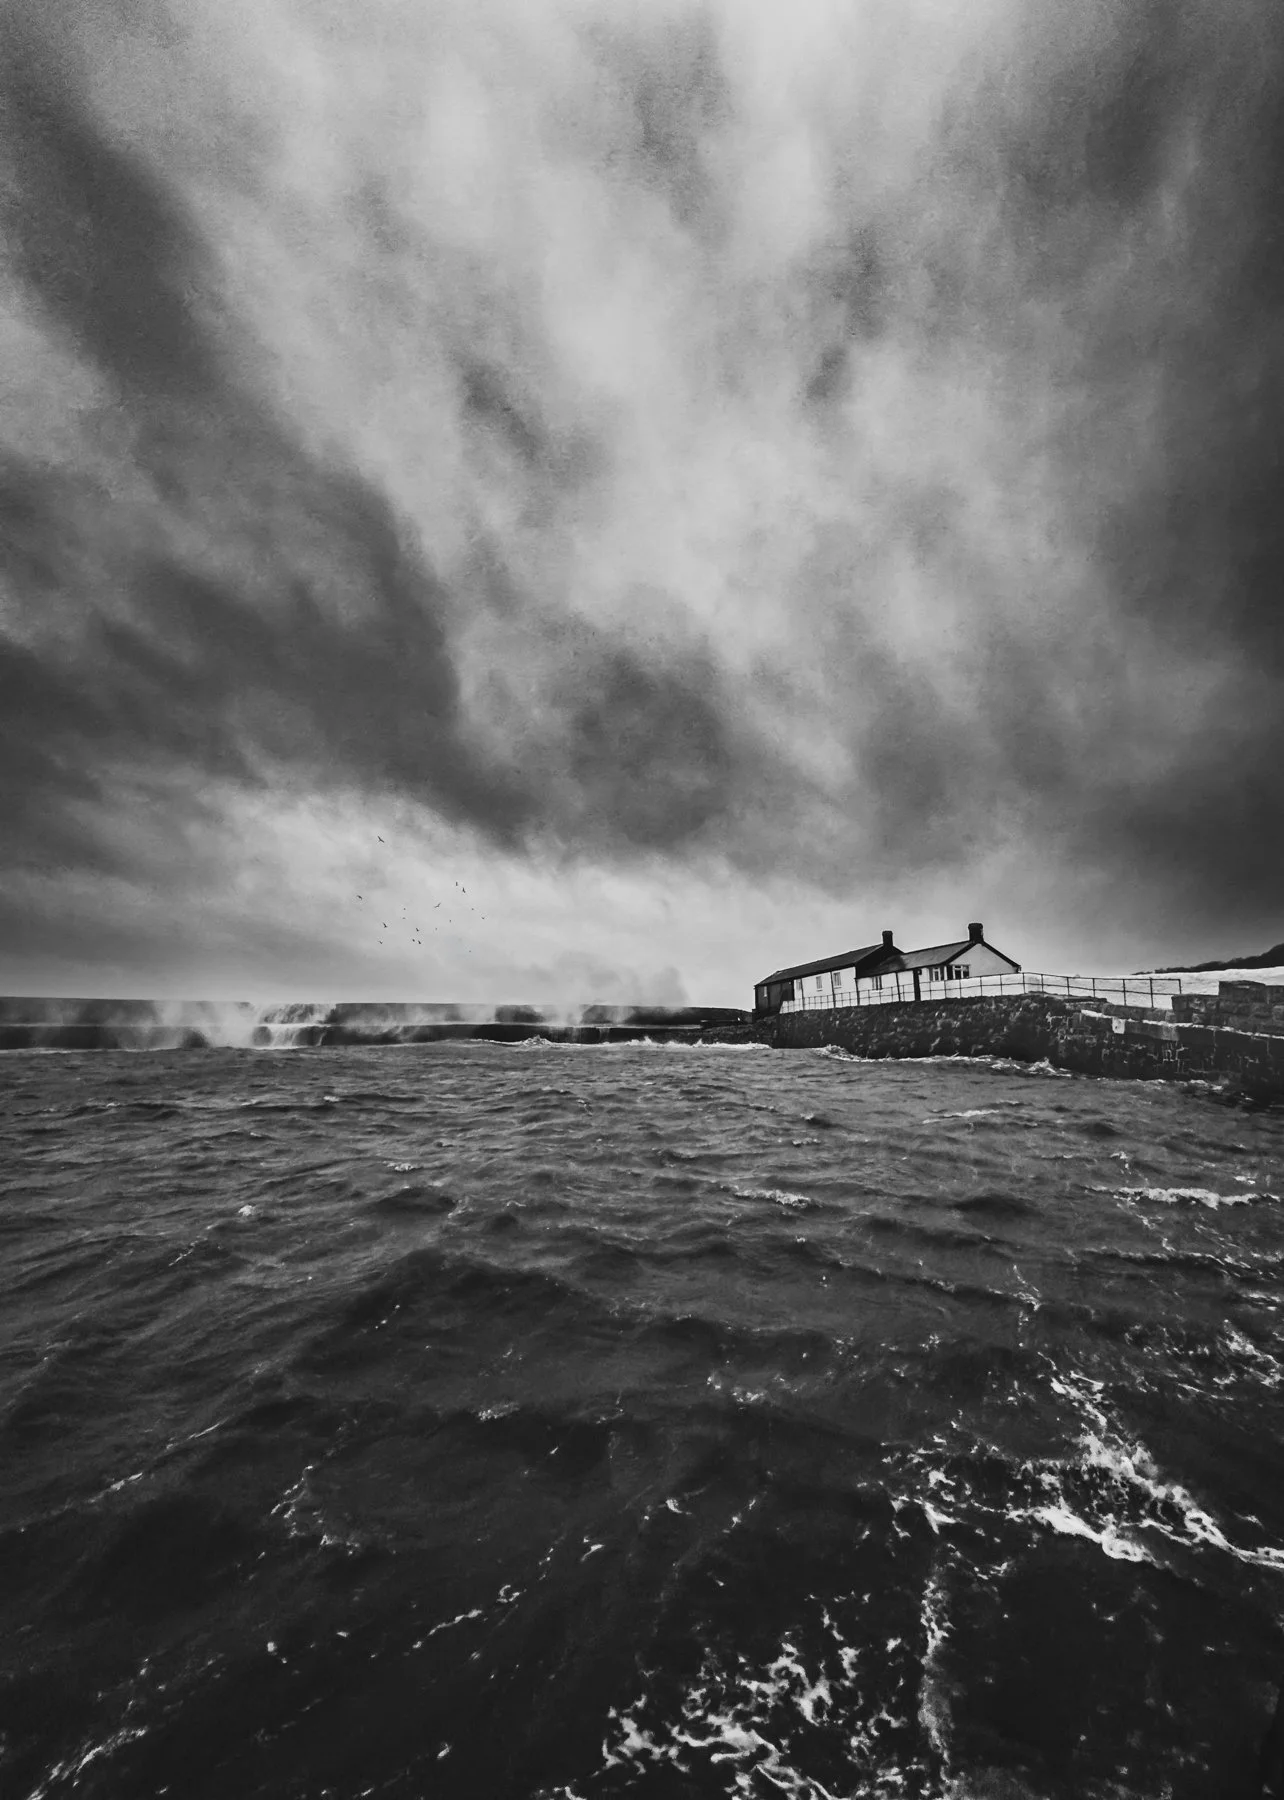
My First Photography and Print of 2025 : Stormy Sea on New Years Day 2025

There’s no better way to kick off the New Year than doing something you love, and for me, that means grabbing my camera, which in this case was my iPhone, and heading out to take some photographs; and this January 1st did not disappoint with a stormy high tide.. How could I resist?

My wife Anne, who’s as much of a storm lover as I am, joined me to not only keep me company, but she also helped capture some behind-the-scenes footage, which added to the fun of the morning.

Two selfies of a smiling couple in hats and coats on a stormy beach with waves behind

We headed down to The Cobb ( Lyme Regis) and straight away it was a WOW moment!

The waves were crashing hard against The Cobb sending water shooting high into the air like fireworks. The sound was thunderous, the kind of deep, powerful roar that makes you feel alive just being near it.

Three photos of waves crashing over a stone harbour wall on a grey stormy day

I knew where I wanted to head to … the only issue was getting there; the lower part of The Cobb to the side of the Aquarium. The problem here was that water was crashing and pouring over The Cobb wall into the Harbour like a giant Ice Bucket Challenge ( remember that??? ) , however I’ve learned my lesson and now travel with full wet weather kit in a bag in the boot of my car.

Still, even though I was weather-proofed it meant timing the run to perfection to avoid the weight of the water crashing down on me … which I’m rather proud to say I managed to avoid.

Weather like this always fills me with excitement BUT that said you do still need to have your wits about you. No photogbraph is worth putting yourself and others at risk. I never want to be THAT guy!

Aerial view of a curved harbour wall and moored boats with a red arrow pointing to the end of the wall

Once at the side of the aquarium I was able to photograph the small beach area behind it and still be safe, protected by a wall and railing. I managed to get the composition I wanted, grab some shots but then the wind seemed to pick up a bit more. So, I decided enough was enough and timed a run back to Anne ( who was near the RNLI Station ) without getting hit by any waves breaching The Cobb Walls.

Actually on this, I’d heard some time ago that waves come in 7s and it did see to be the case. Running there and back I initially counted 7 clear waves breaches and then ran and managed to avoid getting soaked so, clearly there’s some truth in it; if not and it was pure fluke, I’m getting an extra Lottery ticket this week 😃

Black and white photo of a rough sea and harbour wall under a dramatic cloudy sky

As for my iPhone, I used the native 0.5 ( 14mm ) lens and the native Apple Camera App set to Apple ProRaw. The image was edited using Lightroom Mobile on my iPad Pro.

So now I’m up and running; first photograph and print of 2025 is ‘in the bag’ 😃

After walking around a bit more, grabbing some extra shots and some video footage, it was time for breakfast at our favourite spot … Town Mill Bakery.

So here we are in 2025. I’m now really looking foward to the coming months as I plan to be visiting some other coastal locations across Dorset, Devon, Cornwall and Wales ( West and North ) … and my thoughts are that I’ll be doing this with my iPhone to push it that bit more and see what I can get with such minimal kit.

I’ll keep you posted.

Happy New Year!

Ragnar - Viking Composite using Photoshop

Following on from the earlier article I wrote ( LINK ) showing the Behind the Scenes of a recent Viking Photo Shoot, I’ve now finished the 2nd image so thought I’d share it here for you to see …

Composite of a Viking warrior with an axe standing on a rocky clifftop above the sea

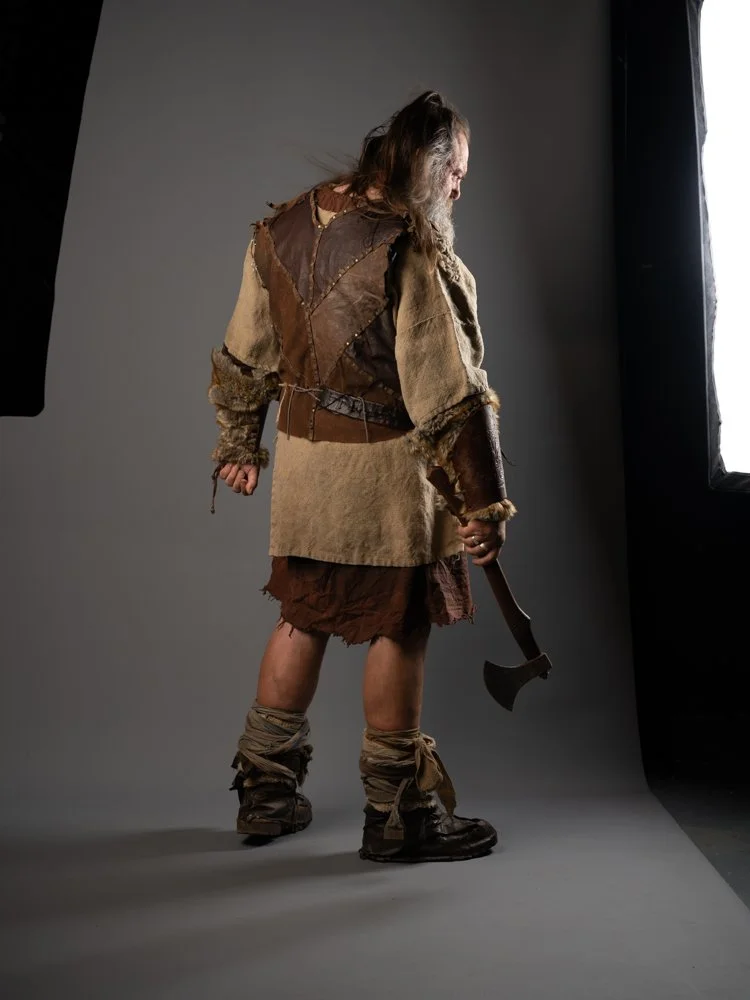
This is a composite made using Photoshop and is a combination of several images comprising the original studio photograph of my friend Simon ‘Foxy’ Fowler dressed as the Viking, the Location Shot and several Sea Bird Photographs.

Here’s the studio photograph of Simon …

Man in Viking costume holding an axe photographed from behind against a grey studio backdrop

Here’s the location shot which is a part of the coastline at Three Cliffs Bay, The Gower, South Wales …

Empty rocky clifftop overlooking the sea under a cloudy sky, a background plate for a composite

To make sure that I got the angle and height correct, when at Three Cliffs Bay, my great friend Anthony Crothers stood in the spot where I would eventually place Simon …

Silhouette of a man standing on a rocky clifftop above the sea under a cloudy sky

In the studio when photographing Foxy, my camera was on a tripod and at a height where the lens was in line with the top portion of his nearest thigh.

When on location photographing the background / scene, Anthony was stood on a rasied area of ground …

(Note: it looks precarious but actually isn’t … to the front of Anthony on the other side is a flat area that you can comfortably walk on)

… so to get the angle / height to look as though Simon was photographed higher than he actually was, the camera lens was level and aimed just below Anthony’s nearest knee.

My new compositing workflow

Returning to some compositing has seen me now approach them in a different way especially when it comes to potentially time consuming cutouts such as hair anf fur.

My new workflow sees me leaving this part to the very end and getting great results in literally a fraction of the time …

Close-up of a long-haired Viking warrior with windswept hair against a stormy sky

This is something that I’ll definitely be going through in my Combining Old and New : Mastering Selections and Cut Outs in 2024 class in the upcoming ( FREE ) Photoshop Virtual Summit 6 …

If you’d like to see a larger version of both images created from this photo shoot, I’ve now added them into my PORTRAITS PORTFOLIO ( LINK )

Thanks for looking in,
Glyn

Returning to Composites: Ragnar Viking Portrait

It’s been a good few years since I did any compositing but recently I’ve been getting the urge to get back to it again. I don’t know if it’s because of all the updates that have come into Photoshop over the past few years or what, but something is drawing me back to start working in this area again … and I’m really excited about it.

So rather than just start creating random images, I’ve taken my own advice and decided on a project that brings together my photography, retouching and something outside of that world that I have a genuine interest and fascination with … and that’s Vikings. I’m a BIG fan of the Vikings Drama Series on Amazon Prime with incredible characters like Ragnar Lothbruk and Ivor the Boneless.

Vikings title card with a winged helmet logo over a dark stormy sea and coastline

So not being one to hang around I started gathering ideas for the first pictures I wanted to work on and so for this I made use of technology that wasn’t available a few years ago when I was last doing composites … Adobe Firelfy AI and the ‘Text to Image’ technology.

This is such an incredibly useful piece of technology for coming up with concepts by simply writing your idea.

So using the Generate Image function in Photoshop I wrote …

Viking with beard and plaited hair and holding an axe stood on cliff looking down onto the sea

… and this is just some of the results that were created …

Four AI concept images of a Viking warrior with an axe standing on coastal cliffs

Now with images of what ideas I had in my head it was so much easier to first of all message my friend Simon Fowler aka Foxy and send him a picture of what I wanted to create of him as a Viking.

Then it was time to source the appropriate clothing for Foxy to wear, and for that I headed to Marigold Costumes in Cardiff and arranged to meet Simon and another friend Anthony Crothers there.

I’ve used Marigold Costumes a few times in the past for other photo shoots as there’s such a huge choice of costumes, and sure enough within no time we’d sorted out what was needed …

Man in a grey T-shirt helping a man try on a costume in a crowded costume store
Man browsing racks of costumes and fabrics in a costume hire store

With clothing sorted it was then just a few days until the gang were all together in the studio for the photo shoot.

Here’s a look at the set up for the first image which is the one where the Viking will be looking down from the cliffs onto the sea below …

Studio setup with labelled Westcott LED lights and Rapid Box Switch softboxes around a man in Viking costume

Doing this using the LED Constant Lights made it so much easier for everyone to see what was being captured … before it wss captured. It also made setting up so incredibly easy.

kit used:

To the front of Foxy I used the light and soft box combination below …

This was used to mimic the light / highlights coming from the sun.

Now when it comes to composting, I was always someone that liked to get the backgrounds first and then photograph the model / subject. I did this because having the background first meant I then had a light style and direction to mimic in the studio.

However I knew where I was going to photograph the background location … Hartand Quay in North Devon.

This is a location I have been to many times and know really well. It’s perfect for the picture I had in mind. I also had a good idea of where the sun would be located at a certain time of day which is why I positioned the light as I did to the front of Foxy.

I did check using the PhotoPills App though just to be sure …

Smartphone showing a photo planning app with coloured direction lines over a map

And here’s one of the ‘out of camera’ shots, which as you can see shows that I also photographed Foxy against a grey background.

The reason for this is two-fold; firstly it contrasts against Foxy so makes it easier to cut him out later in Photoshop. Secondly, because it enables me to capture the real cast shadows, and being grey gives me the option of using a blend mode later in Photoshop to retain them and have them appear in the final composite rather than me paint them in …

Man in Viking costume photographed from behind against a grey studio backdrop

The background / scene

As for the background I intend to add the photograph of Foxy into, I headed over to Hartland Quay over this past weekend with my friend Brian Dukes.

Conditions ended up being perfect with the clouds and incoming tide, and in addition to getting the shots I wanted, it made for a great day hanging out with a close friend in a fabulous location …

Hand pointing towards a camera on a tripod set up on a rocky clifftop above the sea
Two men in blue jackets standing on a grassy coastal path with rocks and sea behind

back to the studio

Anyway, back to the studio, there was one more shot I wanted and that was with Foxy stood facing directly towards the camera. I had an idea of creating a movie poster type of picture.

the set up

For this picture I changed the set up having rim lighting on either side of Foxy and a single light infront …

Studio setup with labelled Westcott LED lights and softboxes around a man in Viking costume

I really should get another 1x4 Softbox to use for the rim lighting, but as it happened, just using the 3x4 softbox and positioning it facing directly across the back of Foxy and him slightly forward worked out just fine. The other 1x4 I positioned on the opposite side, again facing directly across the back of Foxy.

The light directly to the front of Foxy was another Westcott L60-B Bi Color LED and this one was in a Westcott Rapid Box Switch Medium Octa (36”).

With it being on a C-Stand and on a boom, it was easy to get the camera on the tripod directly below so the light was on camera axis.

Here’s the out of camera photograph …

Portrait of a bearded man in Viking costume with his hands resting on an axe, against a grey backdrop

And below is the final edit.

Genuinely loved working on this adding textures, shadows on the background, dodging and burning, lighting effects, colour grading and creating the text from scratch along with the glow from the fire below and the sparks.

It was so much fun seeing how the updates can help with what I’m doing such as using Adobe Express for the fire and sparks and also Generative Fill AI to change the look of the axe head. Loved it!

Movie poster style composite of a bearded Viking warrior with an axe, titled Ragnar

So that’s my new Viking Series officially started and I cannot wait to get working on the other picture from this photoshoot.

Needless to say I’ll share it once finished. I’ll also look at creating some tutorial walk-throughs going through all of the retouching for both.

It sure feels good to be back doing this kind of work 😃 and as always a BIG thank you to my ever supportive friends … Ian Munro, Foxy, Anthony Crothers, Gerwyn Williams and Brian Dukes.

Five people in a photo studio, one in Viking costume, smiling together in front of a grey backdrop

IMAGINATION and CREATIVITY making the IMPOSSIBLE ... POSSIBLE with PHOTOSHOP | Uli Staiger

This is the recording of a live broadcast where I chat with photographer and digital artist Uli Staiger and go behind the scenes of his work. Uli creates digital masterpieces that defy reality, and we talk about the what, the how and the why that goes into making them, from the imagination and creativity behind each idea to the Photoshop work that makes the impossible possible. It's a fascinating look at how one artist turns a concept into a finished picture.

links mentioned in the video:

DEFINITELY check out Uli’s Bēhance page to see the ‘Making Of’ for his images …

Slideshow / Promo I made for Uli’s Guest Appearance

Composite of a woman in a long flowing gown on a moody cobbled street at night
Composite of a sailing boat on a flooded city street in front of a grand hotel
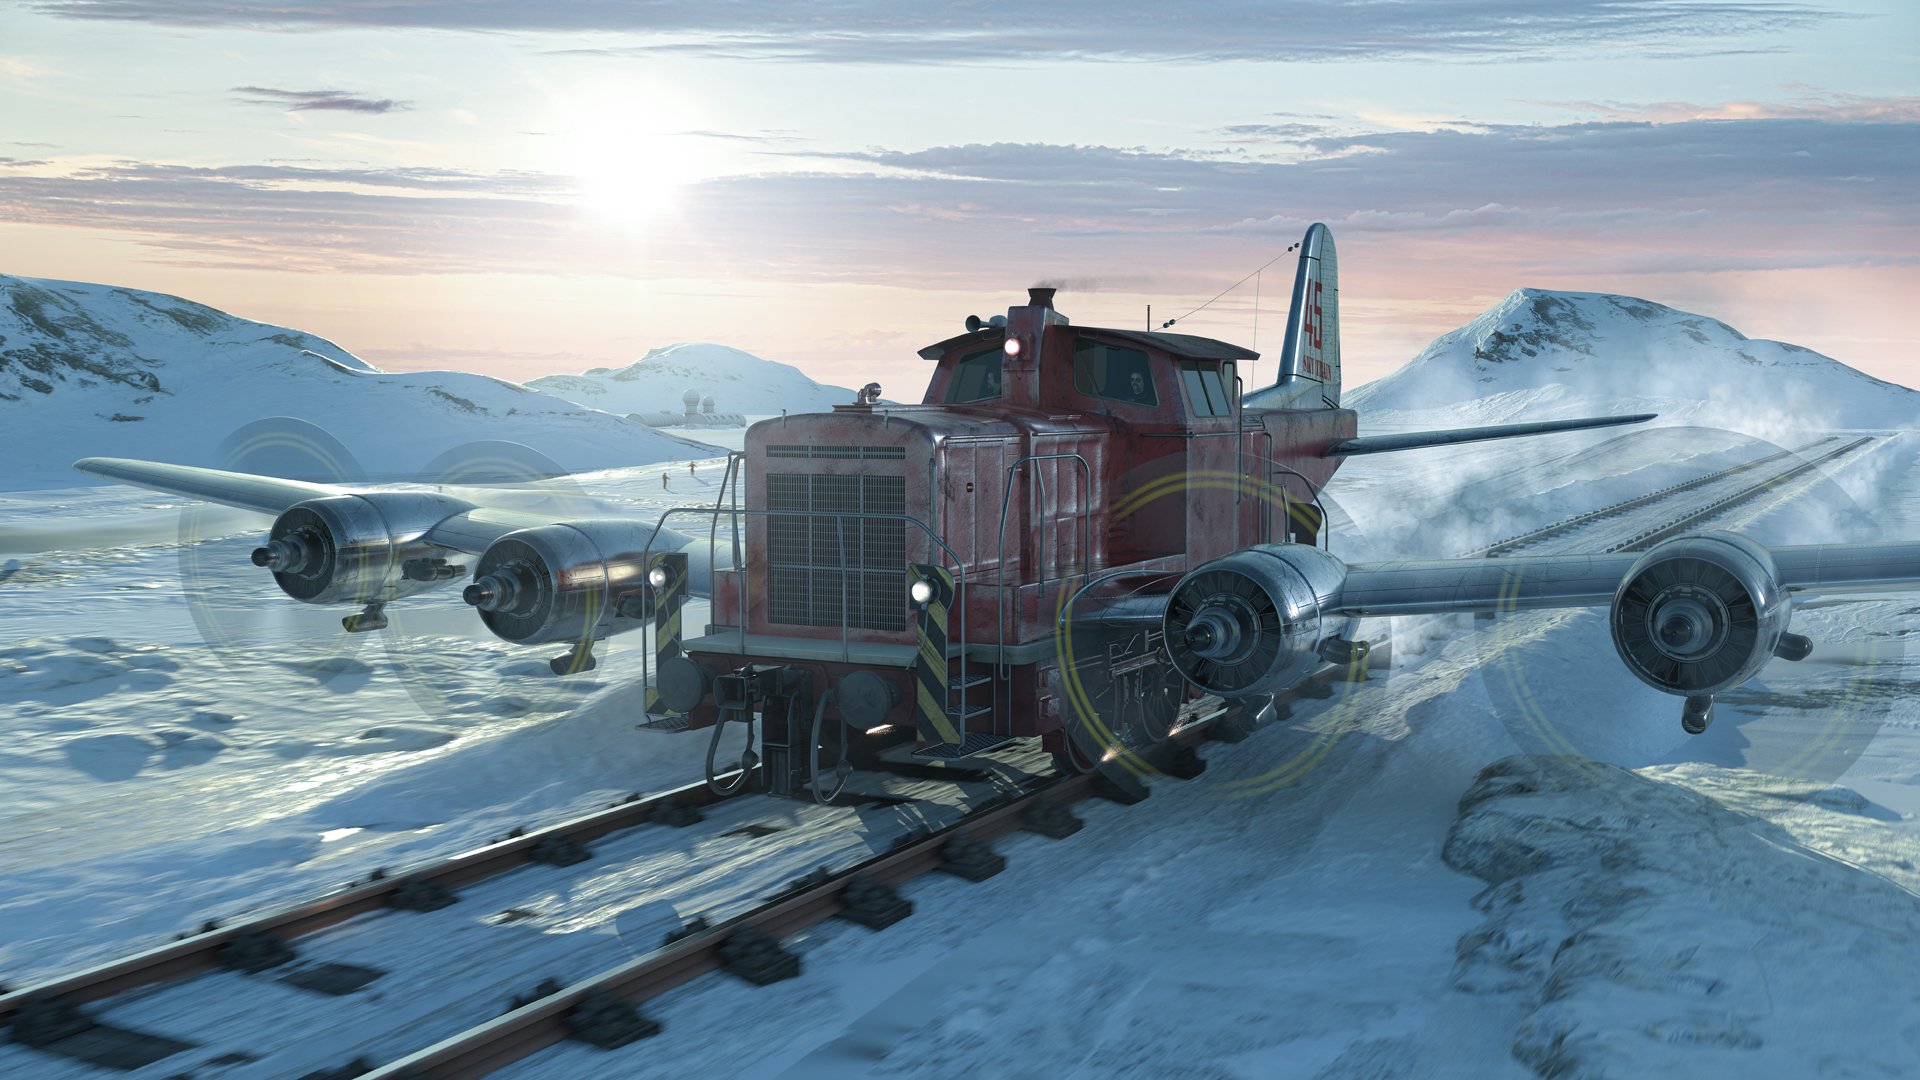
Composite of an old propeller plane on railway tracks in a snowy landscape

Portrait using a 55mm Prime and LED Lighting

I’m currently trying out a new portrait style for me using a different lens focal length than what I’ve used for a while now, and also adding in an additonal light to my usual one-light set up.

For some time I’ve used the Sony 85mm G Master lens with my Sony A7RIV and have and still do love it for the quality and sharpness of the files it produces. However I’m now going to be using a 55mm focal length … my Zeiss f/1.8 Prime Lens.

It’s hard to put into words what I’m really liking about the look the lens gives … it’s just different. Some would say that it gives a much more realistic ‘as the eyes see it’ look but I guess that also depends on how close to the subject you position yourself.

I also like how the focal length means you’re much closer to the subject, making the portraits much more intimate and revealing of the person being photographed ... if that makes sense.

Portrait of an older bald man in a navy polo shirt against a dark blue backdrop

I’m also, like I said, using an additional light with this new look I’m working on; both of which are LED Constant lights.

I’ve been using the 60W Westcott L60-B COB LED for a while now but a few days ago I received the new 120W L120-B COB LED; a slightly bigger unit with the advnatage that no adaptor is needed to fit any of my light modifiers.

So the portrait of my friend Anthony above, I took using one of the grey walls in my office as the background; here’s the set up showing the positon of the lights …

Man seated in a home studio lit by a large softbox with a reflector on his lap

LIGHTING

Westcott L60-B COB LED fitted with a square Westcott Pocket Box Softbox rear and camera right and positioned so that it added both a bit of light onto the background but also a hint of light onto the camera right side of Anthony’s head.

Westcott L120-B COB LED fitted with the 24” Rapid Box Switch Softbox

Westcott 2-in-1 Reflector (silver and White) with silver side uppermost

*NOTE: If you’re looking to invest in Westcott Kit, then give me a shout and I’ll pass on a Discount Code

Westcott L120-B COB LED

Westcott L120 LED light with a reflector and its carry bag on a white background

Westcott 24” Rapid Box Switch Beauty Dish

Westcott Beauty Dish Switch softbox on a white background

Westcott Pocket Box Speedlight Softbox Kit

camera settings

  • Aperture: f/5.6

  • Shutter Speed: 1/60sec

  • ISO: 1250

When taking Anthony’s portrait I was experimenting with different apertures to see hat I prefered for this new look; f/2.0 , f,4.0 , f/5.6 and actually liked the look of f/40 as with the 55m lens it gave a great depth of field with the tip of the nose in foucs and then from the ears losing focus.

However, I mistakenly left the camera in f/5.6 so during the retouching in Lightroom I used the Lens Blur to convincingly fake the depth of the field.

retouching in lightroom

The portrait I retouched using only Lightroom and I’ve added it into my Lightroom Community Profile Page …

When you go to my Lightroom Community Profile Page, click on the portrait and this will then take you to where you can see all of the retouching steps I did to the ‘out of camera’ file. You can also save the settings as a preset to use on your own images and even click on Remix to get access to a Smart Preview of my original file and have a go at retouching it yourself.

Drawing and Animating Movie Magic with Oscar Nominated Artist and Director Aaron Blaise

This is the recording of a live broadcast special where I chat with Oscar-nominated animator and director Aaron Blaise. We talk about his career at Disney working on movies such as The Lion King, Pocahontas, Brother Bear and Aladdin, along with more recent animation projects and how he uses Photoshop to draw. We also go behind the scenes and get an exclusive look into his short film project, Snow Bear. It's a rare chance to hear from someone who has helped bring some of the best-loved animated films to life.

links mentioned in the video:

Aaron’s Website: creatureartteacher.com

Aaron’s Tutorials / Lessons: ( LINK )

Aaron’s Brushes and Texture Sets (Photoshop): ( LINK )

Aaron’s Art and Merchandise: ( LINK )

The Bear and the Hare - John Lewis Christmas Advert 2013: ( LINK )

Snow Bear title card over an illustrated icy landscape with a small polar bear
Illustration of a polar bear cub waving at a flock of geese over a snowy hill
Illustration of a polar bear cub swimming among orcas in a deep blue sea
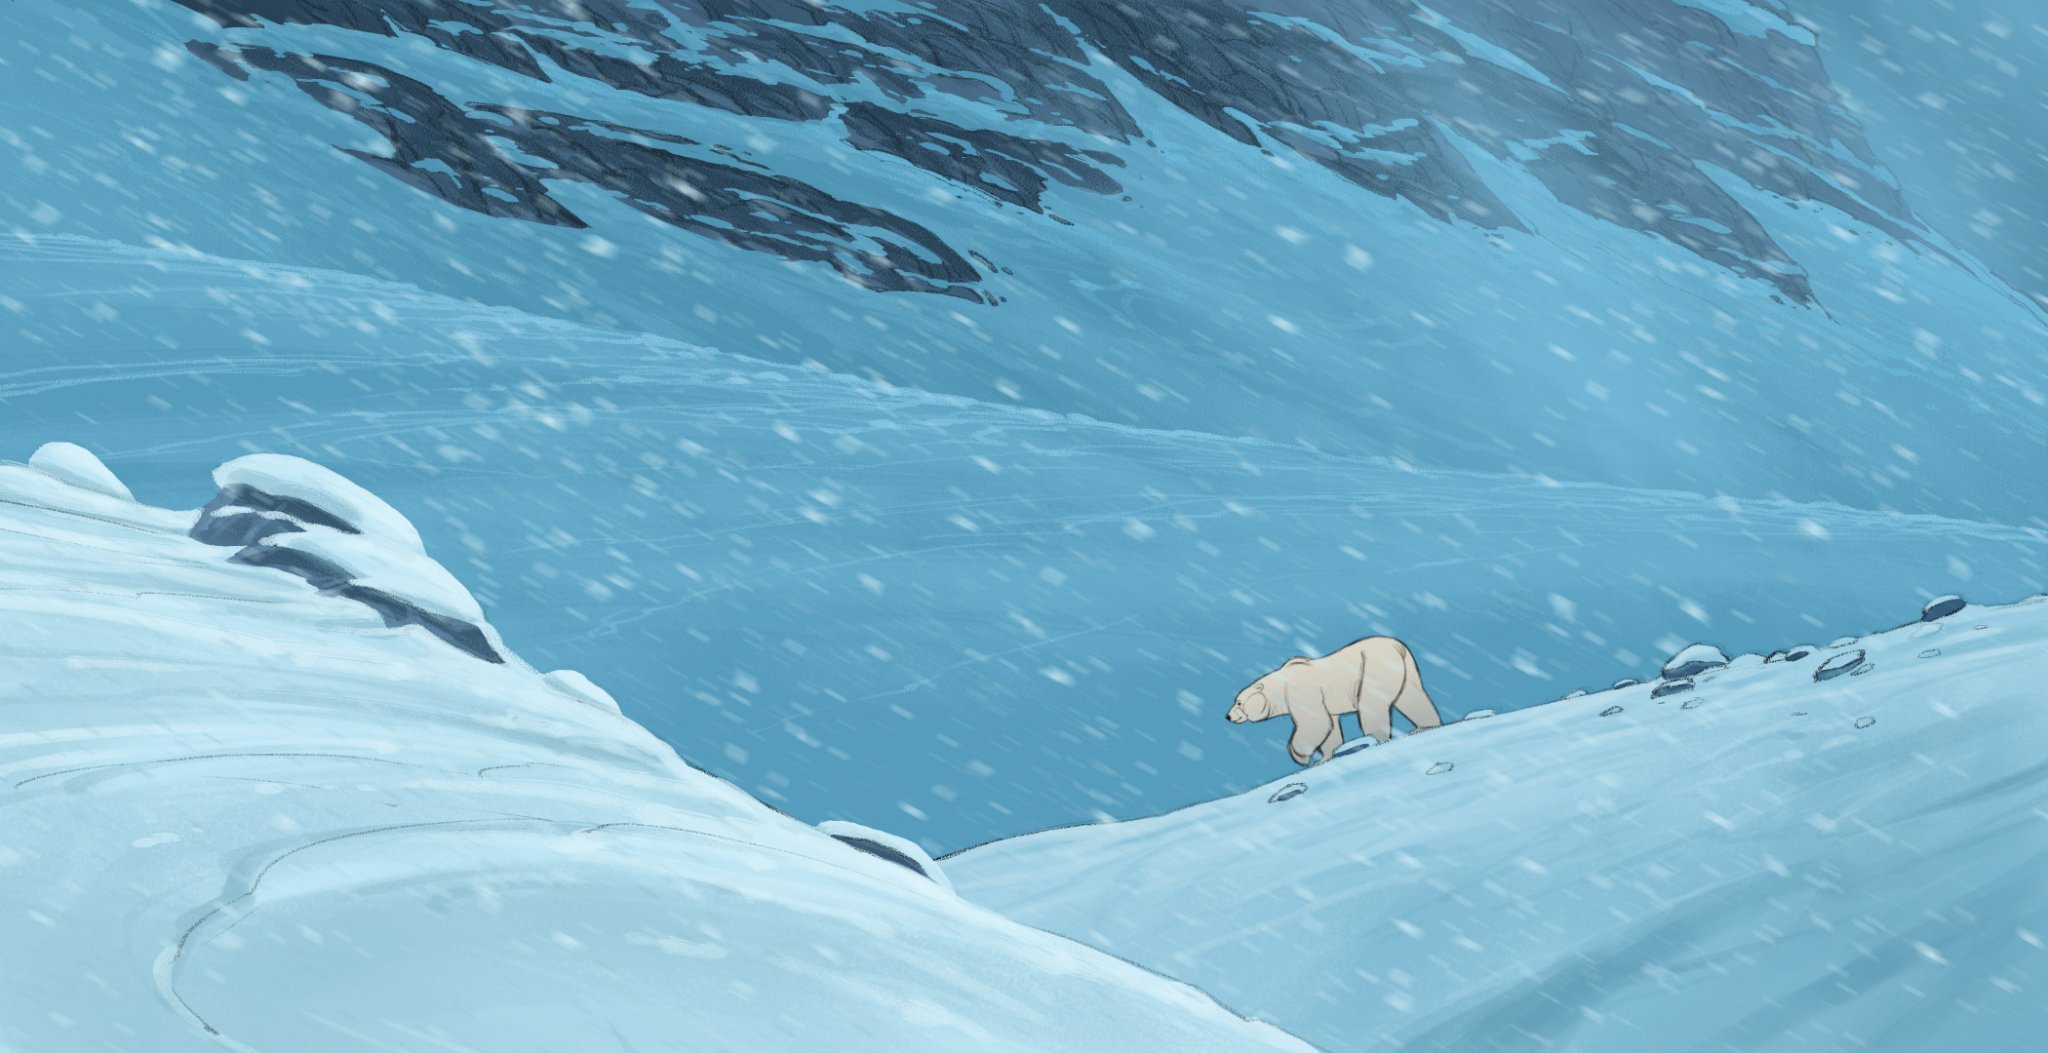
Illustration of a polar bear crossing a snowy slope in a blizzard
Animated illustration of a large polar bear and a small snow bear side by side